Correction status:qualified
Teacher's comments:你可以有自己的想法, 不定完全模仿


DOM: 文档对象模型
JS将整个HTML/XML文档看一个对象,也称为DOM树
DOM树由各种类型的节点组成
标签: document.getElementsByTagName()
ID: document.getElementById()
class: document.getElementsByClassName()
API: document.querySelector() / document.querySelectorAll()

<!DOCTYPE html><html><head><title>获取元素的四种方法</title><meta charset="utf-8"></head><body><!-- 1 学习查询手册, 学习常用的DOM操作方法2 将课堂上所有的涉及的属性与方法全部上机实战3 独立完成最后的Todolist案例 --><div id="list"><ul class="poster"><li name="active">第一行内容</li><li name="ct">第二行内容</li><li>第三行内容</li></ul></div><script type="text/javascript">// document定义一些快速接口console.log(document);console.log(window.document === document);console.log(document.doctype);console.log(document.documentElement);console.log(document.head);console.log(document.body);console.log(document.title);//标签名:返回一个HTML对象集合var ul = document.getElementsByTagName('ul');console.log(ul);console.log(ul[0]);//ID: 返回一个元素对象var list = document.getElementById('list');console.log(list);//替代语法, 用方法来访问: namedItem(id)var div = document.getElementsByTagName('div');console.log(div);console.log(div.namedItem('list'));// namedItem(name属性值)var active = document.getElementsByTagName('li').namedItem('active');console.log(active);active.style.color = 'blue';//选择ul数组的元素的li集合var lis = ul.item(0).getElementsByTagName('li');console.log(lis);lis.item(2).style.backgroundColor = 'yellow';lis.namedItem('ct').style.backgroundColor = 'red';//class: 返回一个HTML集合, 一个类数组var poster = document.getElementsByClassName('poster')console.log(poster);console.log(poster[0]);//在class=poster的ul加边框poster.item(0).style.border = '2px solid'//直接使用css选择器来获取元素//querySelector():返回匹配选择器的第一个元素var div = document.querySelector('#list');console.log(div);var li = document.querySelector('li');console.log(li);// querySelectorAll(): 返回所有匹配选择器的元素集合NodeListvar lis = document.querySelectorAll('.poster > li');console.log(lis);// 返回一个NodeList类型的类数组集合,但是它可以使用forEach()遍历console.log(lis.item(0));lis.item(0).style.backgroundColor = 'lightgreen';</script></body></html>
NodeList: 所有类型的节点集合,包括了元素,文本,注释,片断,文档,属性…HTMLColletion: HTML元素的节点集合 NodeList > HTMLCollection, 是NodeList一个子集
页面元素返回二种类型的集合: HTMLCollection, NodeList
Node节点对象有三个非常重要的属性: nodeName, nodeType, nodeValue
nodeValue: 只有文本节点,这个属性才有意义

<!DOCTYPE html><html lang="en"><head><meta charset="UTF-8"><title>Node,NodeList对象</title></head><body><div id="box"><h2>第一行</h2><p>第二行</p><li>第三行</li></div><p><a href="https://www.baidu.cn">百度一下</a></p><script>var link = document.links.item(0);console.log(link.nodeName);// 1: 元素节点, 2: 属性, 3: 文本节点console.log(link.nodeType);console.log(link.nodeValue); // 元素节点的值没有意义,nullconsole.log(link.firstChild.nodeValue);// 遍历<div>var div = document.querySelector('div');console.log(div.childNodes);// 返回是7而不是我们看到的3, 原因是把换行符当成了文本节点// childNodes,返回值中包括了所有类型的节点for (var i = 0; i < div.childNodes.length; i++) {var currentNode = div.childNodes.item(i);//currentNode.nodeType === 1if (true) {var name = currentNode.nodeName;var type = currentNode.nodeType;var value = currentNode.nodeValue;console.log((i + 1) + ': 名称: ' + name + ', 类型: ' + type + ', 值: ' + value);}}console.log(div.childNodes);// children: 只返回集合中的元素节点console.log(div.children);//遍历div的元素节点for (var i = 0; i < div.childElementCount; i++) {console.log(div.children.item(i));}// //通过判断是否元素节点,遍历元素节点// div.childNodes.forEach(function (ele) {// if (ele.nodeType === 1) console.log(ele );// });// Array.from(): 将类数组转为真正的数组对象// Array.from(div.children).forEach(function (ele) {// console.log(ele );// });// 获取div的子元素// 第一个// console.log(div.firstElementChild);// 最后一个// console.log(div.lastElementChild);// 用索引获取指定的元素console.log(div.children.item(2));// 获取父元素var li = document.querySelector('li');console.log(li.parentElement);console.log(li.parentNode);console.log(li.parentNode === li.parentElement);</script></body></html>
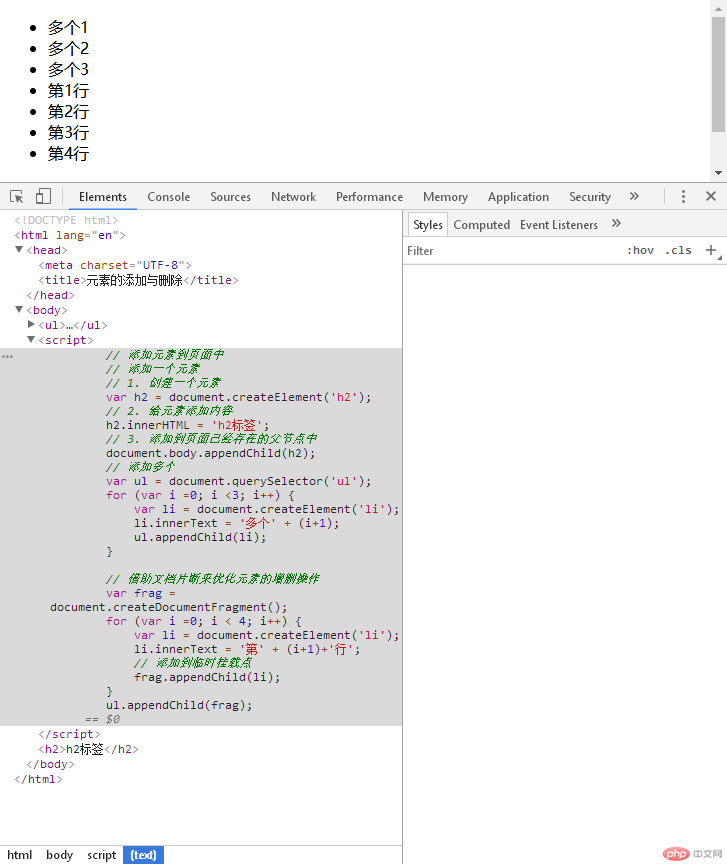
创建元素: createElement()
创建一个元素的片断: createDocumentFragment()

<!DOCTYPE html><html lang="en"><head><meta charset="UTF-8"><title>元素的添加与删除</title></head><body><ul></ul><script>// 添加元素到页面中// 添加一个元素// 1. 创建一个元素var h2 = document.createElement('h2');// 2. 给元素添加内容h2.innerHTML = 'h2标签';// 3. 添加到页面已经存在的父节点中document.body.appendChild(h2);// 添加多个var ul = document.querySelector('ul');for (var i =0; i <3; i++) {var li = document.createElement('li');li.innerText = '多个' + (i+1);ul.appendChild(li);}// 借助文档片断来优化元素的增删操作var frag = document.createDocumentFragment();for (var i =0; i < 4; i++) {var li = document.createElement('li');li.innerText = '第' + (i+1)+'行';// 添加到临时挂载点frag.appendChild(li);}ul.appendChild(frag);</script></body></html>
事件属性: on事件名称
监听器: addEventListernaer()
事件方法: 函数表达式/匿名函数

<!DOCTYPE html><html lang="en"><head><meta charset="UTF-8"><title>事件基本</title></head><body><button onclick="alert(this.firstChild.nodeValue)">快戳我</button><button>不要点</button><a href="https://www.baidu.cn">百度</a><script>var bt2 = document.querySelectorAll('button').item(1);// addEventListener(事件名称字符串, 事件的回调函数, false);bt2.addEventListener('mouseover', function (ev) {// console.log(ev.target);// console.log(ev.type);ev.target.style = 'width:100px;height:50;background: lightgreen;border:none;outline: none;'}, false);bt2.addEventListener('mouseout', function (ev) {ev.target.style = 'width:100px;';}, false);// 给元素对象添加事件属性// 将当前的<a>标签的默认点击后会跳转的行业禁用掉var link = document.links.item(0);link.onclick = function (ev) {ev.preventDefault();// btn.style.display = 'none';};</script></body></html>
ev.preventDefault();var li = document.createElement('li');li.innerHTML = form.content.value;ul.appendChild(li);form.content.value = '';
form.content.focus();
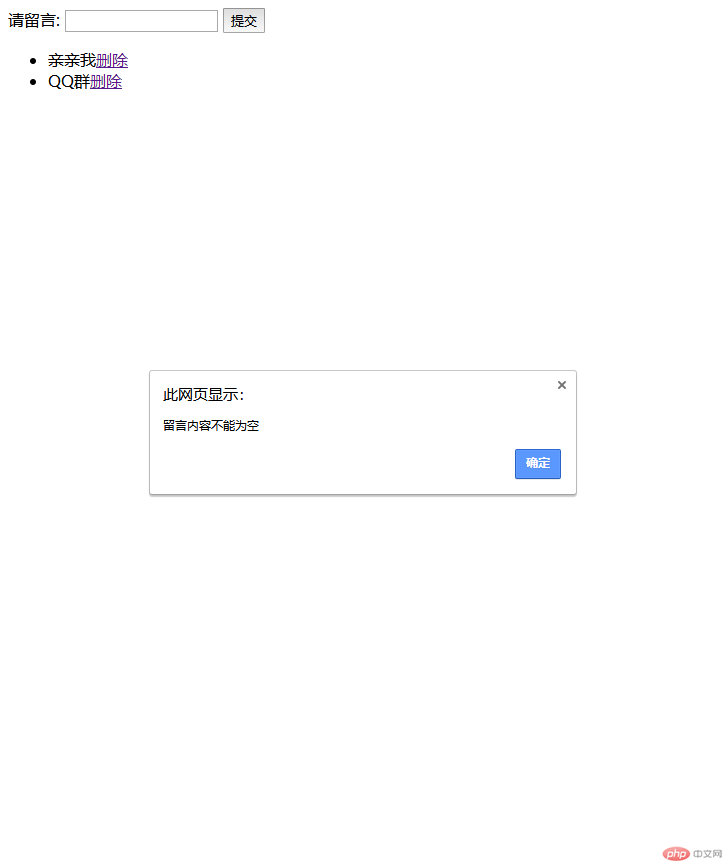
<!DOCTYPE html><html><head><title>todolist案例</title><meta charset="utf-8"></head><body><form action="" name="comment" method="post"><label for="content">请留言:</label><input type="text" name="content"><button>提交</button></form><ul></ul><script >//获取表单var form = document.forms.namedItem('comment');//留言区var ul = document.querySelector('ul');//提交表单form.addEventListener('submit',function(ev){ev.preventDefault();var li = document.createElement('li');//为空禁止提交if (form.content.value.trim().length===0) {alert('留言内容不能为空');form.content.focus();return false;}else {li.innerHTML = form.content.value+'<a href="" onclick="del(this)">删除</a>';;}// li.innerHTML = form.content.value;// ul.appendChild(li);// 如果已经有留言了, 就插入到第一条留言之前if (ul.childElementCount === 0) {ul.appendChild(li);} else {// insertBefor(要插入的元素, 要插入的位置/哪个元素之前)ul.insertBefore(li, ul.firstElementChild);}//清空留言板form.content.value = '';form.content.focus();},false)// 禁止链接的跳转行为function del(ele) {this.event.preventDefault();return confirm('是否删除?') ? ul.removeChild(ele.parentElement) : false;}</script></body></html>