Correction status:qualified
Teacher's comments:表单可以设计的很复杂, 也可以很简单, 并且表单不一定非得用form标签, 这在以后你们都会看到


<button><input>对比| 序号 | <button> |
替代的<input> |
|---|---|---|
| 1 | <button type="...">按钮文本</button> |
<input type="..." value="按钮文本"> |
| 2 | <button><img src="..."></button> |
<input type="image" src="...">图像域 |
| 序号 | 属性 | 描述 |
|---|---|---|
| 1 | type |
必须使用预定义的submit, button, reset之一 |
| 2 | name |
按钮的唯一名称,与 ID 等效 |
| 3 | value |
按钮文本初始值,可通过 JavaScript 修改 |
| 4 | disabled |
禁用按钮 |
| 5 | form |
按钮所属表单(此时按钮type默认类型为submit提交) |
| 6 | formaction |
设置不同按钮可将表单数据提交到不同的 URL 处理 |
| 7 | form*** |
动态设置<form>属性值,如formmethod="GET" |
<!DOCTYPE html><html><head><meta charset="UTF-8"><meta name="viewport" content="width=device-width, initial-scale=1.0"><title>按钮控件元素</title><style>form {padding: 20px;width: 350px;box-shadow: 0 0 8px #888;border-radius: 10px;box-sizing: border-box;margin: auto;background-color: lightskyblue;display: grid;gap: 15px;}form > section {display: grid;grid-template-columns: 80px 1fr;}h3 {text-align: center;}input[type="image"] {justify-self: center;}button {width: 80px;padding: 5px;}.reset-btn{margin-left: 20px;}</style></head><body><h3>用户注册</h3><form action=""><section><label for="username">用户名:</label><input type="text" id="username" name="username" placeholder="请输入您的用户名" /></section><section><label for="password">密码:</label><input type="password" id="password" name="password" placeholder="请输入密码" /></section><!-- 单选框 --><section><label for="secret">性别:</label><div><!-- 只允许返回一个值,多个input的name属性值必须相同 --><input type="radio" name="gender" id="male" value="male" /><label for="male">男</label><input type="radio" name="gender" id="female" value="female" /><label for="male">女</label><!-- checked: 默认选项 --><input type="radio" name="gender" id="secret" value="female" checked /><label for="secret">保密</label></div></section><section><button type="submit" formaction="register.php" formmethod="GET" formtarget="_blank" class="submit-btn" name="submit" >提交</button><!-- 按钮用“Disabled”属性禁止点击,呈现灰色 --><button type="reset" class="reset-btn" disabled>重置</button></section></form></body></html>
效果图如下: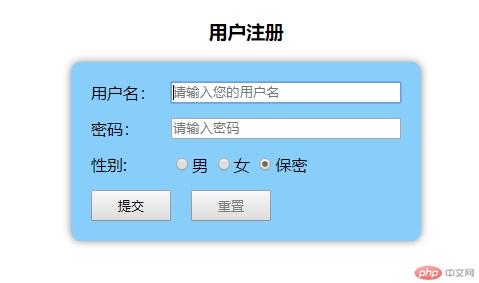
<select><select> + <optgroup> + <option>组合元素实现name定义在<select>中,参数值value,定义在<option>中<select>属性| 序号 | 属性 | 描述 |
|---|---|---|
| 1 | name |
请求参数名称/变量名 |
| 2 | multiple |
是否允许多选(布尔属性) |
| 3 | size |
允许同时显示的列表项 |
| 3 | disabled |
是否禁用(布尔属性) |
<optgroup>属性| 属性 | 描述 |
|---|---|
label |
列表分组名称 |
<option>属性| 序号 | 属性 | 描述 |
|---|---|---|
| 1 | value |
请求参数的值 |
| 2 | label |
默认选项文本值 |
| 3 | selected |
是否选中(布尔属性) |
| 3 | disabled |
是否禁用(布尔属性) |
<select>事件属性| 序号 | 事件属性 | 描述 |
|---|---|---|
| 1 | onchange |
当下拉列表选项值发生变化时才会触发 |
| 2 | onclick |
只要点击就会触发(选项值可以不改变) |
<!DOCTYPE html><html><head><meta charset="UTF-8"><meta name="viewport" content="width=device-width, initial-scale=1.0"><title>选择控件元素</title></head><body><form action=""><select required multiple name="" style="height: 200px;"><optgroup label="想买的车"><option value="volvo">Volvo</option><option value="saab">Saab</option><option value="mercedes">Mercedes</option><option value="audi">Audi</option></optgroup><optgroup label="先努力学习"><option value="html5">HTML5</option><option value="css3" selected>CSS3</option><!-- 使用“disabled”属性,禁止选择此选项 --><option value="javascript" disabled>JavaScript</option><!-- 使用label属性,可省略选项文本,并将option转为单标签 --><option value="es6" label="ECMScript6"> </option><option value="jquery" label="jQuery"> </option></optgroup></select><input type="submit" value="提交" /></form></body></html>
效果图如下: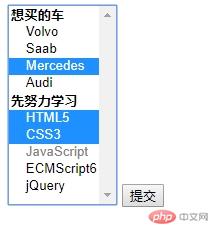
<textarea>| 序号 | 属性 | 描述 |
|---|---|---|
| 1 | cols |
文本域可视宽度 |
| 2 | rows |
文本域可输入的行数 |
| 3 | name |
文本域参数名称 |
| 4 | form |
绑定所属表单元素 |
| 5 | minlength |
允许输入最小字符长度 |
| 6 | maxlength |
允许输入最大字符长度 |
| 7 | maxlength |
允许输入最大字符长度 |
| 8 | placeholder |
提示信息占位符 |
| 9 | wrap |
换行方式:hard/soft默认 |
| 10 | disabled |
禁用(布尔属性) |
| 11 | autofocus |
自动获取焦点(布尔属性) |
| 12 | autocomplete |
自动完成(布尔属性) |
| 序号 | 事件 | 描述 |
|---|---|---|
| 1 | onclick |
点击时触发 |
| 2 | onchange |
文本被修改时触发 |
| 3 | onselect |
文本被选中时触发 |
提示:
<textarea>是双标签,没有value属性,标签内部的文本就是参数值
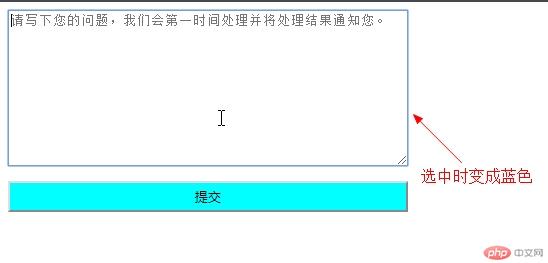
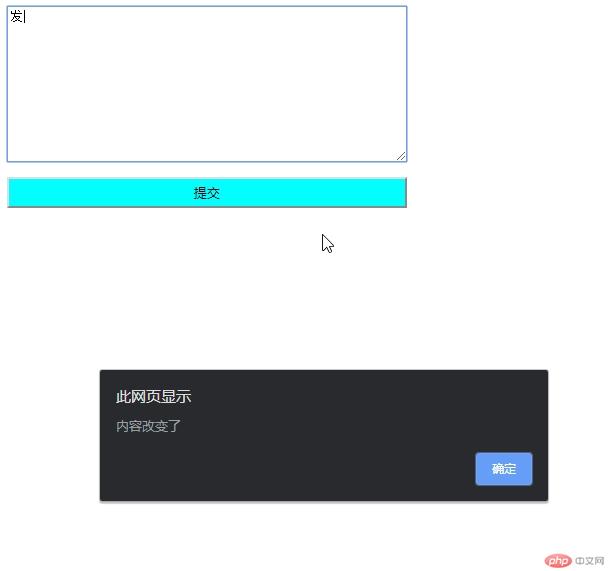
<!DOCTYPE html><html><head><meta charset="UTF-8"><meta name="viewport" content="width=device-width, initial-scale=1.0"><title>文本域示例代码</title><style>body {display: grid;width: 400px;}button {background-color: cyan;padding: 5px;width: 100%;margin-top: 15px;}</style></head><body><!-- 表单内部为空,控件全部使用form属性与之绑定 --><form id="textarea-form"></form><textarea name="form-reply" cols="30" rows="10" form="textarea-form" maxlength="50" placeholder="请写下您的问题,我们会第一时间处理并将处理结果通知您。" onchange="alert('内容改变了')" onselect="this.style.color='blue'"></textarea><button form="textarea-form" type="submit">提交</button></body></html>
效果图如下: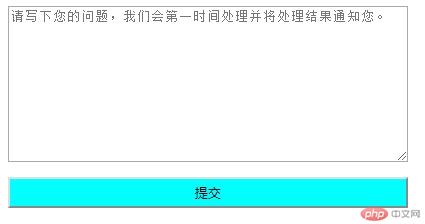
<fieldset><legend>,设置分组标题| 序号 | 属性 | 描述 |
|---|---|---|
| 1 | name |
分组名称 |
| 2 | form |
分组所属表单,默认是最近的表单 |
| 3 | disabled |
禁用分组(布尔属性) |
name,form属性仅供参考,提交参数仍依赖内部控件中的form属性
<!DOCTYPE html><html><head><meta charset="UTF-8"><meta name="viewport" content="width=device-width, initial-scale=1.0"><title>表单域元素</title><style>body {display: grid;row-gap: 15px;width: 500px;}fieldset {color: lightseagreen;border-radius: 6px;border: 2px solid lightseagreen;}fieldset:hover {background-color: lightcyan;}fieldset > section {display: grid;grid-template-columns: repeat(3, 1fr);column-gap: 15px;}fieldset > legend {text-align: center;}input {border: none;outline: none;border-bottom: 1px solid #666;background-color: transparent;}button {height: 30px;border: none;outline: none;border-radius: 6px;background-color: lightseagreen;color: white;}button:hover {background-color: darkorchid;cursor: pointer;}</style></head><body><!-- 提交设置通过<button>元素完成 --><form action="" id="register"></form><!-- 表单域分组 --><fieldset name="base" form="register"><legend>基本信息</legend><section><input type="email" name="email" placeholder="您的邮箱" form="register" autofocus /><input type="password" name="psw1" placeholder="您的密码" form="register" /><input type="password" name="psw2" placeholder="重复密码" form="register" /></section></fieldset><button type="submit" form="register">提交</button></body></html>
效果图如下:
学习button标签的常用属性,与input标签相同之处。
学习下拉列表select标签元素的常用属性,了解 <optgroup>与<option>组合用法。
学习文本域<textarea>元素常用属性,了解<textarea>事件属性的用法。
学习表单域分组元素<fieldset>用法,一般用在表单字段过多时,进行分组管理,让代码更简洁易于管理。