Correction status:qualified
Teacher's comments:掌握了原生js,这些知识点都非常的容易理解


1、demo1代码
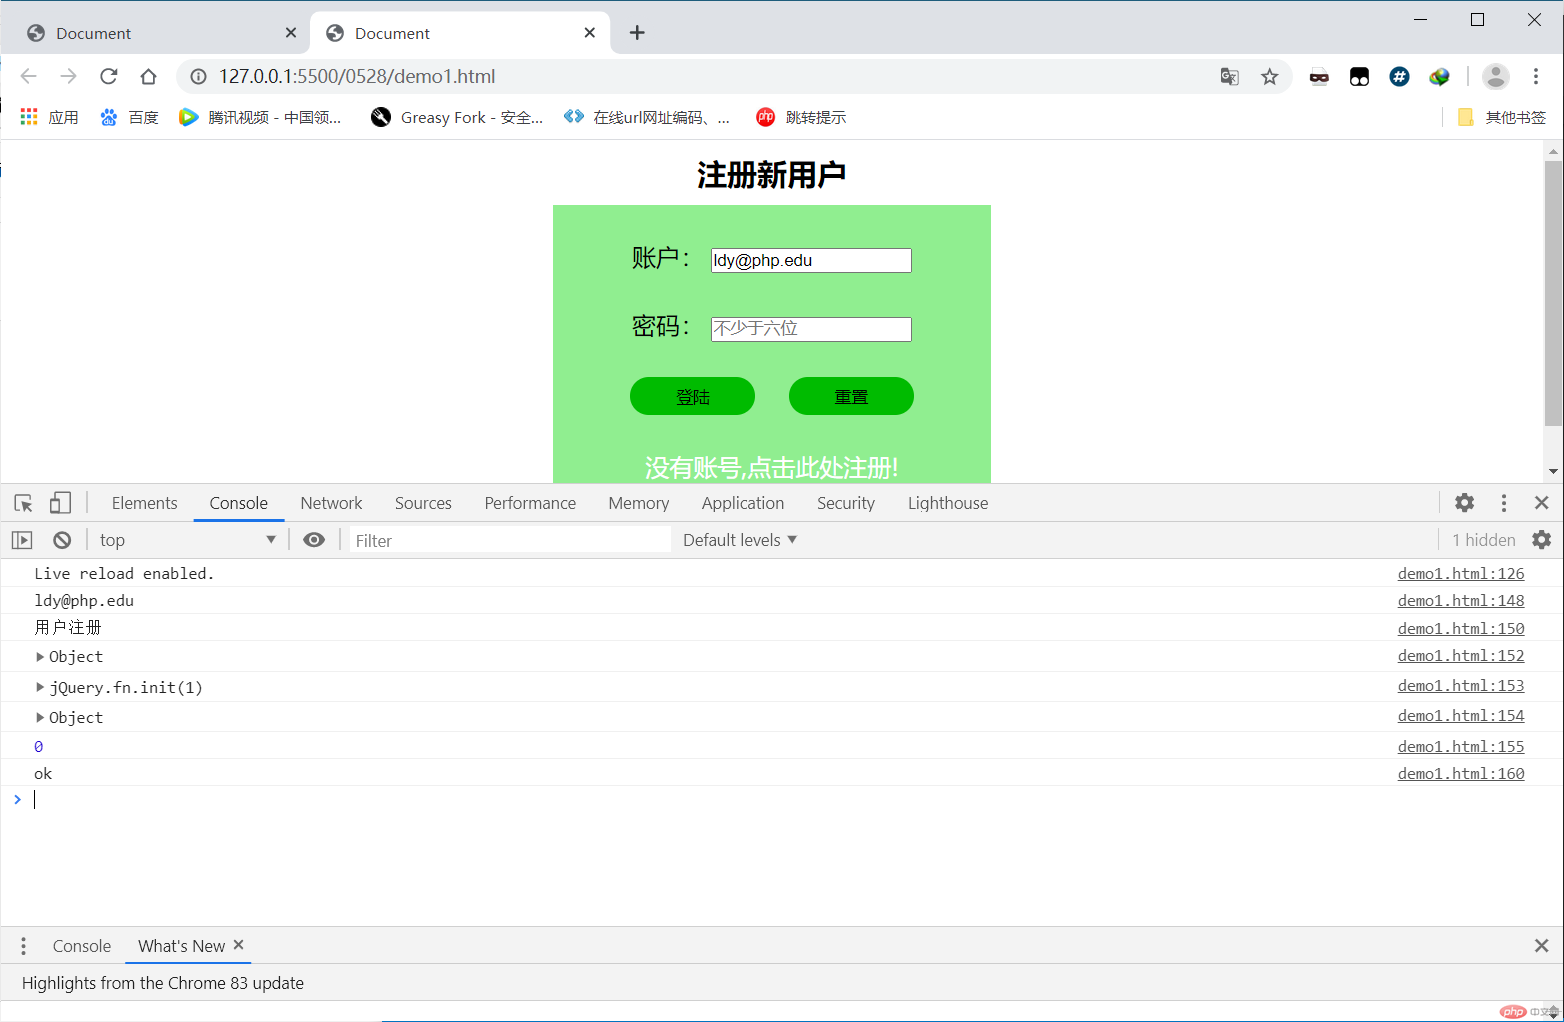
<!DOCTYPE html><html lang="en"><head><meta charset="UTF-8" /><meta name="viewport" content="width=device-width, initial-scale=1.0" /><title>Document</title><script src="../JQuery3.5.1.js"></script><style>* {margin: 0;padding: 0;}h2 {/* display: block; */width: 350px;margin: 0 auto;text-align: center;padding-top: 10px;box-sizing: border-box;}form {margin: 10px auto;width: 350px;height: 250px;background-color: #5384e8;display: flex;flex-flow: column nowrap;justify-content: space-evenly;align-content: center;align-items: center;font-size: 1.2rem;}form:hover {box-shadow: 0 0 5px #626262;}form > .button {width: 280px;display: flex;justify-content: space-evenly;}form > .button > input {width: 100px;height: 30px;background-color: #00bb00;border: none;border-radius: 15px;}form > .button > input:hover {background-color: red;color: white;}a {color: white;text-decoration: none;}</style></head><body><h2 data-index="one">用户注册</h2><form method="POST" onsubmit="return false"><div class="account"><label for="username">账户:</label><inputtype="email"requiredname="username"id="username"placeholder="example@163.com"/></div><div class="pwd"><label for="p2">密码:</label><inputtype="password"requiredname="p2"id="p2"placeholder="不少于六位"/></div><div class="button"><input type="submit" value="登陆" /><input type="reset" value="重置" /></div><div><a href="regist.php">没有账号,点击此处注册!</a></div></form></body><script>var cl = console.log.bind(console);// cl($('input[type="email"]'));var form = $("form");// cl(form);//修改元素标签属性值attr:只有一个参数获取其值,两个参数修改其值form.attr("method", "GET");//修改元素的样式:CSS()form.css("background", "lightgreen");//获取input标签中的值:val();var email = $('input[type="email"]');email.val("ldy@php.edu");cl(email.val());//html()和text()修改元素标签中的文本内容cl($("h2").html());$("h2").text("注册新用户");cl(form.offset()); //相对于文档的坐标位置cl(form.offsetParent()); //取得离指定元素最近的含有定位信息的祖先元素cl(form.position()); //获取匹配元素中第一个元素的当前坐标,相对于offset parent的坐标cl(form.scrollTop());form.scrollTop(30); //滚动距离顶部的距离form.scrollLeft(30); //滚动距离左边的距离//data自定义属性值的获取和设置$("h2").data("index", "ok"); //设置data自定义属性cl($("h2").data("index")); //获取自定义属性值</script></html>
演示结果:
2、demo2代码
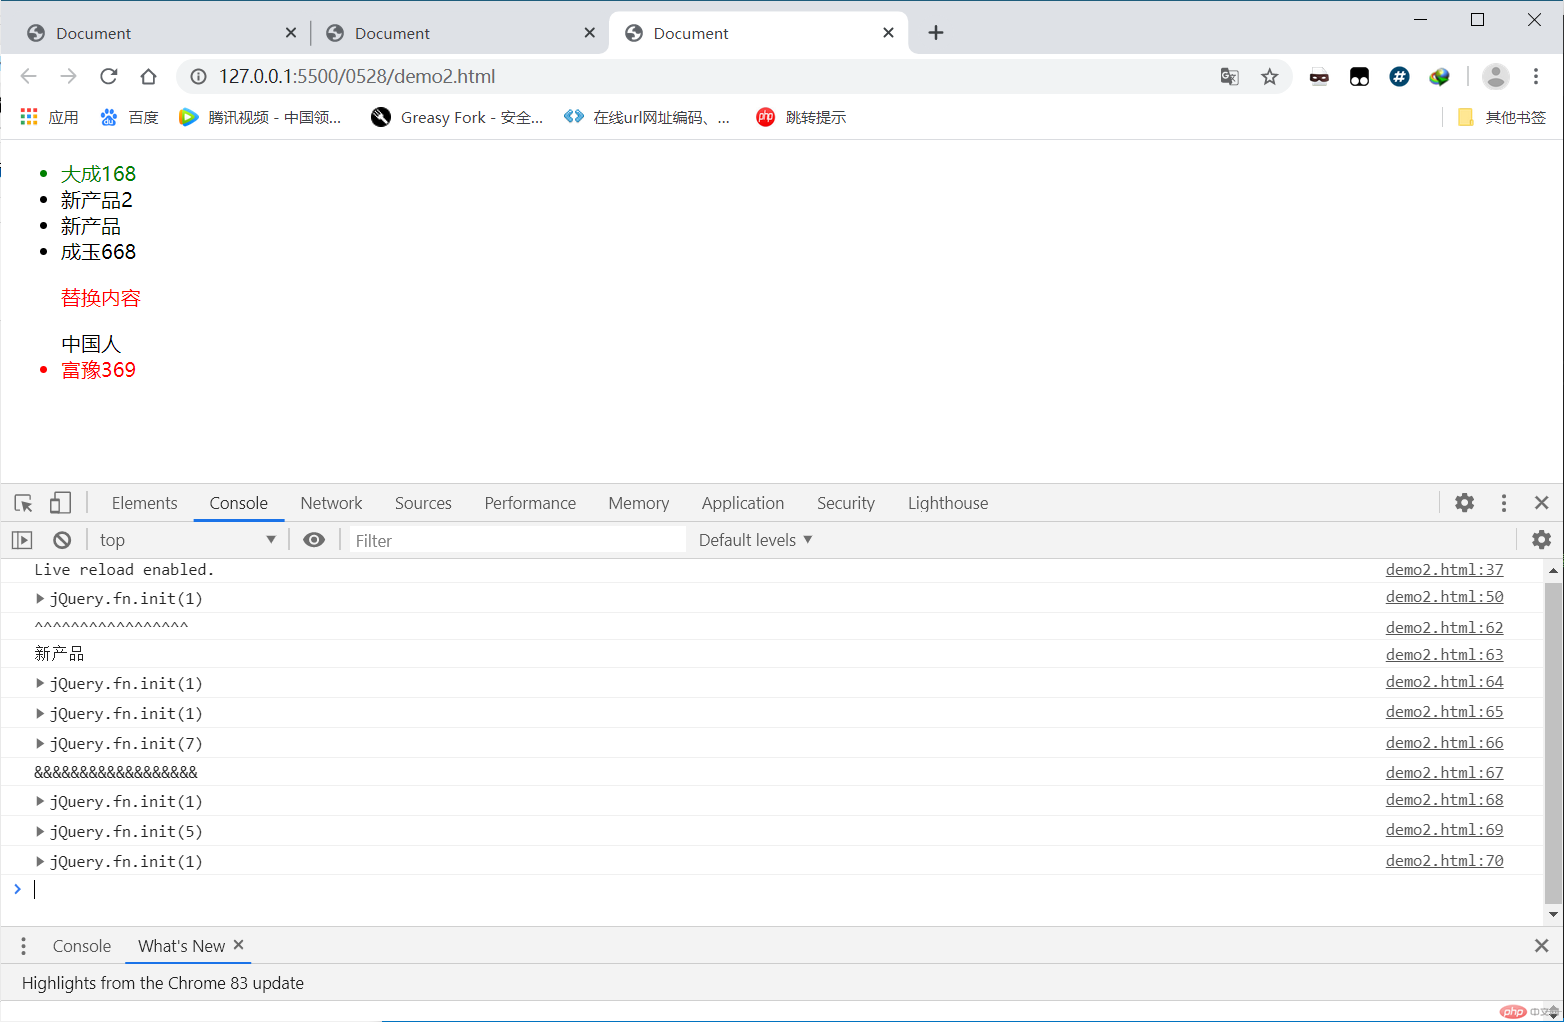
<!DOCTYPE html><html lang="en"><head><meta charset="UTF-8" /><meta name="viewport" content="width=device-width, initial-scale=1.0" /><title>Document</title><script src="../JQuery3.5.1.js"></script></head><body></body><script>var cl = console.log.bind(console);$("body").append("<ul></ul>");cl($("body"));$("<li>富豫369</li>").appendTo("ul"); //尾部插入$("ul").prepend("<li>成玉668</li>"); //头部插入$("<li>大成168</li>").prependTo("ul");$("li").last().css("color", "red");$("li").first().css("color", "green");$("li:nth-child(2)").before("<li>新产品</li>"); //在某个元素之前插入元素$("<li>新产品2</li>").insertBefore("li:nth-child(2)");$("li:nth-child(4)").after("<li>新产品</li>"); //在某个元素之前插入元素$("<li>新产品2</li>").insertAfter("li:nth-child(4)");$("li:nth-child(5)").replaceWith('<p style="color:red">替换内容</p>'); //替换$("<span>中国人</span>").replaceAll("li:nth-child(6)");cl("^^^^^^^^^^^^^^^^^");cl($("li").eq(2).html());cl($("li").eq(2));cl($("li").eq(2).parent());cl($("ul").children());cl("&&&&&&&&&&&&&&&&&&");cl($("ul").children("span")); //获取子代元素cl($("ul").children().filter("li")); //过滤函数cl($("ul").find("p")); //查找其所有后代元素</script></html>
运行结果图:
1、JQuery常用元素标签属性操作函数:
.css():样式获取和设置方法(两个参数:属性、值).attr():元素标签属性的获取和设置方法(两个参数:属性、值).val():表单中的值的获取方式和设置方法(一个参数:值).html()/text():元素标签中文本的获取和设置方法(一个参数:值).data():元素标签的自定义属性的获取和设置(两个参数:属性、值)
2、JQuery元素位置信息和滚动信息获取和设置
.position():获取当前元素的位置相对于定位父级坐标信息.offset():获取当前元素相对于文档的坐标信息.scrollTop|scrollLeft():获取当前元素的滚动条位置信息.scroll(function(ev){}):滚动监听函数
3、JQuery元素添加函数:
.append()|.appendTo():在指定元素尾部添加.prepend()|prependTo():在指定元素头部添加.before()|insertBefore():在指定元素之前插入.after()|.insertAfter():在指定元素之后插入.|replaceWith()|.replaceAll():替换指定元素内容
4、Jquery获取子代和后代元素
.children():获取所有子代元素.filter():过滤函数.first():获取子代元素中的第一个.last():获取子代元素的最后一个.eq():获取子代元素中的任意一个元素.find():获取所有后代元素