Correction status:qualified
Teacher's comments:不建议这样集中提交, 学习效果非常不好, 以后要注意


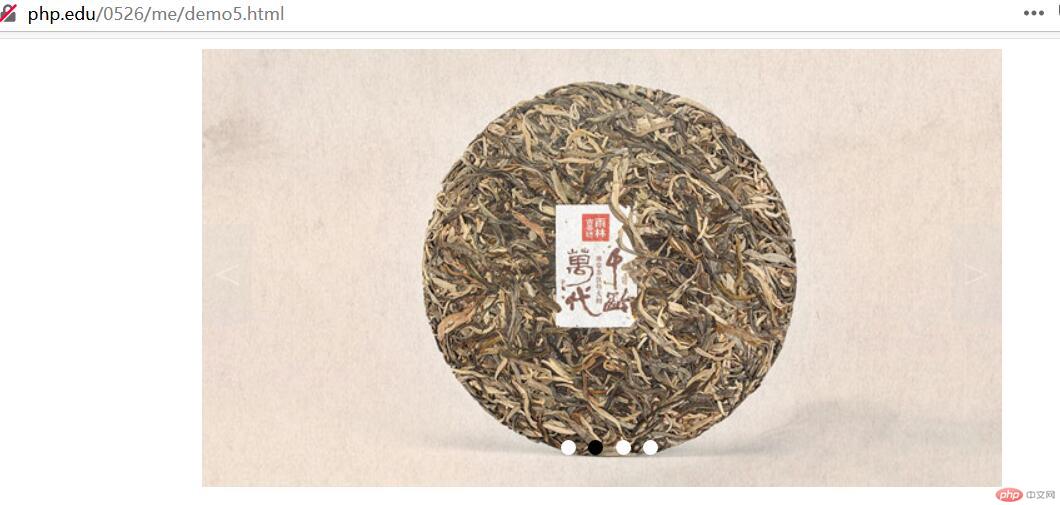
一、轮播图的实现:在项目开发中,轮播图是经常会用到的效果。
1)轮播图的样式主要使用定位的方式,是圆点和翻译按钮显示在图片上层。
2)只显示当前图片,隐藏其它图片。
3)用js设置点击事件,以及定时器自动触发翻页点击事件。
4)代码实现:
<!DOCTYPE html>
<html lang="en">
<head>
<meta charset="UTF-8" />
<title>轮播图实现</title>
<style>
ul,
li {
margin: 0;
padding: 0;
list-style: none;
}
.box {
/*定位父级*/
position: relative;
width: 640px;
height: 350px;
margin: 0 auto;
}
.box .slider {
width: 640px;
height: 350px;
display: none;
}
.box .slider.active {
display: block;
}
.box .point-list {
position: absolute;
/*绝对定位的环境下的水平居中方式*/
left: 50%;
margin-left: -38px;
top: 310px;
}
.box .point-list .point {
display: inline-block;
width: 12px;
height: 12px;
margin: 0 5px;
background-color: white;
border-radius: 100%;
}
.box .point-list .point.active {
background-color: black;
}
.box .point-list .point:hover {
cursor: pointer;
}
.skip {
position: absolute;
top: 140px;
display: inline-block;
width: 40px;
height: 80px;
text-align: center;
line-height: 80px;
background-color: lightgray;
color: white;
opacity: 0.2;
font-size: 36px;
}
.box .prev {
left: 0;
}
.box .next {
right: 0;
}
.box .skip:hover {
cursor: pointer;
opacity: 0.5;
color: black;
}
</style>
</head>
<body>
<div class="box">
<img src="banner/p1.jpg" alt="" data-index="1" class="slider active" />
<img src="banner/p2.jpg" alt="" data-index="2" class="slider" />
<img src="banner/p3.jpg" alt="" data-index="3" class="slider" />
<img src="banner/p4.jpg" alt="" data-index="4" class="slider" />
<div class="point-list">
<!-- <span class="point active" data-index="1"></span>
<span class="point" data-index="2"></span>
<span class="point" data-index="3"></span> -->
</div>
<span class="skip prev"><</span>
<span class="skip next">></span>
</div>
<script>
var cl = console.log.bind(console);
// 轮播图片组
var imgs = document.querySelectorAll("img");
var pointList = document.querySelector(".point-list");
// 动态生成小圆点
imgs.forEach(function (img, index) {
var span = document.createElement("span");
if (index === 0) span.classList.add("point", "active");
span.classList.add("point");
// 将小圆点与当前显示的图片的索引进行关联
span.dataset.index = img.dataset.index;
pointList.appendChild(span);
});
// 为了正确的设置小圆点高亮, 这里需要获取到所有的小圆点
var points = document.querySelectorAll(".point");
// 事件代理/委托: 给小圆点添加点击事件
pointList.addEventListener(
"click",
function (ev) {
cl(ev.target);
imgs.forEach(function (img) {
if (img.dataset.index === ev.target.dataset.index) {
imgs.forEach(function (img) {
img.classList.remove("active");
});
// 设置当前图片的激活样式
img.classList.add("active");
// 公共函数: 设置小圆点当前的高亮, 必须与图片一一对应, 同步
setPointActive(img.dataset.index);
}
});
},
false
);
// 公共函数:setPointActive
function setPointActive(imgIndex) {
// 清除原来的所有的小圆点上的高亮
points.forEach(function (point) {
point.classList.remove("active");
});
points.forEach(function (point) {
if (point.dataset.index === imgIndex) point.classList.add("active");
});
}
// 获取翻页按钮
var skip = document.querySelectorAll(".skip");
// 添加事件
skip.item(0).addEventListener("click", skipImg, false);
skip.item(1).addEventListener("click", skipImg, false);
// 翻页事件回调skipImg
function skipImg(ev) {
// 遍历并找到当前正在显示的图片
var currentImg = null;
imgs.forEach(function (img) {
if (img.classList.contains("active")) currentImg = img;
});
// 1. 判断是否是点击了显示前一张?
if (ev.target.classList.contains("prev")) {
currentImg.classList.remove("active");
currentImg = currentImg.previousElementSibling;
cl(currentImg);
// 如果存在前一张
if (currentImg !== null && currentImg.nodeName === "IMG")
// 将当前图片显示
currentImg.classList.add("active");
else {
//否则就显示最后一张,形成循环
currentImg = imgs[imgs.length - 1];
currentImg.classList.add("active");
}
}
// 2. 判断是否是点击了显示下一张?
if (ev.target.classList.contains("next")) {
currentImg.classList.remove("active");
currentImg = currentImg.nextElementSibling;
cl(currentImg);
// 如果存在前一张
if (currentImg !== null && currentImg.nodeName === "IMG")
// 将当前图片显示
currentImg.classList.add("active");
else {
//否则就显示最后一张,形成循环
currentImg = imgs[0];
currentImg.classList.add("active");
}
}
// 公共函数: 设置小圆点当前的高亮, 必须与图片一一对应, 同步
setPointActive(currentImg.dataset.index);
}
var box = document.querySelector(".box");
var timer = null;
// 1. 当鼠标移出轮播图区域时, 启动定时器,每2.5秒自动切换图片
box.addEventListener("mouseout", startTimer, false);
// 2. 当鼠标移入轮播图区域时,清除定时器,由用户点击操作
box.addEventListener("mouseover", clearTimer, false);
// 启动定时器
function startTimer() {
var click = new Event("click");
//setInterval(): 间歇式执行
setInterval(function () {
skip.item(1).dispatchEvent(click);
}, 2500);
}
// 清除定时器
function clearTimer() {
clearInterval(timer);
}
</script>
</body>
</html>
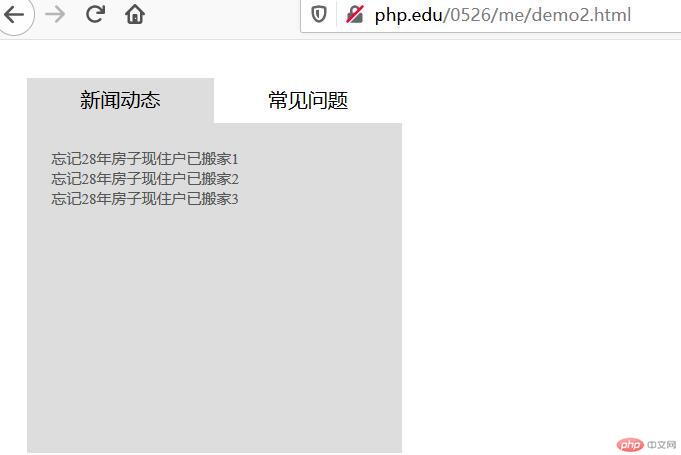
二、TAB选项卡的实现:
1)主要原理是利用标签的点击事件触发,更改相关标签的样式。
2)通过自定义的data-index属性找到对应的内容块。
3)只显示激活状态的标签,其它隐藏。
4)代码实现:
<!DOCTYPE html>
<html lang="en">
  <head>
    <meta charset="UTF-8" />
    <meta name="viewport" content="width=device-width, initial-scale=1.0" />
    <title>选项卡</title>
    <style>
      * {
        margin: 0;
        padding: 0;
      }
      a {
        text-decoration: none;
        color: #555;
      }
      a:hover {
        text-decoration: underline;
        color: red;
      }
      li {
        list-style: none;
      }
      li:hover {
        cursor: default;
      }
      .tabs {
        width: 300px;
        height: 300px;
        margin: 30px;
        background-color: #ddd;

        display: flex;
        flex-direction: column;
      }

      .tab {
        height: 36px;
        display: flex;
      }
      .tab li {
        flex: auto;
        text-align: center;
        line-height: 36px;
        background-color: #fff;
      }
      .tab li.active {
        background-color: #ddd;
      }

      /* 默认所有选项卡只有一个显示,其它隐藏 */
      .item {
        padding: 20px;
        display: none;font-size: 12px;
      }
      .item.active {
        display: block;
      }
    </style>
  </head>
  <body>
    <div class="tabs">
      <!-- 导航 -->
      <ul class="tab">
        <li class="active" data-index="1">新闻动态</li>
        <li data-index="2">常见问题</li>
      </ul>

      <!-- 内容1 -->
      <ul class="item active" data-index="1">
        <li><a href="">忘记28年房子现住户已搬家1</a></li>
        <li><a href="">忘记28年房子现住户已搬家2</a></li>
        <li><a href="">忘记28年房子现住户已搬家3</a></li>
      </ul>

      <!-- 内容2 -->
      <ul class="item" data-index="2">
        <li><a href="">轮播图就是实现图片的轮换播放效果?1</a></li>
        <li><a href="">轮播图就是实现图片的轮换播放效果?2</a></li>
        <li><a href="">轮播图就是实现图片的轮换播放效果?3</a></li>
      </ul>

    </div>

    <script>
      var cl = console.log.bind(console);

      // 导航:事件委托
      var tab = document.querySelector(".tab");
      // 列表
      var items = document.querySelectorAll(".item");

      // 给导航绑定点击事件
      tab.addEventListener("click", show, false);

      // 给导航绑定鼠标移动事件
      tab.addEventListener("mouseover", show, false);
      // 事件回调函数
      function show(ev) {
        cl(ev.target);
        // data-index
        // cl(ev.target.dataset.index);
        // 1. 清空导航原有的激活
        ev.target.parentNode.childNodes.forEach(function (item) {
          if (item.nodeType === 1) item.classList.remove("active");
        });

        // 2. 将当前用户正在点击的导航设置为激活
        ev.target.classList.toggle("active");

        // 3. 清空列表的原有激活
        items.forEach(function (item) {
          item.classList.remove("active");
        });

        // 4. 在列表中查询data-index与导航的data-index相等的内容,将它设置为激活
        items.forEach(function (item) {
          if (item.dataset.index === ev.target.dataset.index)
            item.classList.add("active");
        });
      }
    </script>
  </body>
</html>
三、总结:这个轮播图的使用是十分常见,各个浏览器兼容性也是很重要。以前做轮播图都是在网上拿来直接用的多。要完善好这个轮播图鼠标点击小圆点会乱跳的BUG,还要修一下内功。用了这么久的TAB选项卡,今天才知道JS的原理。怎么样才能达到自己全部手写代码,不用仿的?