Correction status:qualified
Teacher's comments:只要涉及到定位, 一定要有参照物, 记住 这一条就掌握了


能够熟练使用css中的定位对页面美化会有很大的帮助,下面我们详细介绍下四种定位方法:静态定位,相对定位,绝对定位,固定定位
1.静态定位:position: static;也叫文档流定位,一般标签不加定位都属于文档流定位,/* 文档流:元素的排列按照书写顺序 源码中的顺序 */
2.相对定位:position: relative; 元素相对于自己在文档流(浏览器页面)中的原始位置进行偏移

3.绝对定位:position: absolute;一定要有一个定位父级作为定位参照物 否则就相对于body进行定位。通俗点说绝对定位是相对于它的已经做过定位的父级或者上级作为定位参照物的,所以想要绝对定位他的父级或者上级必须有相对定位,否则他就以body为参照物进行定位

4.固定定位:position: fixed; 固定定位与绝对定位类似,但它是相对于浏览器窗口定位,并且不会随着滚动条进行滚动。将元素放置在浏览器窗口的固定位置,拖拽窗口时元素位置不变。

1.什么是事件?
JavaScript 创建动态页面。事件是可以被JavaScript 侦测到的行为。 网页中的每个元素都可以产生某些可以触发 JavaScript 函数或程序的事件。
2.给某个元素定义事件的方法有哪些?
(1)事件属性 通俗说就是给一个元素通过添加属性的方法添加事件
例:<button onclick="console.log(this.innerText)">按钮1</button>通过给按钮添加onclick属性的方法添加点击事件
(2)对象属性 通过获取对象的方式给元素添加事件
<button>按钮2</button><script>document.querySelectorAll("button")[0].onclick = function () {console.log("第一次点击");};document.querySelectorAll("button")[0].onclick = function () {console.log("第二次点击");};</script>

注:只有最后一次有效 同名事件彼此覆盖
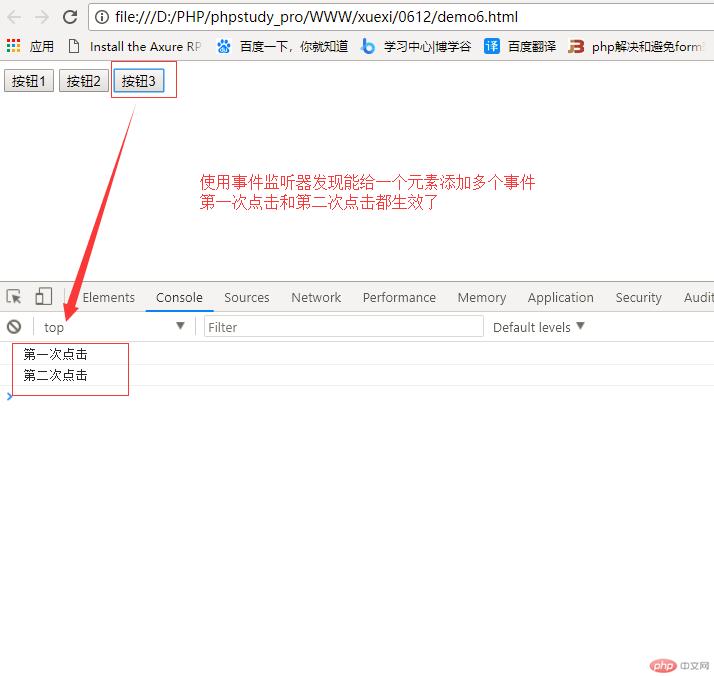
(3)事件监听器
<button>按钮3</button><script>// 3.事件监听器const btn3 = document.querySelectorAll("button")[0];// btn3.addEventListener(事件类型,事件方法,)btn3.addEventListener("click", function () {console.log("第一次点击");});btn3.addEventListener("click", function () {console.log("第二次点击");});//可以给一个元素多次添加</script>

注:可以给一个元素多次添加
代码:
<!DOCTYPE html><html lang="en"><head><meta charset="UTF-8" /><meta name="viewport" content="width=device-width, initial-scale=1.0" /><title>商城导航下拉菜单demo</title><style>body {font-size: 14px;margin: 0;padding: 0;}ul {margin: 0;padding: 0;list-style: none;}a {text-decoration: none;}.box1 {width: 500px;height: 30px;}.box1 .box-min {width: 100px;height: 30px;float: left;position: relative;}.box1 .box-min a {display: block;width: 100px;height: 30px;float: left;text-align: center;line-height: 30px;color: white;background-color: black;}.box1 .box-min a:hover {background-color: rgb(34, 34, 37);}.box1 .box-min ul {position: absolute;top: 30px;}</style></head><body><ul class="box1"><li class="box-min"><a href="">首页</a></li><li class="box-min"><a href="">电子产品</a><ul style="display: none;"><li><a href="">电脑</a></li><li><a href="">手机</a></li><li><a href="">平板</a></li></ul></li><li class="box-min"><a href="">服饰鞋包</a></li><li class="box-min"><a href="">百科图书</a><ul style="display: none;"><li><a href="">军事百科</a></li><li><a href="">动物百科</a></li><li><a href="">历史人物百科</a></li><li><a href="">战争百科</a></li></ul></li><li class="box-min"><a href="">日货零食</a></li></ul></body><!-- js部分代码 --><script>// 1. 定义常量获取所有的一级liconst navs = document.querySelectorAll(".box1 > li");// 2. 循环常量里所有的li并取到当前linavs.forEach(function (nav) {// 3. 给循环当前元素绑定监听事件// (1) 鼠标移入 显示当前一级菜单下的子菜单 mouseover:鼠标移入事件属性nav.addEventListener("mouseover", shownav);// (2) 鼠标移出 隐藏当前一级菜单下的子菜单 mouseout:鼠标移出事件属性nav.addEventListener("mouseout", hidenav);});// 4.创建显示和隐藏函数 shownav hidenav// (1)显示子菜单function shownav(ev) {if (ev.target.nextElementSibling !== null) {ev.target.nextElementSibling.style.display = "block";}}// (2)隐藏子菜单function hidenav(ev) {if (ev.target.nodeName === "A" && ev.target.nextElementSibling !== null) {ev.target.nextElementSibling.style.display = "none";}}</script><!-- js部分代码 --></html>
效果如下:
完美结束!!!
1.重点理解css定位
2.会使用js经常使用到的事件 如 点击事件 移出移入事件等
3.一定要注重实践 多敲代码多结合知识点做demo
4.一起等你键盘敲烂 月薪十万!!!