Correction status:qualified
Teacher's comments:整体来讲,总结的很不错!


| 属性 | 释义 | 注意 |
|---|---|---|
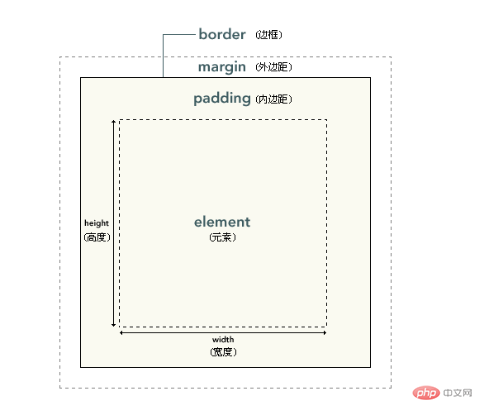
| content | 元素内容 | |
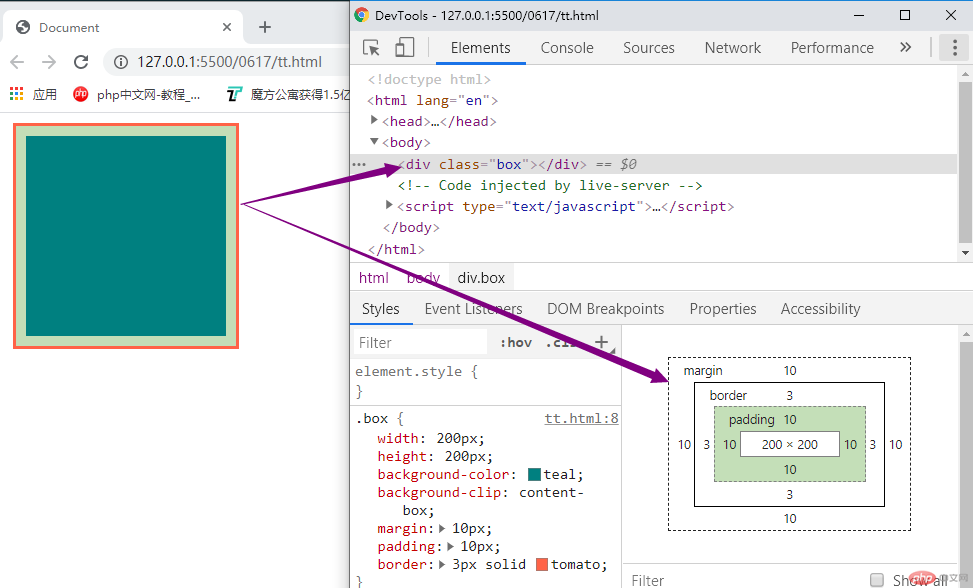
| margin | 外边距 | 有四个值按照上右下左的顺序 |
| padding | 内边距 | 有四个值按照上右下左的顺序 |
| border | 边框 |
<style>.box {width: 200px;height: 200px;/* 显示内边距 */background-color: teal;background-clip: content-box;margin: 10px;padding: 10px;border: 3px solid tomato;}</style></head><body><div class="box"></div></body>
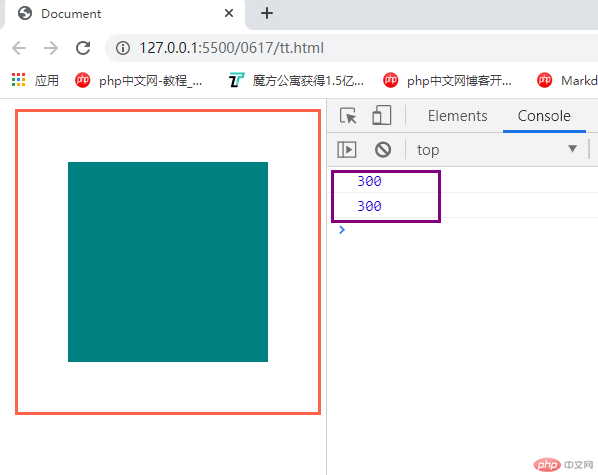
<script>const box = document.querySelector(".box");// 1. 内容区大小// 大小 = width / height + paddingconsole.log(box.clientWidth);console.log(box.clientHeight);</script>
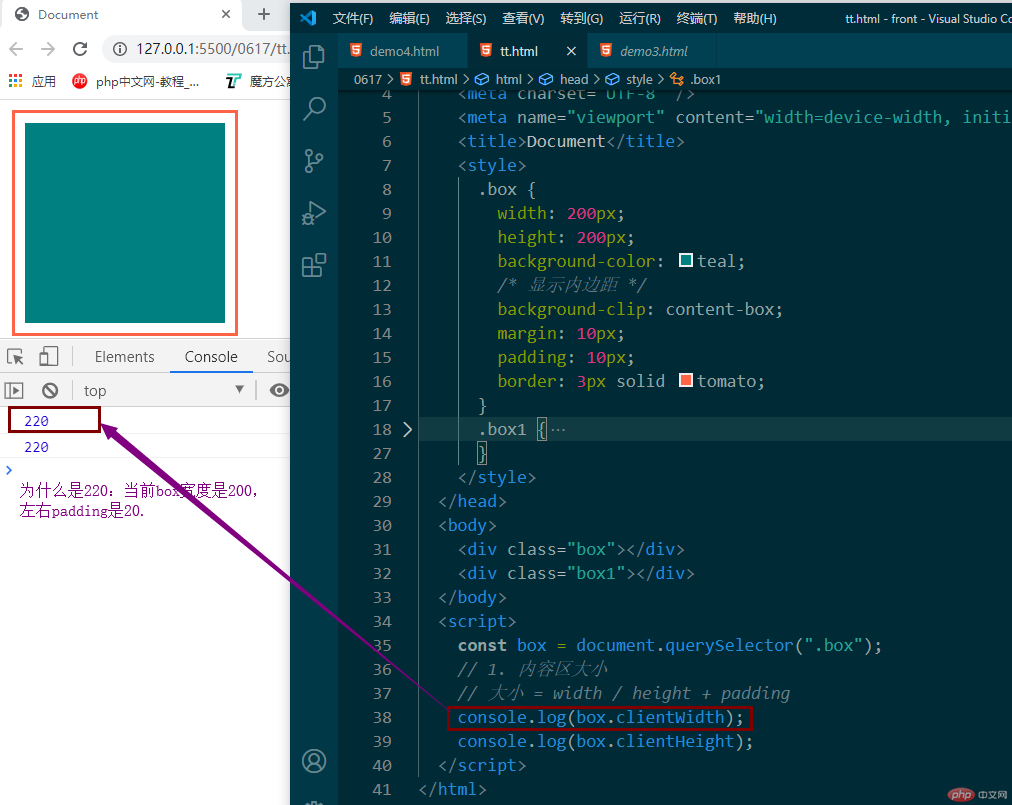
看下图紫色框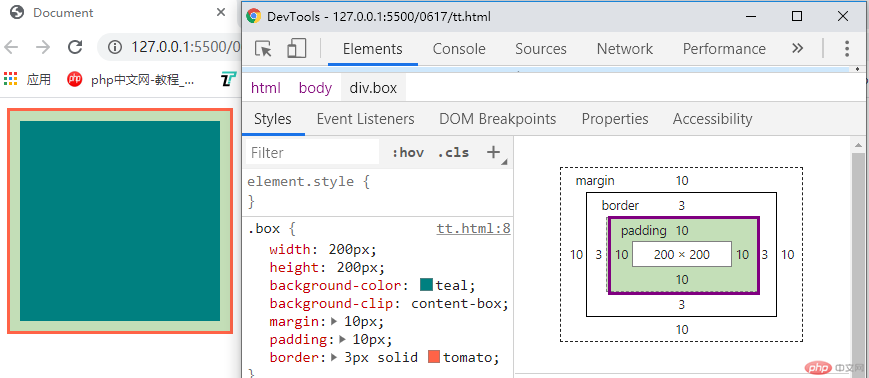
当我们把padding的值修改到50 会发生什么变化呢? 看图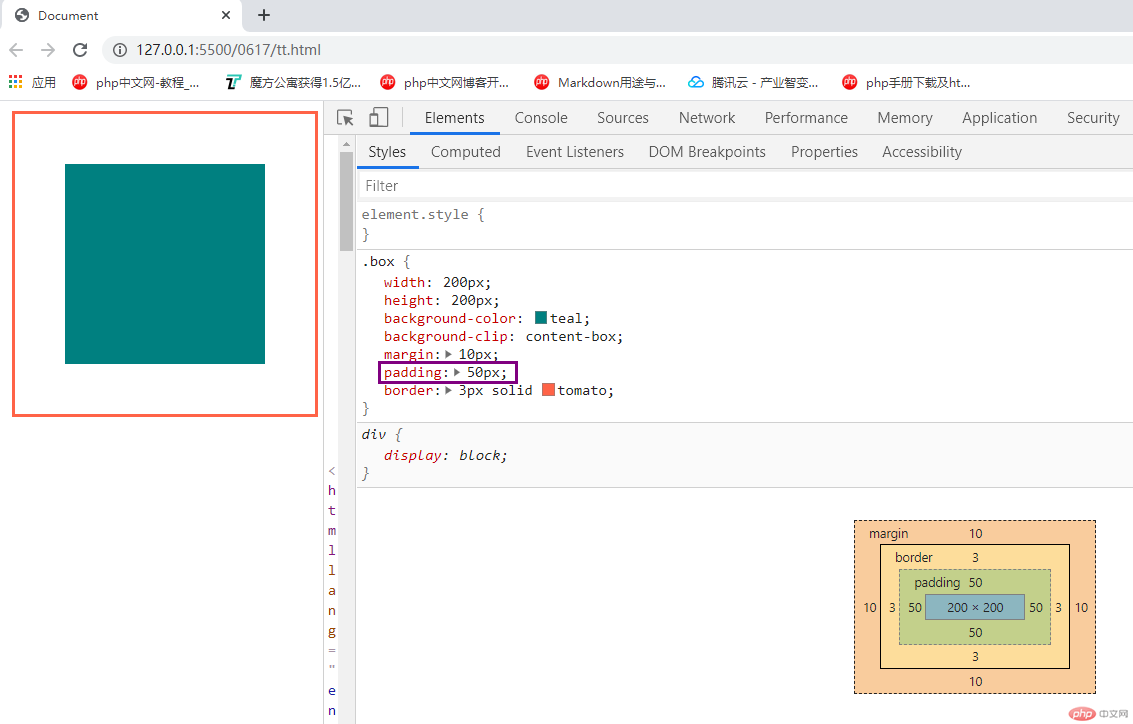
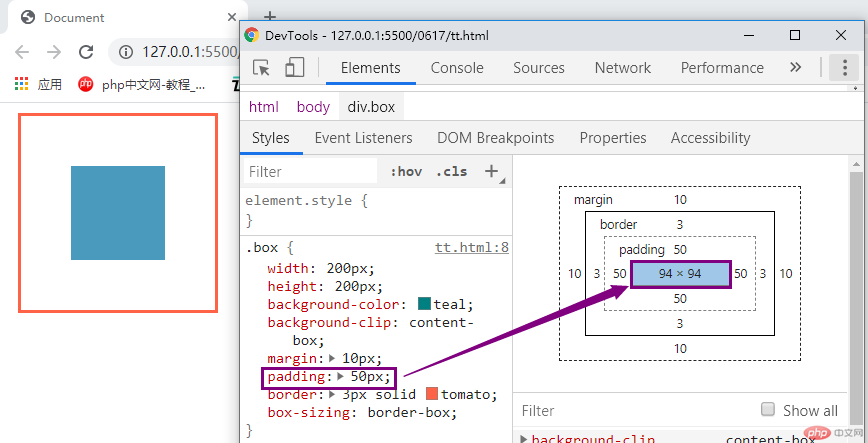
| box-sizing | content-box | 默认值,以内容区为准 |
|---|---|---|
| box-sizing | border-box | 元素大小以边框为准(包含padding和border) |
<style>.box {width: 200px;height: 200px;background-color: teal;/* 显示内边距 */background-clip: content-box;margin: 10px;padding: 50px;border: 3px solid tomato;/* 告诉浏览器这个盒子的宽/高要包含padding和border(宽度200=内容区宽度+左右padding宽度+左右border宽度) */box-sizing: border-box;}</style></head><body><div class="box"></div><!-- <div class="box1"></div> --></body><script>const box = document.querySelector(".box");// 1. 内容区大小// 大小 = width / height + paddingconsole.log(box.clientWidth);console.log(box.clientHeight);</script>
<style>.box {width: 200px;height: 200px;background-color: teal;/* 显示内边距 *//* background-clip: content-box; */margin-bottom: 10px;padding: 10px;border: 3px solid tomato;/* 告诉浏览器这个盒子的宽/高要包含padding和border(宽度200=内容区宽度+左右padding宽度+左右border宽度) *//* box-sizing: border-box; */}.box1 {width: 200px;height: 200px;background-color: teal;/* background-clip: content-box; */margin-top: 50px;padding: 10px;border: 3px solid tomato;}</style></head><body><div class="box"></div><div class="box1"></div></body>
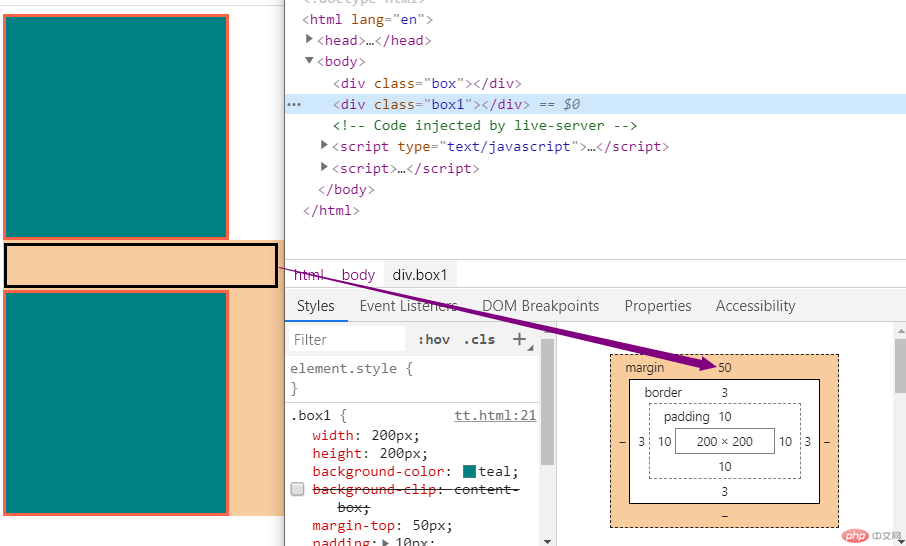
.box.parent {width: 200px;height: 200px;background-color: tomato;margin-top: 20px;}.son {width: 100px;height: 100px;background-color: yellowgreen;margin-top: 10px;}

-总结: 用一个图来表示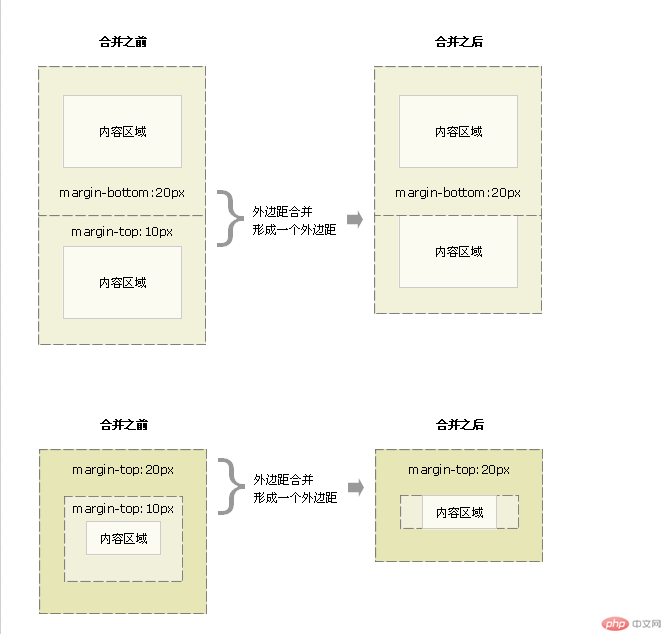
<style>body {background-color: lightgrey;}div {width: 400px;height: 350px;box-sizing: border-box;text-align: center;background-color: #ccc;border: 2px solid bisque;border-radius: 10px;position: absolute;left: 0;top: 0;right: 0;bottom: 0;margin: auto;}form input {width: 260px;height: 30px;margin-top: 10px;margin-left: 10px;padding-left: 10px;border-radius: 5px;border: none;}form input:focus {background-color: coral;}img {width: 90px;height: 90px;margin-top: 50px;}button {width: 100px;height: 40px;border: none;border-radius: 5px;margin-top: 15px;}button:hover {font-size: 1.2rem;cursor: pointer;color: lime;background-color: mediumorchid;}</style></head><body><div><img src="a.jpg" alt="" /><form action=""><p><label>账号:<input type="text" placeholder="请输入" /></label></p><p><label>密码:<input type="password" placeholder="******" /></label></p><button>登陆</button></form></div></body>
