Correction status:qualified
Teacher's comments:写的很好很仔细,也爱思考!你说的是对的,跟顺序有关的


| ** | 常用 | 特点 |
|---|---|---|
| 行内元素 | span.img、big、strong、u、button | 相邻的行内元素不换行,设置宽高无效,只有水平方向的padding和margin属性可以设置 |
| 块级元素 | div,p、h1~h6、table、ul、li、ol.header、section、aside、footer | 独占一行能够设置宽高,margin和padding对上下左右四个方向设置均有效。 |
| 行内块元素 | <img>/<input> | 元素排列在一行,不会自动换行,可设置宽度和高度以及外边距和内边距的所有样式 |
| display | 下面解读他的属性值 | 标签显示模式转换 |
| display | display:inline | 转为行内元素 |
| display | display:block | 转为块元素 |
| display | display:inlinne-block; | 转为行内块元素 |

<style>.box {border: 5px solid red;}.box1 {width: 200px;height: 200px;background-color: royalblue;}.box2 {width: 200px;height: 200px;background-color: chocolate;}.box3 {width: 200px;height: 200px;background-color: lightgreen;}/* 当box下面的所有元素浮动之后,发现父级元素包裹不住下面的子元素了,产生了塌陷因为元素进行浮动之后就会脱离原来文档流的位置,由下面的元素补充 */.box > * {float: left;}/* 解决方案 *//* 一:给父级添加高度,但是如果子元素的宽高发生变化 需要重新修改父级的高度,不行二: 让父级也浮动,可以实现重新包裹但是如果再嵌套一个div,又乱套了,也不行三:使用clear:both清除浮动; 给元素内部浮动元素添加一同级空的标签,给该空标签设置clear:both后期会造成代码冗余 *//* 通过添加伪元素解决 *//* .box::after {content: ;display: block;clear: both;} *//* 终极大招以后就用它 用到BFC(块级格式化上下文) */.box {overflow: hidden;}</style><body><div class="box"><div class="box1">box1</div><div class="box2">box2</div><div class="box3">box3</div></div></body>

<!DOCTYPE html><html lang="en"><head><meta charset="UTF-8" /><meta name="viewport" content="width=device-width, initial-scale=1.0" /><title>定位实现三列经典布局</title><style>@import url(threecolumns.css);</style></head><body><div class="header"><!-- 页眉内容区居中显示 --><div class="content"><ul><li><a href="">首页</a></li><li><a href="">iphone抢购</a></li><li><a href="">你买了吗</a></li><li><a href="">为什么抢购iphone</a></li><li><a href="">买华为小米吧</a></li><li><a href="">你疯了吗</a></li><li><a href="">iphone抢购</a></li><li><a href="">你买了吗</a></li></ul></div></div><div class="container">中间<div class="left">左侧</div><div class="middle">内容区</div><div class="right">右侧</div></div><div class="footer"><div class="content"><p>学员丘佳第一次练习经典三列布局©|实现方法:绝对定位</p></div></div></body></html>

/* 页面初始化 */* {margin: 0;padding: 0;box-sizing: border-box;}a {text-decoration: none;color: #000;}li {list-style: none;}/* 页眉页脚的样式 */.header,.footer {height: 40px;background-color: aquamarine;}/* 页眉页脚内容区 */.content {width: 960px;/* 块级元素居中 用 margin: auto;*/margin: auto;}/* 页眉中导航样式 */.content ul li {float: left;line-height: 40px;padding: 0 20px;}/* 鼠标悬停样式 */.content ul li:hover {font-size: 1.3rem;background-color: cornsilk;}/* 页脚样式 */.content p {text-align: center;line-height: 40px;}/* 主体用定位 */.container {width: 960px;/* 此处margin 原来设置的auto,后面加的13px,为了内容区和页眉页脚的间距 */margin: 13px auto;/* 设置背景色是为了看起来更直观的布局 *//* background-color: cyan; *//* 最小高度即使没有内容 也能撑开 */min-height: 600px;/* 转为定位元素,做定位父级 下面的三列用绝对定位*/position: relative;}.container > .left {width: 200px;min-height: 600px;position: absolute;top: 0;left: 0;background-color: chocolate;}.container > .right {width: 200px;min-height: 600px;position: absolute;top: 0;right: 0;background-color: coral;}.container > .middle {min-height: 600px;/* 页面宽960左右两侧各占200,中间剩下560,为了让中间和左右两侧各有10px间距,从左上角开始绝对定位top为0,但是left为210 这样设置左右各有10px间距*/width: 540px;background-color: cornflowerblue;position: absolute;top: 0;left: 210px;}

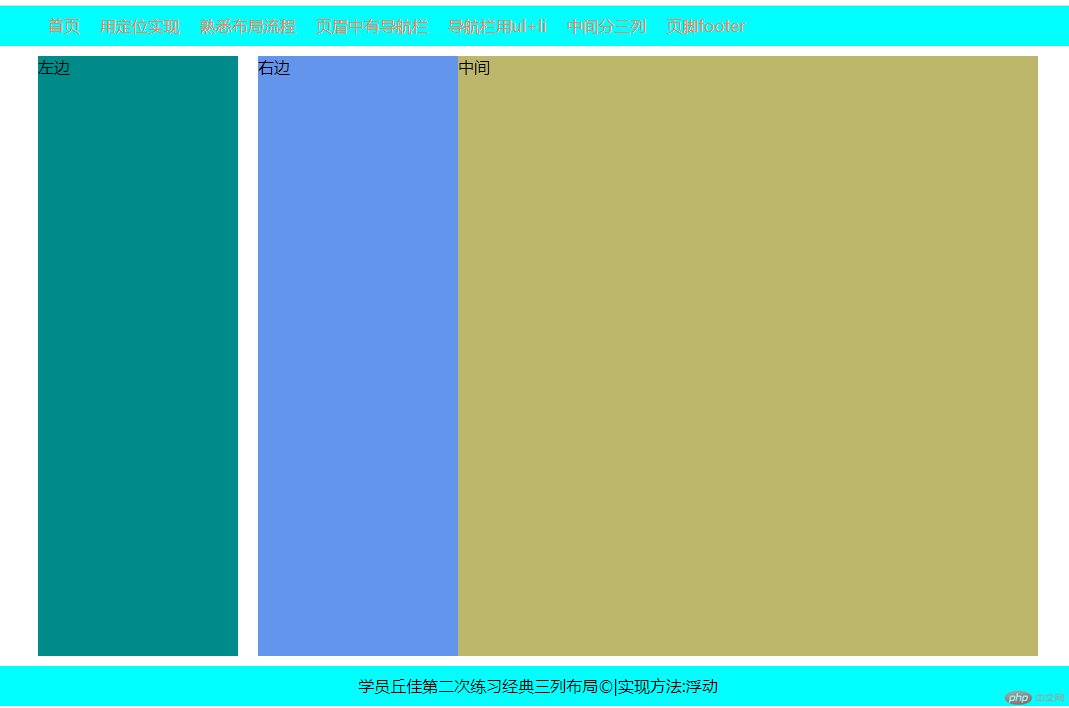
<!DOCTYPE html><html lang="en"><head><meta charset="UTF-8" /><meta name="viewport" content="width=device-width, initial-scale=1.0" /><title>浮动的方式实现三列经典布局</title></head><style>/* 初始化 */*{margin: 0;padding: 0;box-sizing: border-box;}a{text-decoration: none;color: coral;}li{list-style: none;}.header,.footer{height: 40px;background-color: cyan;}.center{/* 块级元素居中要给宽度否则无法生效 */width: 1000px;margin: auto;}.center ul li {float: left;padding: 0 10px;line-height: 40px;}.center p {line-height: 40px;text-align: center;}.container{width: 1000px;margin:10px auto;min-height: 600px;overflow: hidden;}.container > .left{width: 200px;min-height: 600px;background-color: darkcyan;/* 左右两侧在容器container(设好了宽高)中,左浮动就是在左边了,所以看起来没动,其实动了 */float: left;}.container > .right{width: 200px;min-height: 600px;background-color: cornflowerblue;/* 左右两侧在容器container(设好了宽高)中,右浮动肯定是到最右边*/float: right;}.container > .middle{width: 580px;min-height: 600px;background-color: darkkhaki;float: left;margin-left: 10px;}</style><body><div class="header"><div class="center"><ul><li><a href="">首页</a></li><li><a href="">用定位实现</a></li><li><a href="">熟悉布局流程</a></li><li><a href="">页眉中有导航栏</a></li><li><a href="">导航栏用ul+li</a></li><li><a href="">中间分三列</a></li><li><a href="">页脚footer</a></l></ul></div></div><div class="container"><div class="left">左边</div><div class="middle">中间</div><div class="right">右边</div></div><div class="footer"><div class="center"><p>学员丘佳第二次练习经典三列布局©|实现方法:浮动</p></div></div></body></html>

做出来之后尝试了一下让中间右浮动:
.container > .left{width: 200px;min-height: 600px;background-color: darkcyan;/* 左右两侧在容器container(设好了宽高)中,左浮动就是在左边了,所以看起来没动,其实动了 */float: left;}.container > .right{width: 200px;min-height: 600px;background-color: cornflowerblue;/* 左右两侧在容器container(设好了宽高)中,右浮动肯定是到最右边*/float: right;}.container > .middle{width: 580px;min-height: 600px;background-color: darkkhaki;float: right;}
