Correction status:qualified
Teacher's comments:完成的不错,继续加油


| 语法 | 描述 |
|---|---|
background-color |
设置背景颜色 |
background-image |
设置背景图片 |
background-repeat |
设置背景平铺方向 |
background-position |
设置背景图像的位置 |
background-size |
拉伸背景图片 |
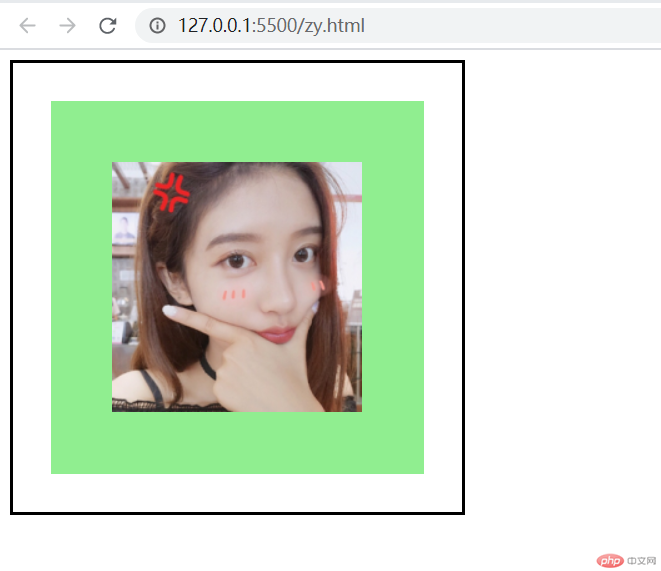
background-clip |
设置背景覆盖范围 |
background: linear-gradient() |
设置背景色渐变 |
box-shadow |
设置背景阴影外发光效果 |
<!DOCTYPE html><html lang="en"><head><meta charset="UTF-8" /><meta name="viewport" content="width=device-width, initial-scale=1.0" /><title>背景控制的常用属性</title><style>.box {width: 300px;height: 300px;padding: 30px;border: 2px solid #000;background-color: lightgreen;background-image: url(girl.jpg);background-repeat: no-repeat;background-position: center;/* background-size: contain; */background-clip: content-box;}</style></head><body><div class="box"></div></body></html>

background-position属性
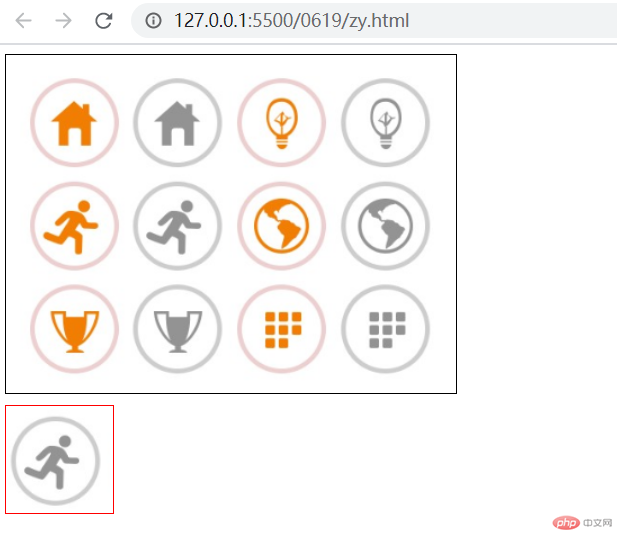
<!DOCTYPE html><html lang="en"><head><meta charset="UTF-8" /><meta name="viewport" content="width=device-width, initial-scale=1.0" /><title>精灵图的原理与实现</title><style>.box1 {width: 400px;height: 300px;border: 1px solid #000;background-image: url(pic.png);background-repeat: no-repeat;background-position: center;}.box2 {margin-top: 10px;width: 95px;height: 95px;border: 1px solid red;background-image: url(pic.png);background-position: -96px, -96px;}</style></head><body><div class="box1"></div><div class="box2"></div></body></html>

www.iconfont.cnGithub或者微博账号注册登录demo_index.html 可以看到使用说明font-class引用-主要进行以下两步骤<link rel="stylesheet" href="./iconfont.css"><span class="iconfont icon-xxx"></span>Unicode 引用(兼容性更好)-主要进行以下四步骤font-icon.css
@font-face {font-family: "iconfont";src: url("iconfont.eot");src: url("iconfont.eot?#iefix") format("embedded-opentype"), url("iconfont.woff2")format("woff2"), url("iconfont.woff") format("woff"), url("iconfont.ttf")format("truetype"), url("iconfont.svg#iconfont") format("svg");}
.iconfont {font-family: "iconfont" !important;font-size: 16px;font-style: normal;-webkit-font-smoothing: antialiased;-moz-osx-font-smoothing: grayscale;}
<span class="iconfont">3</span>font-class引用
<!DOCTYPE html><html lang="en"><head><meta charset="UTF-8" /><meta name="viewport" content="width=device-width, initial-scale=1.0" /><title>阿里字体图标`font-class`引用</title><link rel="stylesheet" href="font/iconfont.css" /><style>.zhengyan {font-size: 36px;color: red;}</style></head><body><div><span class="iconfont icon-zhengyan zhengyan"></span></div></body></html>

Unicode 引用font-icon.css代码
@font-face {font-family: "iconfont";src: url("font/iconfont.eot");src: url("font/iconfont.eot?#iefix") format("embedded-opentype"), url("font/iconfont.woff2")format("woff2"), url("font/iconfont.woff") format("woff"), url("font/iconfont.ttf")format("truetype"), url("font/iconfont.svg#iconfont") format("svg");}.iconfont {font-family: "iconfont" !important;font-size: 16px;font-style: normal;-webkit-font-smoothing: antialiased;-moz-osx-font-smoothing: grayscale;}
HTML代码
<!DOCTYPE html><html lang="en"><head><meta charset="UTF-8" /><meta name="viewport" content="width=device-width, initial-scale=1.0" /><title>阿里字体图标`Unicode`引用</title><link rel="stylesheet" href="font-icon.css" /><style>.zhengyan {font-size: 36px;color: red;}</style></head><body><div><span class="iconfont zhengyan"></span></div></body></html>
