Correction status:qualified
Teacher's comments:不错,很清晰,继续加油。


网页背景一般在
CSS中实现,使用background为开头的属性,如background-color、background-image等,也可以合并使用,合并使用的属性为background,属性值可以为各式各样的背景属性值。
| 属性 | 说明 | 代码示例 | |
|---|---|---|---|
background-color |
背景色 | `background-color:red; | ` |
background-clip |
背景色 | background-clip: content-box; |
|
background: linear-gradient |
渐变 | background: linear-gradient(red, yellow); |
|
background-image |
背景图 | background-image: url("girl.jpg"); |
|
background-repeat |
重复 | background-repeat: no-repeat; |
|
background-attachment |
固定位置,可以设置参不参与滚动 | background-attachment: fixed; |
|
background-position |
定位 | background-position: left; |
|
background-size |
背景图大小样式 | background-size: cover; |
精灵图又称雪碧图,是一种减少请求资源的取图标技术,用一张包括了N个图标的图片,根据位置计算得到我们想要的图标,使浏览器只请求一次资源,无须多次请求。
先用background-image加载一张有多个图标的背景图,再根据图片的大小计算出每个图标的大小,用此大小直接设定元素大小,使其正好显示一个图标,再以图片左上角为(0,0)坐标来移动图片,假如我们要取第三行,第二列的图标,则只需将图片整体向左偏移2个图标宽度,再向上偏移一个图标高度即可,偏移方法:可以直接使用background-position定位即可。
测试图片:
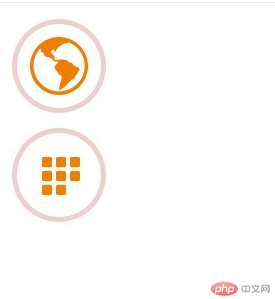
<!DOCTYPE html><html lang="en"><head><meta charset="UTF-8" /><meta name="viewport" content="width=device-width, initial-scale=1.0" /><title>背景实战: 精灵图/雪碧图</title><style>.box1 {/* 设定图标宽、高 */width: 110px;height: 110px;/* 加载背景图片 "1.png" */background-image: url("1.png");/* 不平铺图片 */background-repeat: no-repeat;/* 将图片显示的位置定位,-220px向左移动220px,-110向上移动110px */background-position: -220px -110px;}.box2{width: 110px;height: 110px;background-image: url("1.png");background-repeat: no-repeat;background-position: -220px -220px;}</style></head><body><div class="box1"></div><div class="box2"></div></body></html>

阿里字体图标可以快速的生成样式比较统一的图标,比如:
注意事项:
示例文件中的代码复制后,请在原路径更改为正确的路径,否则会找不到该文件。