Correction status:qualified
Teacher's comments:写的很认真仔细,继续加油!


1.1背景属性用于定义HTML元素的背景,通常用以下常用属性来控制背景效果
| 序号 | 属性 | 定义 |
|---|---|---|
| 1. | background-color |
设置背景颜色; |
| 2. | background-size |
设置背景缩放,contain值可以将背景图放大到边框3边大小,cover值可以等比例缩放图片; |
| 3. | background-image:url("") |
链接背景图片; |
| 4. | background-clip |
border-box值为以边框剪切背景,content-box值为以内容区剪切背景; |
| 5. | background-repeat |
不设置背景默认水平垂直方向按图片大小重复铺满,no-repeat不重复,repeat-x水平方向重复,repeat-y垂直方向重复; |
| 6. | background-position |
值可以是像素点,可以是百分百,也可以是关键词right center |
背景属性的操作详细代码:
<!DOCTYPE html><html lang="en"><head><meta charset="UTF-8"><meta name="viewport" content="width=device-width, initial-scale=1.0"><title>背景</title><style>.box{width:450px;height:450px;border:1px solid #000;/* 半径也可以是像素点 */border-radius:50%;background-color:lightgreen;padding:20px;/* 因为内边距是透明的,只能设置宽高,不能设置样式,所以背景色默认是可以从边框透出来到内边距的 *//* 控制背景的覆盖范围在内容区,裁切 *//* 以边框裁切 */background-clip:border-box;/* 以内容区裁切 */background-clip:content-box;/* 渐变 */background:linear-gradient(red,yellow);background:linear-gradient(45deg,red,yellow);background:linear-gradient(to right,red,yellow);background:linear-gradient(to left,red,yellow);/* rgba,前面是rgb颜色后面的a表示透明度 */background:linear-gradient(to left,rgba(255,0,0,0.7),yellow);/* 背景图片 */background-image:url("girl.jpg");/* 不让图片重复填充 */background-repeat:no-repeat;/* 让图片朝一个方向重复x y *//* background-repeat:repeat-x; *//* 让图片滚动,还需要别的设置,先了解一下 *//* background-attachment:fixed; *//* 背景定位 */background-position:50px 50%;/* 关键词谁在前谁在后无所谓 ,只写一个值的时候后面默认是center*/background-position:right center;/* 当只有一个值是50%时,第二个值默认也是50% */background-position:50%;/* 放大到图片与边框3面相接 */background-size:contain;/* 等比缩放,用到的上面那个多 */background-size:cover;/* 简写 *//* background:blue; */bacrground:url("girl.jpg") no-repeat left;/* 5px是水平向右,8px是垂直向下,10px是羽化效果值 *//* box-shadow:5px 8px 10px #888; */}.box:hover{/* 外发光效果 */box-shadow:0 0 10px #888;cursor:pointer;}</style></head><body><div class="box"></div></body></html>
效果图:
网站的每一张图片都需要向服务器请求,图片加载过多会非常占用服务器资源。所以出现精灵图,只需要向服务器请求一张图就可以展示不同图片内容。
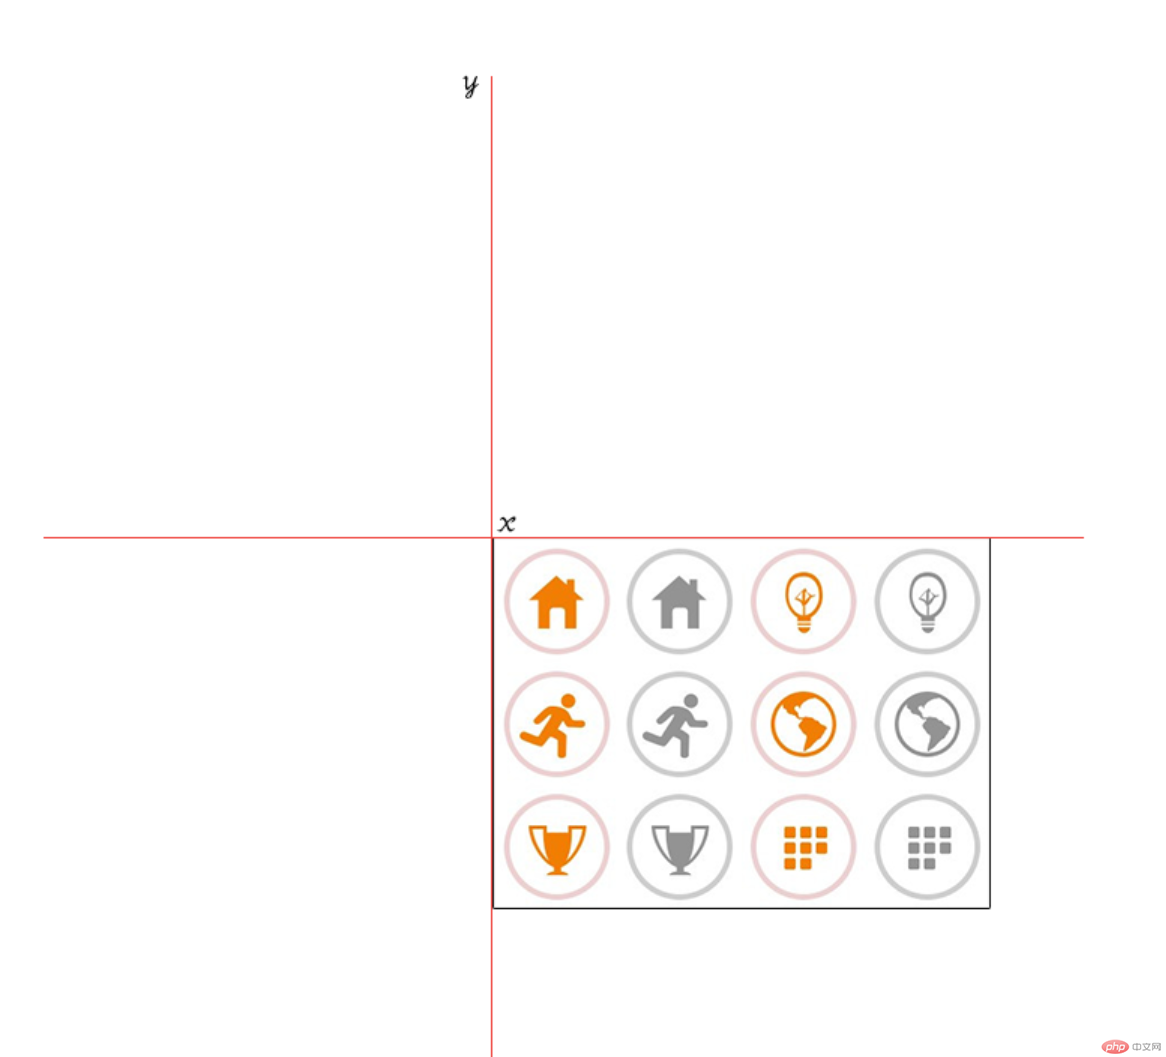
所以将图片位置移动到显示区域就可以显示需要的内容;
<!DOCTYPE html><html lang="en"><head><meta charset="UTF-8"><meta name="viewport" content="width=device-width, initial-scale=1.0"><title>背景实战:精灵图/雪碧图</title><style>.box1{width:500px;height:400px;border:1px solid #000;background-image:url(1.png);background-repeat:no-repeat;background-position:50px 20px;}.box2{width:110px;height:110px;background-image:url(1.png);background-repeat:no-repeat;background-position:-220px -110px;}.box3{width:110px;height:110px;background-image:url(1.png);background-repeat:no-repeat;background-position:-220px -220px;}</style></head><body><!-- 网站每个内容都是要加载请求的,页面中图片多请求多,占用的资源会大,用一个精灵图一次请求就可以加载到 --><div class="box1"></div><div class="box2"></div><div class="box3"></div></body></html>
效果展示:
3.1可以用微博或github账号登录阿里图标网站;
3.2找到需要的图标点进去后将其加入购物车;
3.3将购物车里的图标都添加到项目中;
3.4在项目中下载图标;
3.5解压打开文件,找到demo_index.html文件在浏览器中打开;
3.6在自己的网页中添加阿里图标提示文件中的代码;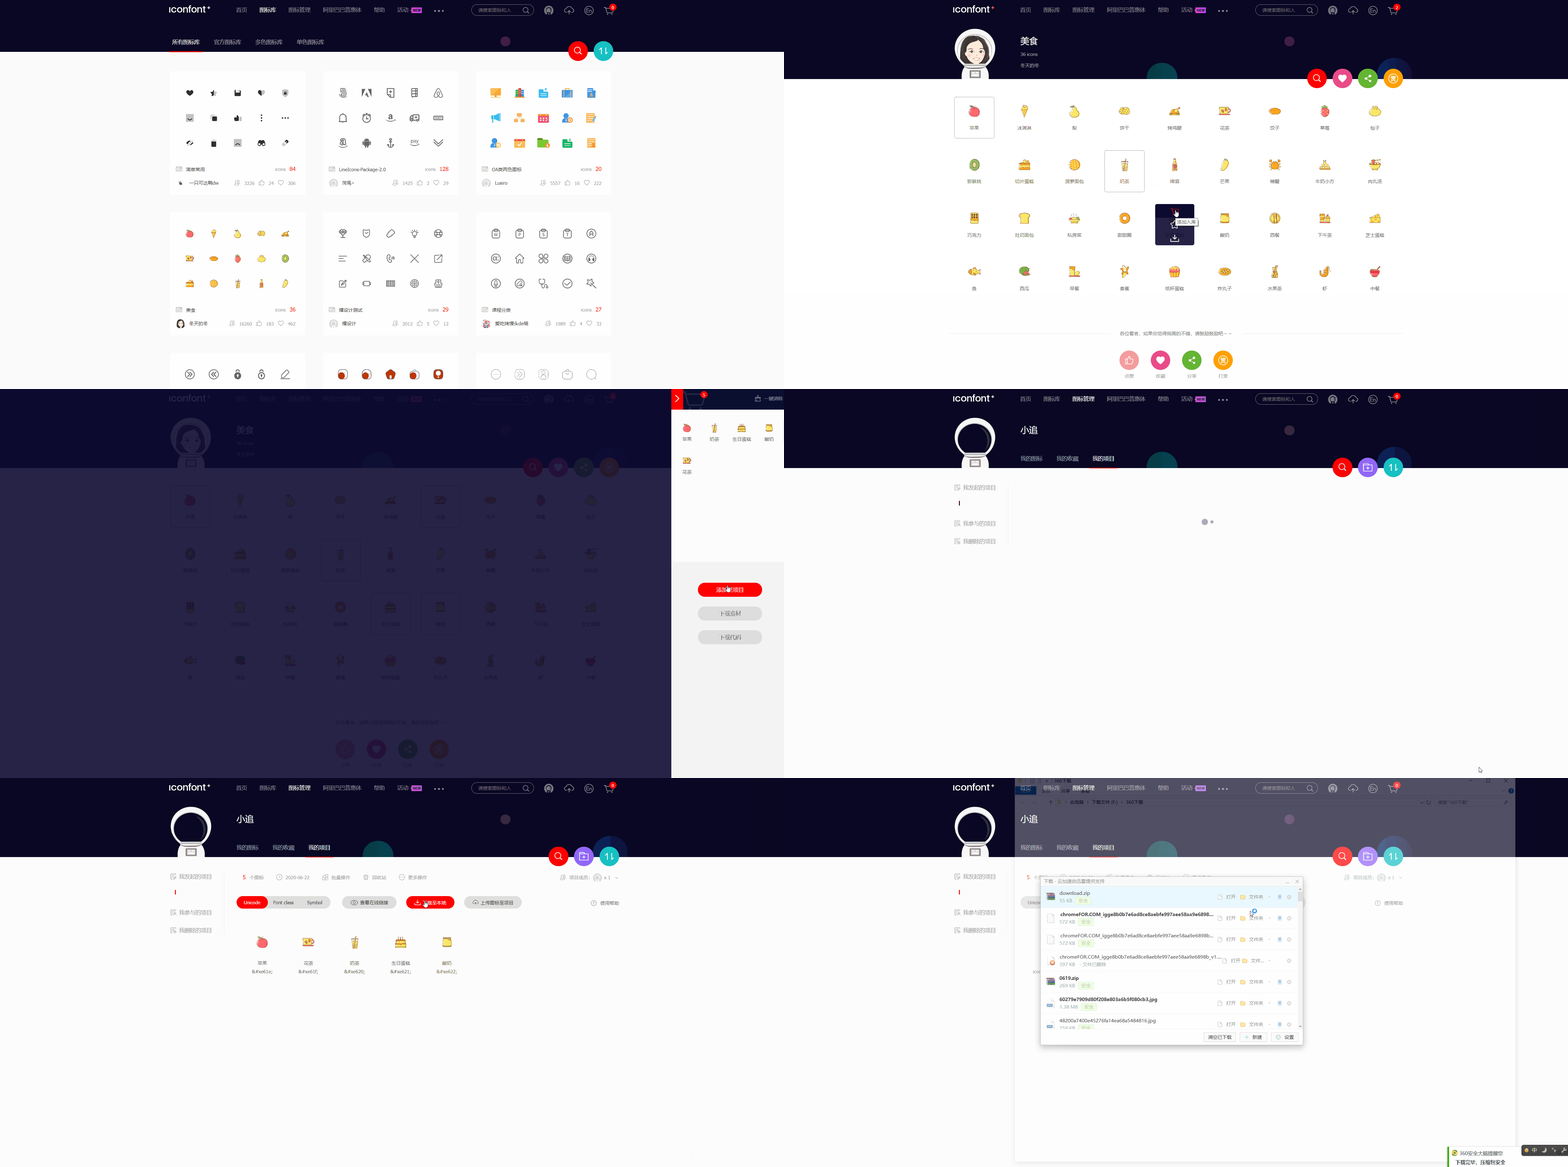
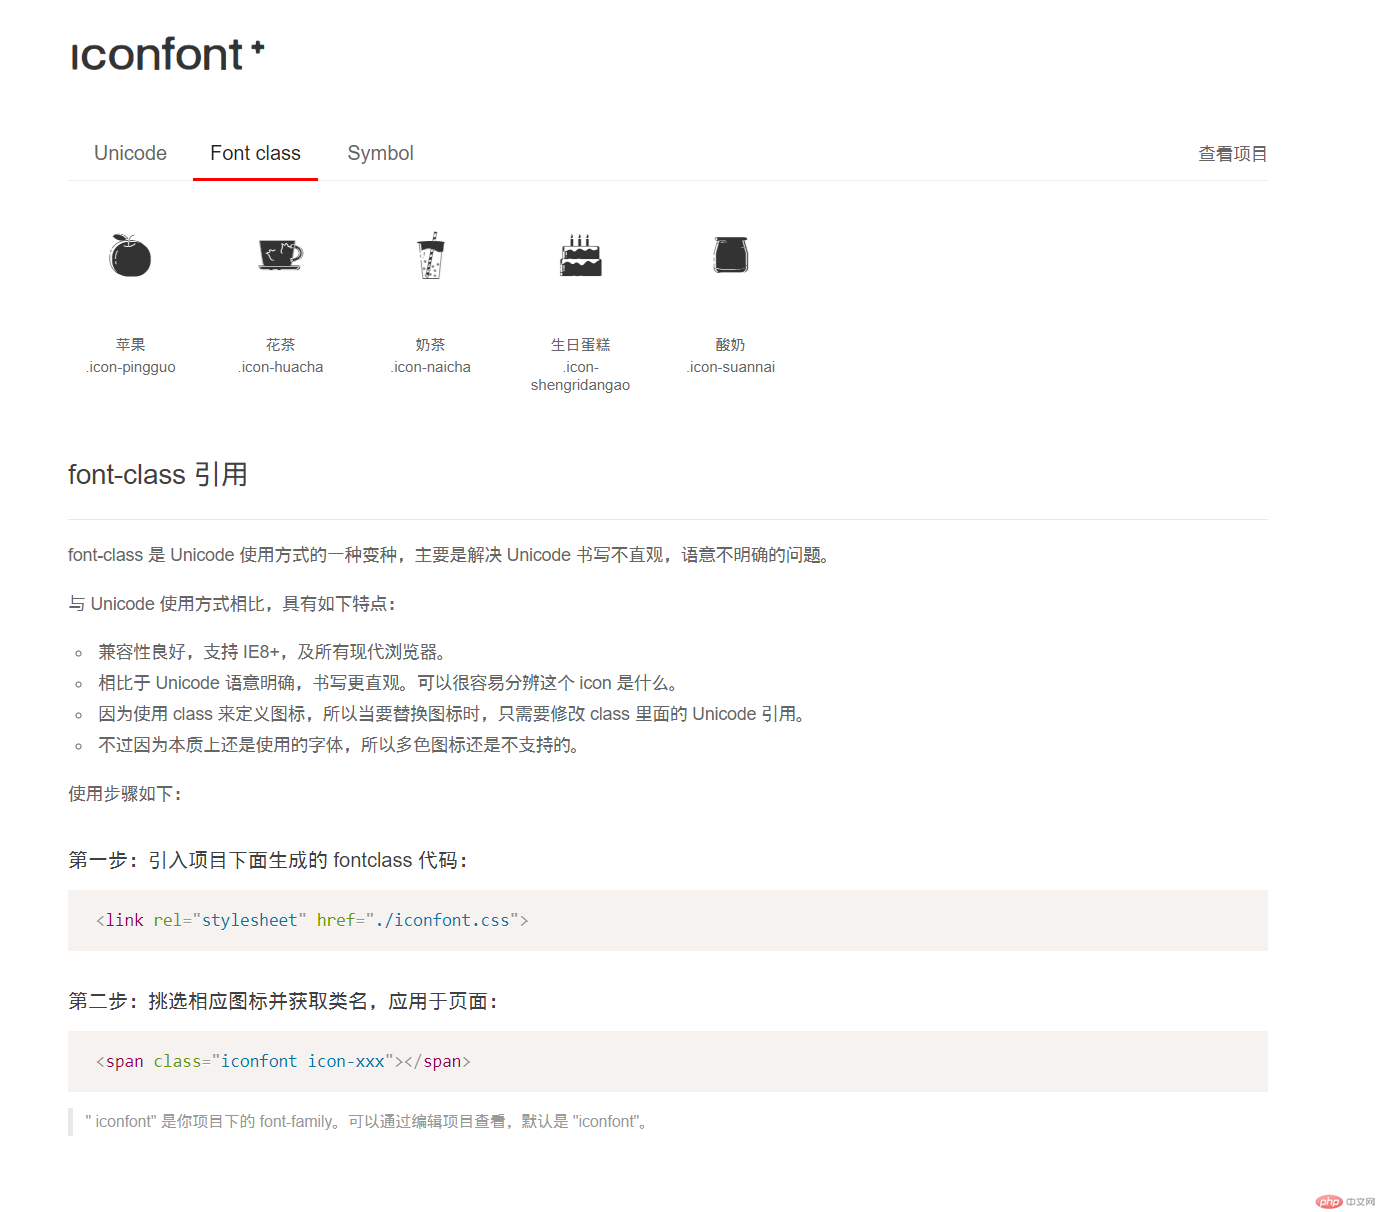
<!DOCTYPE html><html lang="en"><head><meta charset="UTF-8"><meta name="viewport" content="width=device-width, initial-scale=1.0"><title>阿里字体图标的使用方法1</title><!-- 引入字体图标的类样式 --><link rel="stylesheet" href="font/iconfont.css"><style>.hot{/* 字体图标可以当成字体去设置 */font-size:60px;color:coral;}</style></head><body><div><!-- 把图标名粘贴到class=iconfont后面,然后去掉“.icon-rexiaochanpin”小点 --><span class="iconfont icon-pingguo hot"></span></div></body></html>
效果: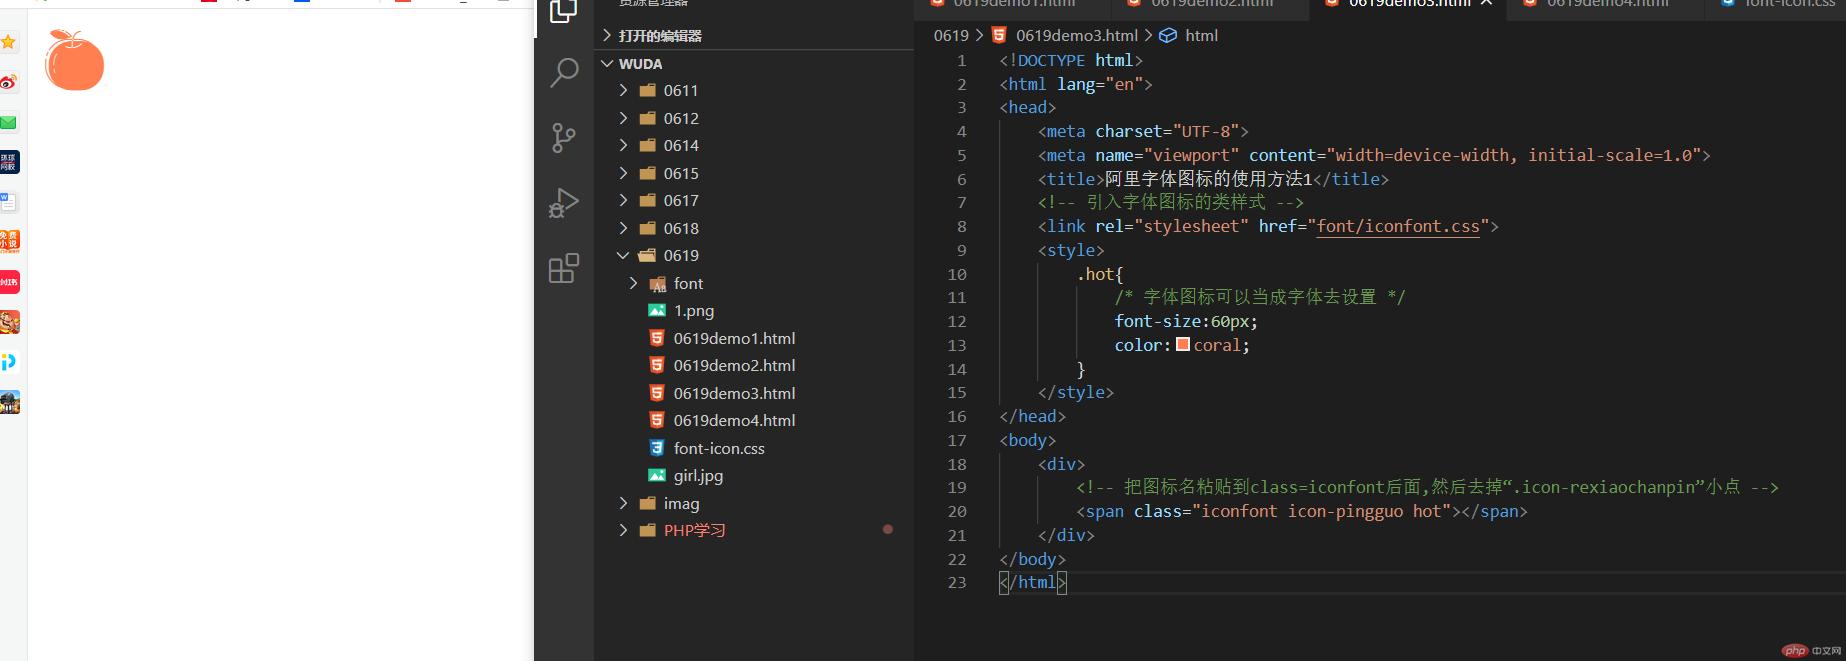
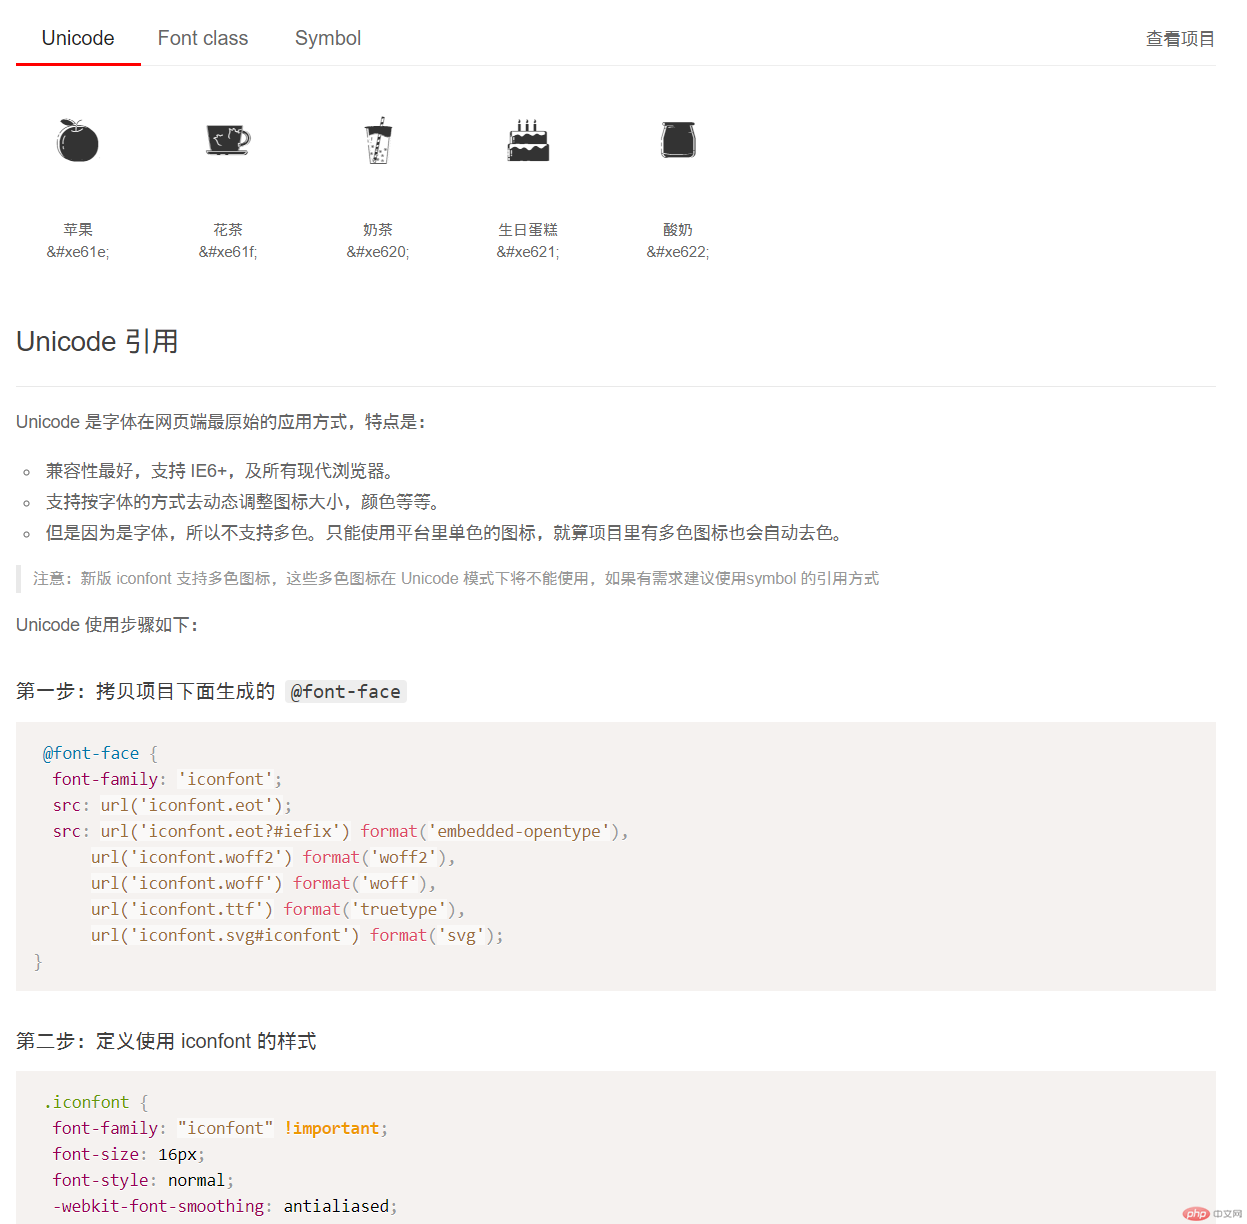
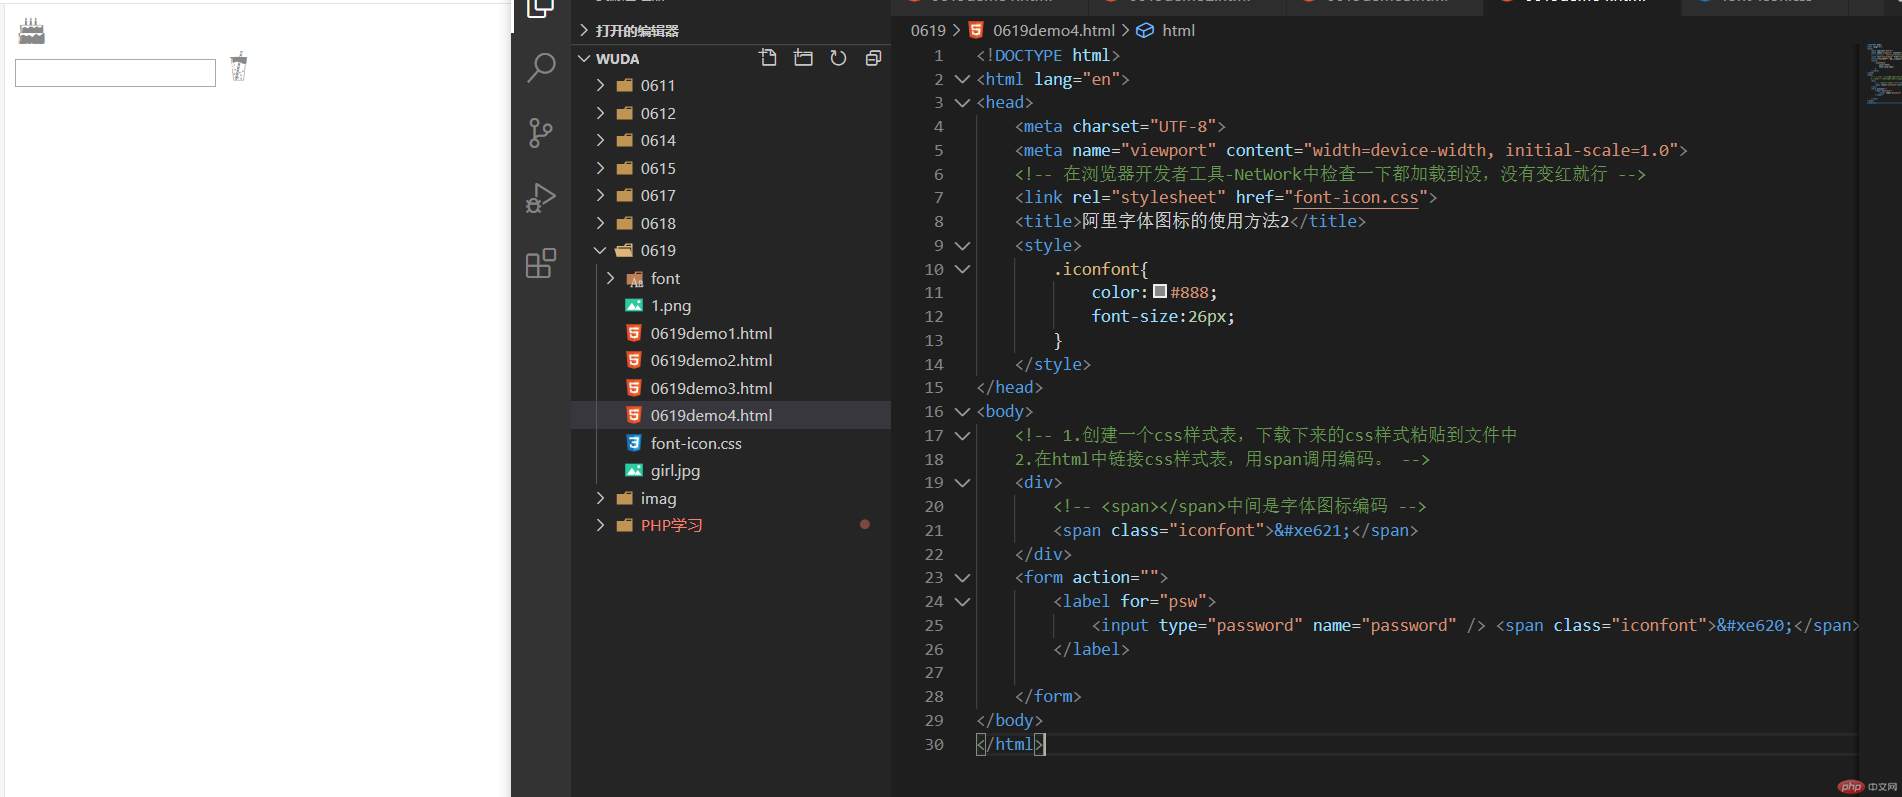
<!DOCTYPE html><html lang="en"><head><meta charset="UTF-8"><meta name="viewport" content="width=device-width, initial-scale=1.0"><!-- 在浏览器开发者工具-NetWork中检查一下都加载到没,没有变红就行 --><link rel="stylesheet" href="font-icon.css"><title>阿里字体图标的使用方法2</title><style>.iconfont{color:#888;font-size:26px;}</style></head><body><!-- 1.创建一个css样式表,下载下来的css样式粘贴到文件中2.在html中链接css样式表,用span调用编码。 --><div><!-- <span></span>中间是字体图标编码 --><span class="iconfont"></span></div><form action=""><label for="psw"><input type="password" name="password" /> <span class="iconfont"></span></label></form></body></html>
@font-face {/* 粘贴过来时没有正确的字体路径自己添加一下 */font-family: 'iconfont';src: url('font/iconfont.eot');src: url('font/iconfont.eot?#iefix') format('embedded-opentype'),url('font/iconfont.woff2') format('woff2'),url('font/iconfont.woff') format('woff'),url('font/iconfont.ttf') format('truetype'),url('font/iconfont.svg#iconfont') format('svg');}.iconfont {font-family: "iconfont" !important;font-size: 16px;font-style: normal;-webkit-font-smoothing: antialiased;-moz-osx-font-smoothing: grayscale;}
效果: