Correction status:qualified
Teacher's comments:动图是亮点, 直观,加油


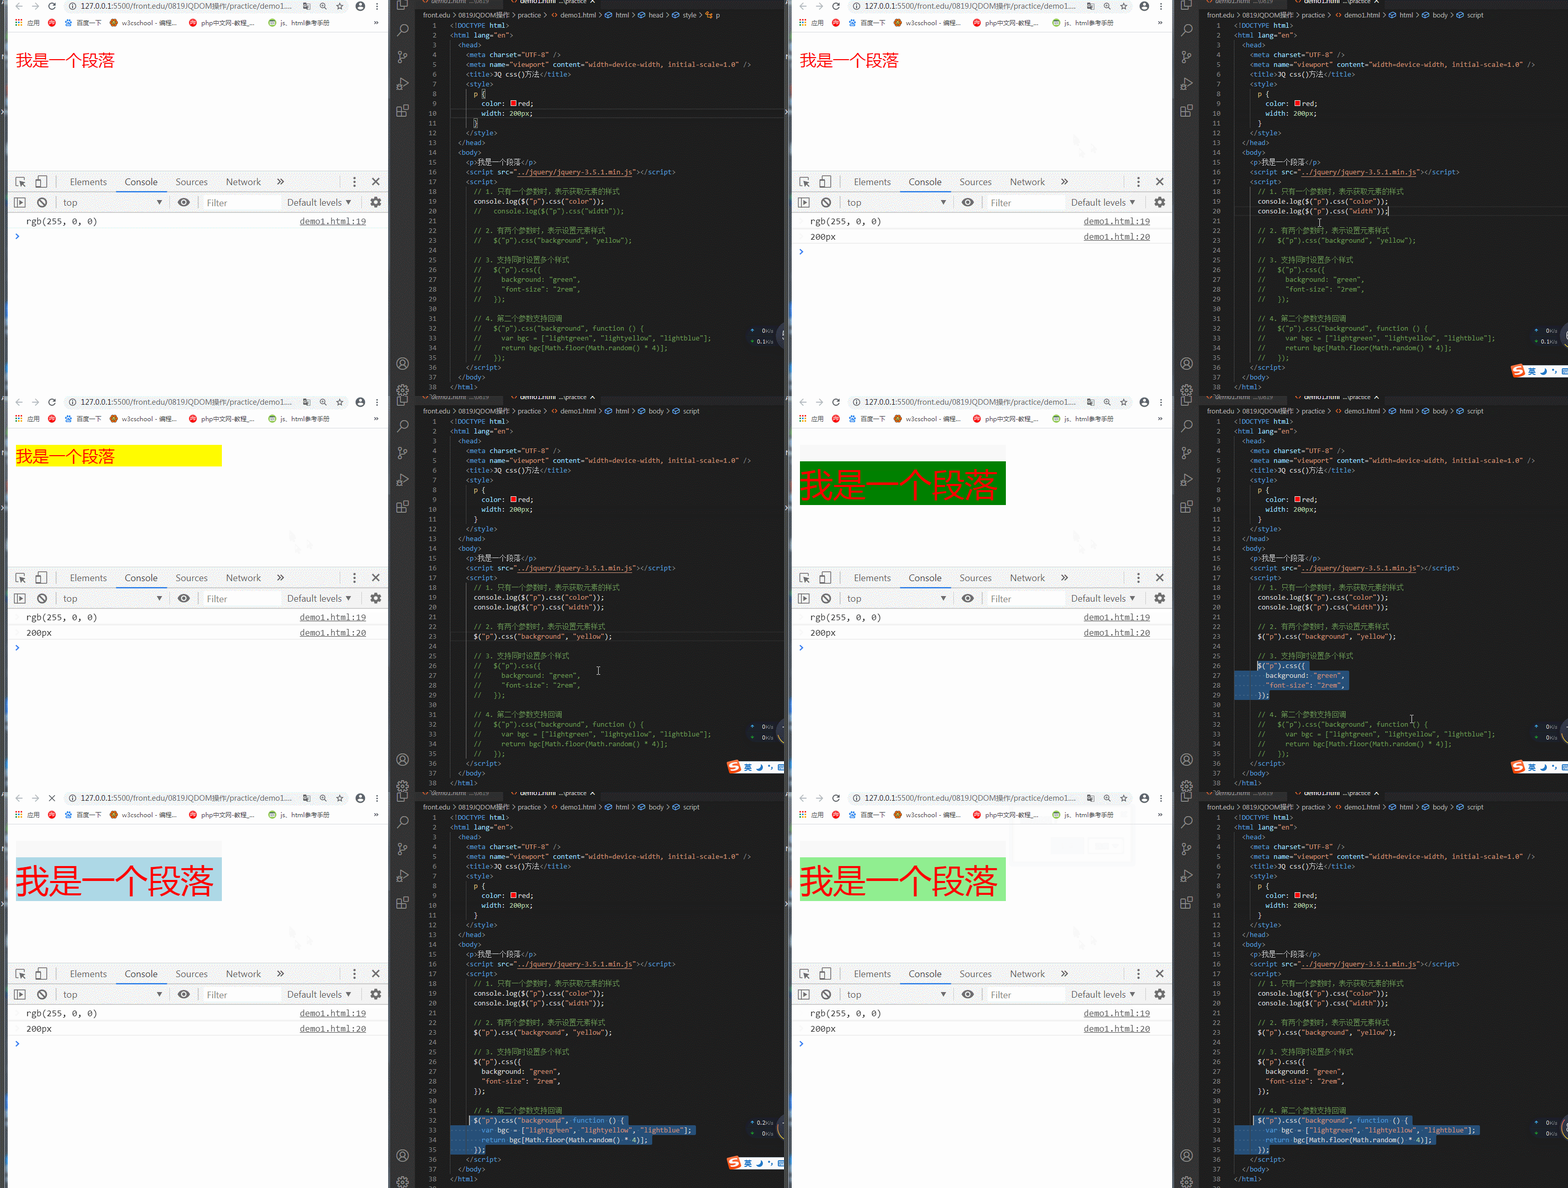
css() 方法
<!DOCTYPE html><html lang="en"><head><meta charset="UTF-8" /><meta name="viewport" content="width=device-width, initial-scale=1.0" /><title>JQ css()方法</title><style>p {color: red;width: 200px;}</style></head><body><p>我是一个段落</p><script src="../jquery/jquery-3.5.1.min.js"></script><script>// 1. 只有一个参数时,表示获取元素的样式console.log($("p").css("color"));console.log($("p").css("width"));// 2. 有两个参数时,表示设置元素样式$("p").css("background", "yellow");// 3. 支持同时设置多个样式$("p").css({background: "green","font-size": "2rem",});// 4. 第二个参数支持回调$("p").css("background", function () {var bgc = ["lightgreen", "lightyellow", "lightblue"];return bgc[Math.floor(Math.random() * 4)];});</script></body></html>
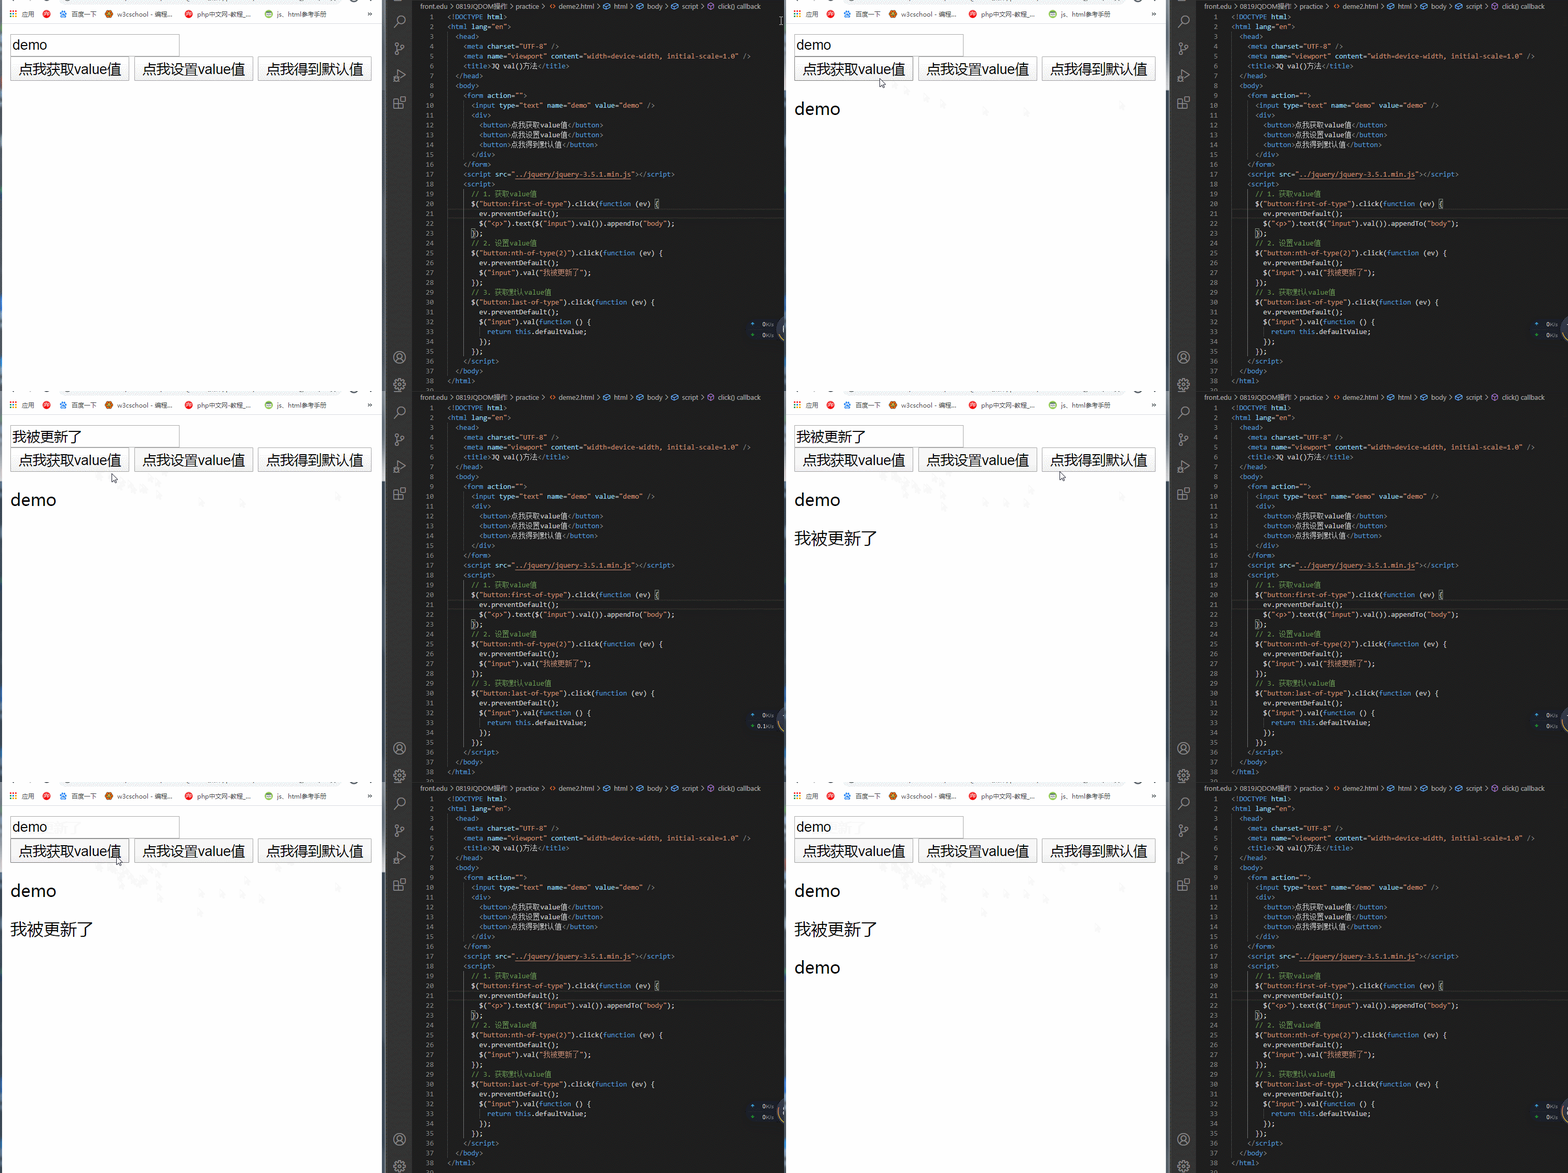
val() 方法
<!DOCTYPE html><html lang="en"><head><meta charset="UTF-8" /><meta name="viewport" content="width=device-width, initial-scale=1.0" /><title>JQ val()方法</title></head><body><form action=""><input type="text" name="demo" value="demo" /><div><button>点我获取value值</button><button>点我设置value值</button><button>点我得到默认值</button></div></form><script src="../jquery/jquery-3.5.1.min.js"></script><script>// 1. 获取value值$("button:first-of-type").click(function (ev) {ev.preventDefault();$("<p>").text($("input").val()).appendTo("body");});// 2. 设置value值$("button:nth-of-type(2)").click(function (ev) {ev.preventDefault();$("input").val("我被更新了");});// 3. 获取默认value值$("button:last-of-type").click(function (ev) {ev.preventDefault();$("input").val(function () {return this.defaultValue;});});</script></body></html>
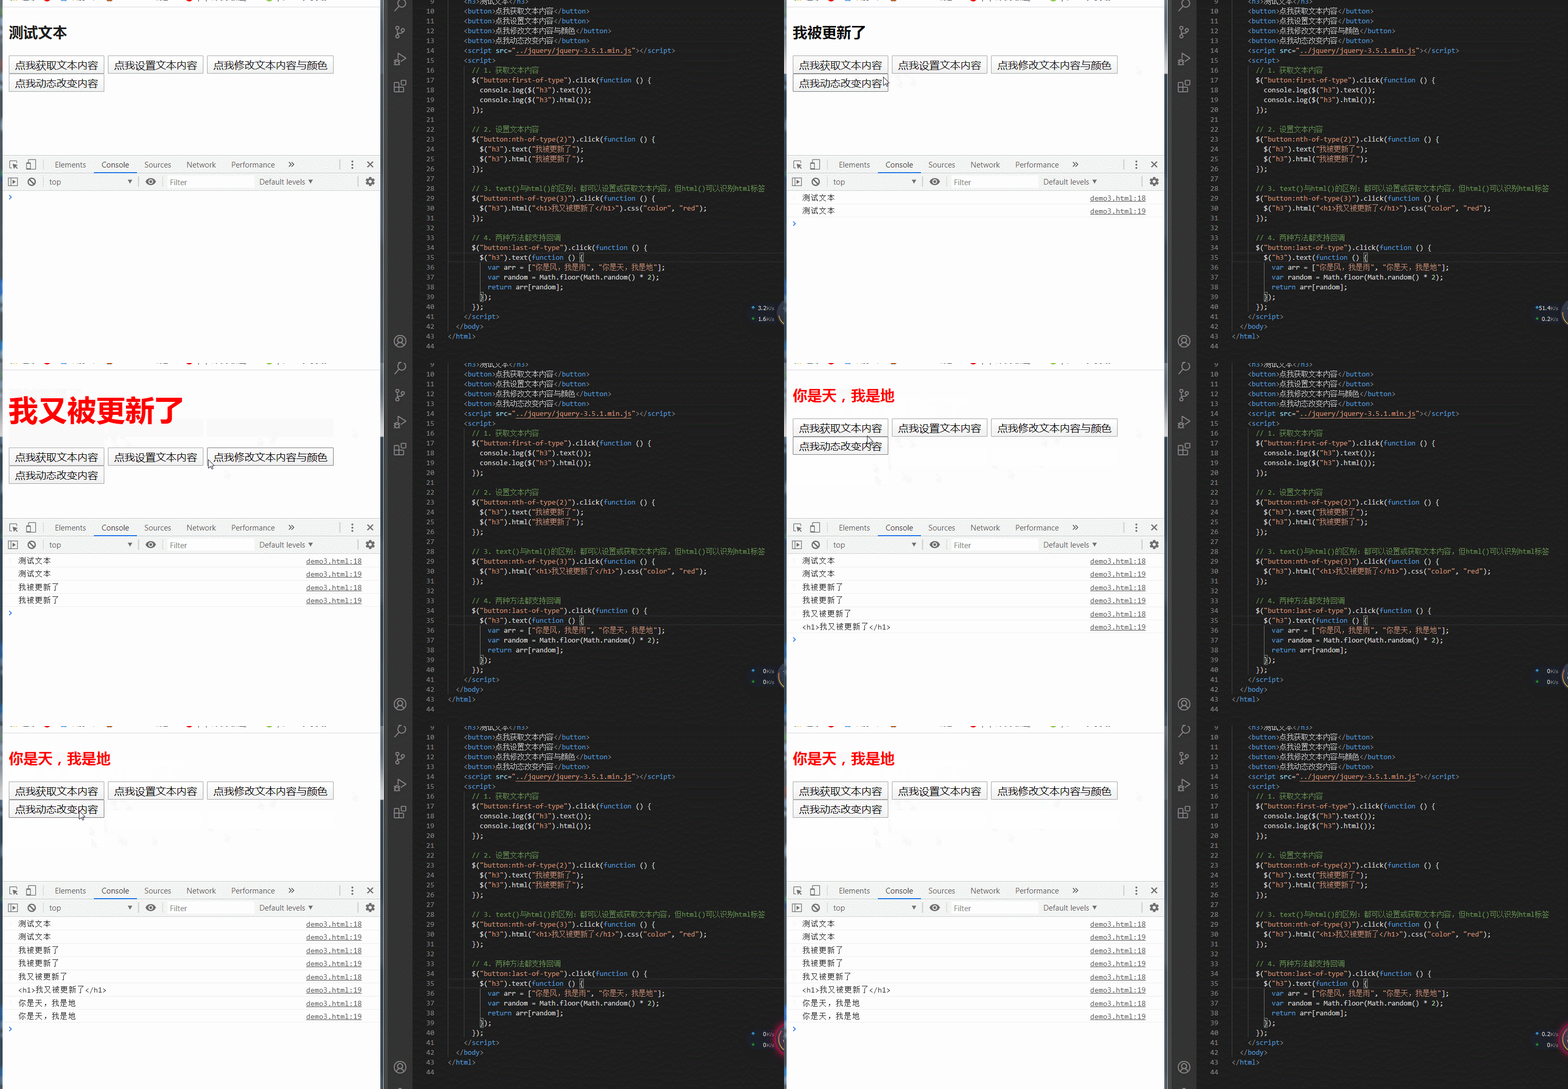
text() 和 html() 方法
<!DOCTYPE html><html lang="en"><head><meta charset="UTF-8" /><meta name="viewport" content="width=device-width, initial-scale=1.0" /><title>JQ text()和html()方法</title></head><body><h3>测试文本</h3><button>点我获取文本内容</button><button>点我设置文本内容</button><button>点我修改文本内容与颜色</button><button>点我动态改变内容</button><script src="../jquery/jquery-3.5.1.min.js"></script><script>// 1. 获取文本内容$("button:first-of-type").click(function () {console.log($("h3").text());console.log($("h3").html());});// 2. 设置文本内容$("button:nth-of-type(2)").click(function () {$("h3").text("我被更新了");$("h3").html("我被更新了");});// 3. text()与html()的区别:都可以设置或获取文本内容,但html()可以识别html标签$("button:nth-of-type(3)").click(function () {$("h3").html("<h1>我又被更新了</h1>").css("color", "red");});// 4. 两种方法都支持回调$("button:last-of-type").click(function () {$("h3").text(function () {var arr = ["你是风,我是雨", "你是天,我是地"];var random = Math.floor(Math.random() * 2);return arr[random];});});</script></body></html>
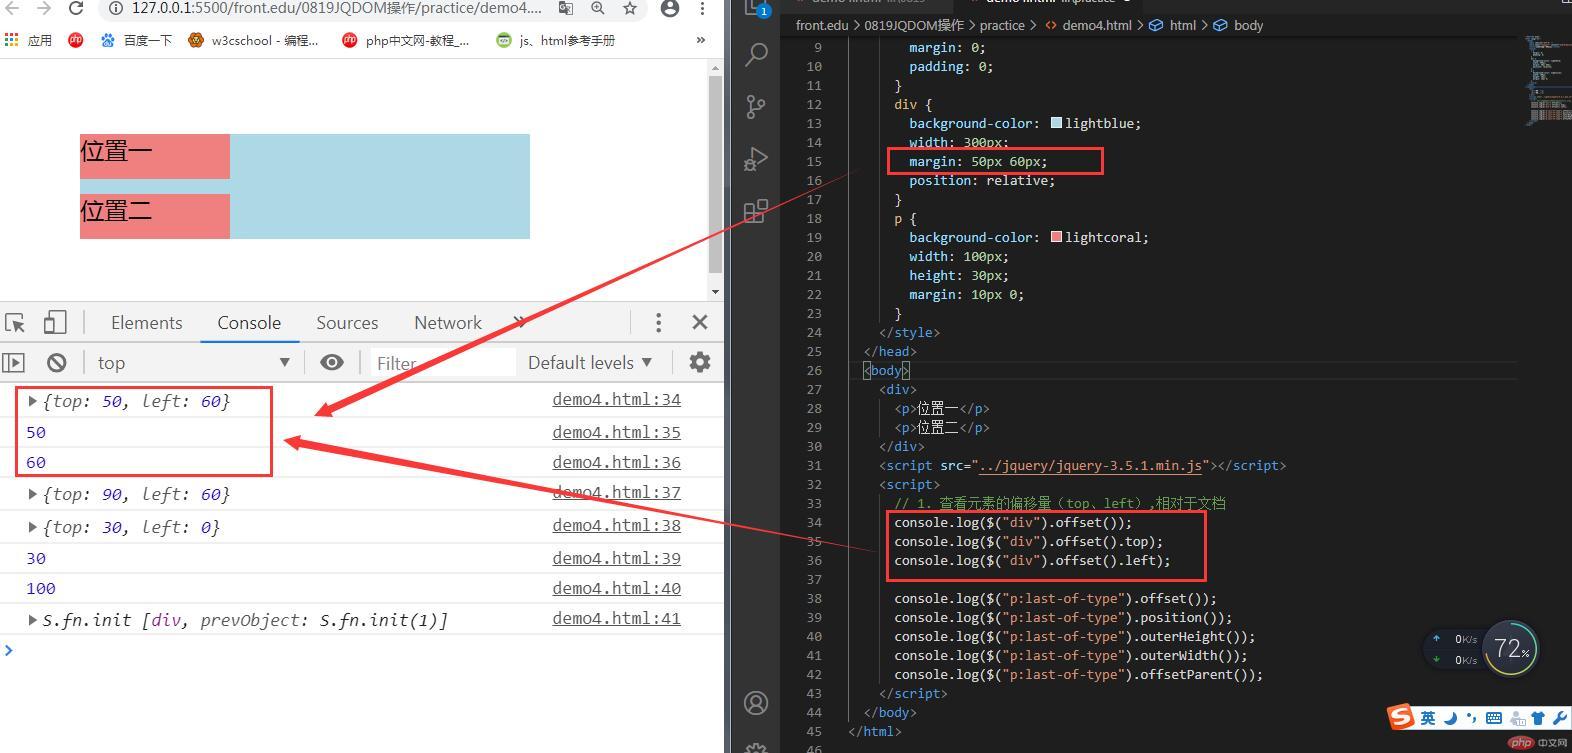
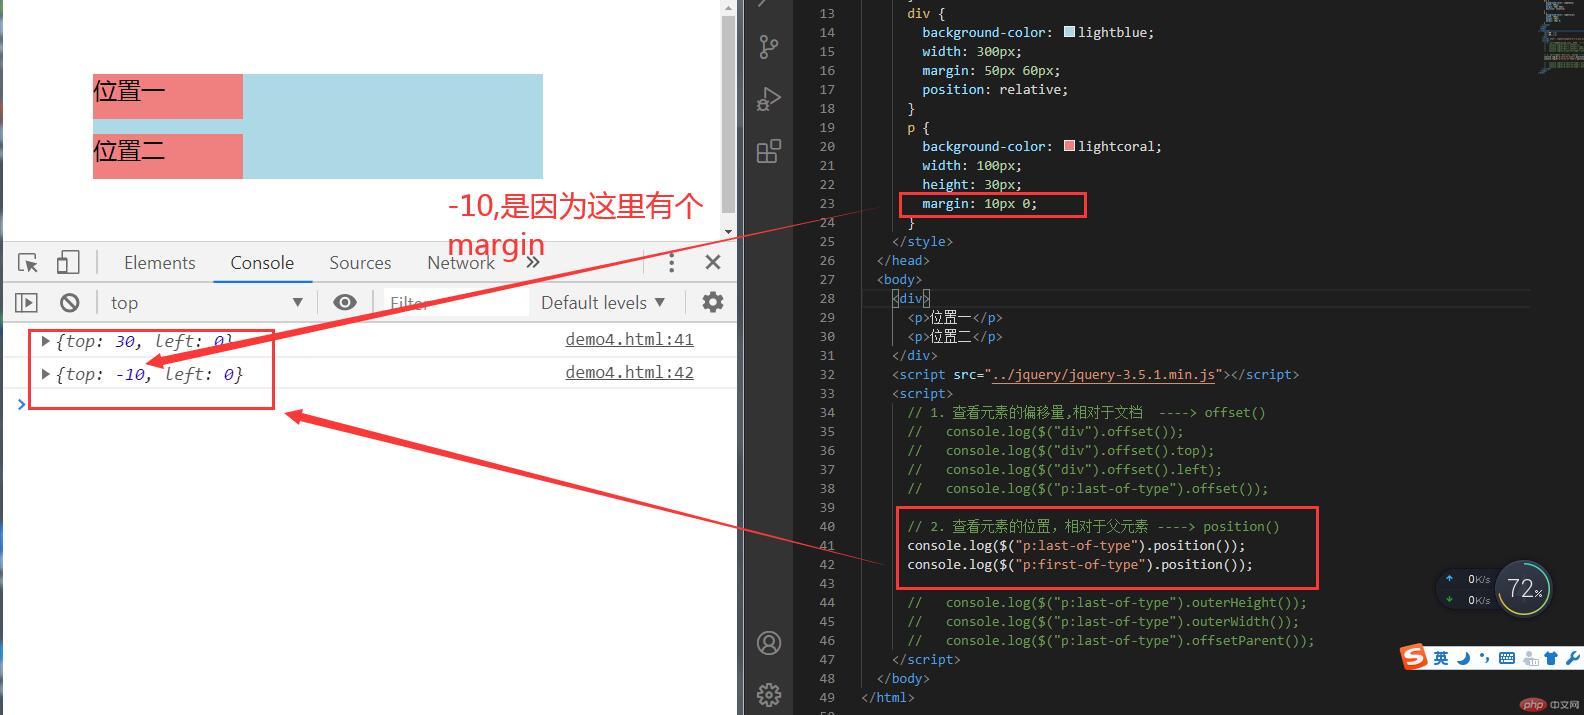
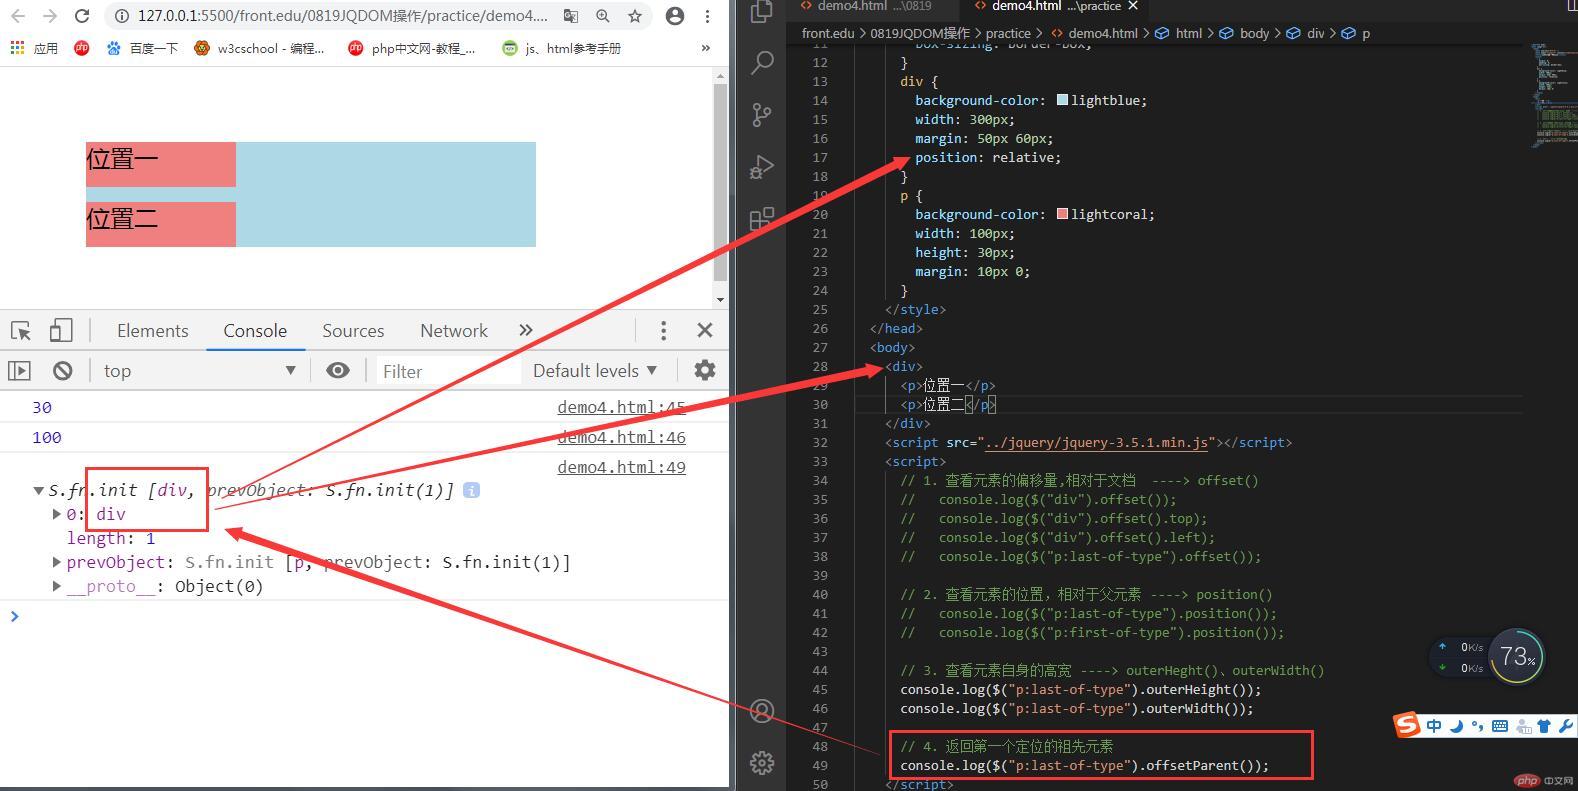
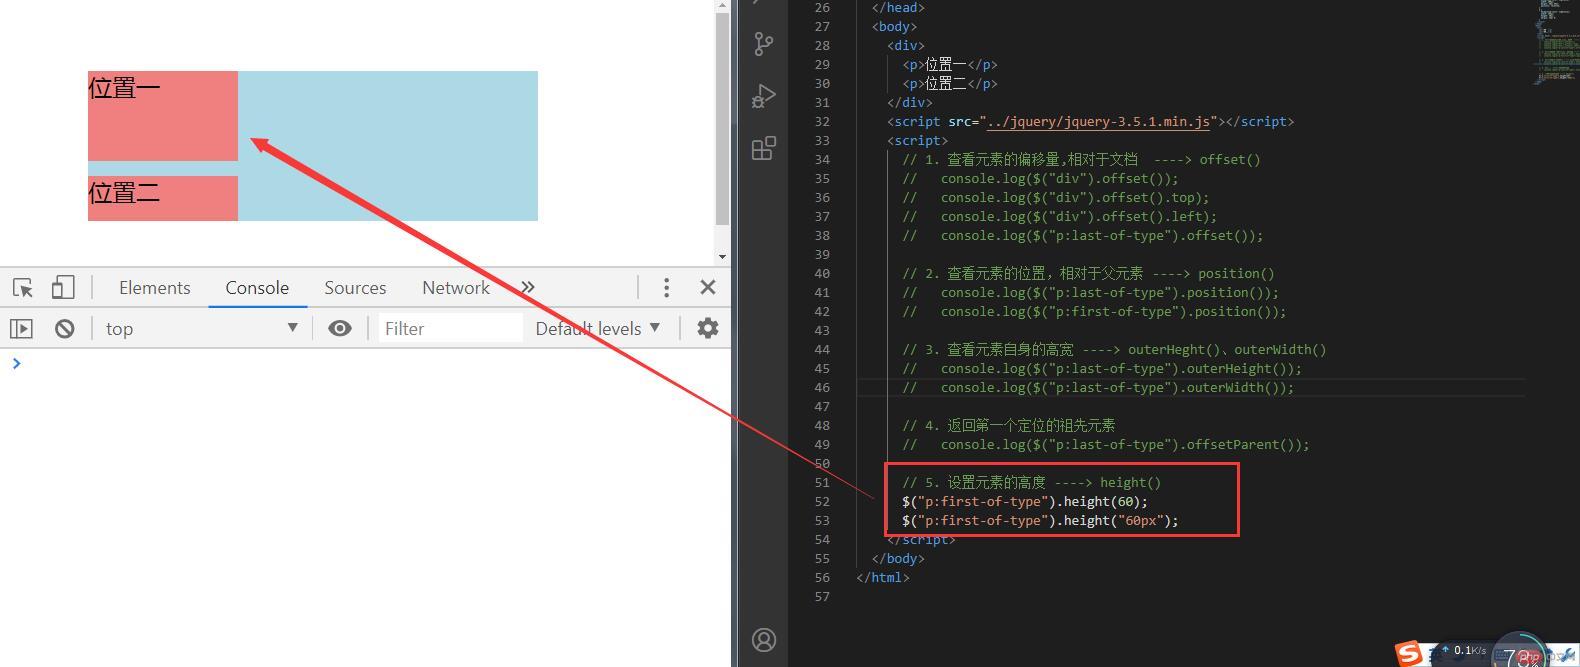
<!DOCTYPE html><html lang="en"><head><meta charset="UTF-8" /><meta name="viewport" content="width=device-width, initial-scale=1.0" /><title>获取元素位置信息</title><style>* {margin: 0;padding: 0;box-sizing: border-box;}div {background-color: lightblue;width: 300px;margin: 50px 60px;position: relative;}p {background-color: lightcoral;width: 100px;height: 30px;margin: 10px 0;}</style></head><body><div><p>位置一</p><p>位置二</p></div><script src="../jquery/jquery-3.5.1.min.js"></script><script>// 1. 查看元素的偏移量,相对于文档 ----> offset()// console.log($("div").offset());// console.log($("div").offset().top);// console.log($("div").offset().left);// console.log($("p:last-of-type").offset());// 2. 查看元素的位置,相对于父元素 ----> position()// console.log($("p:last-of-type").position());// console.log($("p:first-of-type").position());// 3. 查看元素自身的高宽 ----> outerHeght()、outerWidth()// console.log($("p:last-of-type").outerHeight());// console.log($("p:last-of-type").outerWidth());// 4. 返回第一个定位的祖先元素// console.log($("p:last-of-type").offsetParent());// 5. 设置元素的高度 ----> height()$("p:first-of-type").height(60);$("p:first-of-type").height("60px");</script></body></html>
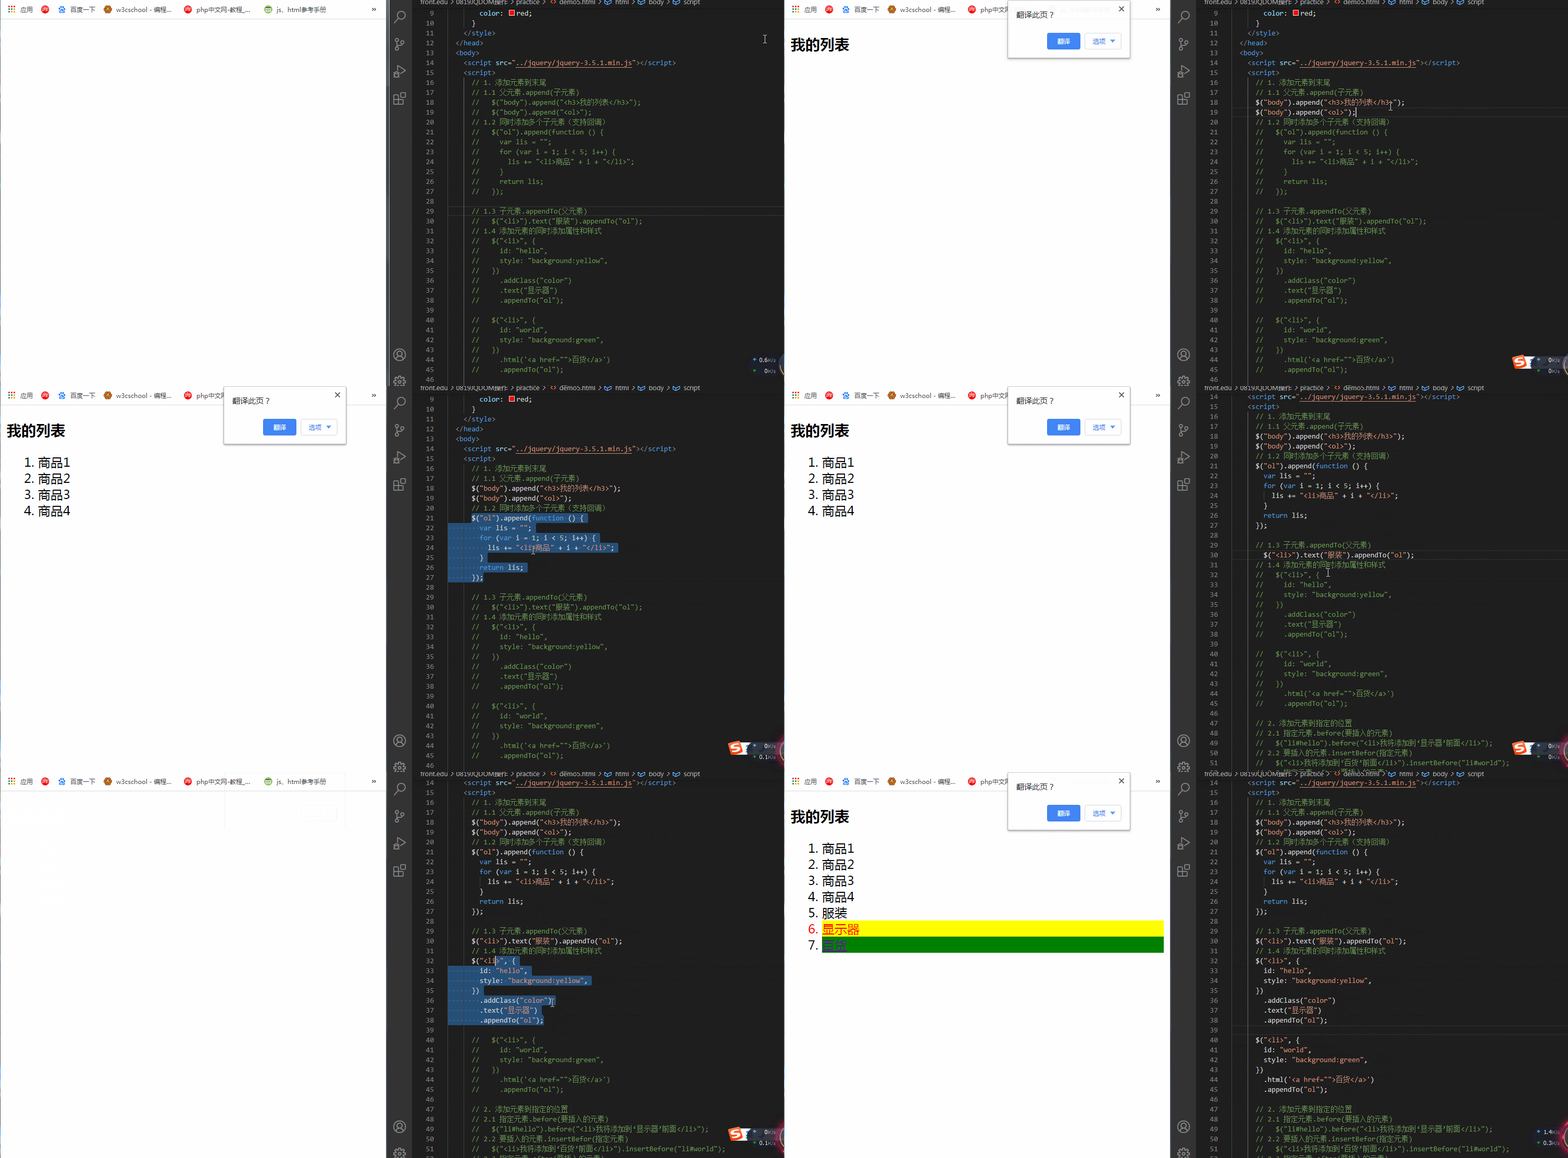
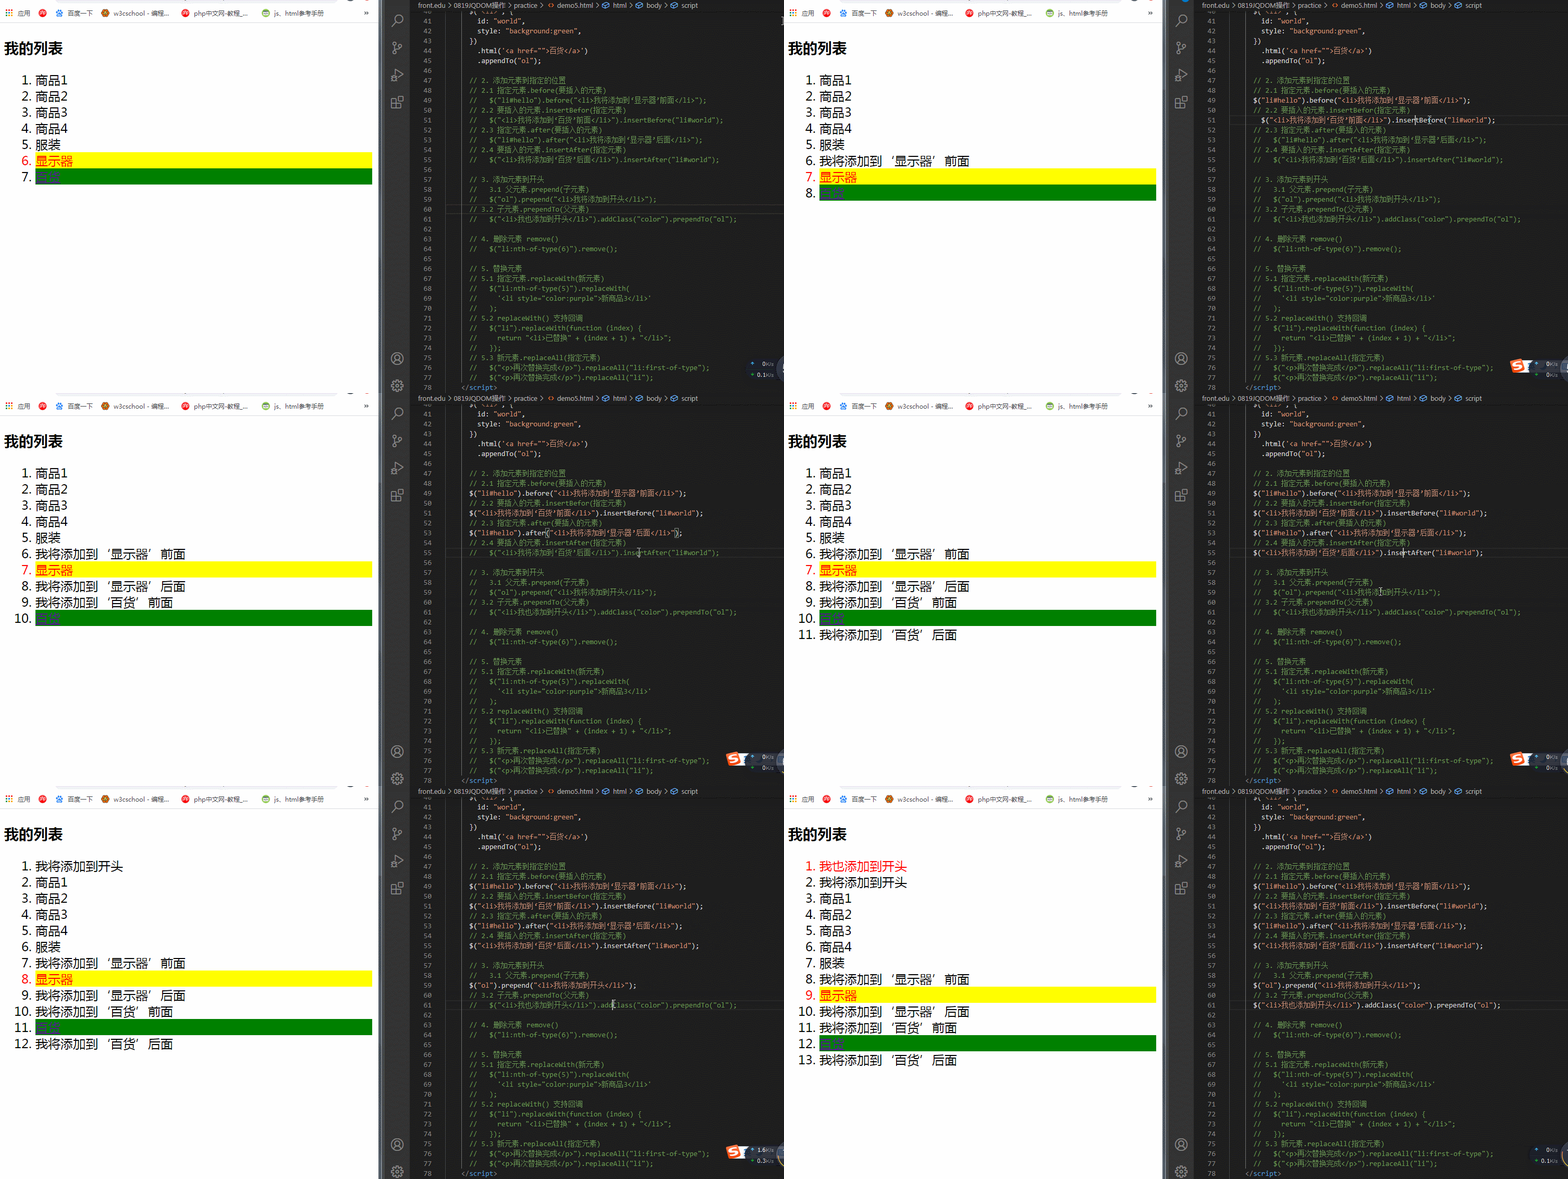
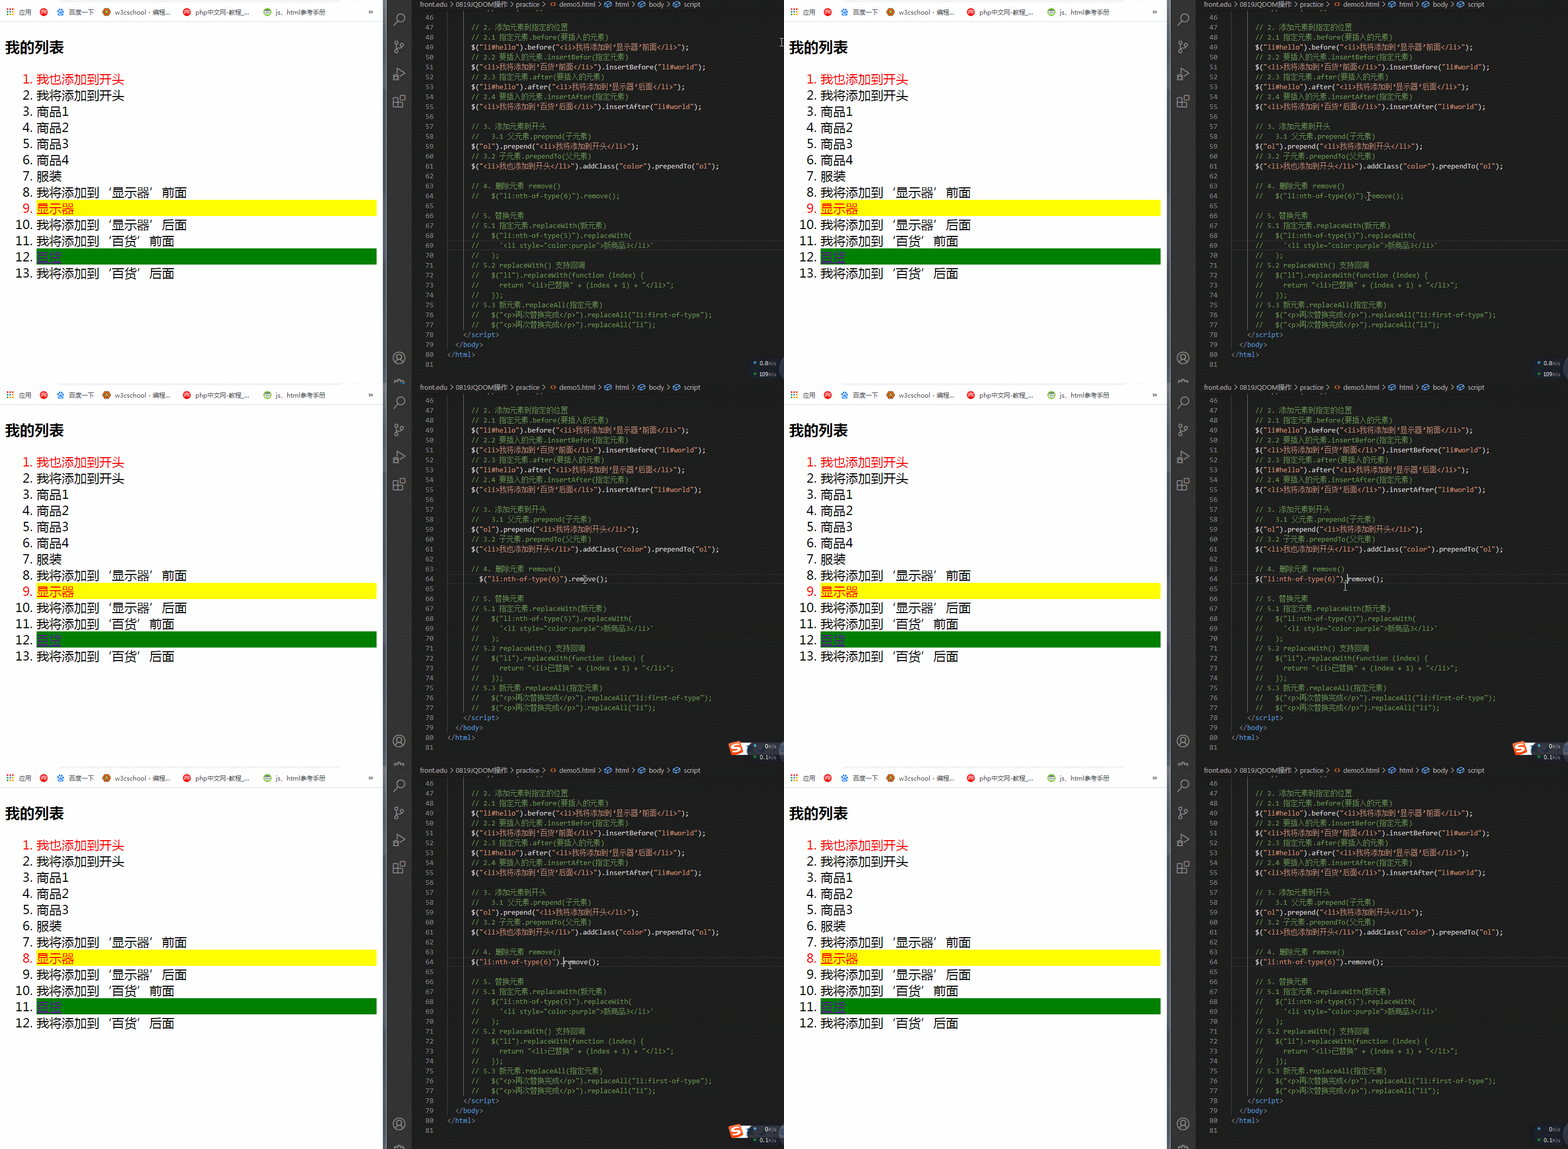
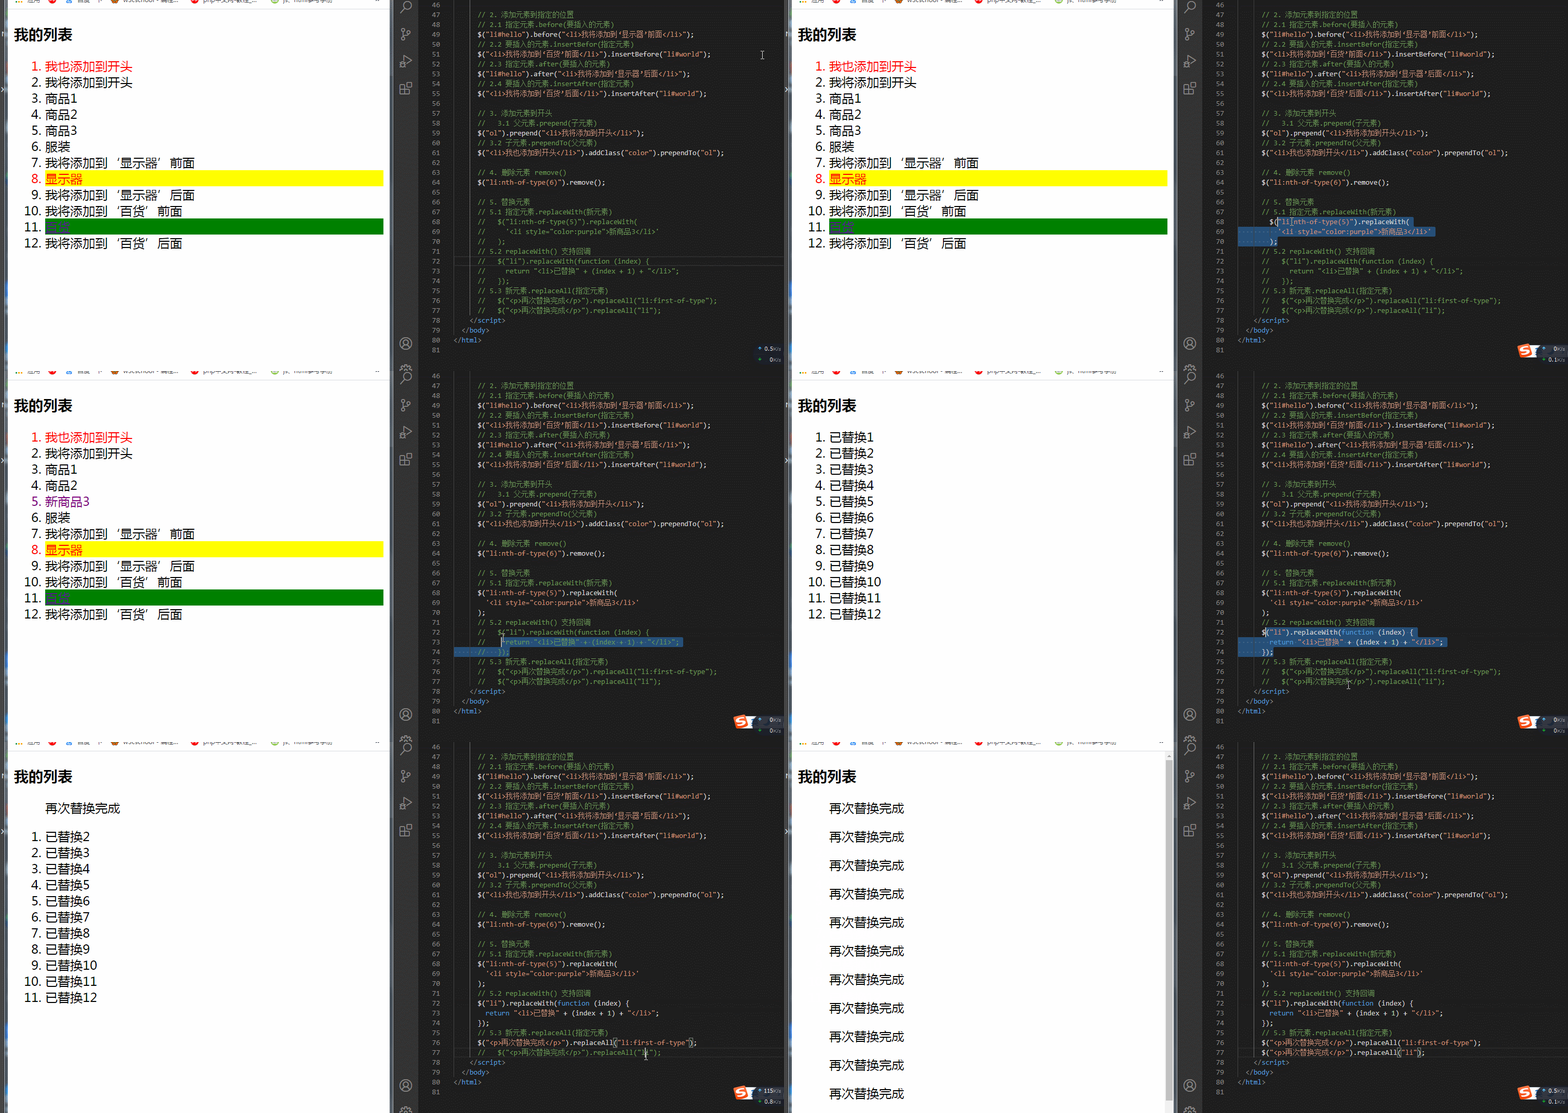
<!DOCTYPE html><html lang="en"><head><meta charset="UTF-8" /><meta name="viewport" content="width=device-width, initial-scale=1.0" /><title>元素的添加与删除</title><style>.color {color: red;}</style></head><body><script src="../jquery/jquery-3.5.1.min.js"></script><script>// 1. 添加元素到末尾// 1.1 父元素.append(子元素)$("body").append("<h3>我的列表</h3>");$("body").append("<ol>");// 1.2 同时添加多个子元素(支持回调)$("ol").append(function () {var lis = "";for (var i = 1; i < 5; i++) {lis += "<li>商品" + i + "</li>";}return lis;});// 1.3 子元素.appendTo(父元素)$("<li>").text("服装").appendTo("ol");// 1.4 添加元素的同时添加属性和样式$("<li>", {id: "hello",style: "background:yellow",}).addClass("color").text("显示器").appendTo("ol");$("<li>", {id: "world",style: "background:green",}).html('<a href="">百货</a>').appendTo("ol");// 2. 添加元素到指定的位置// 2.1 指定元素.before(要插入的元素)$("li#hello").before("<li>我将添加到‘显示器’前面</li>");// 2.2 要插入的元素.insertBefor(指定元素)$("<li>我将添加到‘百货’前面</li>").insertBefore("li#world");// 2.3 指定元素.after(要插入的元素)$("li#hello").after("<li>我将添加到‘显示器’后面</li>");// 2.4 要插入的元素.insertAfter(指定元素)$("<li>我将添加到‘百货’后面</li>").insertAfter("li#world");// 3. 添加元素到开头// 3.1 父元素.prepend(子元素)$("ol").prepend("<li>我将添加到开头</li>");// 3.2 子元素.prependTo(父元素)$("<li>我也添加到开头</li>").addClass("color").prependTo("ol");// 4. 删除元素 remove()$("li:nth-of-type(6)").remove();// 5. 替换元素// 5.1 指定元素.replaceWith(新元素)$("li:nth-of-type(5)").replaceWith('<li style="color:purple">新商品3</li>');// 5.2 replaceWith() 支持回调$("li").replaceWith(function (index) {return "<li>已替换" + (index + 1) + "</li>";});// 5.3 新元素.replaceAll(指定元素)$("<p>再次替换完成</p>").replaceAll("li:first-of-type");$("<p>再次替换完成</p>").replaceAll("li");</script></body></html>
