第四章 JS特效
01.图片切换
效果图如下:
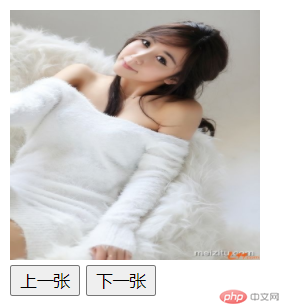
html代码如下:
<img src="images/image01.jpg" id="flower" width="200" height="200"><br><button id="prev">上一张</button><button id="next">下一张</button>
javascript代码如下:
// 1.获取事件源 需要的标签var flower = document.getElementById('flower');var nextBtn = document.getElementById('next');var prevBtn = document.getElementById('prev');var minIndex = 1,maxIndex = 4; currentIndex = minIndex;// 2.监听按钮的点击nextBtn.onclick = function(){if(currentIndex === maxIndex){ // 到最后一张了 currentIndex = minIndex; }else{ currentIndex++; } flower.setAttribute('src',`images/image0${currentIndex}.jpg`)}prevBtn.onclick = function(){ if(currentIndex === minIndex){ // 到最后一张了 currentIndex = maxIndex; }else{ currentIndex--; } flower.setAttribute('src',`images/image0${currentIndex}.jpg`)}
02.显示和隐藏图片
效果图如下:

html代码如下:
<button id="btn">隐藏</button><br><img src="images/img01.jpg" id="new">
javascript代码如下:
// 1.获取事件源var obtn = document.getElementById('btn');var newImg = document.getElementsByTagName('img')[0];// var isShow = true;// 2.绑定事件obtn.onclick = function(){ // 3.事件驱动程序 if(obtn.innerHTML === '隐藏'){ newImg.style.display = 'none'; obtn.innerHTML = '显示'; // isShow = false; }else{ newImg.style.display = 'block'; obtn.innerHTML = '隐藏'; // isShow = true; }}
03.衣服相册
效果图如下:
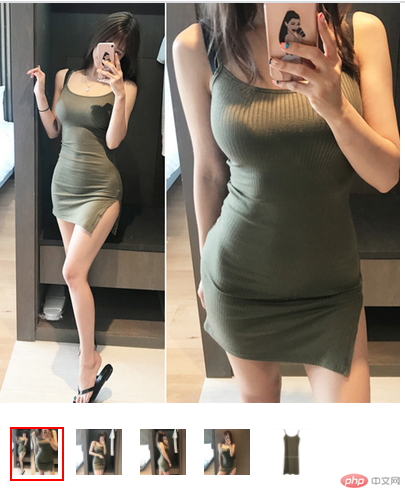
css代码如下:
<style type="text/css"> *{ padding: 0; margin: 0; } ul{ list-style: none; overflow: hidden; } ul li{ float: left; width: 50px; height: 50px; margin-left: 10px; margin-top: 20px; border: 2px solid #fff; } ul li.active{ border-color: red; } </style>
html代码如下:
<img src="images/1.jpg" id="bigImg"><ul> <li class="active"> <a href=""> <img src="images/1.jpg" width="46" class="smallImg"> </a> </li> <li> <a href=""> <img src="images/2.jpg" width="46" class="smallImg"> </a> </li> <li> <a href=""> <img src="images/3.jpg" width="46" class="smallImg"> </a> </li> <li> <a href=""> <img src="images/4.jpg" width="46" class="smallImg"> </a> </li> <li> <a href=""> <img src="images/5.jpg" width="46" class="smallImg"> </a> </li></ul>
javascript代码如下:
// 1.获取事件源var bigImg = document.getElementById('bigImg');var smallImgs = document.getElementsByClassName('smallImg');for(var i = 0; i < smallImgs.length; i++){ //2. 遍历集合,给每个img标签添加事件 smallImgs[i].onmouseover = function(){ // 3.事件处理程序 // 3.1 在悬浮到每个li标签之前,先把所有的li标签的类名都置为空值 for(var j = 0; j < smallImgs.length; j++){ smallImgs[j].parentNode.parentNode.setAttribute('class', ''); } // 3.2修改大图的src属性值 var smallImgSrc = this.getAttribute('src'); bigImg.setAttribute('src',smallImgSrc); // 3.3 给鼠标悬浮的img标签的父标签添加类 this.parentNode.parentNode.setAttribute('class', 'active'); }}
04.关闭小广告
效果图如下:

css代码如下:
<style type="text/css"> *{ padding: 0; margin: 0; } #qe_code{ width: 180px; height: 160px; margin: 100px auto; position: relative; } #qe_code img{ position: absolute; right: 0; } #qe_code #close{ position: absolute; width: 18px; height: 18px; border: 1px solid #e0e0e0; text-align: center; line-height: 18px; cursor: pointer; color: #666; }</style>
html代码如下:
<div id="qe_code"> <img src="images/phone_taobao.png" id="code"> <span id="close">X</span></div>
javascript代码如下:
var closeSpan = document.getElementById('close');var qe_code = document.getElementById('qe_code'); closeSpan.onclick = function(){ qe_code.style.display = 'none'; }
05.图片切换
效果图如下:
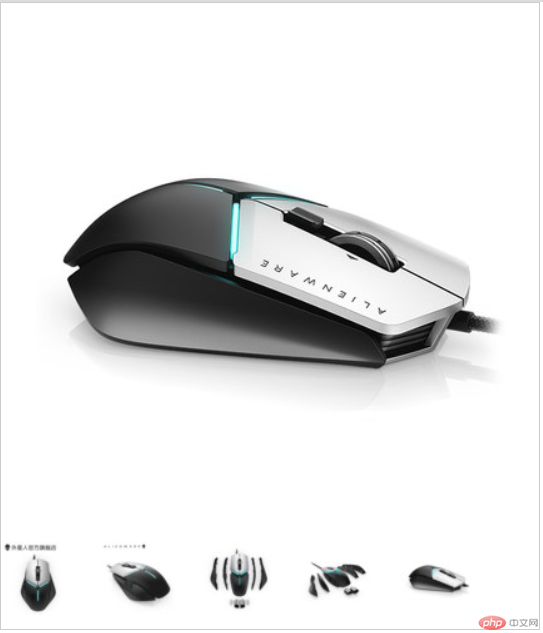
css代码如下:
<style type="text/css"> *{ padding: 0; margin: 0; } #box{ border: 1px solid #ccc; width: 430px; height: 70px; padding-top: 430px; background: url('images/big_pic1.jpg') no-repeat; } #box ul li{ display: inline-block; margin-right: 15px; }</style>
html代码如下:
<div id="box"> <ul> <li id="item1" class="item"> <img src="images/pic1.jpg"> </li> <li id="item2" class="item"> <img src="images/pic2.jpg"> </li> <li id="item3" class="item"> <img src="images/pic3.jpg"> </li> <li id="item4" class="item"> <img src="images/pic4.jpg"> </li> <li id="item5" class="item"> <img src="images/pic5.jpg"> </li> </ul></div>
javascript代码如下:
// 初学者 小白 书写的方式// 1.获取事件源/*var item1 = document.getElementById('item1');var item2 = document.getElementById('item2');var item3 = document.getElementById('item3');var item4 = document.getElementById('item4');var item5 = document.getElementById('item5');var oBox = document.getElementById('box');$('item1').onmouseover = function(){ oBox.style.background = `url('images/big_pic1.jpg') no-repeat`}$('item2').onmouseover = function(){ oBox.style.background = `url('images/big_pic2.jpg') no-repeat`}$('item3').onmouseover = function(){ oBox.style.background = `url('images/big_pic3.jpg') no-repeat`}$('item4').onmouseover = function(){ oBox.style.background = `url('images/big_pic4.jpg') no-repeat`}$('item5').onmouseover = function(){ oBox.style.background = `url('images/big_pic5.jpg') no-repeat`}*///封装代码1如下:// 1.获取事件源function $(id){ return typeof id === 'string' ? document.getElementById(id) : null;}function changebgcImg(liId,imgSrc){ // 2.添加事件 $(liId).onmouseover = function(){ // 3.改变背景图 $('box').style.background = imgSrc; }}changebgcImg('item1',`url('images/big_pic1.jpg') no-repeat`);changebgcImg('item2',`url('images/big_pic2.jpg') no-repeat`);changebgcImg('item3',`url('images/big_pic3.jpg') no-repeat`);changebgcImg('item4',`url('images/big_pic4.jpg') no-repeat`);changebgcImg('item5',`url('images/big_pic5.jpg') no-repeat`);//封装代码2如下:// 1.获取事件源function $(id){ return typeof id === 'string' ? document.getElementById(id) : null;}var items = document.getElementsByClassName('item');for(var i = 0;i < items.length; i++){ var item = items[i]; item.index = i+1; items[i].onmouseover = function(){ $('box').style.background = ` url('images/big_pic${this.index}.jpg') no-repeat`; }}
06.百度换肤
效果图如下:
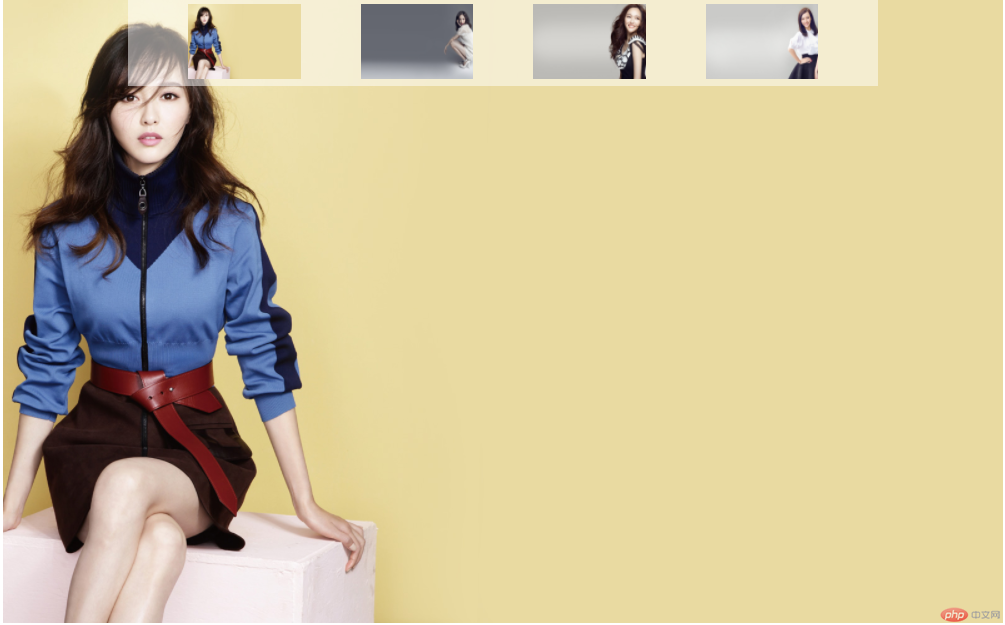
css代码如下:
<style type="text/css"> *{ margin:0px; padding:0px; } ul{ list-style:none; } #skin{ position:fixed; top:0px; left:0px; width:100%; height:100%; backgroundimage:url('images/skin1.jpg'); background-position:center 0; background-repeat:no-repeat; } #skin-photo{ width:100%; height:100px; position:relative; z-index:10; } #skin-photo ul{ overflow:hidden; width:1200px; margin:0 auto; background-color:rgba(255,255,255,0.5) } #skin-photo ul li{ float:left; cursor:pointer; height:120px; margin:10px 0 10px 96px; } #skin-photo ul li img{ width:180px; height:120px; }</style>
html代码如下:
<div id="skin"></div><div id="skin-photo"> <ul> <li> <img src="images/skin1.jpg" id="0"> </li> <li> <img src="images/skin2.jpg" id="1"> </li> <li> <img src="images/skin3.jpg" id="2"> </li> <li> <img src="images/skin4.jpg" id="3"> </li> </ul></div>
javascript代码如下:
//1.获取对应的图片var skin = document.getElementById('skin');var allItems = document.getElementsByTagName('li');console.log(allItems); for(var i=0;i<allItems.length;i++){ allItems[i].index =i+1; allItems[i].onclick =function(){ skin.style.backgroundImage=`url(images/skin${this.index}.jpg)`; }}
07.千千音乐盒
效果图如下:
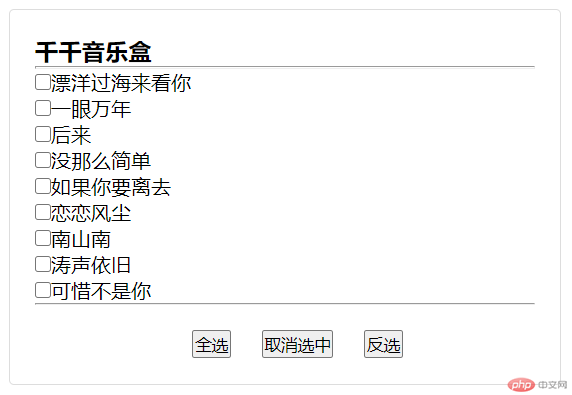
css代码如下:
<style type="text/css"> *{ padding:0px; margin:0px; } #panel{ background-color:#fff; border:1px solid #ddd; border-radius:4px; width:400px; padding:20px; margin:100px auto; } .panel-footer{ text-align:center; } .panel-footer button{ margin-left:20px; margin-top:20px; }</style>
html代码如下:
<div id="panel"> <div class="panel-title"> <h3>千千音乐盒</h3> <hr> </div> <div class="panel-content"> <input type="checkbox">漂洋过海来看你<br> <input type="checkbox">一眼万年<br> <input type="checkbox">后来<br> <input type="checkbox">没那么简单<br> <input type="checkbox">如果你要离去<br> <input type="checkbox">恋恋风尘<br> <input type="checkbox">南山南<br> <input type="checkbox">涛声依旧<br> <input type="checkbox">可惜不是你<br> </div> <div class="panel-footer"> <hr> <button id="allSelect">全选</button> <button id="cancelSelect">取消选中</button> <button id="reverseSelect">反选</button> </div></div>
javascript代码如下:
function $(id){ return typeof id === 'string'?document.getElementById(id):null;}//1.获取所有的复选框var inputs = document.getElementsByTagName('input');//2.全选$('allSelect').onclick = function(){ for(var i=0;i<inputs.length;i++){ inputs[i].checked = true; }}//3.取消选中$('cancelSelect').onclick = function(){ for(var i=0;i<inputs.length;i++){ inputs[i].checked = false; }}//4.反选$('reverseSelect').onclick = function(){ for(var i=0;i<inputs.length;i++){ // if(inputs[i].checked){ // inputs[i].checked = false; // }else{ // inputs[i].checked = true; // } inputs[i].checked = !inputs[i].checked; }}
08.表单验证
效果图如下:

css代码如下:
<style type="text/css"> *{ padding:0px; margin:0px; } #prompt{ font-size:12px; color:darkgray; } #score{ border:1px solid darkgray; } .right{ background:url('images/right.png') no-repeat 5px center; padding-left:20px; color:lightgreen !important; background-size:15px 15px; } .error{ background:url('images/error.png') no-repeat 5px center; padding-left:20px; color:red !important; background-size:15px 15px; }</style>
html代码如下:
<div id="box"> <label for="score">你的成绩:</label> <input type="text" placeholder="请输入分数" id="score"> <span id="prompt">请输入您的成绩!</span></div>
javascript代码如下:
function $(id){ return typeof id === 'string'?document.getElementById(id):null;}//input输入框失去焦点$('score').onblur = function(){ //1获取输入的内容 var value = parseFloat(this.value); console.log(typeof value); //2.验证 console.log(isNaN(value)); if(isNaN(value)){ //不是一个数 $('prompt').innerHTML = '输入的成绩不正确'; // $('prompt').setAttribute('class','error'); $('prompt').className = 'error'; this.style.borderColor = 'red'; }else if(value>0 && value<=100){ $('prompt').innerHTML = '输入的成绩正确'; // $('prompt').setAttribute('class','error'); $('prompt').className = 'right'; this.style.borderColor = 'green'; }else{ //超出成绩范围 $('prompt').innerHTML = '输入的成绩正确必须0-100'; // $('prompt').setAttribute('class','error'); $('prompt').className = 'error'; this.style.borderColor = 'red'; }}//input输入框获取焦点 恢复原来的状态$('score').onfocus = function(){ $('prompt').innerHTML = '请输入您的成绩!'; $('prompt').className = ''; $('score').style.borderColor = 'darkgrey'; $('score').style.outline = 'none'; $('score').value = '';}
09.上传图片验证
效果图如下:

html代码如下:
<label for="file">上传图片格式验证:</label><input type="file" name="" id="file">
javascript代码如下:
//jpg png gif window.onload = function(){ //1.获取标签 var file = document.getElementById('file'); //2.监听图片选择变化 file.onchange = function(){ //2.1获取上传的图片路径 var path = this.value; // console.log(path);//C:\fakepath\an1.png //2.2获取在路径字符串中占的位置 var loc = path.lastIndexOf('.'); //2.3截图文件路径的后缀名 var suffix = path.substr(loc); //2.4统一转小写 var lower_suffix = suffix.toLowerCase(); //2.5判断 if(lower_suffix === '.jpg' || lower_suffix === '.png'|| lower_suffix === '.jpeg'|| lower_suffix === '.gif'){ alert('上传图片格式正确'); }else{ alert('上传图片格式错误'); } } }
10.随机验证码校验
效果图如下:
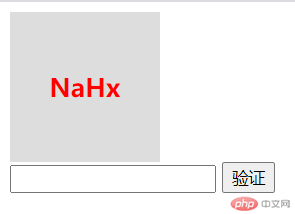
css代码如下:
#code{ width:100px; height:100px; background-color:#ddd; padding:10px; line-height:100px; text-align:center; font-size:20px; color:red; font-weight:bold;}input{outline:none;}
html代码如下:
<div id="code"></div><input type="text" id="newCode"><input type="button" id="validate" value="验证">
javascript代码如下:
window.onload = function(){ //设置默认空的字符串 var code; var codeDiv = document.getElementById('code'); var newCodeInput = document.getElementById('newCode'); var validate = document.getElementById('validate'); //加载页面对应的验证码 createCode(); //1.获取min到max之间的整数(1-100) function random(max,min){ return Math.floor(Math.random()*(max-min)+min); } function createCode(){ code = ''; //设置长度; var codeLength = 4; var randomCode = [0,1,2,3,4,5,6,7,8,9,'A','B','C','D','E','F','G','H','I','J','K','L','M','N','O','P','Q','R','S','T','U','V','W','X','Y','Z','a','b','c','d','e','f','g','h','i','j','k','l','m','n','o','p','q','r','s','t','u','v','w','x','y','z']; for(var i = 0;i < codeLength; i++){ //设置随机范围0~36 var index = random(0,62); code += randomCode[index]; } codeDiv.innerHTML = code; } //验证按钮校验 validate.onclick = function(){ //获取用户新输入的验证码 var newCode = newCodeInput.value; // var newCode = newCodeInput.value.toUpperCase(); if(newCode === code){ //验证成功跳转网址 window.location.href = 'http://php.cn'; }else{ //验证失败 alert('输入验证码错误,请重新输入'); //输入框中的值为空 newCodeInput.value = ''; //重新生成验证码 createCode(); } }}
11.发布评论
效果图如下:
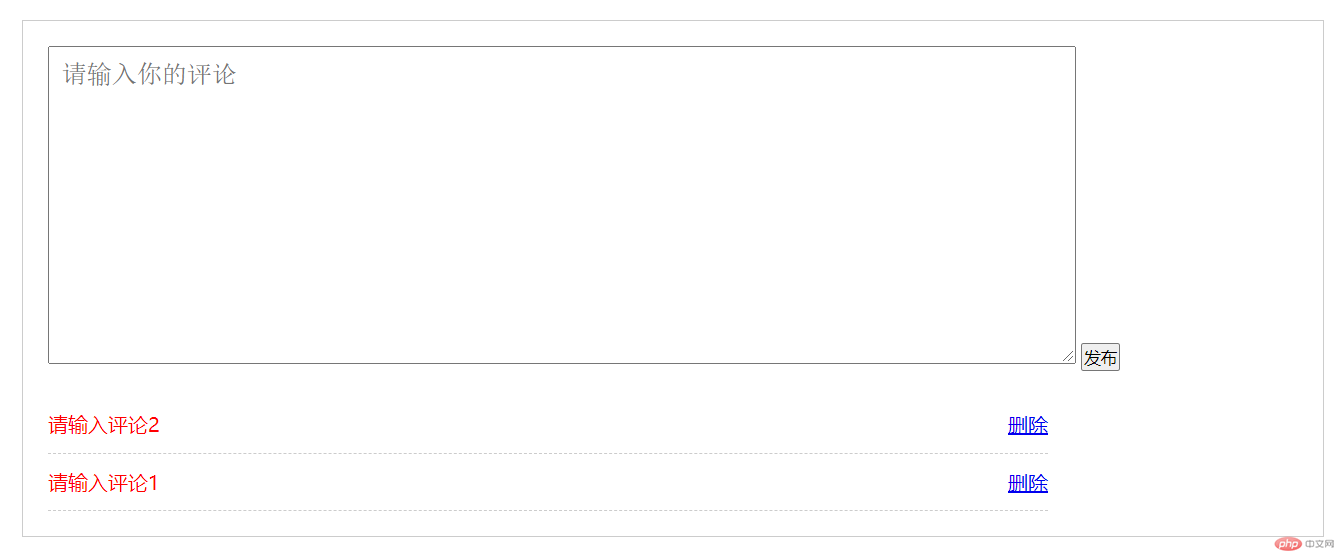
css代码如下:
<style type="text/css"> *{padding:0px;margin:0px;} ul{list-style:none;} #box{width:1000px;border:1px solid #ccc;margin:100px auto;padding:20px;} #comment{width:80%;padding:10px 10px;font-size:20px;outline:none;} .box_top{margin-bottom:20px;} #comment_content li{border-bottom:1px dashed #ccc;width:800px;color:red;line-height:45px;} #comment_content li a{float:right;}</style>
html代码如下:
<div id="box"> <div class="box_top"> <textarea id="comment" cols="100" rows="10" placeholder="请输入你的评论"></textarea> <button id="btn">发布</button> </div> <!-- javascript:void(0); 禁用a链接本身事件 --> </div>
javascript代码如下:
window.onload = function(){ //1.监听按钮的点击 $('btn').onclick = function(){ //1.1获取用户输入的内容 var content = $('comment').value; console.log(content); //1.2判断 if(content.length === 0){ alert('请输入内容'); return; } //1.3创建li标签插入到ul中 var newLi = document.createElement('li'); newLi.innerHTML = `${content}<a href='javascript:void(0)'>删除</a>`; // $('comment_content').appendChild(newLi); $('comment_content').insertBefore(newLi,$('comment_content').children[0]); //1.4清空输入框中的内容 $('comment').value=''; //1.5删除评论 var delBtns = document.getElementsByTagName('a'); for(var i=0;i<delBtns.length;i++){ delBtns[i].onclick = function(){ this.parentNode.remove(); } } } function $(id){ return typeof id === 'string'?document.getElementById(id):null; }}
12.九宫格布局
效果图如下:
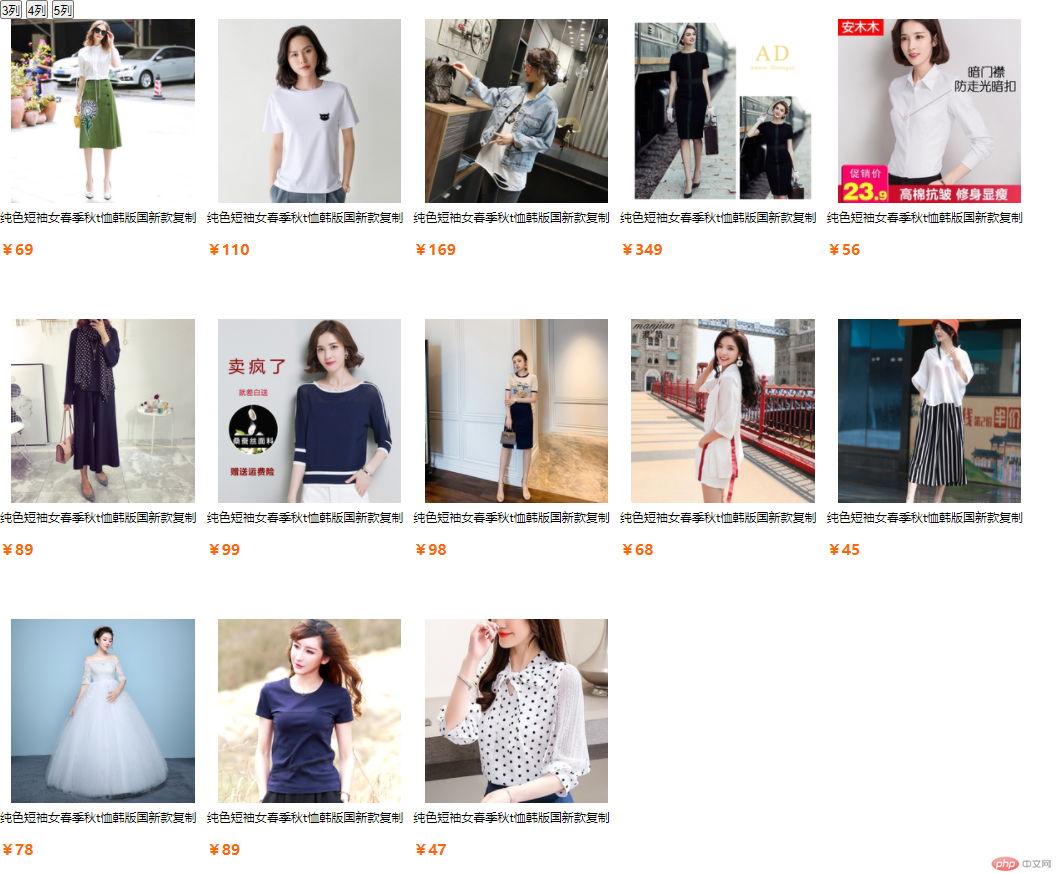
css代码如下:
1.浮动写法:*{margin:0px;padding:0px;}#wrap{overflow:hidden;}#wrap .item{width:248px;height:360px;font-size:13px;}#wrap .item .title{width:248px;height:30px;line-height:30px;overflow:hidden;margin-bottom:10px;}.imgContainer{width:248px;display:table-cell;text-align:center;}#wrap .item .price{color:#ff6700;font-size:18px;font-weight:bold;}2.定位写法: *{margin:0px;padding:0px;} #wrap{position:relative;} #wrap .item{width:248px;height:360px;font-size:13px;} #wrap .item .title{width:248px;height:30px;line-height:30px;overflow:hidden;margin-bottom:10px;} .imgContainer{width:248px;display:table-cell;text-align:center;} #wrap .item .price{color:#ff6700;font-size:18px;font-weight:bold;}
html代码如下:
<div class="cols"> <button>3列</button> <button>4列</button> <button>5列</button></div><div id="wrap"> <div class="item"> <div class="imgContainer"> <img src="images/taobao_1.jpg"> </div> <p class="title">纯色短袖女春季秋t恤韩版国新款复制2019潮</p> <p class="price">¥69</p> </div> <div class="item"> <div class="imgContainer"> <img src="images/taobao_2.jpg"> </div> <p class="title">纯色短袖女春季秋t恤韩版国新款复制2019潮</p> <p class="price">¥110</p> </div> <div class="item"> <div class="imgContainer"> <img src="images/taobao_3.jpg"> </div> <p class="title">纯色短袖女春季秋t恤韩版国新款复制2019潮</p> <p class="price">¥169</p> </div> <div class="item"> <div class="imgContainer"> <img src="images/taobao_4.jpg"> </div> <p class="title">纯色短袖女春季秋t恤韩版国新款复制2019潮</p> <p class="price">¥349</p> </div> <div class="item"> <div class="imgContainer"> <img src="images/taobao_5.jpg"> </div> <p class="title">纯色短袖女春季秋t恤韩版国新款复制2019潮</p> <p class="price">¥56</p> </div> <div class="item"> <div class="imgContainer"> <img src="images/taobao_6.jpg"> </div> <p class="title">纯色短袖女春季秋t恤韩版国新款复制2019潮</p> <p class="price">¥89</p> </div> <div class="item"> <div class="imgContainer"> <img src="images/taobao_7.jpg"> </div> <p class="title">纯色短袖女春季秋t恤韩版国新款复制2019潮</p> <p class="price">¥99</p> </div> <div class="item"> <div class="imgContainer"> <img src="images/taobao_8.jpg"> </div> <p class="title">纯色短袖女春季秋t恤韩版国新款复制2019潮</p> <p class="price">¥98</p> </div> <div class="item"> <div class="imgContainer"> <img src="images/taobao_9.jpg"> </div> <p class="title">纯色短袖女春季秋t恤韩版国新款复制2019潮</p> <p class="price">¥68</p> </div> <div class="item"> <div class="imgContainer"> <img src="images/taobao_10.jpg"> </div> <p class="title">纯色短袖女春季秋t恤韩版国新款复制2019潮</p> <p class="price">¥45</p> </div> <div class="item"> <div class="imgContainer"> <img src="images/taobao_11.jpg"> </div> <p class="title">纯色短袖女春季秋t恤韩版国新款复制2019潮</p> <p class="price">¥78</p> </div> <div class="item"> <div class="imgContainer"> <img src="images/taobao_12.jpg"> </div> <p class="title">纯色短袖女春季秋t恤韩版国新款复制2019潮</p> <p class="price">¥89</p> </div> <div class="item"> <div class="imgContainer"> <img src="images/taobao_13.jpg"> </div> <p class="title">纯色短袖女春季秋t恤韩版国新款复制2019潮</p> <p class="price">¥47</p> </div></div>
javascript代码如下:
1.浮动写法://1.获取标签var btns = document.getElementsByTagName('button');var items = document.getElementsByClassName('item');//2.监听按钮的点击btns[0].onclick = function(){ lj_flex(3); }btns[1].onclick = function(){ lj_flex(4); }btns[2].onclick = function(){ lj_flex(5); }function lj_flex(colNum){ //3.循环 for(var i=0;i<items.length;i++){ // var itemW = 248; items[i].style.float='left'; // console.log(items[i].offsetWidth); items[i].parentNode.style.width = (colNum*items[i].offsetWidth) + 'px'; }}2.定位写法://1.获取标签var btns = document.getElementsByTagName('button');var items = document.getElementsByClassName('item');//2.监听按钮的点击btns[0].onclick = function(){ lj_flex(3); }btns[1].onclick = function(){ lj_flex(4); }btns[2].onclick = function(){ lj_flex(5); }function lj_flex(colsNum){ //第0行第0列 top:0*h left:0*h //第0行第1列 top:0*h left:1*h //第0行第2列 top:0*h left:2*h //第1行第0列 top:1*h left:0*h //第1行第1列 top:1*h left:1*h //第1行第2列 top:1*h left:2*h //第2行第0列 top:2*h left:0*h //第2行第1列 top:2*h left:1*h //第2行第2列 top:2*h left:2*h for(var i=0;i<items.length;i++){ //求每个盒子占的行数和列数 var row = parseInt(i/colsNum); var col = parseInt(i%colsNum); //设置盒子定位 items[i].style.position = 'absolute'; items[i].style.top = (row*items[i].offsetHeight)+'px'; items[i].style.left = (col*items[i].offsetWidth)+'px';}
13.日期特效
效果图如下:
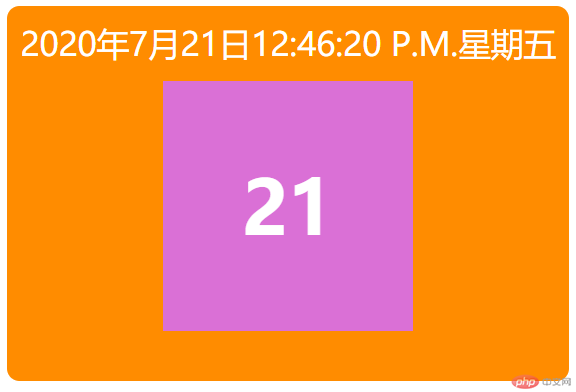
css代码如下:
*{margin:0px;padding:0px;}#date{width:450px;height:300px;background-color:darkorange;border-radius:10px;margin:100px auto;}#nowDate{width:450px;height:60px;line-height:60px;text-align:center;color:#fff;font-size:26px;}#day{width:200px;height:200px;line-height:200px;background-color:orchid;margin:0px auto;text-align:center;color:#fff;font-weight:bold;font-size:60px;}
html代码如下:
<div id="date"> <p id="nowDate"></p> <p id="day"></p></div>
javascript代码如下:
//1.获取标签var nowDate = document.getElementById('nowDate');var days = document.getElementById('day');//用定时器更新时间的变化setInterval(nowTime,100);// nowDate.innerHTML= '';function nowTime(){ //0-23; //6:27:35 P.M. //6:30:01 P.M. //6:04:01 A.M. var now = new Date(); var hour = now.getHours();//时 var minute = now.getMinutes();//分 var second = now.getSeconds();//秒 var year = now.getFullYear();//年 var month = now.getMonth();//月 var day = now.getDate();//日 var week = now.getDay();//星期 // console.log(week);//索引 var weeks=['星期天','星期一','星期二','星期三','星期四','星期五']; //18>12?(18-12):8 var temp ='' + (hour > 12 ? hour - 12 : hour); if(hour === 0){ temp = '12'; }else if(hour < 10 && hour != 10){ temp = '0' + temp; } temp = temp + (minute < 10 ? ':0' : ":") + minute; temp = temp + (second < 10 ? ':0' : ":") + second; temp = temp + (hour >= 12 ? ' P.M.' : ' A.M.'); temp = `${year}年${month}月${day}日${temp}${weeks[week]}`; nowDate.innerHTML = temp; days.innerHTML = day;}
css代码如下:
#box{ width:50px; height:50px; background-color:red; /* transform:translate(100px,200px)rotate(50deg)scale(2.0)skew(10deg); */ /* translate:位移;rotate:旋转;scale:放大;skew:倾斜; */}
html代码如下
<button id="start">开启</button><button id="stop">关闭</button><button id="btn">形变</button><div id="box"></div>
javascript代码如下:
//1.获取标签var start = document.getElementById('start');var stop = document.getElementById('stop');var num = 0,timer = null;start.onclick = function(){ //使用定时器的时候先清除定时器再开启定时器,防止用户频繁性的开启定时器 clearInterval(timer); timer = setInterval(function(){ num++; console.log(num); },1000) }stop.onclick = function(){ clearInterval(timer);}window.onload = function(){ var btn = document.getElementById('btn'); var box = document.getElementById('box'); var index = 0; btn.onclick = function(){ index++; box.style.transform = `translate(${index*100}px,${index*50}px)rotate(${index*10}deg)scale(${index*1.3})`; }}
15.数字时钟案例
效果图如下:
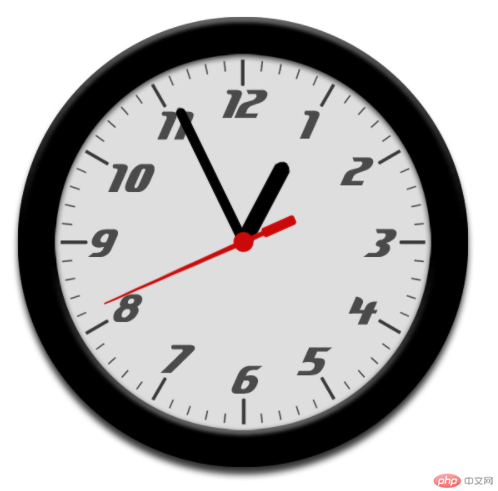
css代码如下:
<style type="text/css"> *{padding:0px;margin:0px;} #clock{width:600px;height:600px;background:url('images/clock.jpg')no-repeat;position:relative;} #hour,#minute,#second{position:absolute;width:30px;height:600px;left:50%;top:0;margin-left:-15px;} #hour{background:url(images/hour.png)no-repeat center center;} #minute{background:url(images/minute.png)no-repeat center center;} #second{background:url(images/second.png)no-repeat center center;}</style>
html代码如下:
<div id="clock"> <div id="hour"></div> <div id="minute"></div> <div id="second"></div></div>
javascript代码如下:
//1.获取标签var hour = document.getElementById('hour');var minute = document.getElementById('minute');var second = document.getElementById('second');//2.开启定时器获取当前时间setInterval(function(){ //2.1获取当前的时间戳 var now =new Date(); //2.2获取小时 分钟 秒 var sec = now.getSeconds(); var min = now.getMinutes()+sec/60; var hou = now.getHours()%12+min/60; //2.3旋转 second.style.transform =`rotate(${sec*6}deg)`; minute.style.transform =`rotate(${min*6}deg)`; hour.style.transform =`rotate(${hou*30}deg)`;},10)
16.长图滚动案例
效果如下:
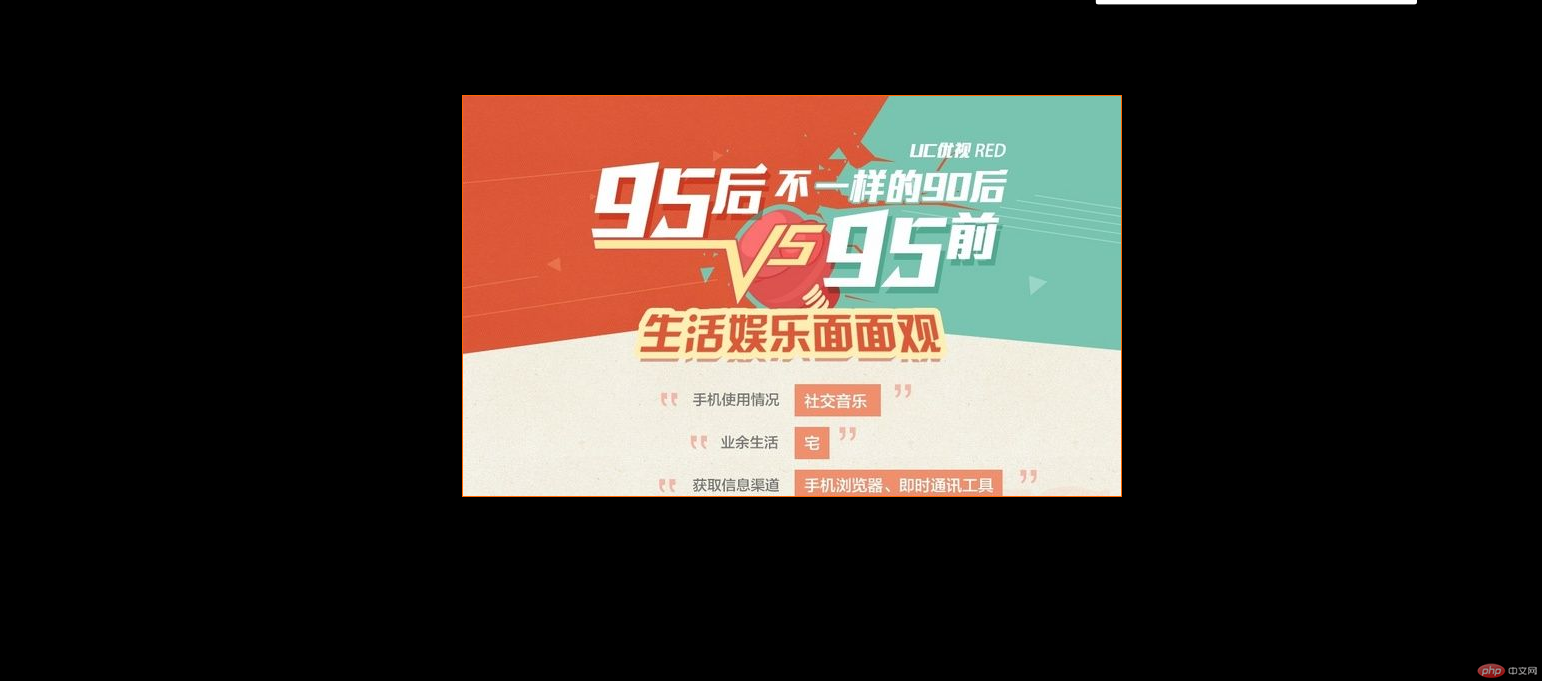
css代码如下:
<style type="text/css">*{padding:0px;margin:0px;}body{background-color:#000;}#box{width:658px;height:400px;border:1px solid #ff6700;margin:100px auto;overflow:hidden;position:relative;}#box img{position: absolute;top:0px;left:0px;}#box span{position:absolute;width:100%;height:50%;left:0px;cursor:pointer;}#box #top{top:0px;}#box #bottom{bottom:0px;}</style>
html代码如下:
<div id="box"> <!-- 658*4066 --> <img src="images/timer.jpeg" alt=""> <span id="top"></span> <span id="bottom"></span></div>
javascript代码如下:
//1.获取标签var box =document.getElementById('box');var pic =document.getElementsByTagName('img')[0];var divTop =document.getElementById('top');var divBottom = document.getElementById('bottom');var num = 0;var timer = null;divTop.onmouseover = function(){ //让图片向上滚动 clearInterval(timer); timer = setInterval(function(){ num-=10; if(num>=-3666){ pic.style.top = num+'px';//4066-400=3666 }else{ clearInterval(timer); } },50);}divBottom.onmouseover = function(){ clearInterval(timer); // 让图片向上滚动 timer = setInterval(function(){ num += 10; if(num <= 0){ pic.style.top = num + 'px'; }else{ clearInterval(timer); } },100);}box.onmouseout = function(){ clearInterval(timer);}


![[Web front-end] Node.js quick start](https://img.php.cn/upload/course/000/000/067/662b5d34ba7c0227.png)


