Correction status:qualified
Teacher's comments:OK


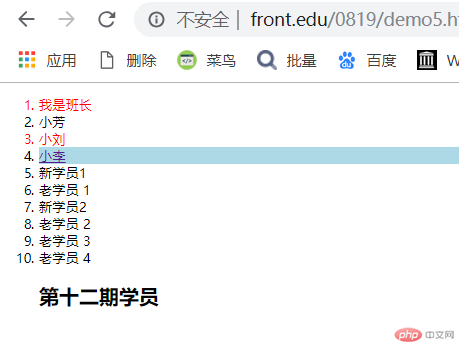
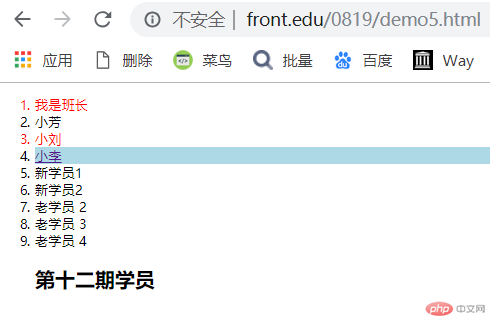
<!DOCTYPE html><html lang="en"><head><meta charset="UTF-8" /><meta name="viewport" content="width=device-width, initial-scale=1.0" /><title>jQuery中常用DOM基础</title><style>.active {color: red;}</style></head><body><script src="../0818/lib/jquery-3.5.1.js"></script><script>// 1. 元素的添加// 父元素.append(子元素)// var ol = $("<ol>");// $("body").append(ol);// $("body").append($("<ol>"));$("body").append("<ol>");// 子元素.appendTo(父元素)$("<li>").text("小芳").appendTo("ol");// 添加内容的时候,可又同步设置样式addClass$("<li>").addClass("active").text("小刘").appendTo("ol");// 在创建元素时,可以同步的生成属性$("<li>", {id: "hello",style: "background:lightblue",}).html('<a href="">小李</a>').appendTo("ol");// append(callback)$("ol").append(function () {// 动态生成一定数量的<li>var lis = "";for (var i = 0; i < 5; i++) {lis += "<li>老学员 " + (i + 1) + "</li>";}return lis;});// 从第4个元素前面添加一个<li>, 原位置上. before(新元素)$("ol > li:nth-of-type(4)").before("<li>新学员1</li>");//新元素.insertAfter(原来的位置)$("<li>新学员2</li>").insertAfter("ol > li:nth-of-type(5)");// prepend(), prependTo(),最上面插入一个$('<li class="active">我是班长</li>').prependTo("ol");// 最后一个替换// 元素的替换: 要被替换掉的元素.replaceWith(新元素)$("ol > li:last-of-type").replaceWith("<h2>第十二期学员</h2>");// 删除元素 remove()$("li:nth-of-type(6)").remove();</script></body></html>


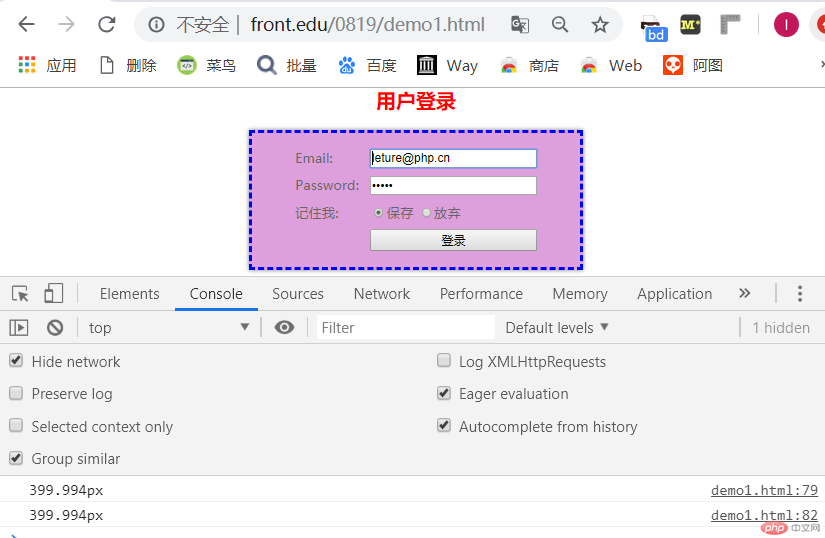
<!DOCTYPE html><html lang="en"><head><meta charset="UTF-8" /><meta name="viewport" content="width=device-width, initial-scale=1.0" /><title>getter / setter -2</title><style>body {display: flex;flex-direction: column;align-items: center;color: #666;}form {width: 400px;/* height: 150px; */padding: 20px 10px;border: 1px solid #aaa;box-shadow: 0 0 5px #888;box-sizing: border-box;background-color: #eee;display: grid;grid-template-columns: 80px 200px;gap: 10px;place-content: center center;}button {grid-column: 2 / 3;height: 26px;}button:hover {color: white;background-color: #888;border: none;cursor: pointer;}.red {color: red;}</style></head><body><h2 class="red">用户登录</h2><form action="handle.php" method="GET""><label for="email">Email:</label><inputtype="email"name="email"id="email"autofocusvalue="leture@php.cn"/><label for="password">Password:</label><input type="password" name="password" id="password" value="不少于6位" /><label for="confirm">记住我:</label><div><input type="radio" name="save" id="confirm" value="1" checked /><labelfor="confirm">保存</label><input type="radio" name="save" id="cancel" value="0" /><labelfor="cancel">放弃</label></div><button>登录</button></form><script src="../0818/lib/jquery-3.5.1.js"></script><script>var form = $("form");// console.log(form);// css(): 设置元素的内联样式的// css(name): getter, 获取表单宽度console.log(form.css('width'));// 用原生的来获取非内联样式(计算样式)var form = document.forms.item(0);console.log(window.getComputedStyle(form,null).getPropertyValue("width")) ;// css(name, value): setter, 设置$('form').css('border', "3px dashed green")// css({...}): 支持同样设置多个样式属性$('form').css({'border': "3px dashed blue",'background': 'yellow'});// css(callback): 支持回调函数当参数,每次打开背景颜色不同$('form').css('background-color', function (){var bgcolors = ['plum', 'lightblue', 'tan', 'lime']; // index = [0, 3]// Math.floor()向下取整, 3.14 = 3, 4.8 => 4var randomIndex = Math.floor(Math.random()*bgcolors.length);return bgcolors[randomIndex];});</script></body></html>
append(子元素)、appendTo(父元素)css(): getter 获取表单宽度