Correction status:qualified
Teacher's comments:


php 运算符
条件分支控制
前端界面是一个form表单,两个输入框允许用户输入要运算的数值,一个下拉列表允许用户选择运算方式,比如+、-、×、÷等算数运算符。用ajax异步请求的方式把需要运算的数值和运算符传递给php脚本,php脚本根据前端所传递过来数据进行判断、运算,然后把结果返回给浏览器,浏览器把结果渲染到窗口。
html代码
<form action="http://php.std/1119/1.php" method="post" onsubmit="return false;"><label for="num1"></label><input type="text" name="num1" id="num1" value="" /><select name="operator" id="operator"><option value="0">+</option><option value="1">-</option><option value="2">×</option><option value="3">÷</option></select><label for="num2"></label><input type="text" name="num2" id="num2" value="" /><button>=</button><span id="result" style="color: rebeccapurple; padding-left: 1em"></span></form>
js代码
//获取按钮let btn = document.getElementsByTagName("button")[0];//获取表单let form = document.getElementsByTagName("form")[0];//服务器地址let url = "http://php.std/1119/calculator.php";// ajax初始化const handle = new XMLHttpRequest();// 点击计算btn.addEventListener("click", () => {// 构造ajax请求数据// 第一个数let num1 = document.querySelector("#num1").value;console.log(num1);// 第二个数let num2 = document.querySelector("#num2").value;console.log(num2);// 操作符(0->+,1->-,2->x,3->÷)let opt = document.querySelector("#operator").value;console.log(opt);// 构造请求对象const data = {num1,num2,opt,};// 转为json;const dataToJson = JSON.stringify(data);console.log(dataToJson);// ajax请求handle.addEventListener("readystatechange", show, false);handle.open("POST", url, true);// 设置请求头(post必须设置)handle.setRequestHeader("content-type", "application/x-www-form-urlencoded");handle.send(dataToJson);});// 结果渲染function show() {// 返回结果赋值变量let ret = handle.response;// 渲染document.querySelector("#result").innerHTML = ret;}
php代码
<?phperror_reporting(0);// 接受参数$post = json_decode(key($_POST),true);// 第一个数$num1 = isset($post['num1'])?$post['num1']:0;// 第二个数$num2 = isset($post['num2'])?$post['num2']:0;// 运算符代号(0->+,1->-,2->x,3->÷)$opt = isset($post['opt'])?(int)$post['opt']:0;// 验证数据合法性if(!verify($num1,$num2,\$opt)) {echo '非法数据,你已经被我们标记!';die;}// 计算switch($opt){case 0:// 加 +echo $num1+$num2;break;case 1:// 减 -echo $num1-$num2;break;case 2:// 乘 *echo $num1\*$num2;break;case 3:// 除 /echo $num1/\$num2;break;}// 定义数据合法性函数function verify($num1,$num2,$opt){$opt_allow = [0,1,2,3];//验证if(!is_numeric($num1)||!is_numeric($num2)) {return false;}else{return in_array($opt,$opt_allow) && true;}}
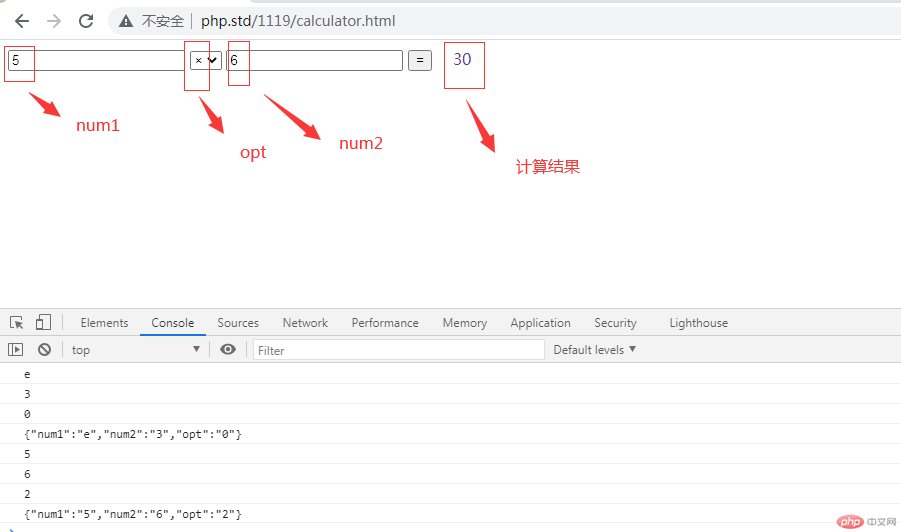
正常效果
 ;
;
当用户传入非法数据效果
 ;
;
作为服务端的开发者来说,永远不要相信用户的输入,因此对于用户的输入既要在前端过滤一遍的同时,也建议在服务端也过滤一遍。当然作为演示,我在前端没写验证代码,其实正确的做法是先在前端验证一遍再在服务端验证。