Correction status:qualified
Teacher's comments:好, 一如既往, 看的出用心了, 继续加油


本文的看点在于实现了留言的动态插入。
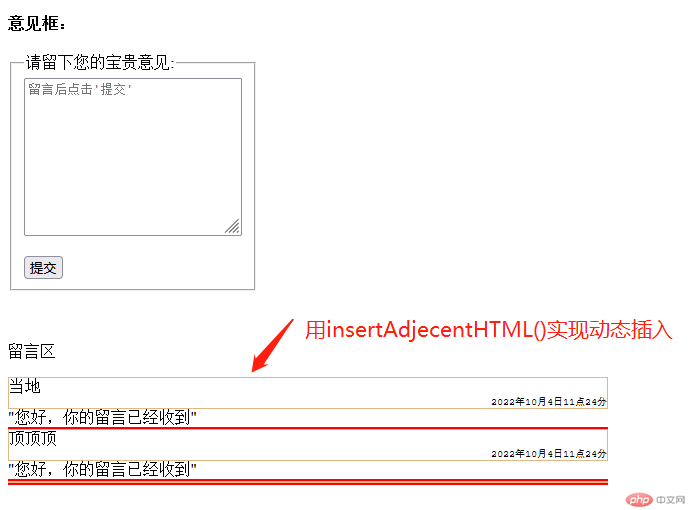
效果图如下:
<style>/* 留言框 */form fieldset{width: 200px;}/* 留言区CSS */.container{/* border: 1px solid gray; */max-width: 600px;}.container .note{border: 1px solid burlywood;display: grid;}.container .note div:last-of-type{text-align: right;font-size: x-small;font-family: 'Courier New', Courier, monospace;}.container .reply{border-bottom: 2px solid red;}</style></head><body><!-- 1. 改写留言板案例,适当添加CSS美化 2. (选做), 将留言板案例改成"智能客服系统",实现机器人回复 --><h4>意见框:</h4><form action="#" method="post" name="myForms_1" ><fieldset><legend>请留下您的宝贵意见:</legend><textarea name="note" id="note" cols="30" rows="10" placeholder="留言后点击'提交'" autofocus></textarea><br><br><button type="button" onclick = "tijiao()">提交</button></fieldset></form><br><br><!-- 以下为留言区 --><p>留言区</p><div class="container"><div class="note"><div></div><div></div></div><div class="reply"></div></div>
// 获取form表单let forms = document.forms.myForms_1;// 获取留言区的DOM元素let container = document.querySelector('.container');let note = document.querySelector('.note');let note_1 = note.firstElementChild;let note_2 = note.lastElementChild;let reply = document.querySelector('.reply');// 留言提交函数function tijiao(){let trLength = note.children.length;console.log(trLength);console.log(forms.note.value);let value = forms.note.value;let date = new Date();let time = date.getFullYear()+"年"+date.getMonth()+"月"+date.getDay()+"日"+date.getHours()+"点"+date.getMinutes()+"分";// 将内容放到模板字面量里let noteDiv = `<div class = "note"><div>${value}</div><div>${time}</div></div><div class="reply">"您好,你的留言已经收到"</div>`;// 将内容插入留言区container.insertAdjacentHTML("afterbegin",noteDiv);forms.note.value="";}