


![[Web front-end] Node.js quick start](https://img.php.cn/upload/course/000/000/067/662b5d34ba7c0227.png)


 天蓬老师
天蓬老师Correction status:qualified
Teacher's comments:


任何一个函数都有一个原型属性:prototype;原型属性对于普通函数没用,对构造函数来说才有用;构造函数是“对象工厂”,用来创建对象的,对象也叫“实例”(实际案例);JS中没有类的概念,它是基于原型的语言,所以可简单的将构造函数当成类;构造函数必须使用“new”来调用,普通函数不用;new的过程就是类的实例化过程,就是创建一个对象的过程;创建对象的过程,就叫“类的实例化”
//声明一个构造函数function User(name,email){//1.创建一个新对象,用this来表示//const this=new User;伪代码,系统会自动创建并执行,写出来为了辅助理解// 2.初始化对象,给这个对象添加一个自定义属性,用来和其他实例进行区分this.name=name;this.email=email;// 3.返回这个对象// return this;伪代码,系统会自动创建并执行,写出来为了辅助理解}const user=new User("admin","ad@php.cn");console.log(user);// 实例的原型永远指向它的构造函数的原型,实例的原型从构造函数的原型继承成员(属性/方法)const user2=new User("tom","tom@php.cn");console.dir(User);console.log(user2.__proto__ === User.prototype);// 需要被所以类实例共享的成员,需要写到构造函数的原型上User.prototype.nation="CHINA";console.log(user.nation,user2.nation);// 属性通常通常不应该共享的,它是区分不同对象的标志,方法更适合共享User.prototype.show=function (){return {name:this.name,email:this.email}};console.log(user.show());console.log(user2.show());
const User=function(name,email){this.name=name;this.email=email;}User.prototype.show=function (){return {name:this.name,email:this.email};};const user=new User("景云","Jy@php.cn");console.log(user.show());// es6中的类来改写上面class User2{//构造方法constructor(name,email){this.name=name;this.email=email;};//原型方法,要是用实例/对象来调用show (){return {name:this.name,email:this.email,age:this.#age};};//私有成员,只能在本类中使用,类外和子类都不能使用#age=28;}const user2=new User2("景云","Jy@php.cn");console.log(user2.show());// 类的继承class Child extends User2{// 子类扩展父类的功能,可以拥有自己的属性或方法// 子类中可以访问父类的构造方法、原型方法、静态方法,不能访问私有成员constructor(name,email,gender){// super()调用父类构造方法,确定this指向super(name,email);this.gender=gender;}show (){return {name:this.name,email:this.email,gender:this.gender };};}const child=new Child("景云c","Jyc@php.cn","男");console.log(child.show());
<ul id="list"><li class="item">item1</li><li class="item">item2</li><li class="item">item3</li><li class="item">item4</li><li class="item">item5</li></ul>
// 使用css选择器获取dom元素是最直观的// 3.1 获取所以满足条件的元素const list=document.querySelectorAll("#list li");console.log(list);// 返回结果中Nodelist是浏览器内置的集合类型,属于类数组;Array.form()、...rest都可以将其转为真正的数组。let list2=Array.from(list);console.log(list2);let list3=[...list];console.log(list3);// Nodelist可以用forEach()遍历list.forEach(function(item,len,arr){console.log(item);});console.log("=================");// 3.2 获取满足条件的第一个元素let first=document.querySelector("#list li");console.log(first);
<ul id="list"><li class="item">item1</li><li class="item">item2</li></ul>
const ul=document.querySelector("#list");const li=document.createElement("li");//parent.appendChild(newEl),添加到页面ul.appendChild(li);li.innerText="item3";// 也可以使用html字符串,将html字符串直接解析为dom元素let htmlStr="<li style='color:red'>item4</li>";ul.insertAdjacentHTML("beforeend",htmlStr);// 如果大量添加元素应该使用文档片段完成const frag=new DocumentFragment();for(let i=0;i<4;i++){const li=document.createElement("li");li.textContent="hello"+(i+1);// 将生成的节点先临时挂载到文档片段中frag.appendChild(li);}ul.appendChild(frag);
const ul=document.querySelector("#list");const li=document.createElement("li");let h6=document.createElement("h6");let h3=document.createElement("h3");h6.innerText="你好呀6";h3.innerText="你好呀3";document.querySelector("li:nth-of-type(3)").replaceWith(h3);// 也可以换一种写法 ul.replaceChild(h6,document.querySelector("li:last-of-type"));
const ul=document.querySelector("#list");const li=document.createElement("li");ul.removeChild(document.querySelector("li:nth-of-type(5)"));
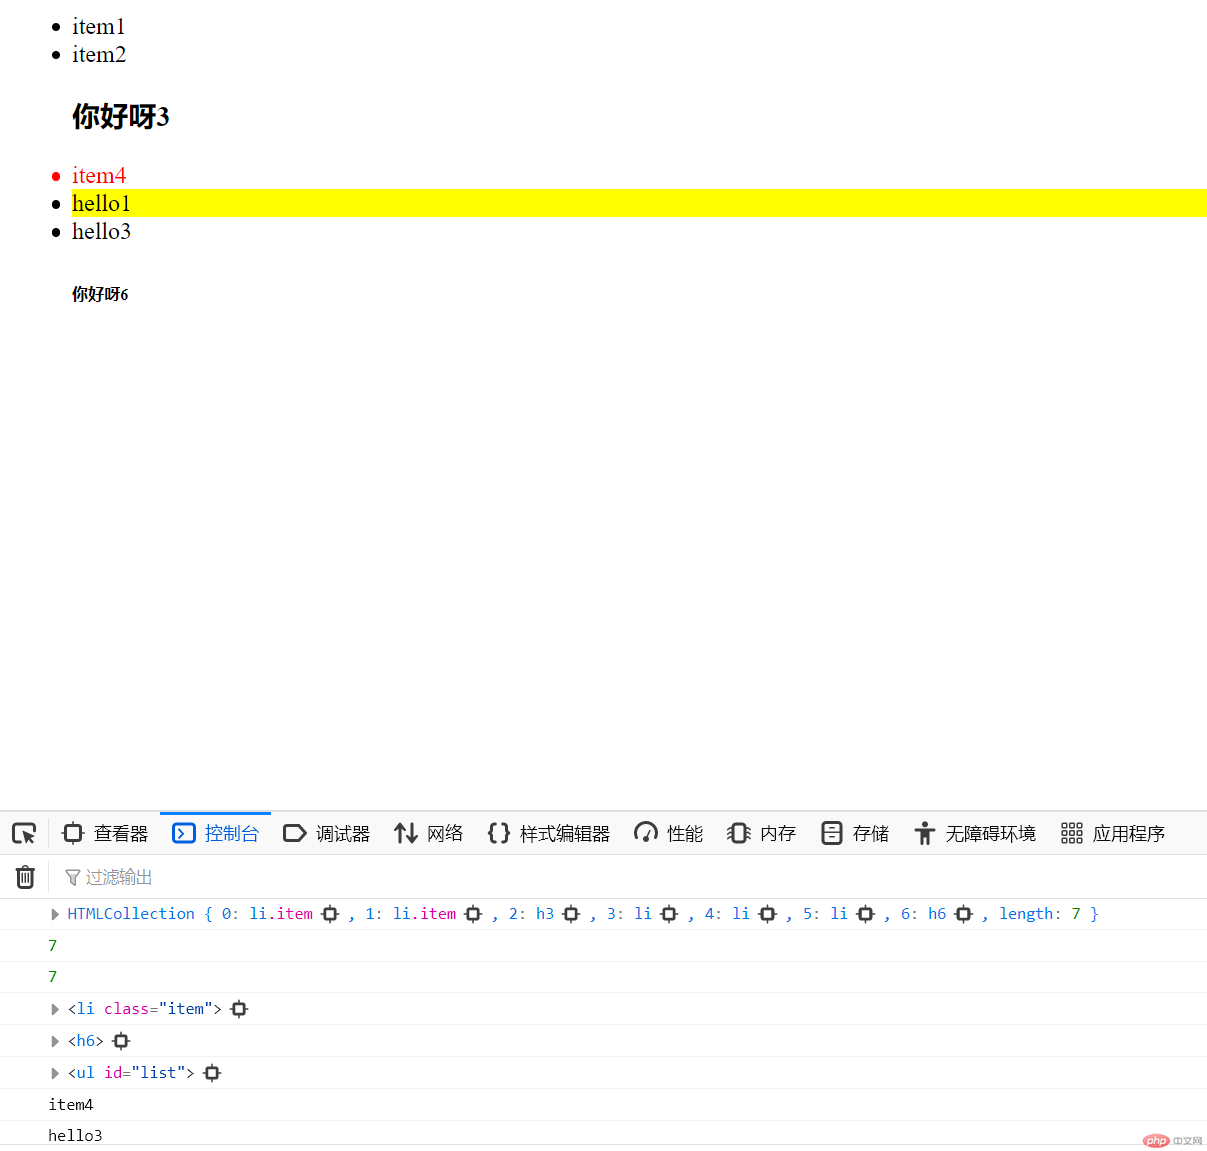
// 获取所有子元素console.log(ul.children);// 获取子元素数量console.log(ul.children.length);console.log(ul.childElementCount);// 第一个子元素console.log(ul.firstElementChild);// 最后一个元素console.log(ul.lastElementChild);// 父节点,需要在子节点上执行console.log(ul.firstElementChild.parentElement);// 前一个兄弟const qian=document.querySelector("li:nth-of-type(4)");qian.style.background="yellow"; console.log(qian.previousElementSibling.innerHTML);//打印前一个兄弟元素的html// 后一个兄弟console.log(qian.nextElementSibling.innerHTML);//打印后一个兄弟元素的html
附:图示