Correction status:qualified
Teacher's comments:


- 写一个实现的多文件上传案例,并将它封装成一个可复用的函数或类
- 实例演示MVC与依赖注入的原理,以及服务容器对依赖对象的管理的实现过程。。。。
uploads文件夹图片(有不同格式图片)
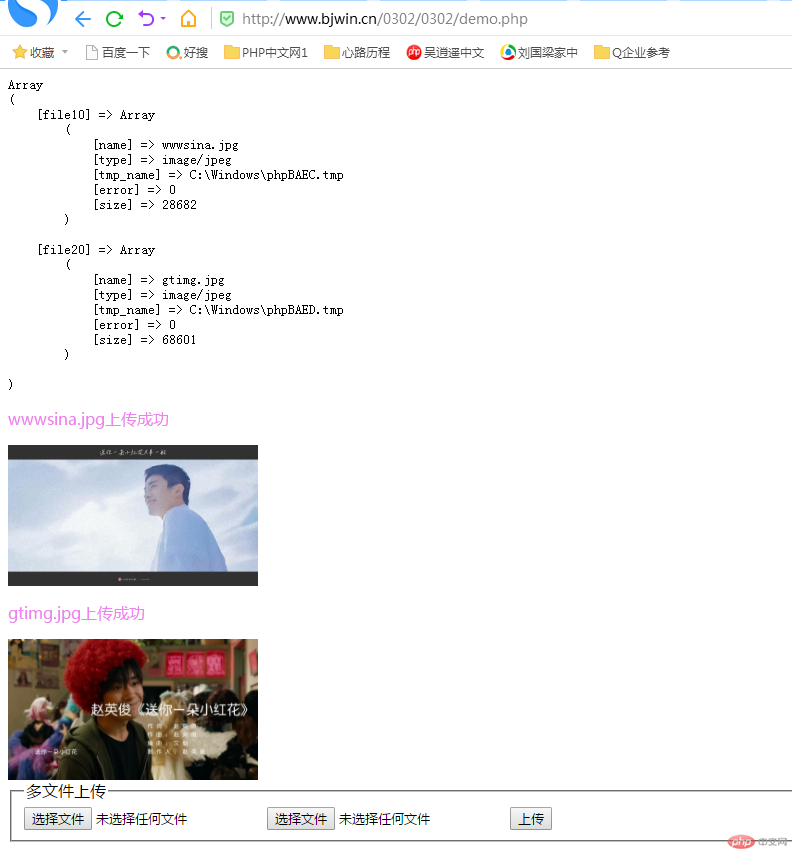
<?phpprintf('<pre>%s</pre>', print_r($_FILES, true));foreach ($_FILES as $file) {if ($file['error'] === 0) {$path = 'uploads/' . md5(strstr($file['name'] . 'helloworld', '.', true)) . strstr($file['name'], '.');if (move_uploaded_file($file['tmp_name'], $path)) {echo "<p style=\"color:violet\">{$file['name']}上传成功</p>";echo "<img src='{$path}' width='250' />";}} else {include 'list.php';echo upload_error($error);}}?><!DOCTYPE html><html lang="en"><head><meta charset="UTF-8"><meta http-equiv="X-UA-Compatible" content="IE=edge"><meta name="viewport" content="width=device-width, initial-scale=1.0"><title>多文件上传</title></head><body><form action="" method="post" enctype="multipart/form-data"><fieldset><legend>多文件上传</legend><input type="hidden" name="MAX_FILE_SIZE" value="10485760"><input type="file" name="file10"><input type="file" name="file20"><button>上传</button></fieldset></form></body></html>
图示:
<?php// 函数库function upload_error(int $errno) : string{switch ($errno) {case 1:$msg = '超过的单文件大小';break;case 2:$msg = '超过前端表单限制';break;case 3:$msg = '上传文件不完整';break;case 4:$msg = '没有文件被上传';break;case 6:$msg = '找不到临时目录';break;case 7:$msg = '写入失败,目标目录无写入权限';default:exit('未定义错误');}return $msg;}
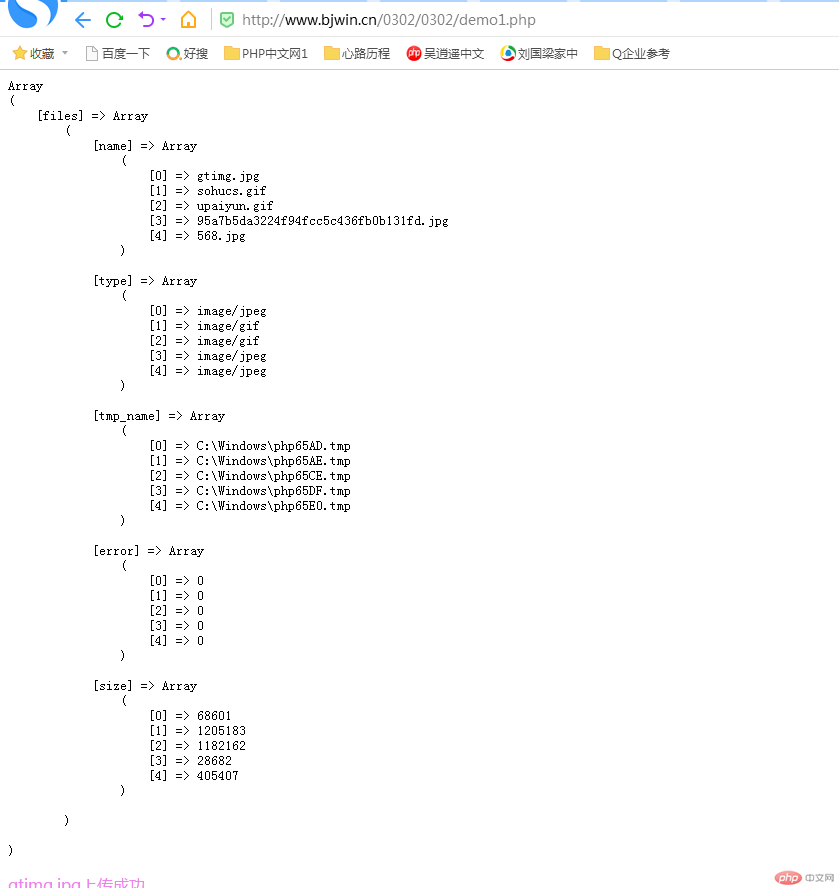
<?php// 多文件上传: 批量上传,允许同时选择多个printf('<pre>%s</pre>', print_r($_FILES, true));$files = $_FILES['files'] ?? null;foreach ($files['error'] as $key => $error) {if ($error === 0) {$path = 'uploads/' . md5(strstr($files['name'][$key] . 'helloworld', '.', true)) . strstr($files['name'][$key], '.');if (move_uploaded_file($files['tmp_name'][$key], $path)) {echo "<p style=\"color:violet\">{$files['name'][$key]}上传成功</p>";echo "<img src='{$path}' width='260' />";}} else {include 'bank.php';echo upload_error($error);}}?><!DOCTYPE html><html lang="zh-CN"><head><meta charset="UTF-8"><meta http-equiv="X-UA-Compatible" content="IE=edge"><meta name="viewport" content="width=device-width, initial-scale=1.0"><title>多文件上传</title></head><body><form action="" method="post" enctype="multipart/form-data"><fieldset><legend>多文件上传</legend><input type="hidden" name="MAX_FILE_SIZE" value="10485760"><!-- 添加 multipart name的值写成php数组的格式 --><input type="file" multiple name="files[]"><button>上传</button></fieldset></form></body></html>
图示:


二 MVC服务容器管理依赖注入
MVC:
M-模型(数据库相关的操作),
V-视图(页面,html),
C-控制器(功能:1.获取数据 2.选择视图)
依赖注入: 简单那来说就是为了解决对象之间的耦合(在一个类中调用其他类的实例)
方法: 在类的外部实例化其他类, 然后以参数的方式传入
服务容器: 将外部依赖(需要引用的外部类实例)进行统一的管理
<?phpnamespace mvc_demo;use PDO;// 模型类class Model{// 获取数据public function getData(){$pdo = new PDO('mysql:dbname=phpedu', 'root', 'root');$stmt = $pdo->prepare('select * from staffs limit 10');$stmt->execute();return $stmt->fetchAll(PDO::FETCH_ASSOC);}}
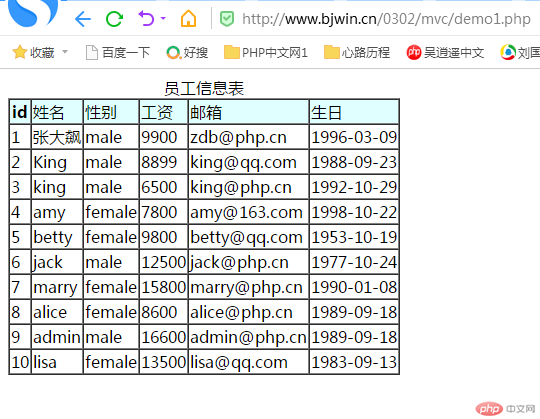
<?phpnamespace mvc_demo;// 视图class View{// 数据展示public function fetch($data){$table = '<table border="1" cellspacing="0">';$table .= '<caption>员工信息表</caption><tr bgcolor="lightcyan"><th>id</th><td>姓名</td><td>性别</td><td>工资</td><td>邮箱</td><td>生日</td></tr>';foreach ($data as $staff) {$table .= '<tr>';$table .= '<td>' . $staff['sid'] . '</td>';$table .= '<td>' . $staff['name'] . '</td>';$table .= '<td>' . $staff['gender'] . '</td>';$table .= '<td>' . $staff['salary'] . '</td>';$table .= '<td>' . $staff['email'] . '</td>';$table .= '<td>' . $staff['birthday'] . '</td>';$table .= '</tr>';}$table .= '</table>';return $table;}}
<?php// 控制器// 复用构造器实现外部依赖对象的共享namespace mvc_demo;// 加载模型require 'Model.php';// 加载视图require 'View.php';class Controller3{private $model;private $view;// 构造方法,将依赖的外部对象,在类实例化就导入到当前的类中public function __construct($model, $view){$this->model = $model;$this->view = $view;}// 1. 获取数据, 2. 选择视图public function index(){//1. 获取数据$data = $this->model->getData();//2. 渲染视图return $this->view->fetch($data);}public function hello (){// $model 用不了?// 如果让依赖的外部对象共享// $this->model}}// 客户端测试// 创建控制器对象$model = new Model();$view = new View();$controller = new Controller3($model,$view);echo $controller->index();
<?php// 模型: Model, 员工信息表$pdo = new PDO('mysql:dbname=phpedu', 'root', 'root');$stmt = $pdo->prepare('select * from staffs limit 10');$stmt->execute();$staffs = $stmt->fetchAll(PDO::FETCH_ASSOC);?><!DOCTYPE html><html lang="zh-CN"><head><meta charset="UTF-8"><meta http-equiv="X-UA-Compatible" content="IE=edge"><meta name="viewport" content="width=device-width, initial-scale=1.0"><title>员工信息表</title></head><body><!-- 以下就是视图 View --><table border="1" cellspacing="0"><caption>员工信息表</caption><tr bgcolor="lightcyan"><th>id</th><td>姓名</td><td>性别</td><td>工资</td><td>邮箱</td><td>生日</td></tr><?php foreach ($staffs as $staff) : ?><tr><td><?=$staff['sid']?></td><td><?=$staff['name']?></td><td><?=$staff['gender']?></td><td><?=$staff['salary']?></td><td><?=$staff['email']?></td><td><?=$staff['birthday']?></td></tr><?php endforeach ?></table></body></html>
图示: