

镜像下载、域名解析、时间同步请点击 阿里云开源镜像站
# yum –y install gcc gcc-c++ openssl openssl-devel pcre pcre-devel zlibzlib-devel
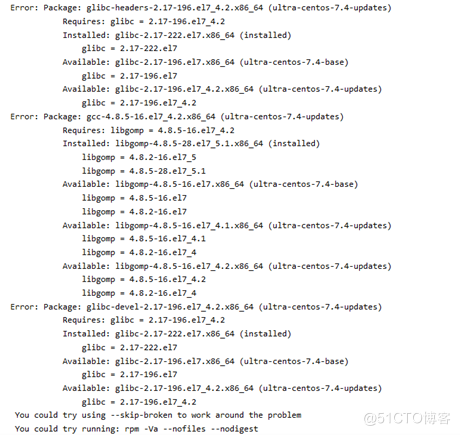
如yum安装依赖包时报错:

解决办法:
#~ wget -O /etc/yum.repos.d/CentOS-Base.repo http://mirrors.aliyun.com/repo/Centos-7.repo##可连外网的情况下,下载一个网络源
#~ sed -i 's/$releasever/7/g' /etc/yum.repos.d/CentOS-Base.repo##将整个文件中的$releasever替换为当前的版本号,例如我当前Centos版本号为7
#~ yum repolist##显示已启用的yum存储库的列表
或报错 :error: Failed dependencies: krb5-devel(x86-64)
解决办法: 直接yum下载即可
#~ yum –y iinstall krb5-devel重新安装依赖包即可
找一固定目录上传nginx安装包
rz nginx-1.18.0.tar.gz
#~ tar xzvf nginx-1.18.0.tar.gz ##解压安装包#~ cd nginx-1.18.0
#~ ./configure --prefix=/usr/local/nginx-1.18.0/nginx 配置指定安装目录#~ make && make install 编译安装#~ echo $? 检验执行结果执行完命令后,在指定的安装目录里如果看到了conf和sbin目录,说明nginx基本安装成功

然后进入nginx.conf文件里,修改配置文件
#~ vim conf/nginx.conf

保存退出
进入sbin目录中,启动nginx
#~ ./nginx#~ ps –ef |grep nginx 查看nginx是否启动
直接使用nginx命令,需创建软连接:
ln –s /usr/local/nginx-1.18.0/nginx/sbin/nginx /usr/local/bin