


镜像下载、域名解析、时间同步请点击 阿里云开源镜像站
WSL全称为Windows Subsystem for Linux,官网译为:适用于 Linux 的 Windows 子系统 (WSL)。
官方文档直达:适用于 Linux 的 Windows 子系统文档 | Microsoft Docs
WSL1和WSL2的比较:
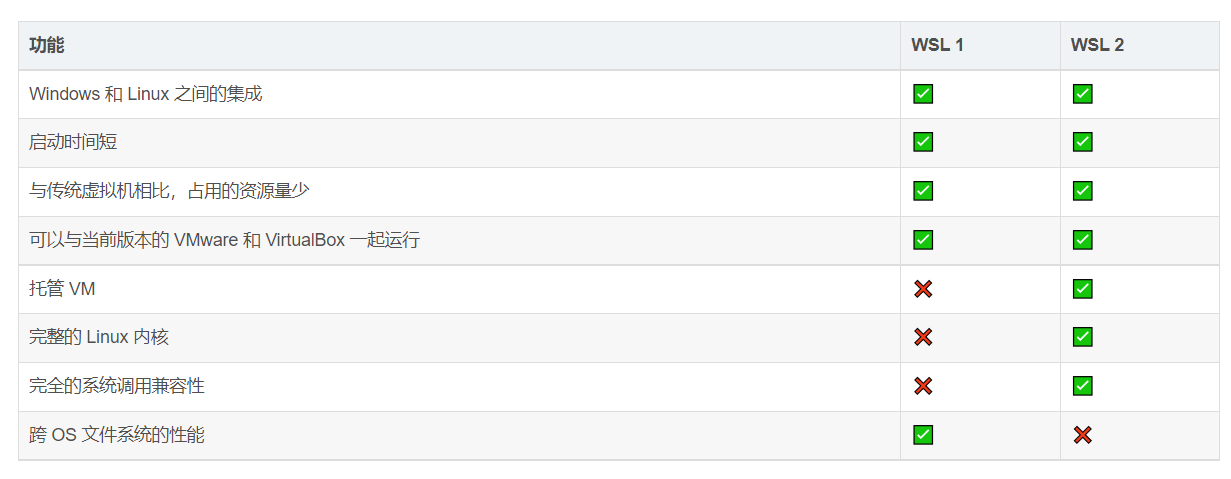
官方解释:可让开发人员直接在 Windows 上按原样运行 GNU/Linux 环境(包括大多数命令行工具、实用工具和应用程序),且不会产生传统虚拟机或双启动设置开销。
我的观点:日常生活中程序的开发离不开Linux,而Windows的GUI界面又是我们常用的(微信、Office等)。我们可以有很多种方式使用Linux,如:

重点:Windows与Linux子系统将共用同一文件系统!!! 我们可以在WSL中使用三剑客命令查询分析windows文档、日志、使用shell命令或者bash脚本运行存储在windows中的linux程序、甚至在WSL中创建docker容器,在windows下使用docker desktop进行可视化管理。
总结:WSL2让我们既拥有Windows的操作界面又拥有Linux的命令行工具。
WSL 2 需要启用 Windows 10 的 “虚拟机平台” 特性。它独立于 Hyper-V,并提供了一些在 Linux 的 Windows 子系统新版本中可用的更有趣的平台集成。
要在 Windows 10(2004)上启用虚拟机平台,请以管理员身份打开 PowerShell 或 cmd 并运行:
dism.exe /online /enable-feature /featurename:VirtualMachinePlatform /all /norestart
要在 Windows 10(1903,1909)上启用虚拟机平台,请以管理员身份打开 PowerShell或 cmd 并运行:
Enable-WindowsOptionalFeature -Online -FeatureName VirtualMachinePlatform -NoRestart
为了确保所有相关部件都整齐到位,您应该在此时重启系统,否则可能会发现事情没按预期进行。

本次安装环境
处理器 Intel® Core™ i5-10210U CPU @ 1.60GHz 2.11 GHz
机带 RAM 8.00 GB (7.79 GB 可用)
系统类型 64 位操作系统, 基于 x64 的处理器
操作系统 Windows 10 家庭中文版
注意:本次安装之前没安装过WSL和Ubuntu,只运行过VMware虚拟机。
检查是否可以安装
您的电脑需要以下配置:
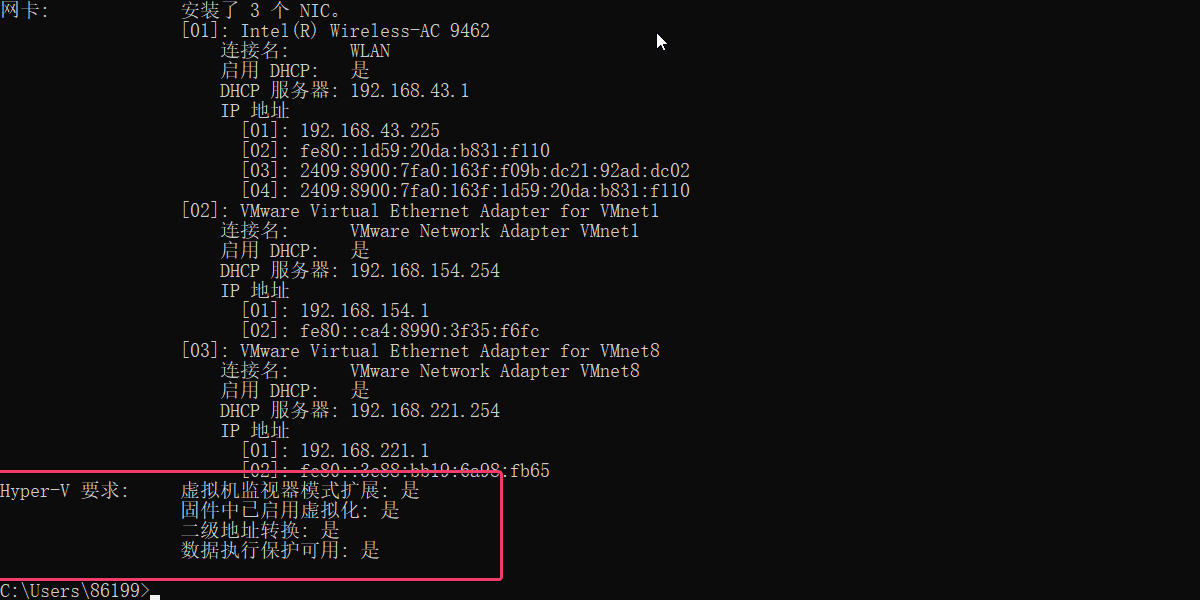
查看是否支持Hyper-V的方法:
systeminfo
比如我的电脑就可以支持
用管理员身份运行PowerShell
wsl --install
–install 命令执行以下操作:
注意: 上述命令仅在完全未安装 WSL 时才有效,如果运行 wsl —install 并查看 WSL 帮助文本,请尝试运行 wsl —list —online 以查看可用发行版列表并运行 wsl —install -d <DistroName> 以安装发行版。
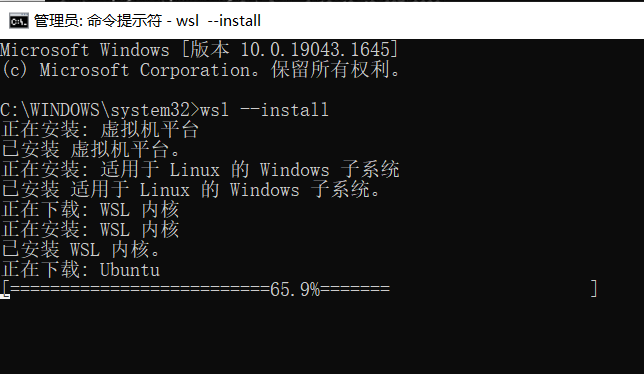
等待一会会,去打局游戏再回来…
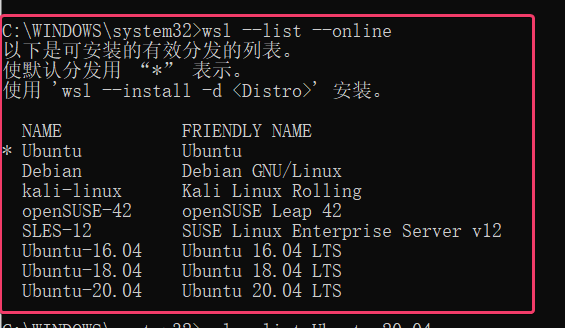
顺便查看了一下可以支持的linux系统,大便、Kali、OpenSUSE、乌班图都有,默认安装Ubuntu。
wsl --list --online
安装了好一会儿了。。。。发现还是在85.7%,等不下去了CTRL+C了。
重新安装,这次安装指定的系统
wsl --install -d Ubuntu-20.04

重启,然后成功了!
接下来打开已安装的Ubuntu,这时候会提示你配置用户和密码
配置完毕!即可享用
测试一下,用命令 cd / && ls -la 查看所有文件,如下(是不是很熟悉)
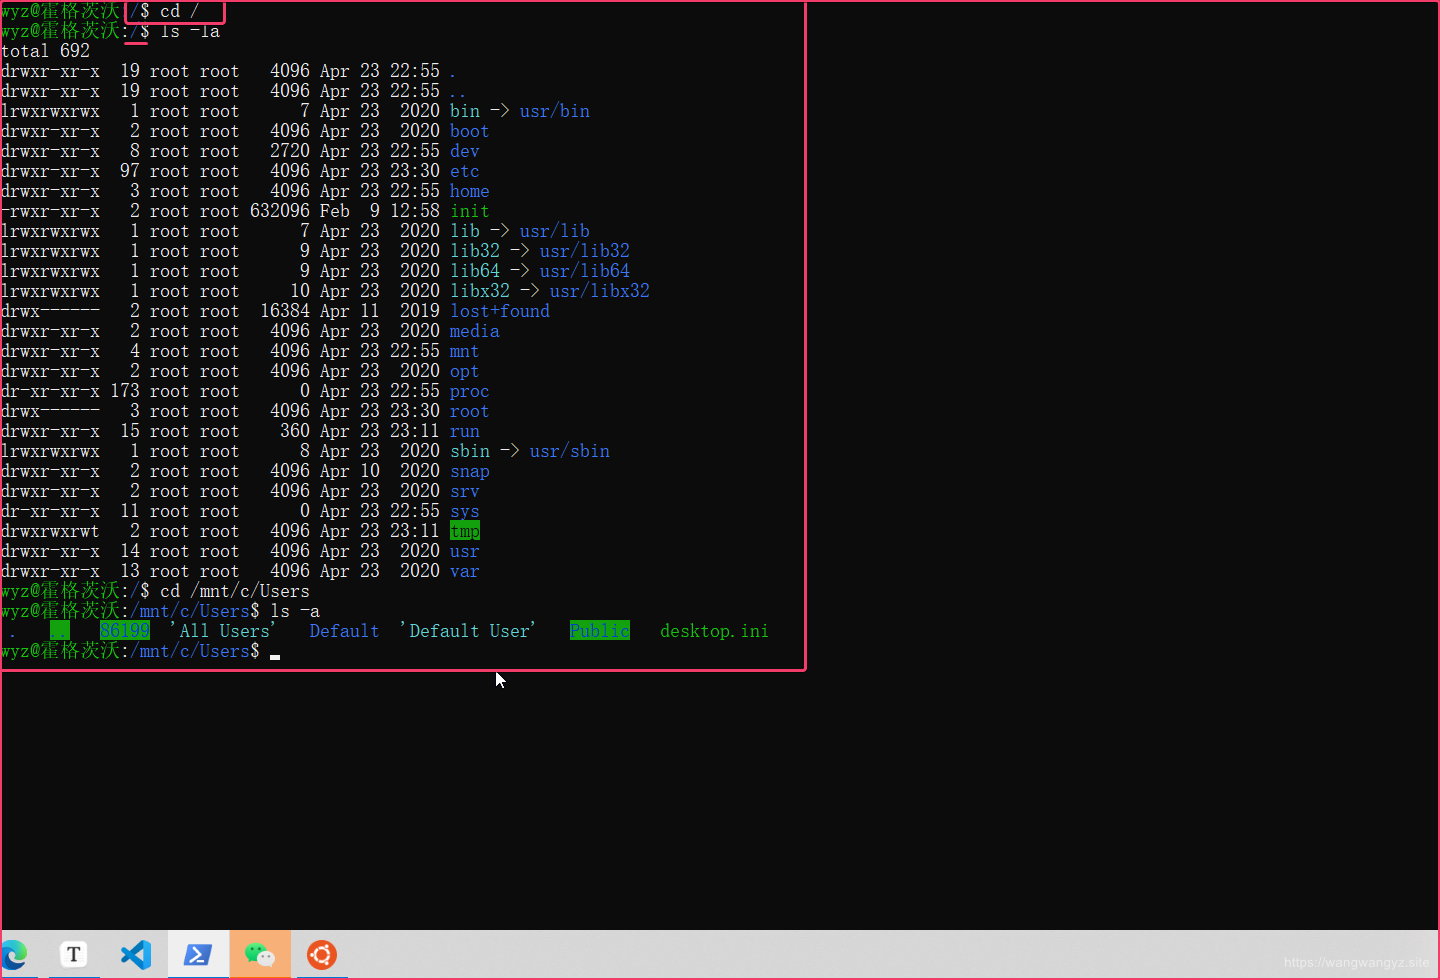
更新一下镜像源:
sudo vim /etc/apt/sources.list
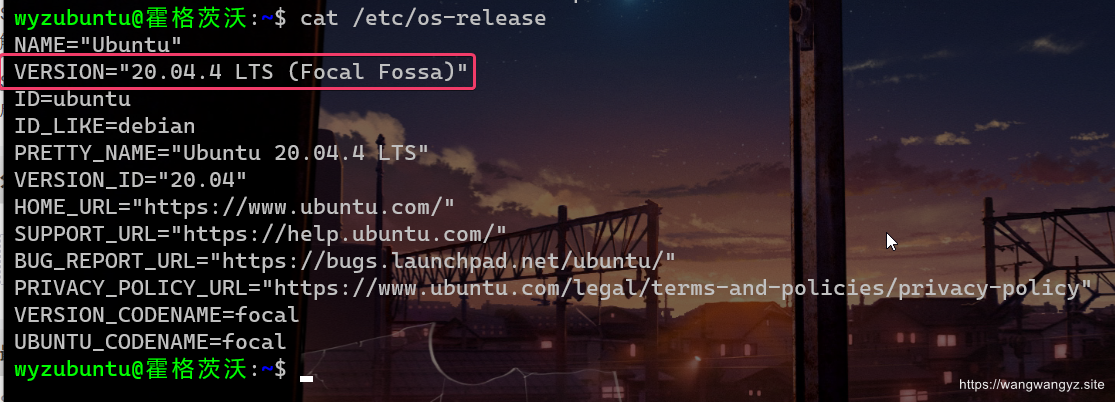
将官方的源都注释掉,换成的下面即可(我的是Ubuntu20.04,别的版本或者源可以自行网上搜)
deb https://mirrors.aliyun.com/ubuntu/ focal main restricted universe multiversedeb-src http://mirrors.aliyun.com/ubuntu/ focal main restricted universe multiversedeb https://mirrors.aliyun.com/ubuntu/ focal-security main restricted universe multiversedeb-src https://mirrors.aliyun.com/ubuntu/ focal-security main restricted universe multiversedeb https://mirrors.aliyun.com/ubuntu/ focal-updates main restricted universe multiversedeb-src http://mirrors.aliyun.com/ubuntu/ focal-updates main restricted universe multiversedeb https://mirrors.aliyun.com/ubuntu/ focal-proposed main restricted universe multiversedeb-src https://mirrors.aliyun.com/ubuntu/ focal-proposed main restricted universe multiversedeb https://mirrors.aliyun.com/ubuntu/ focal-backports main restricted universe multiversedeb-src https://mirrors.aliyun.com/ubuntu/ focal-backports main restricted universe multiverse
Debian系统分好几种,wheezy、jessie、stretch、buster,它们分别对应:

Debian 11(Bullseye)国内镜像源:
阿里
deb https://mirrors.aliyun.com/debian/ bullseye main non-free contribdeb-src https://mirrors.aliyun.com/debian/ bullseye main non-free contribdeb https://mirrors.aliyun.com/debian-security/ bullseye-security maindeb-src https://mirrors.aliyun.com/debian-security/ bullseye-security maindeb https://mirrors.aliyun.com/debian/ bullseye-updates main non-free contribdeb-src https://mirrors.aliyun.com/debian/ bullseye-updates main non-free contribdeb https://mirrors.aliyun.com/debian/ bullseye-backports main non-free contribdeb-src https://mirrors.aliyun.com/debian/ bullseye-backports main non-free contrib
Certificate verification failed: The certificate is NOT trusted——更新Ubuntu20.04、Debian11的过程中遇到的证书验证失败问题。
解决办法:
sudo nano /etc/apt/sources.list
sudo apt update
sudo apt install --reinstall ca-certificates
参照步骤一将镜像源文件改回https
再次更新源
sudo apt update && sudo apt upgrade
Windows Terminal能帮助我们管理命令行工具、PowerShell和WSL等Shell用户的工具,能为我们提供最佳的 WSL 体验。
下载方式
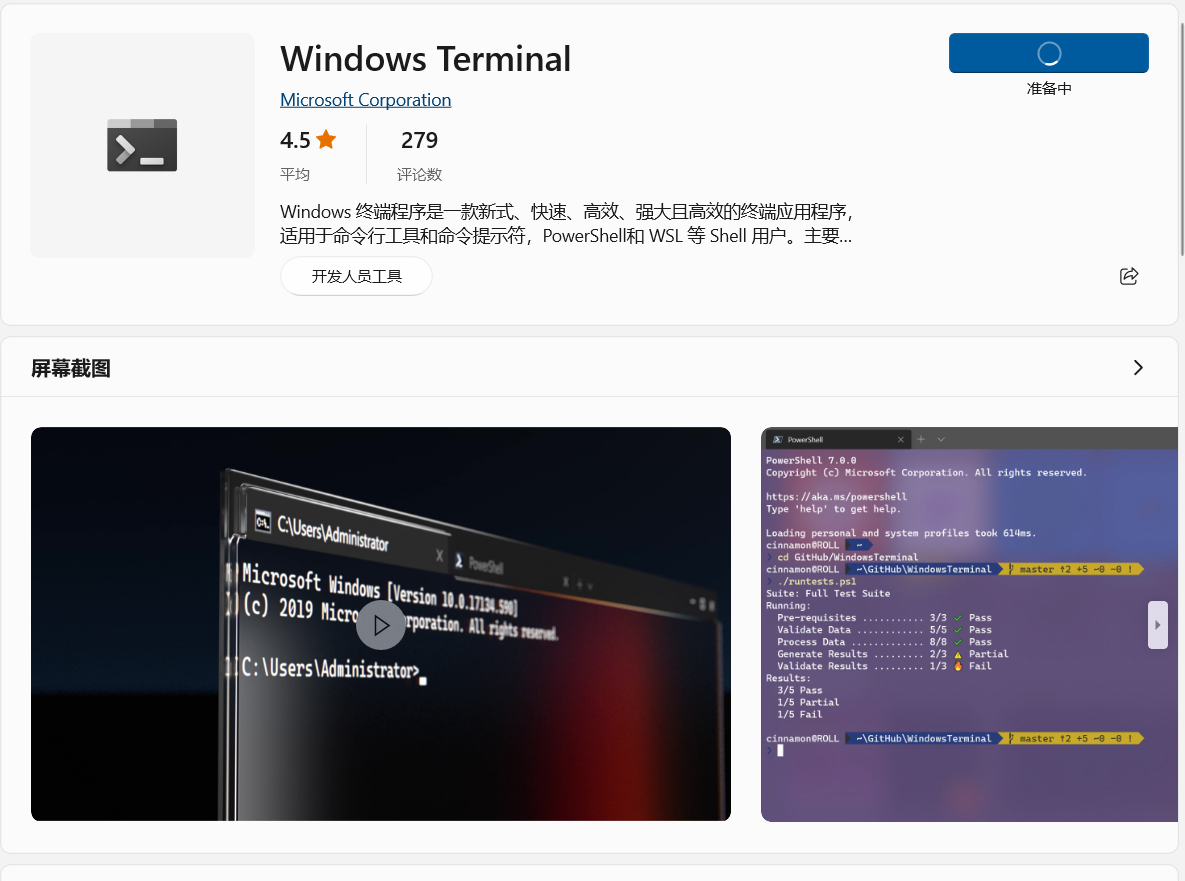
下载安装即可。功能确实很多哈哈哈,效果:
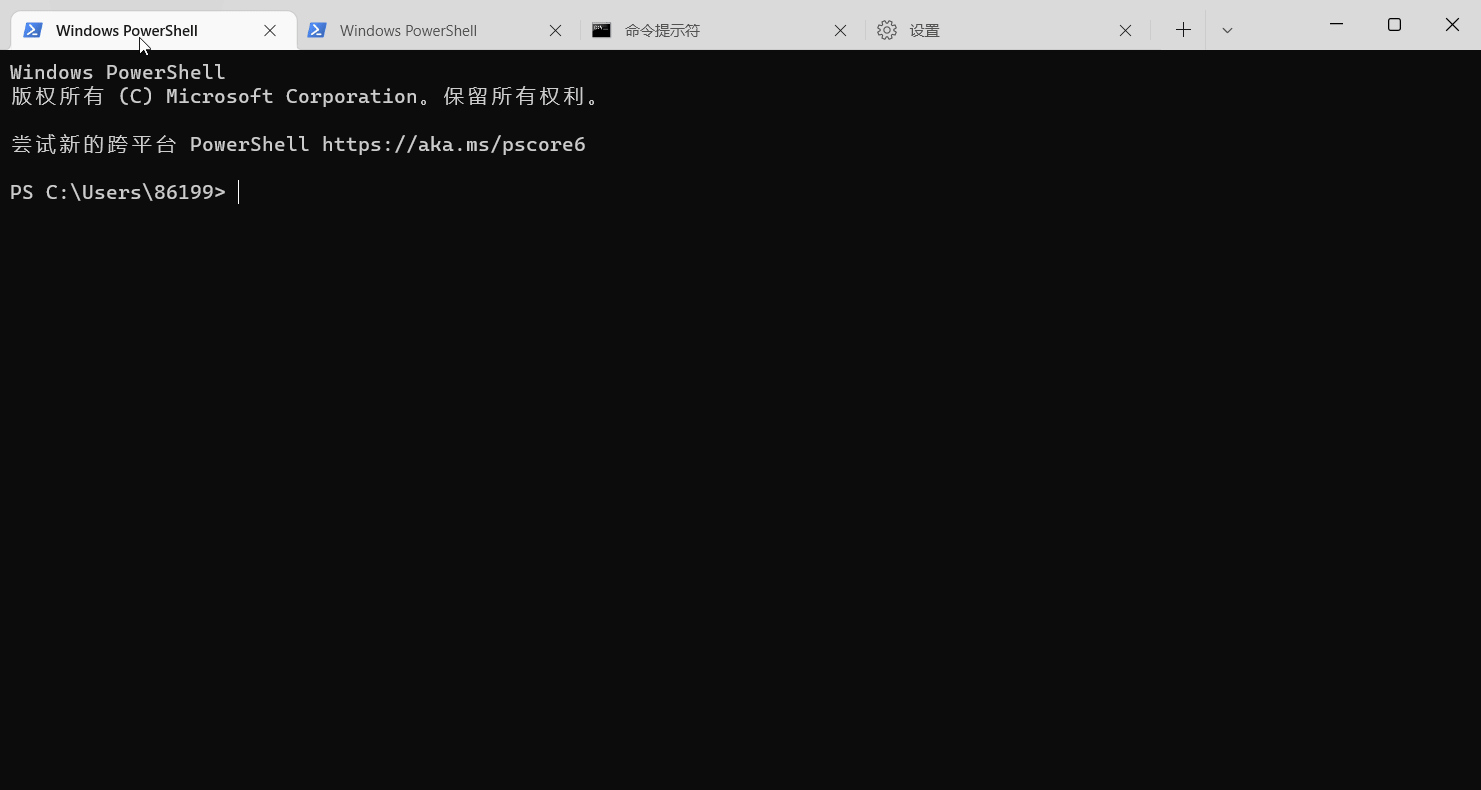
遇到的问题:过程中下载失败了好多次我不断点击重新下载才成功。


本文转自:https://blog.csdn.net/weixin_51245887/article/details/124393376