

镜像下载、域名解析、时间同步请点击 阿里云开源镜像站
作为一个半路出家的linuc用户,coredump这个问题太让人抓狂了,网上找了好多都是不全面,不适应或者看不懂;现在终于解决了,记录一下防止以后出现还是无解,同时也分享给大家,希望大家能少踩一些坑。
core dump又叫核心转储, 当程序运行过程中发生异常, 程序异常退出时, 由操作系统把程序当前的内存状况存储在一个core文件中, 叫core dump. (linux中如果内存越界会收到SIGSEGV号,然后就会core dump)。产生段错误的原因大致上有三类:访问不存在的内存地址、访问系统保护的内存地址和访问只读的内存地址。
网上的资料虽然比较乱,但是也提供了一个解决问题的思路:
(1)设置core文件,找到段错误生成的core文件
(2)利用core文件,使用GDB测试找到问题所在
先看问题:

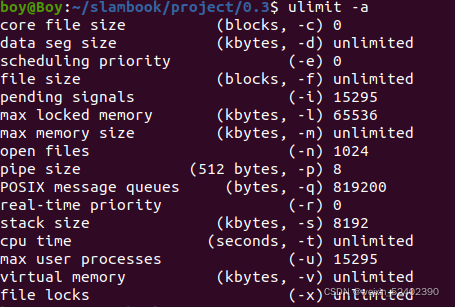
3.1.1 使用ulimit -a命令查看core文件大小限制

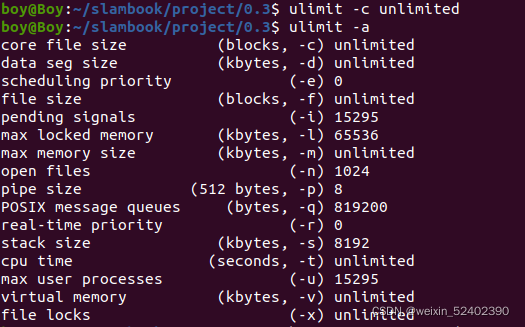
可以看到core file size的大小为0,文件根本装不进,需要使用 ulimit -c unlimited 修改这个文件的大小

修改成功后,按照网上的说法,再运行程序就会生成core文件,一般路径和可执行程序一个路径。但是在ubuntu20.04下,怎么也找不到去哪里了(反正我的是这样),因此需要查看core文件的生成路径。
3.1.2 在终端输入 cat /proc/sys/kernel/core_pattern 查看core的生成路径。

转到这个路径下去找是找不到core文件,这是因为ubuntu的服务apport.service。自动生成崩溃报告,官方为了自动收集错误的。我们肯定想到修改路径的办法,那就演示一下会怎么样。
core的设置主要有两个命令:
//控制core文件的文件名中是否添加pid作为扩展echo "1" > /proc/sys/kernel/core_uses_pid//设置core文件的输出路径和输出文件名,这里我的路径是/home/boy/corefile,文件名就是后面的部分echo "/home/boy/corefile/core-%e-%p-%t"> /proc/sys/kernel/core_pattern//参数说明%p - insert pid into filename 添加pid%u - insert current uid into filename 添加当前uid%g - insert current gid into filename 添加当前gid%s - insert signal that caused the coredump into the filename 添加导致产生core的信号%t - insert UNIX time that the coredump occurred into filename 添加core文件生成时的unix时间%h - insert hostname where the coredump happened into filename 添加主机名%e - insert coredumping executable name into filename 添加程序名
我直接用echo “/home/boy/corefile/core-%e-%p-%t”> /proc/sys/kernel/core_pattern 进行修改,结果如图

3.1.3 修改core文件生成路径
因为我们修改的core_pattern文件是只读文件,没法这样修改。所以要换一种思路,修改不了就先停掉apport.service,这个服务对我们来说基本没用。
错误报告的部分操作命令如下:
//1.启用错误报告sudo systemctl enable apport.service//或sudo service apport start//2.关闭错误报告sudo systemctl disable apport.service//或sudo service apport stop
所以,用sudo service apport stop关闭错误报告后我们再看core文件的路径会怎么样

可以看到,路径发生了变化,再运行一次试试,看现在能不能生成core

可以看到,运行完后用ll查看生成了core文件,方法有限,下面就是GDB调试找到错误的位置了。
GDB详细说明请看参考资料大佬的整理,这里只记录一下我怎么测试的
3.2.1 启动gdb
输入gdb 运行文件 core文件,例如:
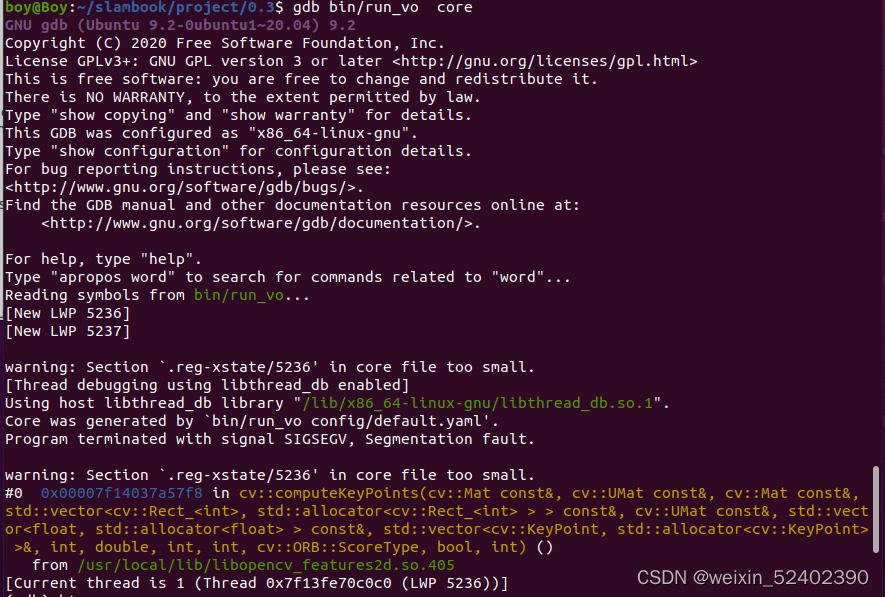
gdb bin/run_vo core
结果如下:

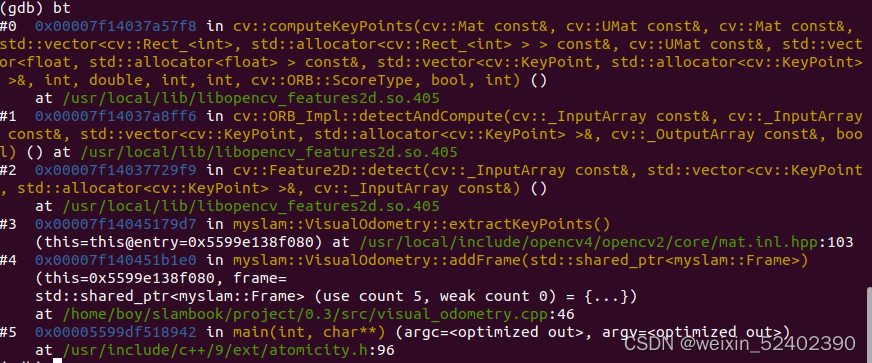
可以看到对内存出现非法访问时将收到段错误信号SIGSEGV下面就是出错的位置,我们还可以使用backtrace回溯定位问题。
3.2.2 输入bt回溯定位

可以看到现在的报告更加详细。
到此,coredump问题已经解决,输入q,即可退出gdb,剩下就是修改问题部分了。
原文链接:https://blog.csdn.net/weixin_52402390/article/details/123900689