Correction status:qualified
Teacher's comments:


| API名称 | 描述 |
|---|---|
| createElement | 创建新元素 |
| append | 追加操作 |
| before | 在某一个元素节点之前插入 |
| after | 在某一个元素节点之后插入 |
| cloneNode | 克隆元素节点 |
| replaceChild | 替换元素 |
| remove | 移除元素 |
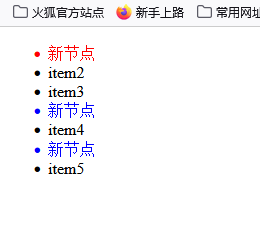
效果截图:
/* * 1. createElement(ele): 创建新元素, document上调用* 2. append(string/ele): 追加到父级最后子节点后,在父节点上调用* 3. before(string/ele): 在某元素之前插入节点, 在当前元素上调用* 4. after(string/ele): 在某元素之后插入节点, 在当前元素上调用* 5. cloneNode(true): 克隆节点(true:包含子节点),在要被克隆的节点上调用* 6. replaceChild(ele,pos): 替换子元素,在父级节点上调用* 7. remove(ele): 移除元素 谁调用删谁*///createElement():创建新元素 在当前文档document上调用//创建一个ul元素const ul = document.createElement("ul");// 将ul追加到body中document.body.append(ul);//使用循环添加五个lifor (let i = 0; i < 5; i++) {//创建一个li元素const li = document.createElement("li");// 将li追加到ul中ul.append(li);// 追加文本内容到li里li.append("item" + (i + 1));}//添加一个新元素到item2前面const li = document.createElement("li");li.append("新节点");li.style.color = "red";let item = document.querySelector("li:nth-of-type(2)");// 在某个元素节点上调用传的是要插入的值item.before(li);//添加一个新元素到item3后面const li1 = document.createElement("li");li1.append("新节点");li1.style.color = "blue";let item1 = document.querySelector("li:nth-of-type(4)");// 在某个元素节点上调用传的是要插入的值item1.after(li1);//克隆元素// cloneNode:在要被克隆的元素节点上调用const li3 = li1.cloneNode(true);let item2 = document.querySelector("li:last-of-type");item2.before(li3);//修改元素// replaceChild:修改对应的节点 用新节点替换就节点 在父节点上调用const newNode = document.createElement("li");newNode.style.color = "red";newNode.append("替换的");const jiu = document.querySelector("li:first-of-type");ul.replaceChild(newNode, jiu);// insertAdjacentElement(插入位置,元素);// 插入位置有四个// afterBegin: 起始标签后面// beforeBegin: 起始标签前面// afterEnd: 结束标签后面// beforeEnd: 结束标签之前// 在ul前面插入一个大标题const p = document.createElement("h3");p.append("标题");ul.insertAdjacentElement("beforebegin", p);//在ul之后插入大标题const p1 = document.createElement("h3");p1.append("标题");ul.insertAdjacentElement("afterend", p1);//删除元素// removenewNode.remove();p.remove();p1.remove();

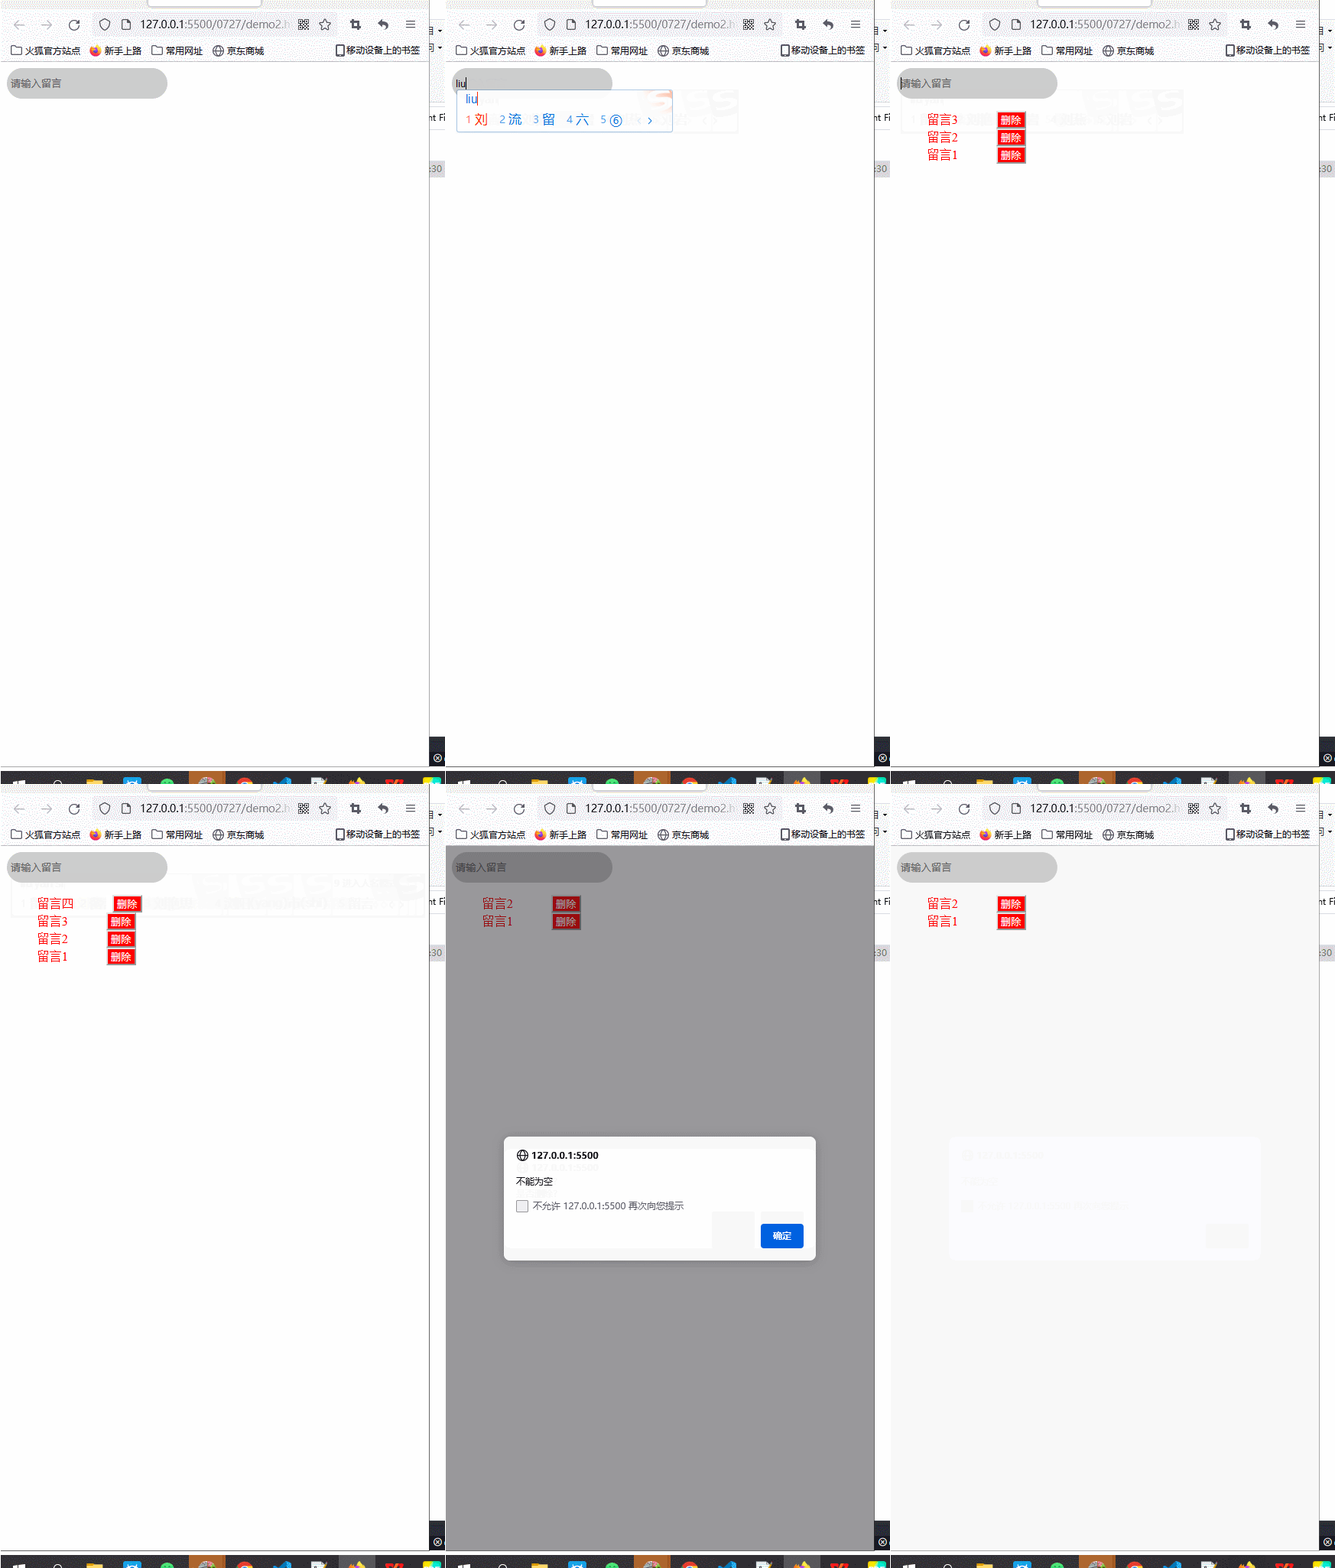
<div><input type="" onkeydown="ly(this)" placeholder="请输入留言" autofocus /><ul class="list"></ul></div><script>const input = document.querySelector("input");input.style.border = "none";input.style.outline = "none";input.style.background = "#ccc";let width = window.getComputedStyle(input).width;width = parseInt(width);input.style.width = 200 + "px";let height = window.getComputedStyle(input).height;height = parseInt(height);input.style.height = 30 + "px";input.style.borderRadius = "20px";input.style.padding = "5px";const ul = document.querySelector("ul");ul.style.listStyle = "none";function ly(e) {if (event.key == "Enter") {// 1.拿到留言板的内容 判断是否为空if (!e.value) {alert("不能为空");return false;e.foucs();} else {// 2.将内容显示到页面中const ul = document.querySelector(".list");const li = document.createElement("li");let neirong = `<li style="color:red">${e.value}<button class="shanchu" onclick="del(this.parentNode)" style="margin-left:50px;width:50px border-radius:10px ; background:red ; color:#fff" >删除</button></li>`;ul.insertAdjacentHTML("afterbegin", neirong);// 3.清空输入框e.value = null;}}}function del(ele) {confirm("是否删除?") ? ele.remove() : false;}</script>