Correction status:qualified
Teacher's comments:


<!DOCTYPE html><html lang="zh-CN"><head><meta charset="UTF-8"><meta http-equiv="X-UA-Compatible" content="IE=edge"><meta name="viewport" content="width=device-width, initial-scale=1.0"><title>dom 增删改</title></head><body><script>// 创建元素document.createElementconst ul = document.createElement('ul');// 添加ul内部元素 append 追加元素 追加内容document.body.append(ul);// 在ul内添加多个li// 方法一for(let i = 0 ; i < 5 ; i++){const li = document.createElement('li');// 给 li给元素 添加内容 注是括弧里面(i+1)li.append('item-'+(i+1));// 在ul内添加liul.append(li);}console.log(ul);console.log('================');// 在某个节点之前插入 before// 创建li 元素const li = document.createElement('li');// ('new item') 添加新的节点 注意括弧;里面的单引号// li 元素 里面添加内容li.append('new item');li.style.color ='red';// 在某个元素之前插入,先获取这个元素// 采用伪类获取const itm = ul.querySelector('li:nth-of-type(3)')// 在获取的元素之前插入新的元素itm.before(li);// 在获取的元素之后插入新的元素// 1、克隆 方法 clon clonNode 克隆节点// 克隆新节点 注意 如果后面(ture) 是,带着节点内容克隆的,否则只克隆节点元素let newnode = li.cloneNode(true);// 在某个节点之后插入itm.after(newnode);// 在某个节点 元素 之前之后添加 insertAdjacentElement// begin 表示开始标签、 end标识结束标签// beforebegin afterbegin beforeend afterendul.style.border = ' 2px solid red ';// 在UL列表前面增加标题const h3 = document.createElement('h3');h3.append('商品');// 开始标签之前插入ul.insertAdjacentElement('beforebegin',h3);// 开始标签之后插入并且插入样式ul.insertAdjacentHTML('beforebegin','<li style = "color:red">之后插入</li>');// 结束标签之前ul.insertAdjacentHTML('beforeend','<li style = "color:red">之后插入</li>');ul.insertAdjacentHTML('beforeend','<h3>你好</h3>');// 元素替换// replaceChild() 在父元素调用// parentNode.replaceChild( 新节点,被替换的节点)const lastNode = ul.querySelector('li:last-of-type');const link = document.createElement('a');link.href = 'http://www.baidu.com';link.append('百度');ul.replaceChild(link,lastNode);// remove 移除// 移除第一个节点ul.firstElementChild.remove;// 移除最后一个节点ul.lastElementChild.remove;// 移除某一个节点// 移除第二个ul.querySelector('li:nth-of-type(2)').remove</script></body></html>

<!DOCTYPE html><html lang="zh-CN"><head><meta charset="UTF-8"><meta http-equiv="X-UA-Compatible" content="IE=edge"><meta name="viewport" content="width=device-width, initial-scale=1.0"><title>js的操作内容</title></head><body><!-- 你好就是内容 内容就是文本 --><!-- <h2>你好</h2> --><div class="box"><style>h2 {color: aqua;}</style><h2>通知</h2><!-- display:none 不可见、 --><span style="display: none"> 注意</span><p>下雨</p></div><script>// 1、textContent() 首选// 返回所有内容,包括 css style display 内容const box = document.querySelector('.box')console.log( '%c'+box.textContent, 'color:red');// 2、innerText() 只输出文本 ,css、style display 内容 不输出console.log( '%c'+box.innerText, 'color:blue');// 3、innerHTML() 与 textContent() 相比只 展示标签,带着标签 次选console.log( '%c'+box.innerHTML, 'color:red');// 举例let p = document.createElement('p');let ul ='<a href = "http://www.baidu.com">百度</a>'p.innerText =ul;box.append(p);// 对象console.log( box);// 4、outerHtml() 返回当前包裹当前元素字符串,也就是源代码 不能用json传递console.log( '%c'+box.outerHTML, 'color:blue');// 替换 内容// box.outerHTML = '<h3 style = "color:red">hello</h3>';// 删除:给一个null相当于删除// box.outerHTML = null ;</script></body></html>

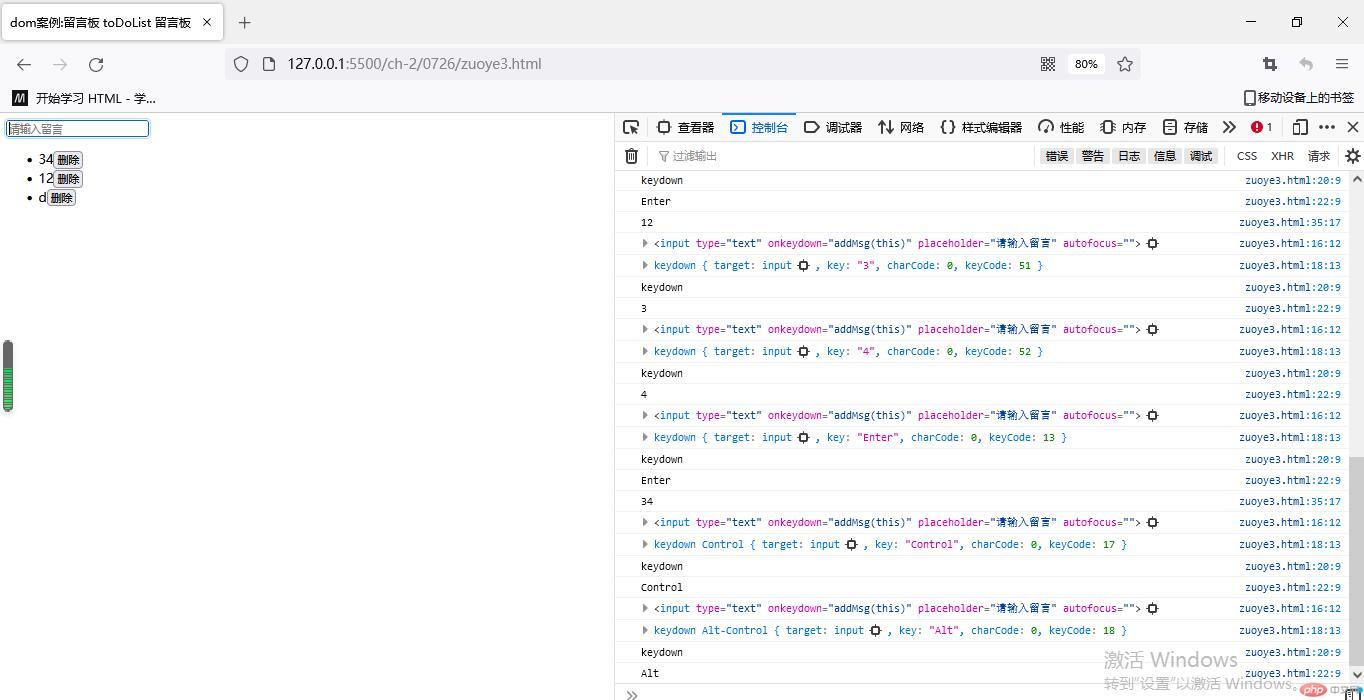
<!DOCTYPE html><html lang="zh-CN"><head><meta charset="UTF-8"><meta http-equiv="X-UA-Compatible" content="IE=edge"><meta name="viewport" content="width=device-width, initial-scale=1.0"><title>dom案例:留言板 toDoList 留言板</title></head><body><!-- placeholder="请输入留言" 提示文字 自动获取焦点autofocus --><!-- onkeydown="" 事件,当键盘按下时触发 this把当前元素 input传入 --><input type="text" onkeydown="addMsg(this)" placeholder="请输入留言" autofocus><ul class="list"></ul><script>function addMsg(anjian) {console.log(anjian);// 事件方法 中有一个对象,表示当前事件:event 按键盘的事件console.log(event);// 按键类型 keytypeconsole.log(event.type);// 获取当前按键的信息 即按 键盘哪个键console.log(event.key);// 判断用户是否提交留言,且 是否按下回车键if(event.key =='Enter'){// 第一步、留言是否为空if(anjian.value.length ==0) {alert ('留言不能为空');// 重置焦点anjian.focus;return fsale;}else{// 添加留言输出控制台console.log(anjian.value);const li =document.createElement('li')li.append(anjian.value);// 2\ 添加到文档 ,且当前插入位置为 依次插入,有问题的// document.querySelector('.list').append(li);//2.1 应该最后输入的插到最开始位置 注意 如果最开始 的值null 会报错,需要做个判断// document.querySelector('.list').firstElementChild.append(li);// 2.2 判断是否已有第一个元素const ul = document.querySelector('.list');// if (ul.firstElementChild != null ){// ul.firstElementChild.before(li);// }// else{// ul.append(li);// }// 以上简化版// 注意括弧里面是 逗号// 进一步简化 就可以省略// console.log(anjian.value);// const li =document.createElement('li')// ul.insertAdjacentHTML('after','<li>${anjian.value}</li>');// 为每条留言添加删除功能 并且增加事件// ele.value = ele.value + '<button onclick="del(this.parentNode)">删除</button>';anjian.value= anjian.value + '<button onclick= "del(this.parentNode)">删除</button>';ul.insertAdjacentHTML('afterbegin' , `<li>${anjian.value}</li>`);// ul.insertAdjacentHTML('afterbegin', `<li>${ele.value}</li>`);// 3\ 清空输入框anjian.value =null;}// 删除功能}}function del(anjian){console.log(anjian);// anjian.remove()// 增加判断if (confirm('是否删除')){anjian.remove()}// 简化 三元运算// confirm('是否删除')?anjian.remove():false;// 另一方式// return confirm('是否删除?') ? (anjian.outerHTML = null) : false;}</script></body></html>

<!DOCTYPE html><html lang="zh-CN"><head><meta charset="UTF-8"><meta http-equiv="X-UA-Compatible" content="IE=edge"><meta name="viewport" content="width=device-width, initial-scale=1.0"><title>自定义属性对象dataset</title></head><body><!--1、预定义属性 id class title 官方的2、 自定义 :data---><div class="btn-group"><!-- 将每个按钮的索引 保存到一个自定义属性,方便用户操作 --><!-- 添加事件 --><!-- 此处 index 省略了dataset- 前缀 --><button data-index="1" onclick="console.log(this.dataset.index);">btn1</button><button data-index="2" onclick="console.log(this.dataset.index);" >btn2</button><button data-index="3" onclick="console.log(this.dataset.index);">btn3</button><div class = "my" data-my-email="123456@qq.com"> 我的邮箱</div></div><script>const div =document.querySelector ('.my');console.log(div);// 注意 my-email 转为驼峰式console.log(div.dataset.myEmail);</script></body></html>

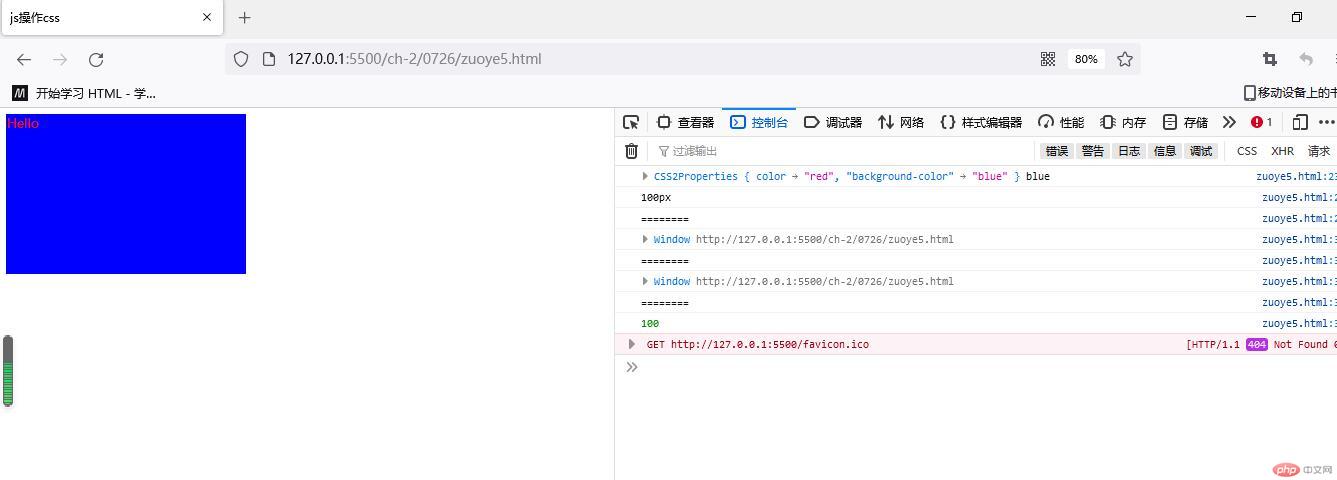
<!DOCTYPE html><html lang="zh-CN"><head><meta charset="UTF-8"><meta http-equiv="X-UA-Compatible" content="IE=edge"><meta name="viewport" content="width=device-width, initial-scale=1.0"><title>js操作css</title><style>/* 文档内部样式 */div {width: 100px;height: 200px;}</style></head><body><div style="color: red; background-color: blue;"> Hello</div><script>// 获取元素样式const div = document.querySelector('div');// 行内样式 获取不到文档内部样式console.log(div.style,div.style.backgroundColor);// 一个元素的最终样式,有外部,内部行内多种级别多个来源确定,所以叫计算样式// getComputedStyle 因为 只读 所以只能通过行内style 来更新console.log(window.getComputedStyle(div).width);console.log('========');// window 全局对象console.log(window);console.log('========');console.log(document.defaultView);console.log('========');// parseFloat parseInt 字符转换。就把 获取的100px 变为 100let width = window.getComputedStyle(div).widthwidth = parseInt (width);console.log(width);div.style.width = width + 200 +'px ';</script><!-- <iframe src="" frameborder="0"></iframe> 添加画中画 --><!-- <iframe src="" frameborder="0"></iframe> --></body></html>
