

一、简要概述
本文简单简述了前端大神研究出的两种布局方式,双飞翼布局和圣杯布局,主要的模式为左右两端固定宽度,中部主体为自适应宽度。
二、双飞翼案例展示及分析
1.头尾部分设置
1.1、首先设置头尾的基本样式,宽度自适应,高度为固定值。
1.2、设置头尾中间内容基本样式,宽度为固定值,高度引用父级高度,首先让内容区域水平居中(margin:auto;)在使文字内容水平垂直居中(text-align:center;line-height:60px),行高设置的方式需和父级高度相一致才能实现水平能居中,具体讲解之前博文有提到过,想了解的小伙伴可以去查看。
2.主体部分设计
2.1、设置主体部分基本样式,首先设置主体的总宽度,这个部分非常重要,因为左右两侧固定的宽度需要写在这个div里,
设置水平居中,margin:auto;。
3.主体中间区域样式设计
3.1、设置主题中间区域样式基本设计,定义宽度,宽度与父级宽度一直,设置为width:100%,左浮动脱离文档流(双飞翼和圣杯布局很像,都需要加上左侧浮动),设置中间区块样式,设置最小高度,min-height这个高度会被真是存在的内容所替代,随后设置左右边距,使区块在正确的地方显示,margin:0 200px。
3.2、左侧部分设置,宽度为固定宽度,高度设置为最小高度,min-height,依旧是用浮动,float:left;*这时候需要将左侧部分拉回到想要正确显示的部分,使用margin!margin!margin! margin-left:-100%,此刻就会显示到我们想要的左侧部分。
3.3、右侧设置与左侧部分相同只需要将margin-left的大小调正为所要拉回的宽度即可。
<!DOCTYPE html>
<html lang="en">
<head>
    <meta charset="UTF-8" />
    <title>双飞翼布局</title>
    <style type="text/css">
    /* 头部底部外框限制高度,宽度自适应 */
    .header,.bottom{
        width:100%;
        height:60px;
        background-color:#D2D3D3;
        /* clear:both; */
    }
    /* 头部底部内容区域 */
    .content{
        width:1000px;
        height:100%;
        background-color:#868686;
        text-align:center;
        line-height:60px;
        margin:auto;
    }
    .container{
        width:1000px;
        overflow:hidden;
        margin:auto;
        background-color:brown;
    }
    .wrap {
        width:100%;
        float: left;
        background-color:orange;
    }
    .wrap .main{
        height:650px;
        background-color:red;
        text-align:center;

    }

    .left{
        float:left;
        width:200px;
        min-height:650px;
        margin-left:-100%;
        background-color:green;
    }
    .right{
        float: left;
        width:200px;
        min-height:650px;
        margin-left:-200px;
        background-color:yellow;
    }

    </style>
</head>
<body>
    <div class="header">
        <div class="content">头部</div>
    </div>
    <!-- 主体 -->
    <div class="container">
        <div class="wrap">
            <div class="main">中部</div>
        </div>
        <div class="left">左侧</div>
        <div class="right">右侧</div>
    </div>
    <div class="bottom">
        <div class="content">底部</div>
    </div>
</body>
</html>点击 "运行实例" 按钮查看在线实例

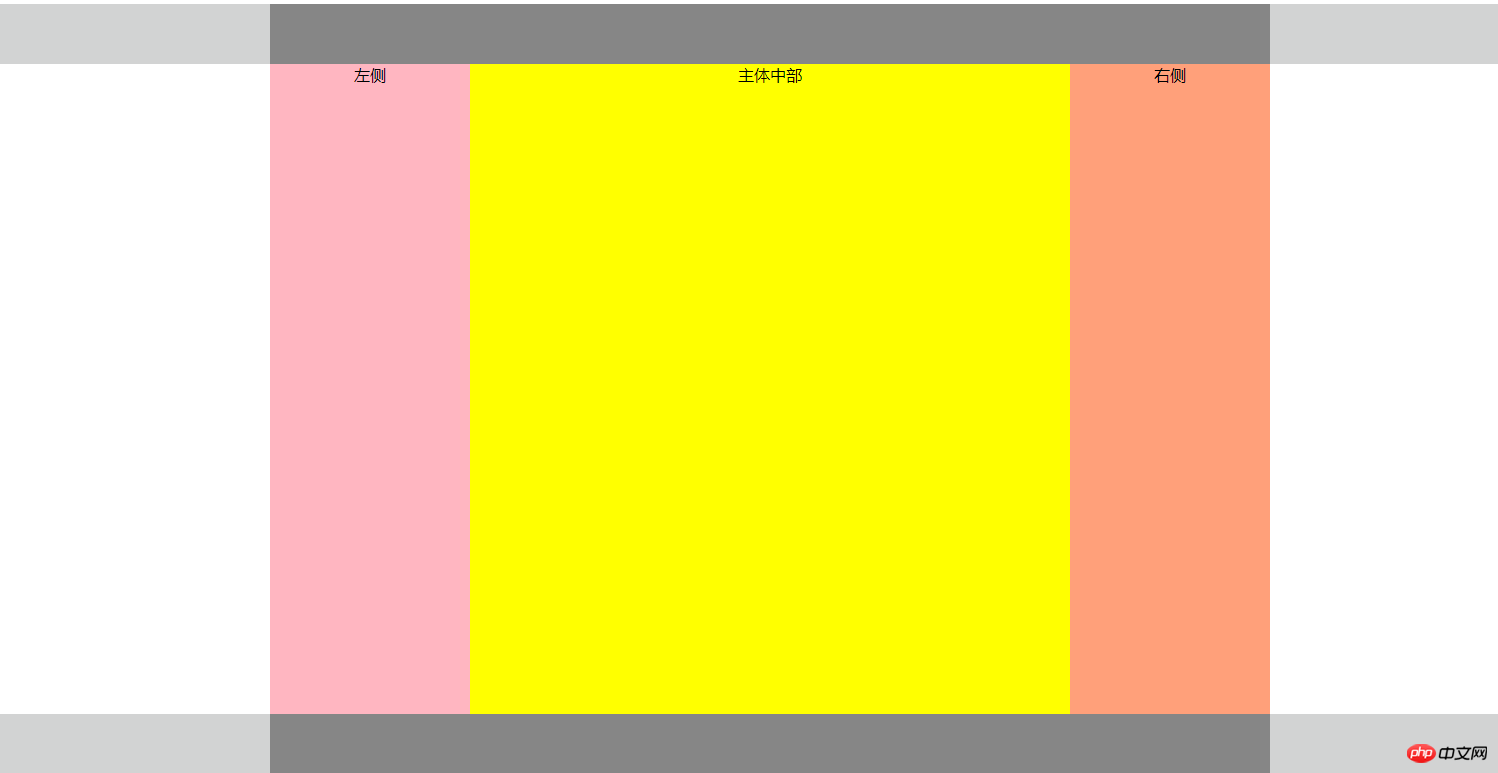
三、圣杯案例展示及分析
1.头尾部分设置
1.1、头部部分和双飞翼的设置是一样的,具体可参照上面的代码。
2.主体部分设计
2.1、设置主体部分基本样式,设置总体宽度,水平居中显示,**上述案例少说了一个浮动,在此进行补充**,使用浮动后需设置overflow:hidden;将多余的浮动块进行隐藏,不然位置会飘。
3.主体中间区域样式设计
3.1、中间的部分依旧是设置最小高度,宽度跟随父级宽度,向左浮动。
3.2、左侧部分设置固定宽度,高度设置为最小高度,浮动向左,此刻和圣杯的原理是一样的,外边距设置同双飞翼设置接下来才是重点!!!相对定位设置,有人说浮动了以后可以进行相对定位吗?不是说浮动以后脱离了文档流吗?没错,浮动是脱离了文档流,但相对定位还是在原本的文档流里,外边距调整好以后,定位为当前文档位置,所以可以定位,利用之前文章中提过的(position:relative;left:)你想要移动的位置。
3.3、右侧设置跟左侧同理。
<!DOCTYPE html>
<html lang="en">
<head>
    <meta charset="UTF-8" />
    <title>圣杯布局</title>
    <style type="text/css">
    .header,.bottom{
        width:100%;
        height:60px;
        background-color:#D2D3D3;
        clear:both;
    }
    /* 头部底部内容区域 */
    .content{
        width:1000px;
        height:100%;
        background-color:#868686;
        text-align:center;
        line-height:60px;
        margin:auto;
    }
    .container{
        width:600px;
        background-color:lightskyblue;
        overflow:hidden;
        margin:auto;
        padding:0 200px;
        text-align:center;

    }
    .container .main{
        width:100%;
        min-height:650px;
        background-color:yellow;
        float:left;
    }
    .container .left{
        width:200px;
        float:left;
        min-height:650px;
        margin-left:-100%;
        position:relative;
        left:-200px;
        background-color:lightpink;
    }
    .container .right{
        width:200px;
        min-height:650px;
        margin-left:-200px;
        position:relative;
        right:-200px;
        background-color:lightsalmon;
        float:left;
    }


    </style>
</head>
<body>
    <!-- 头部 -->
    <div class="header">
        <div class="content"></div>
    </div>
    <!-- 中间主体部分 -->
    <div class="container">
        <div class="main">主体中部</div>
        <div class="left">左侧</div>
        <div class="right">右侧</div>
    </div>
    <!-- 底部 -->
    <div class="bottom">
        <div class="content"></div>
    </div>
</body>
</html>点击 "运行实例" 按钮查看在线实例
圣杯效果图
![]()
