Correction status:qualified
Teacher's comments:


jquery实战之在线相册管理器
代码:demo2.html
<!DOCTYPE html>
<html lang="en">
<head>
	<meta charset="UTF-8">
	<title>jquery实战之在线相册管理器</title>
	<link rel="stylesheet" href="css/style.css">
	<script src="../js/jquery-3.3.1.js"></script>
	<script src="js/demo.js"></script>
</head>
<body>
	<div class="wrap">
		<div class="header">
			 <h2>在线相册管理器</h2>
			 <p>
			 	 <label for="img_url">请输入图片地址</label>
			 	 <!-- <input type="text" name="img_url" id="img_url" placeholder="images/demo.jpg"> -->
			 	 <input type="text" name="img_url" id="img_url" placeholder="images/demo.jpg" value="../images/zly.jpg">
			 </p>
			 <p>请选择图片类型:
			 	 <input type="radio" name="border" id="rect" value="0" checked=""><label>矩形</label>
			 	 <input type="radio" name="border" id="radius" value="10"><label>圆角</label>
			 	 <input type="radio" name="border" id="circle" value="50"><label>圆形</label>
			 </p>
			 <p>
			 图片是否添加阴影:
			 	<select name="shasow" id="">
			 		 <option value="0" selected="">不添加</option>
			 		 <option value="1">添加</option>
			 	</select>
			 </p>
			 <p><button class="add">添加图片</button></p>
		</div>
		<div class="main"><ul></ul></div>
	</div>
</body>
</html>
点击 "运行实例" 按钮查看在线实例
style.css
.wrap{
	width:360px;
	height: auto;
	background-color: lightyellow;
	border:1px solid #cecece;
	color:#363636;
}

.wrap .header{
	padding: 15px;
}

.wrap .header h2{
	text-align: center;
}

.add{
	width: 100px;
	height: 30px;
	border: none;
	cursor: pointer;
	background-color: skyblue;
	color: white;
}

.add:hover{
	background-color: orange;
	font-size:1.1em;
}

.main{
	/*background-color: lightgreen;*/
	overflow: hidden;
}

.main ul{
	margin:0;
	padding: 0;
}

.main ul li{
	list-style: none;
	float:left;
	margin-left: 20px;
	margin-bottom: 10px;
	width:150px;
	height: 200px;
	text-align: center;
}

.main ul li button{
	margin:3px;
	border: none;
	border-radius: 20%;
	background-color: lightgreen;
}

.main ul li button:hover{
	background-color: orange;
	color: white;
	cursor: pointer;
}点击 "运行实例" 按钮查看在线实例
demo.js
$(document).ready(function(){
	//先给按钮添加点击事件
	$('button.add').on('click', function(){
		//获取图片的相关信息
		var img_url = $('#img_url').val()
		//console.log(img_url)
		//1.获取图片地址。	如果用户没有输入图片地址:提示用户
		if(img_url.length == 0){
			alert('请选择一张图片')
			$('#img_url').focus()
			return false
		}

		//2.获取图片类型
		var img_type = $(':radio:checked').val()
		img_type = img_type + '%'
		// console.log(img_type)
		//3.是否添加阴影?
		var shadow = 'none'
		if($(':selected').val() == 1){
			shadow = '3px 3px 3px #666'
		}
		// console.log(shadow)

		//第二步:创建图片元素,并把相关的属性添加上
		var img = $('<img>')
					.prop('src', img_url)
					.width(150)
					.height(150)
					.css({
						'border-radius':img_type,
						'box-shadow':shadow
					})

		//给相册添加移动和删除
		//创建三个按钮
		var before = $('<button>').text('前移')
		var after = $('<button>').text('后移')
		var remove = $('<button>').text('移除')

		//将这三个按钮添加到图片下面
		var li = $('<li>').append(img, before, after, remove)

		//第三步:将图片添加到页面中
		li.appendTo('ul')

		//////////////////////////////////////////////////

		//前移操作:将前一个图片作为插入点,在此之前插入当前图片
		before.click(function(){
			$(this).parent().prev().before($(this).parent())
		})

		//后移操作:将前一个图片作为插入点,在此之前插入当前图片
		after.click(function(){
			$(this).parent().next().after($(this).parent())
		})

		//后移操作:将前一个图片作为插入点,在此之前插入当前图片
		remove.click(function(){
			$(this).parent().remove()
		})
	})
})点击 "运行实例" 按钮查看在线实例
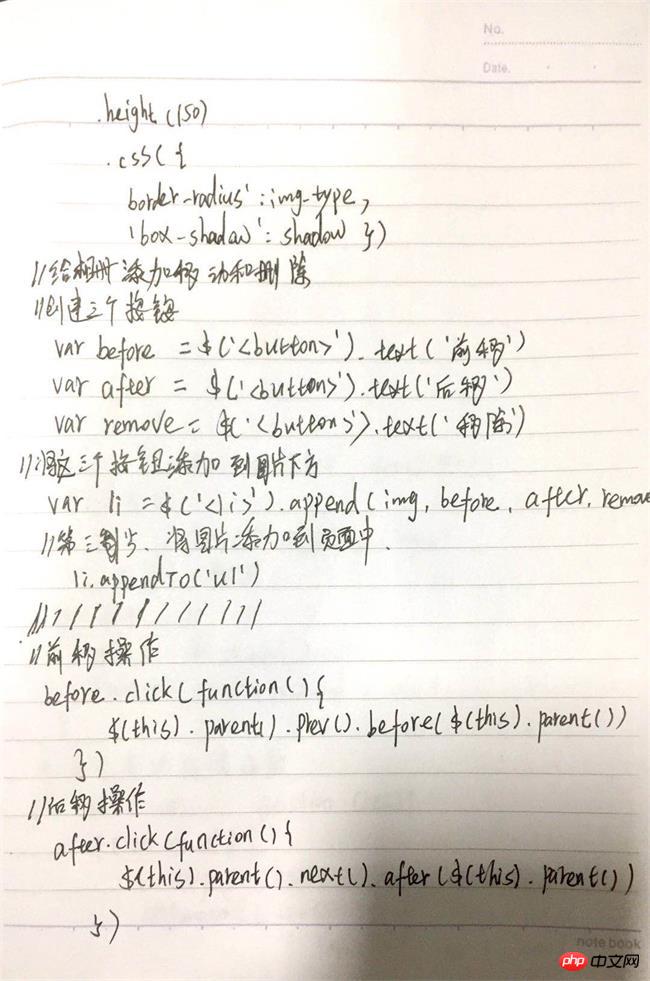
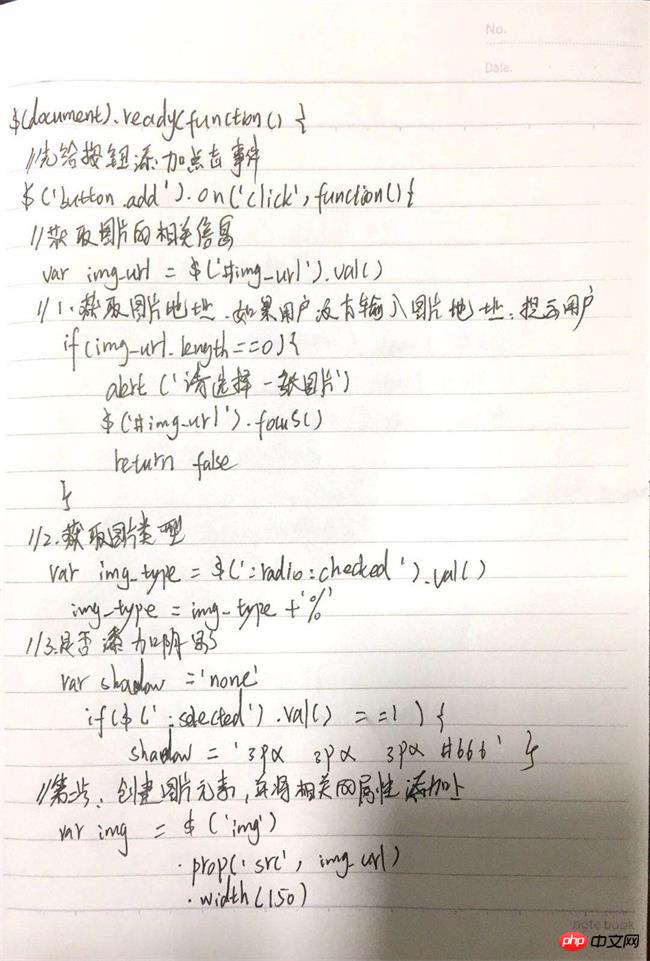
手抄关键js代码


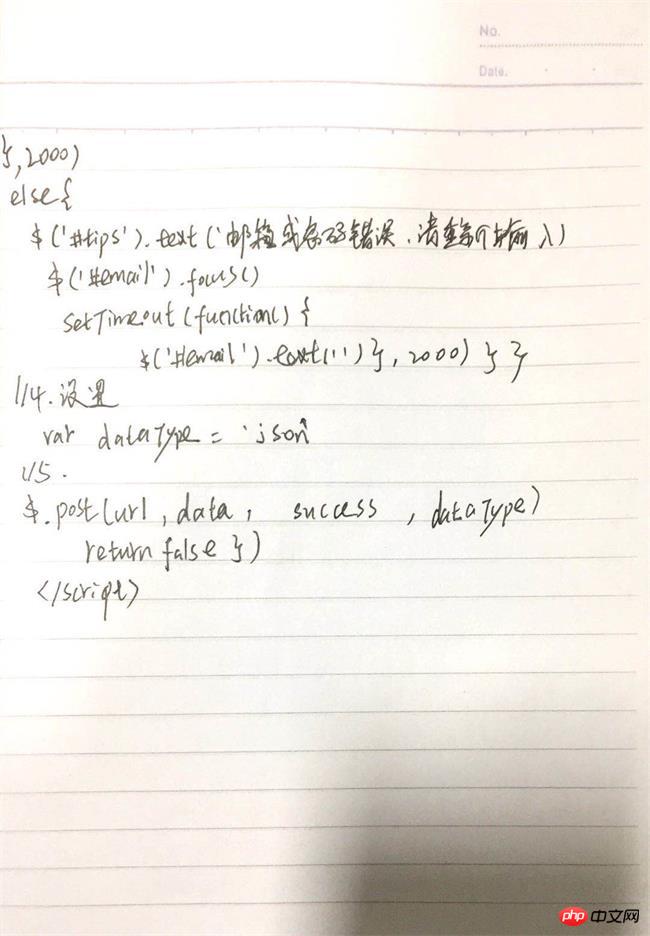
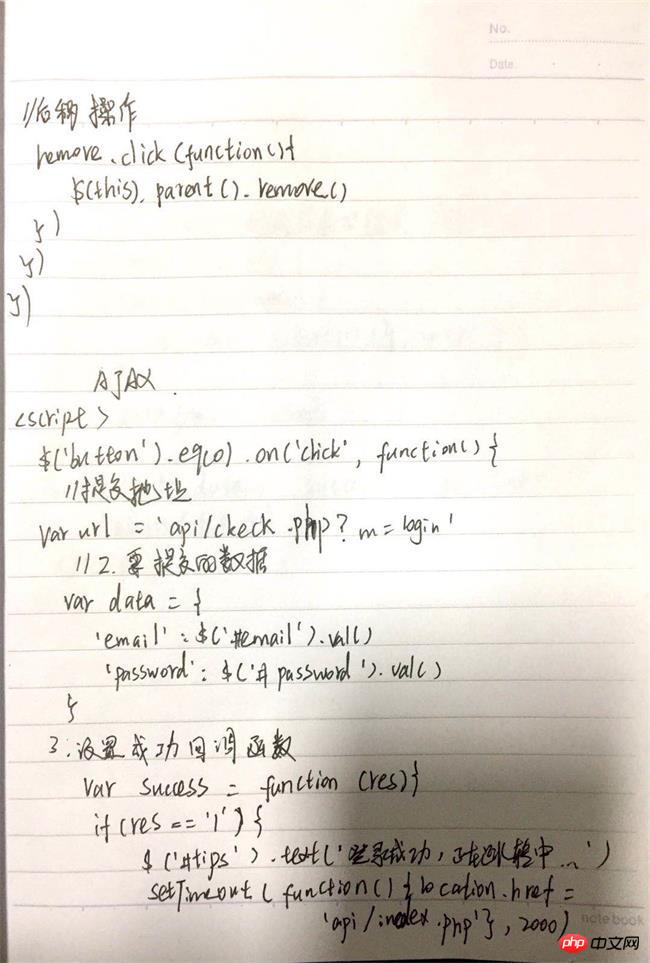
手抄post提交
