

4.8-元素的创建移动及包裹
代码如下:
<!doctype html>
<html lang="en">
<head>
	<meta charset="UTF-8">
	<title>4.8-元素的创建移动及包裹</title>
	<script type="text/javascript" src="http://apps.bdimg.com/libs/jquery/2.1.4/jquery.js"></script>


</head>
<body>
	<div>1. .text()用法:向指定元素内插入内容。只能是文本内容,如有标签,也以文本内容输出。 </div>
	<div></div><br>
	<div>2.  .html() 用法:向指定的元素里插入HTML内容。可以解析标签。见下行示例!</div>
	<div></div><br>
	<div>3. .val()  用法:常用于获取表单元素内容。见下行示例!</div>
	<div> <input type="text"><button>获取</button>在文本框中获入内容,点获取按钮可以获取到输入的内容!</div><br>
	<br><div>上方的三个方法。与原生JS中功能相同:<br>.html()---->.innerHtml()<br>.text()---->.containsText()<br>.val()---->.value()</div>
	<p></p><br>
<div>4. $('<img>')元素的创建 用法:用尖括号包裹就能用来创建元素。然后再通过appendTo()插入到目标节点。下面的圆图就是实现效果。</div>
	<div>5.append()  用法:在目标元素内容后面插入内容。例:点append()按钮可将文本01移到内容06下面。</div>
	<div>6.prepend()  用法:在目标元素内容前面插入内容。例:点prepend()按钮可将文本02移到内容01上面。</div>
	<div>6.after()  用法:在目标元素内容前面插入内容。例:点after()按钮可将文本03移到内容03上面。</div>
	<div>7.before()  用法:在目标元素内容后面插入内容。例:点before()按钮可将文本04移到内容05上面。</div>
	<div>8. .remove() 用法:删除指定元素。  例: $('p').remove()   删除所有P标签元素。</div>
	<div><h3>这两组方法意思根本一样,只是选择的参照对象不一样罢了</h3></div>
	<div>9.appendTo()  用法:将元素内容指入到目标元素后面。例:点appendTo()按钮可将文本01移到内容06下面。</div>
	<div>10.prependTo()  用法:将元素内容指入到目标元素前面。例:点prependTo()按钮可将文本02移到内容01上面。</div>
	<div>11.indsertAfter()  用法:在目标元素内容前面插入内容。例:点after()按钮可将文本03移到内容03上面。</div>
	<div>12.insertBefore()  用法:在目标元素内容后面插入内容。例:点before()按钮可将文本04移到内容05上面。</div>

	<div>9.wrap()  用法:给元素套一个标签,可以是新建 标签 也可以是已经存在的标签。例:点wrap()按钮看效果</div>
	<div>10.wrapInner()  用法:给元素内容套一个标签。例:wrapInner()按钮看效果。</div>
	<div>11.wrapAll()  用法:给一组元素套一个标签。例:点wrapAll()按钮看效果。</div>
	<div>12.unwrap()  用法:给当前元素解除一个外层标签,可链试操作,实现多存解套。例:.unwrap().unwrap()。</div>

	<ul style="background-color:pink">
		<li>内容1</li>
		<li>内容2</li>
		<li>内容3</li>
		<li>内容4</li>
		<li>内容5</li>
		<li>内容6</li>
	</ul>
	<button>append()</button>
	<button>prepend()</button>
	<button>after()</button>
	<button>before()</button>
	<button>remove()</button><br>
		<button>appendTo()</button>
	<button>prependTo()</button>
	<button>insertafter()</button>
	<button>insertbefore()</button><br><br>

	<button>wrap()</button>
	<button>wrapIner()</button>
	<button>wrapAll()</button>
	<button>unwrap()</button>
	<p>文本01</p>
	<p>文本02</p>
	<p>文本03</p>
	<p>文本04</p>
	<p>文本05</p>
	<div class="cj"></div>
</body>
</html>
<script type="text/javascript">
	$('div').eq(1).text('你好啊!//此为JQUERY方法插入的代码。')
	$('div').eq(3).html('<h3>这里是用.html()实现的<h3>')
	$('button').eq(0).click(function(){
		var a = $('input').val()
		alert(a)
	})
	$('<img>').attr('src','images/1.jpg').width('150px').css('border-radius','50%').appendTo('div.cj')
	$('ul').append($('<li>').text('这是新建的li,并要插入到UL中'))
	$('button').eq(1).click(function(){
		$('ul').append($($('p').eq(1)))
	})


	$('button').eq(2).click(function(){
		$('ul').prepend($($('p').eq(2)))
	})


	$('button').eq(3).click(function(){
		$('li').eq(2).after($($('p').eq(3)))
	})

		$('button').eq(4).click(function(){
		$('li').eq(4).before($($('p').eq(4)))
	})


		$('button').eq(5).click(function(){
		$('p').remove()
	})

		$('button').eq(6).click(function(){
		$($('p').eq(1)).appendTo($('ul'))
	})

		$('button').eq(7).click(function(){
		$($('p').eq(2)).prependTo($('ul'))
	})

		$('button').eq(8).click(function(){
		$($('p').eq(3)).insertAfter($($('li').eq(3)))
	})


		$('button').eq(9).click(function(){
		$($('p').eq(4)).insertBefore($($('li').eq(5)))
	})

		$('button').eq(10).click(function(){
	$('p').wrap($('<li>'))

		// $('button').eq(10).click(function(){
	// $('p').wrap($('li'))
		})

	$('button').eq(11).click(function(){
	$('p').wrapInner($('<strong>'))
	})

	$('button').eq(12).click(function(){
	$('p').wrapAll($('<div style="color:cyan">'))
	})

	$('button').eq(13).click(function(){
	$('li').unwrap()
	})
</script>点击 "运行实例" 按钮查看在线实例
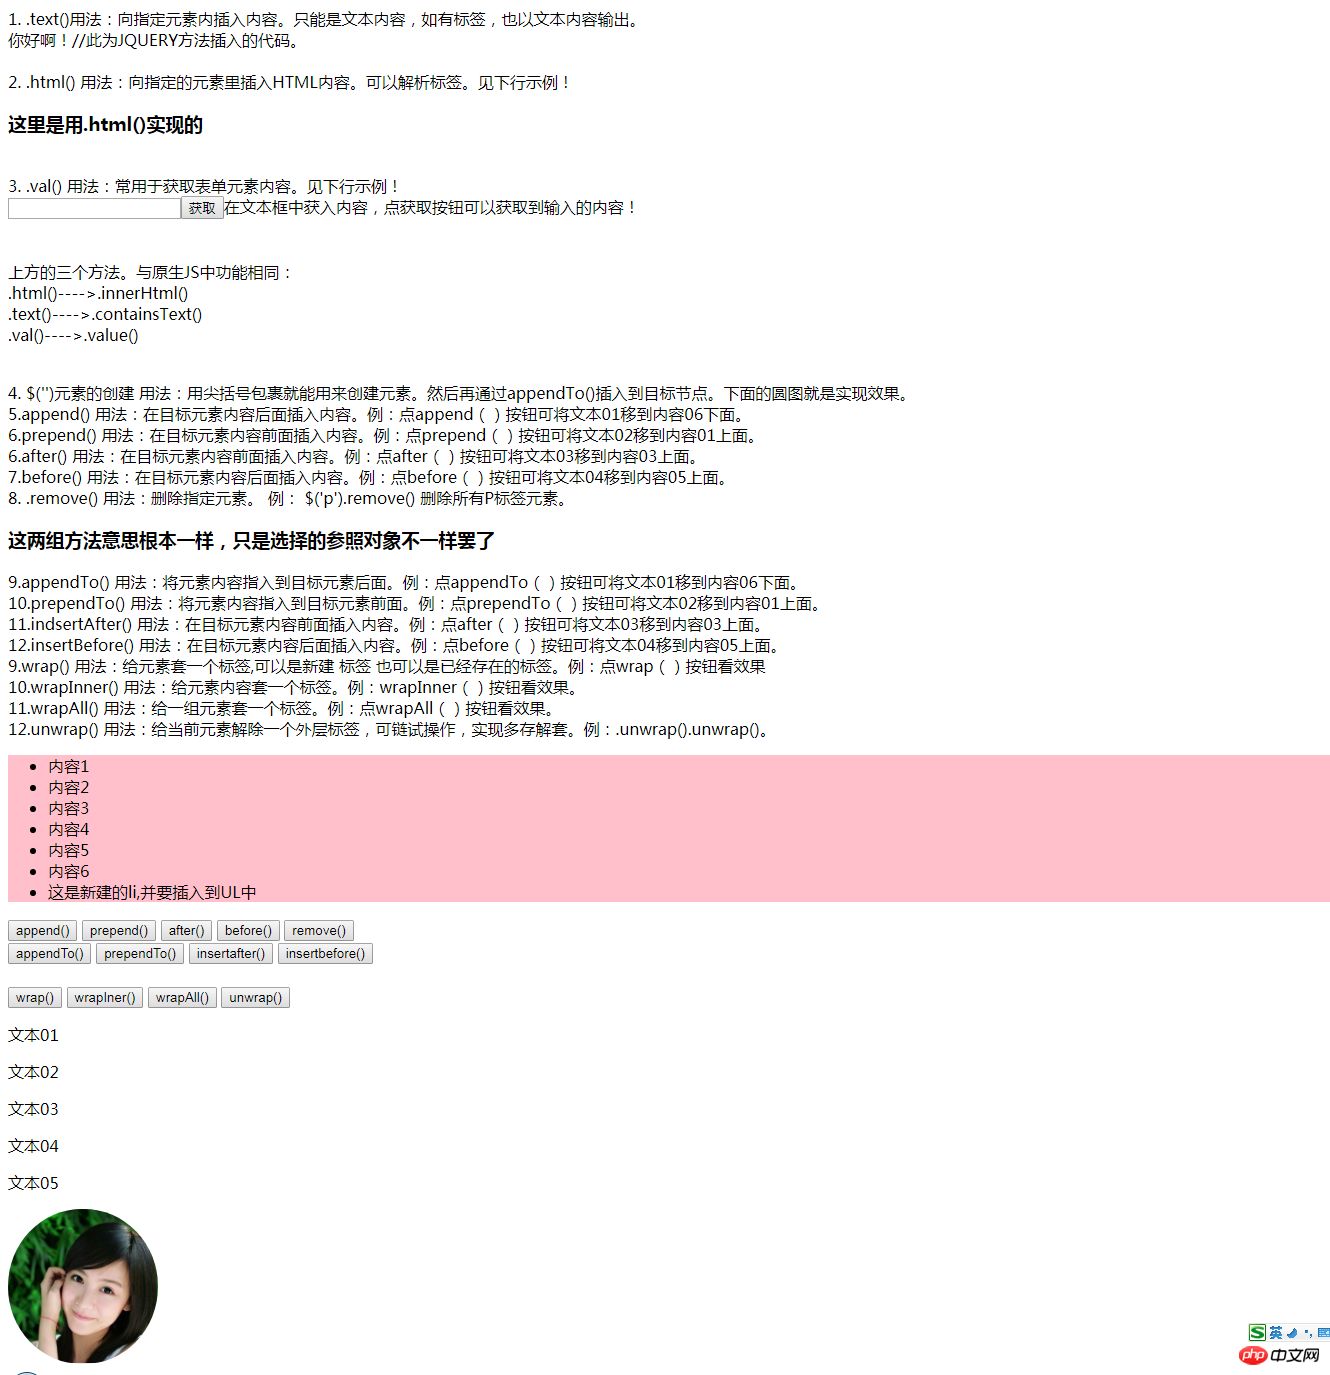
运行效果图如下:
