Correction status:qualified
Teacher's comments:


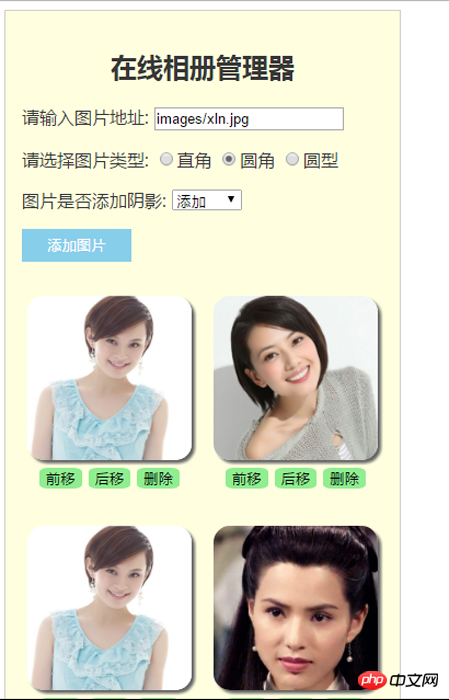
案例演示:
案例源码:
<!DOCTYPE html>
<html lang="en">
<head>
	<meta charset="UTF-8">
	<title>jquery实战之在线相册管理器</title>
	<link rel="stylesheet" type="text/css" href="css/style.css">
	<script type="text/javascript" src="js/jquery.js"></script>
	<script type="text/javascript" src="js/demo.js"></script>
</head>
<body>
	<div class="wrap">
		<div class="header">
			<h2>在线相册管理器</h2>
			<p>
				<label for="img_url">请输入图片地址:</label>
				<!-- <input type="text" name="img_url" id="img_url" placeholder="images/demo.jpg" value="images/zly.jpg"> -->
				<input type="text" name="img_url" id="img_url" placeholder="images/demo.jpg">
			</p>
	        <p>请选择图片类型:
	        	<input type="radio" id="rect" name="border" value="0" checked><label for="rect">直角</label>
	            <input type="radio" id="radius" name="border" value="10%"><label for="radius">圆角</label>
	            <input type="radio" id="circle" name="border" value="50%"><label for="circle">圆型</label>
	        </p>
	        <p>图片是否添加阴影:
				<select name="shadow">
					<option value="0" selected>不添加</option>
					<option value="1">添加</option>
				</select>
	        </p>
	        <p><button class="add">添加图片</button></p>
		</div>
		<div class="main">
			<ul></ul>
		</div>
	</div>
</body>
</html>
点击 "运行实例" 按钮查看在线实例
总结:采用文件流来选择,再用css来调整样式,再用jq实现上下的调整功能