

JSON 与 Ajax 及实战
- 时间:2018年9月13号 天气:台风
1.问答: Ajax的工作原理分析(用自己语言组织)
答:
(1)Ajax全称是 Asynchronous JavaS and XML 即:异步的JavaScript和XML;所以我可以理解为为它是两种技术的结合体。而网上的比较全面理解为ajax并非一种新的技术,而是几种原有技术的结合体。它由下列技术组合而成。
1.使用CSS和XHTML来表示。
2. 使用DOM模型来交互和动态显示。
3.使用XMLHttpRequest来和服务器进行异步通信。
4.使用javascript来绑定和调用。
(2)Ajax的工作机制
简单来说,Ajax就是通过XMLHttpRequest()[简称为xhr对象]向服务器发送异步请求,让后使用JavaScript和操作DOM来处理获得的数据从而更新页面。
而Ajax所依赖的xhr对象常用的属性和方法如下:
1. 对象: XMLHttpRequest() 简称 xhr对象;
2. 事件: onreadystatechange() 监听就绪状态属性的变化;
3. 属性: readyState 请求状态值,有四个值,我们只对数据就绪状态的值:4感兴趣;
4. 属性: status 请求状态码, 返回 200 时,表示已从服务器上成功的获取到了返回的文本;
5. 属性: responseText, 从服务器端返回的文本内容;
6. 方法: open('请求类型','请求的url',请求方式,默认为true异步):设置请求参数
7. 方法: send(): 发送请求,GET请求请填上参数null;
8. 方法: 如果是post请求,需要设置一下请求头信息,请文档类型重置:
setRequestHeader('Content-Type', 'application/x-www-form-urlencoded');
2.编程: Ajax用户登录验证
<!DOCTYPE html>
<html lang="en">
<head>
    <meta charset="UTF-8">
    <title>表单验证</title>
</head>
<body>
<h3>用户登录</h3>
<form>
<p>邮箱:<input type="email" name="email" value="" ></p>
<p>密码:<input type="password" name="password" value="" ></p>
    <button type="button">登陆</button>
</form>

<script>
    let btn = document.getElementsByTagName('button')[0];
    btn.onclick = function () {
        //1.创建xhr对象
        let xhr = new XMLHttpRequest();

        //2.监听响应状态
        xhr.onreadystatechange = function () {
            if (xhr.readyState === 4) {
                //判断是否有响应的数据
                if (xhr.status === 200) {
                    //在页面创建一个新元素用来显示响应的数据
                    let p = document.createElement('p');
                    p.style.color = 'red';
                    let json = JSON.parse(xhr.responseText);
                    if (json.status === 1) {
                        p.innerHTML = json.msg;
                    } else if (json.status === 0) {
                        p.innerHTML = json.msg;
                    }
                    document.forms[0].appendChild(p);
                    //禁用按钮
                    btn.disabled = true;
                    setTimeout(
                        function () {
                            document.forms[0].removeChild(p);
                            btn.disabled = false;
                            if (json.status == 1) {
                                location.href = 'admin.php';
                            }
                        }, 2000)

            } else {
                alert('响应失败!!!' + xhr.status);
            }
        }
    else{
            //一张GIF转圈圈的动图
        }
    }

        //3.设置请求参数
        xhr.open('post', 'inc/check.php', true);
        //4. 设置头信息,将内容类型设置为表单提交方式
        xhr.setRequestHeader('Content-Type', 'application/x-www-form-urlencoded');
        //5发送请求
        let data = {
            email: document.getElementsByName('email')[0].value,
            password: document.getElementsByName('password')[0].value
        };
        let data_json = JSON.stringify(data);
        xhr.send('data=' + data_json);
    }
</script>

</body>
</html>

<!--
//demo3,不成功-->点击 "运行实例" 按钮查看在线实例
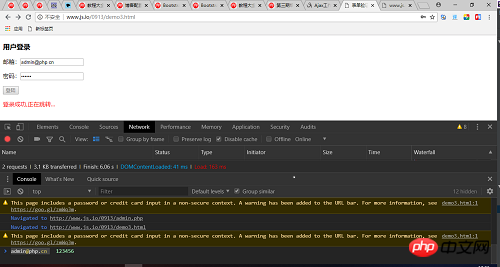
本机运行图:

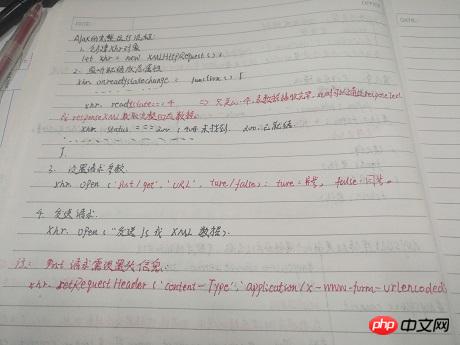
3.手写: Ajax的完整运行流程(以get为例),共四步。

点评:好记忆不如烂笔头,手写一遍更清楚的了解Ajax的运行