 Operation and Maintenance
 CentOS
 2. Linux CentOS Pagoda Panel Installation and Settings Tutorial (Picture and Text Steps)
2. Linux CentOS Pagoda Panel Installation and Settings Tutorial (Picture and Text Steps)
1. Install the Pagoda Panel
#The cloud server has installed the yum command. The yum command will be explained to you in the following tutorials
yum install -y wget && wget -O install.sh http://download.bt.cn/install/install_6.0.sh && sh install.sh

Install the pagoda panel into the www directory, enter y and press Enter

After the installation is completed, there will be an external network panel address, and port 8888 needs to be opened

##2. Panel operation
1. Panel login
After installing the Pagoda panel, there will be access Address, account and password must be remembered. Also go to the panel to change your account and password so that you can easily remember them.

- If you don’t want to install the package, you need to bind a Pagoda account. If not, register one

2. The software store
- website is online and needs to install services. LNMP or LAMP, N and A can only choose one
- L is a Linux server
- N is Nginx
- M is MySQL
- P is PHP ## A is Apache


Enable SSH: Remote access cannot be achieved after it is closed
- Firewall: It is the server port, which can be opened in Alibaba Cloud, here Flexible
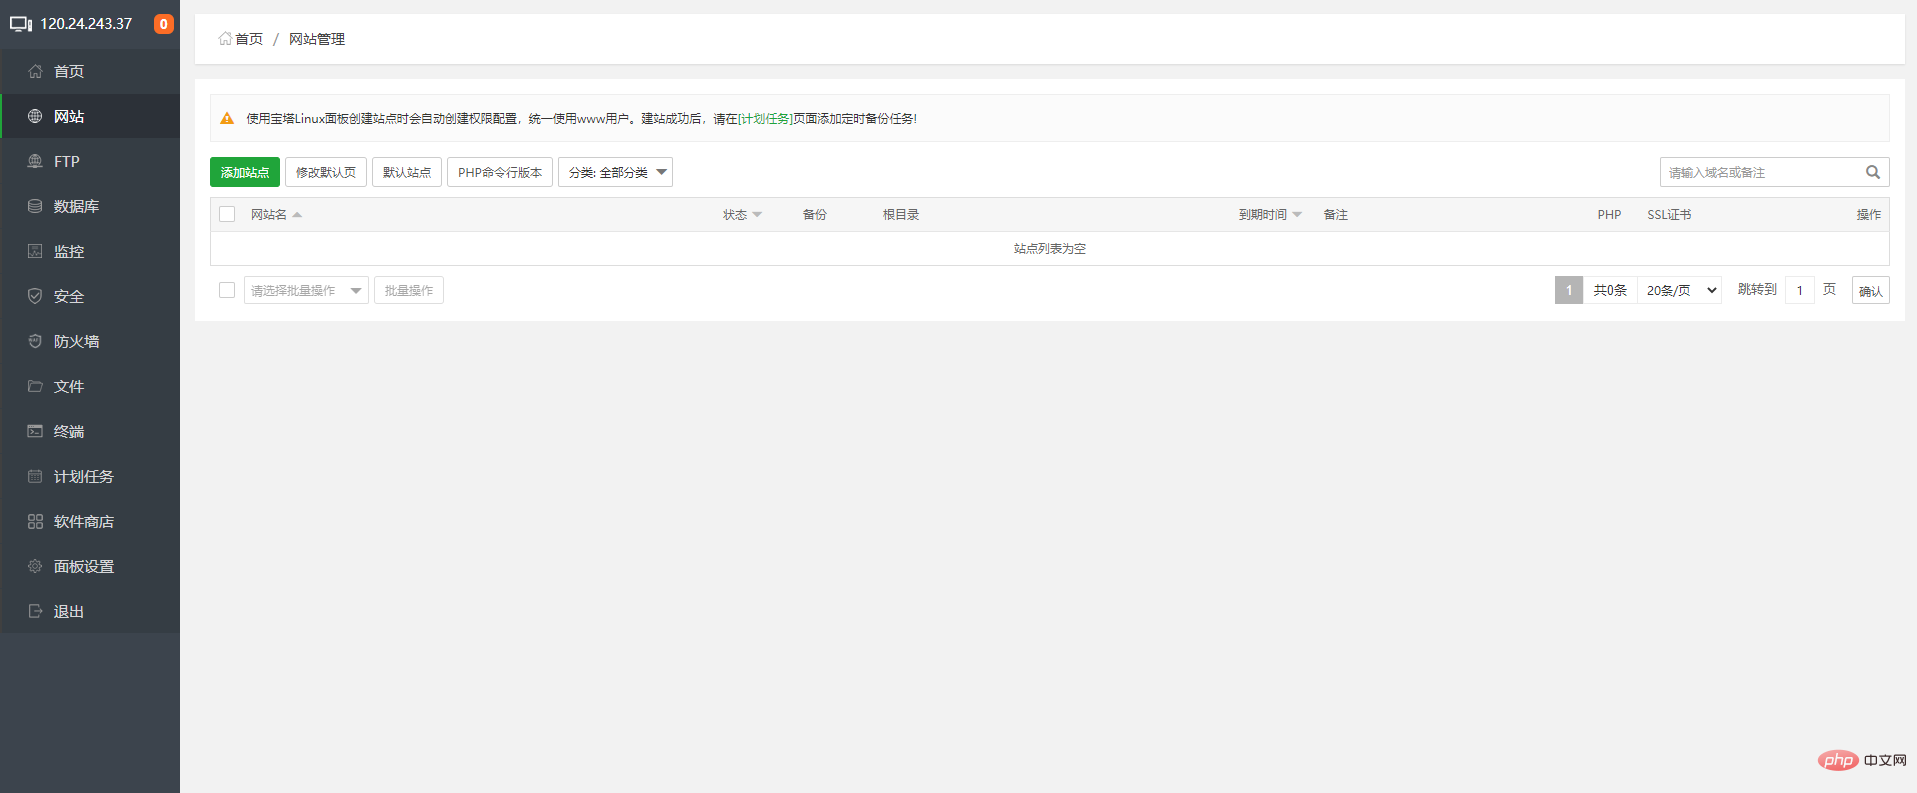
 ## 4. Create a website
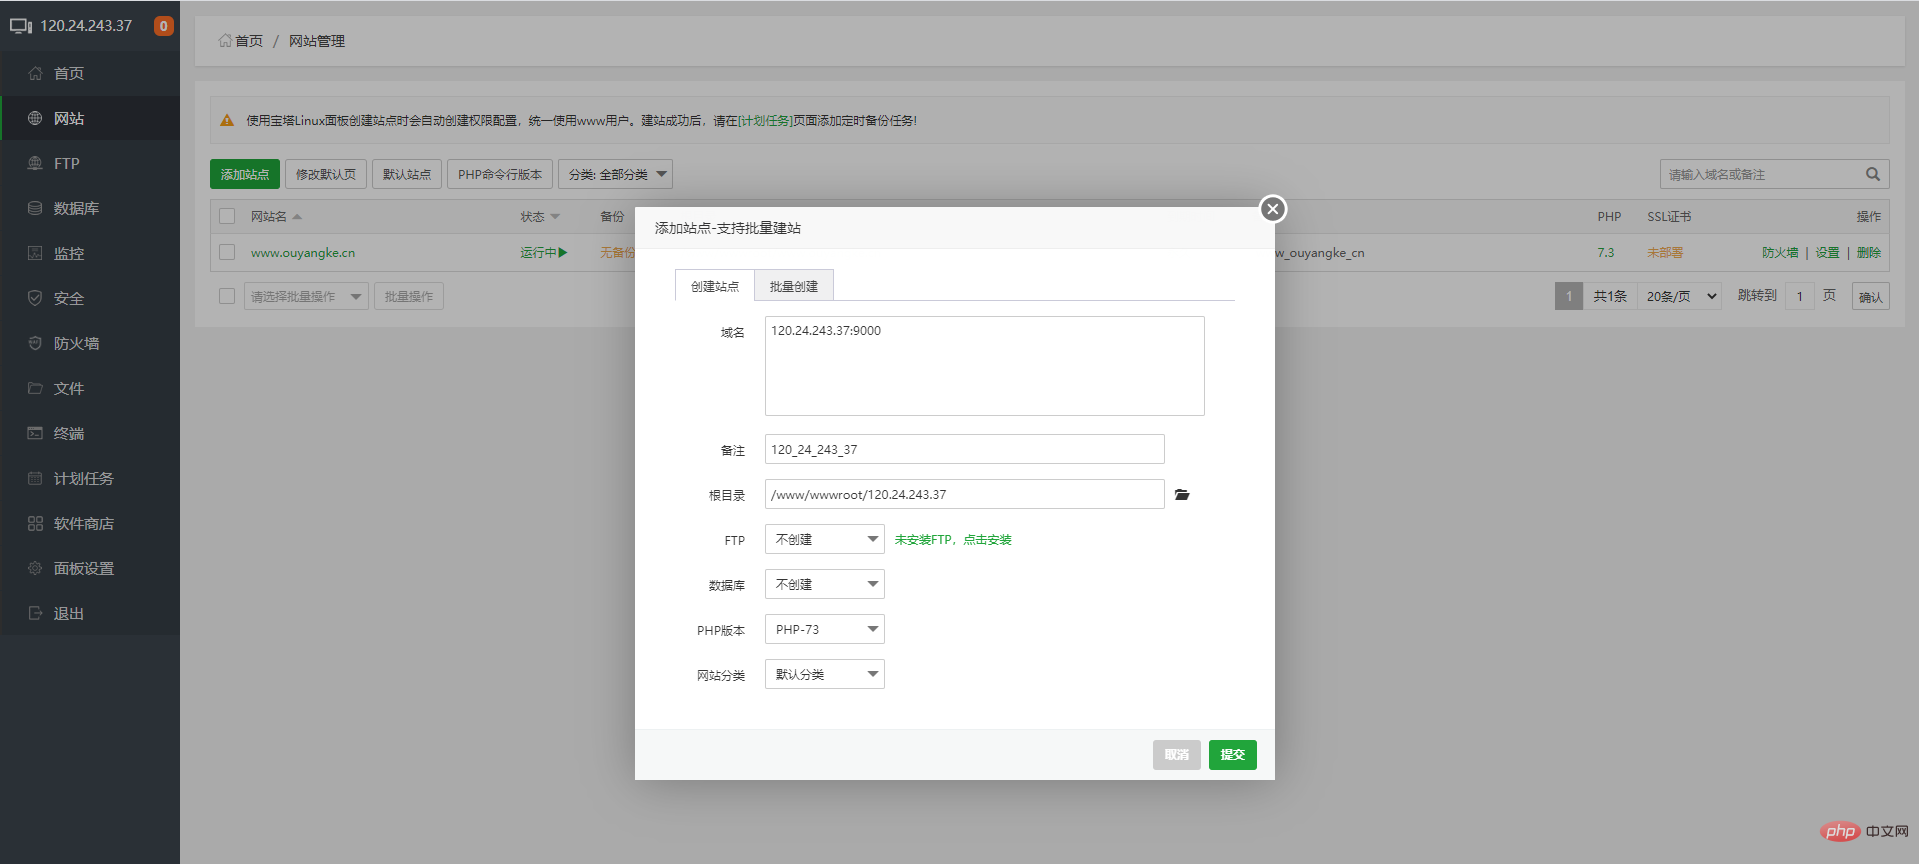
 1. `ip` Create a website
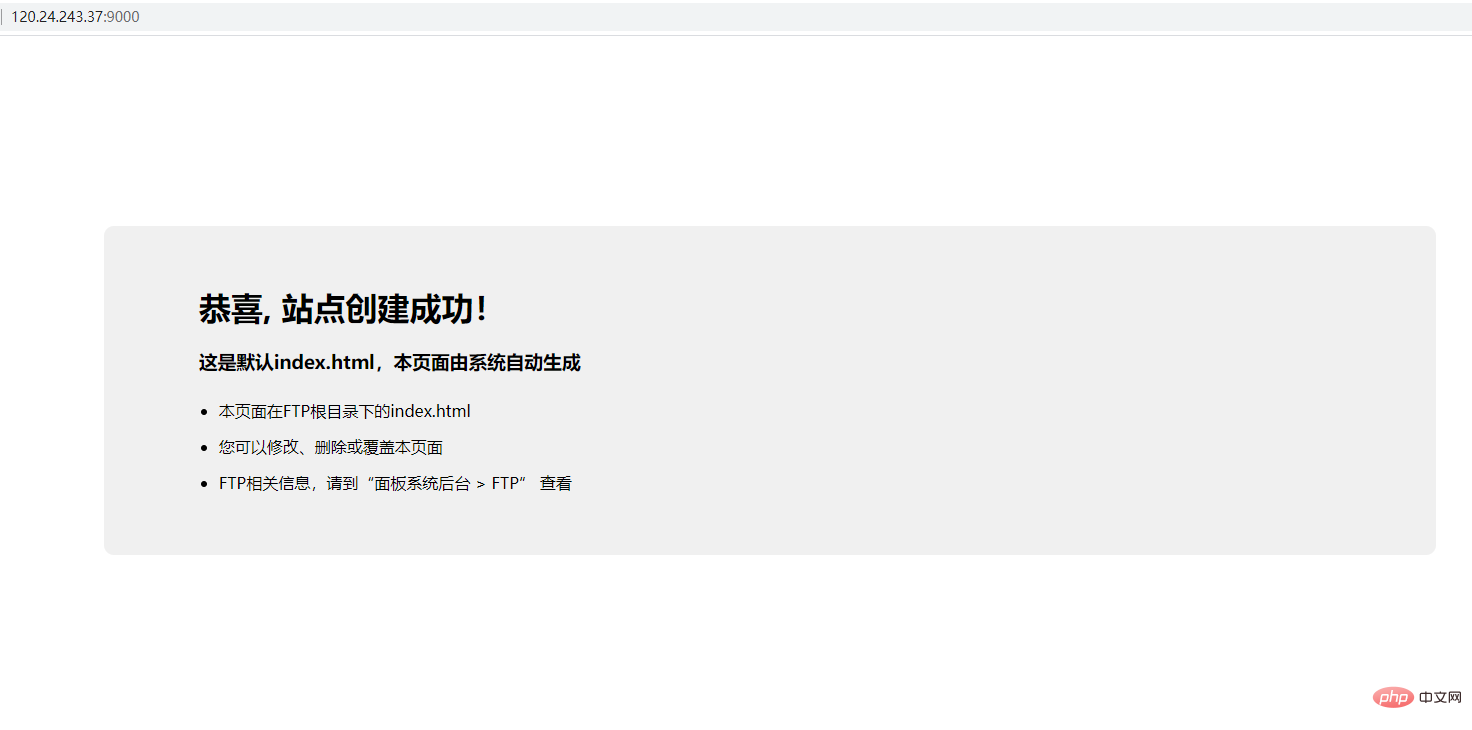
If you don’t have a domain name, you can use `ip port` to create a website, port Must be opened


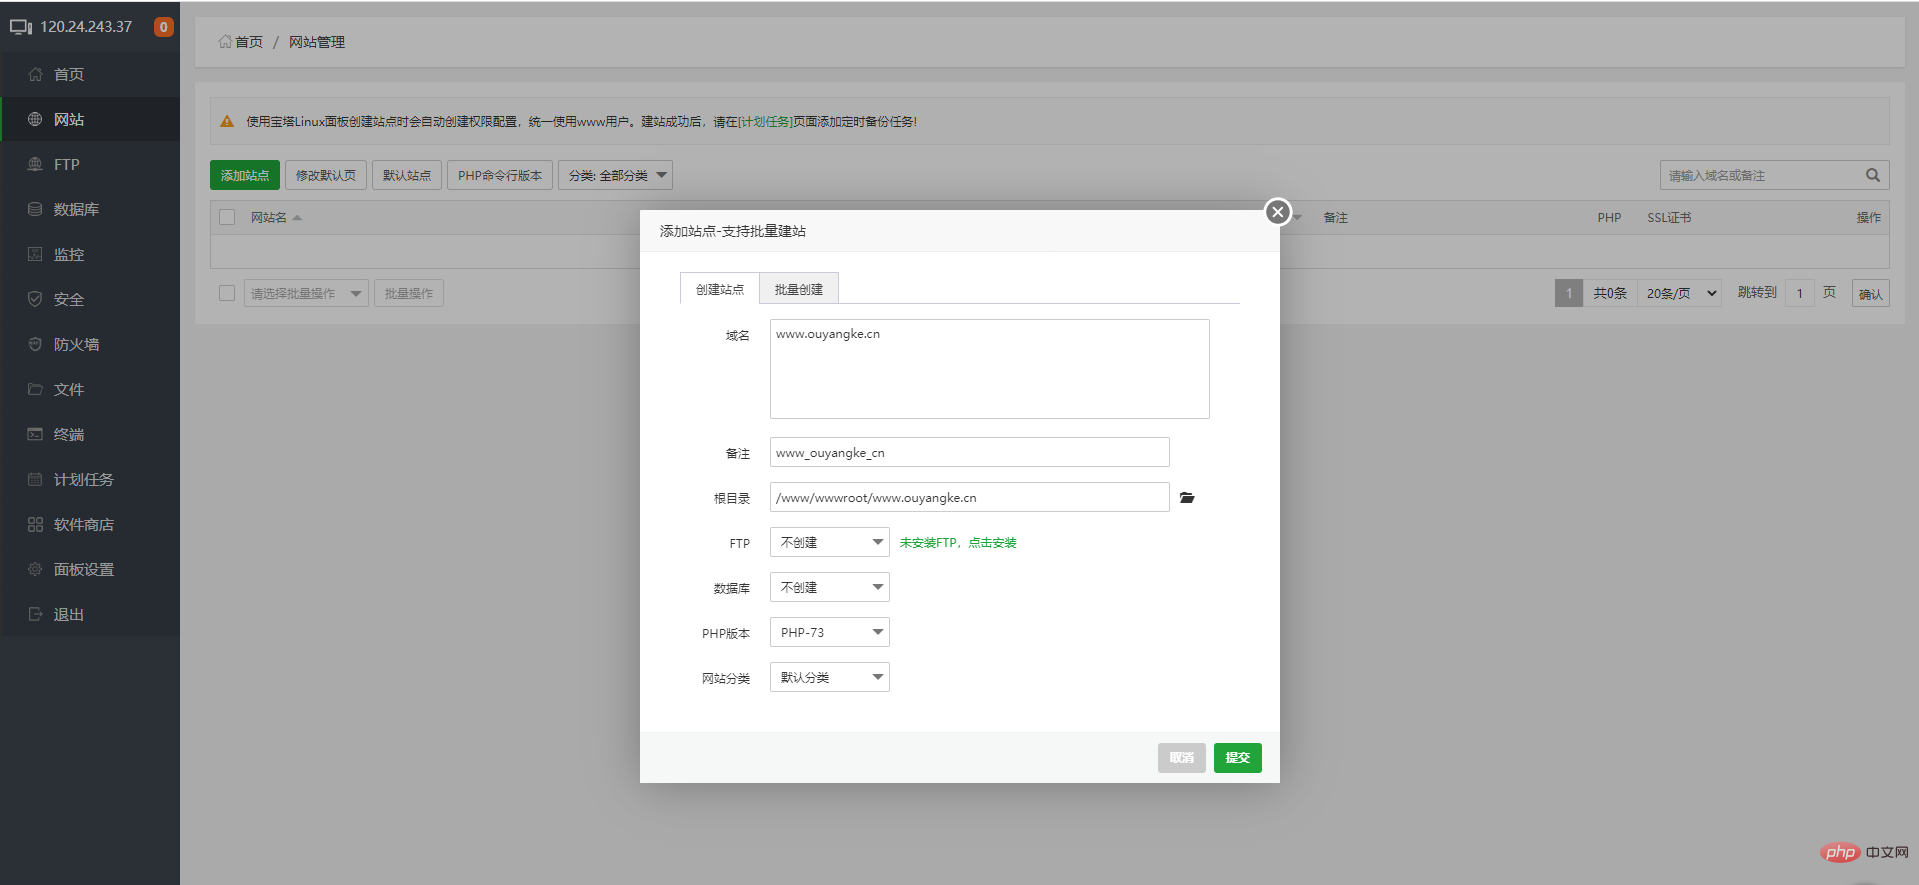
If you have a domain name, use the domain name to create it. The domain name needs to point to the server

)
#You can add multiple ports or domain names, such as those opened by ouyangke.cn and www.ouyangke.cn They are all the same website, so you need to set it up twice
- 4. Apply for https certificate
5. Switch `php` version
6. Change website directory
If it is ThinkPHP and Laravel framework, you need to change the running directory to public
5. Panel Settings
-Alias: You can use whatever you like, it’s up to you
- Panel port: The default panel port is 8888, it must be changed to ensure safety
- Timeout time: On your own computer, this time does not matter , even if you are on a public computer, remember to log out, or set the time to a smaller value
-Security entrance: URL suffix, which is randomly encrypted by default for the first time. It is best to change it easily. Remember
-BasicAuth authentication: It’s more complicated, don’t enable it if you don’t understand
-Message channel: You can add an email address, and there are some messages on the panel Will be sent to the email address
- Login alarm: You can add an email address. Wherever you log in, a message will be sent to the email address
- Domain name: Bind to the panel After setting a domain name, you can access the panel without using IP
- Authorized IP: Only authorized IP can access the panel. It is best not to set up the home network. The home network will change every day ip
-Default website directory: Create the default website directory, no need to change
- Default backup directory: no need to change
- Server IP: no need to change
- Server time: no need to change
- Panel user: This is the panel login account, be sure to change it to one you can remember
- ##- Panel password: This is the panel login password, Be sure to change what you can remember
linux CentOS server goes online
2. 3.linux CentOS Pagoda Panel using svn
4.External Access the database through the Internet
5.Recommended learning:The above is the detailed content of 2. Linux CentOS Pagoda Panel Installation and Settings Tutorial (Picture and Text Steps). For more information, please follow other related articles on the PHP Chinese website!

Hot AI Tools

Undresser.AI Undress
AI-powered app for creating realistic nude photos

AI Clothes Remover
Online AI tool for removing clothes from photos.

Undress AI Tool
Undress images for free

Clothoff.io
AI clothes remover

AI Hentai Generator
Generate AI Hentai for free.

Hot Article

Hot Tools

Notepad++7.3.1
Easy-to-use and free code editor

SublimeText3 Chinese version
Chinese version, very easy to use

Zend Studio 13.0.1
Powerful PHP integrated development environment

Dreamweaver CS6
Visual web development tools

SublimeText3 Mac version
God-level code editing software (SublimeText3)

Hot Topics
 1376
1376
 52
52
 How to solve the permissions problem encountered when viewing Python version in Linux terminal?
Apr 01, 2025 pm 05:09 PM
Solution to permission issues when viewing Python version in Linux terminal When you try to view Python version in Linux terminal, enter python...
 Why does an error occur when installing an extension using PECL in a Docker environment? How to solve it?
Apr 01, 2025 pm 03:06 PM
Causes and solutions for errors when using PECL to install extensions in Docker environment When using Docker environment, we often encounter some headaches...
 How to efficiently integrate Node.js or Python services under LAMP architecture?
Apr 01, 2025 pm 02:48 PM
Many website developers face the problem of integrating Node.js or Python services under the LAMP architecture: the existing LAMP (Linux Apache MySQL PHP) architecture website needs...
 How to solve permission issues when using python --version command in Linux terminal?
Apr 02, 2025 am 06:36 AM
Using python in Linux terminal...
 How to configure apscheduler timing task as a service on macOS?
Apr 01, 2025 pm 06:09 PM
Configure the apscheduler timing task as a service on macOS platform, if you want to configure the apscheduler timing task as a service, similar to ngin...
 Can the Python interpreter be deleted in Linux system?
Apr 02, 2025 am 07:00 AM
Regarding the problem of removing the Python interpreter that comes with Linux systems, many Linux distributions will preinstall the Python interpreter when installed, and it does not use the package manager...
 Four ways to implement multithreading in C language
Apr 03, 2025 pm 03:00 PM
Multithreading in the language can greatly improve program efficiency. There are four main ways to implement multithreading in C language: Create independent processes: Create multiple independently running processes, each process has its own memory space. Pseudo-multithreading: Create multiple execution streams in a process that share the same memory space and execute alternately. Multi-threaded library: Use multi-threaded libraries such as pthreads to create and manage threads, providing rich thread operation functions. Coroutine: A lightweight multi-threaded implementation that divides tasks into small subtasks and executes them in turn.
 How to open web.xml
Apr 03, 2025 am 06:51 AM
To open a web.xml file, you can use the following methods: Use a text editor (such as Notepad or TextEdit) to edit commands using an integrated development environment (such as Eclipse or NetBeans) (Windows: notepad web.xml; Mac/Linux: open -a TextEdit web.xml)


)
)
)
)
)
