Friends often visit forums, read blogs, buy products, read other users’ comments, or register as a user themselves to reply to comments.
Maybe you are an article publisher and you can reply to other people's comments on your article or delete comments you don't like.
In this chapter we will explain the idea of developing a simple guestbook, the database tables that need to be created, the functions implemented, etc.

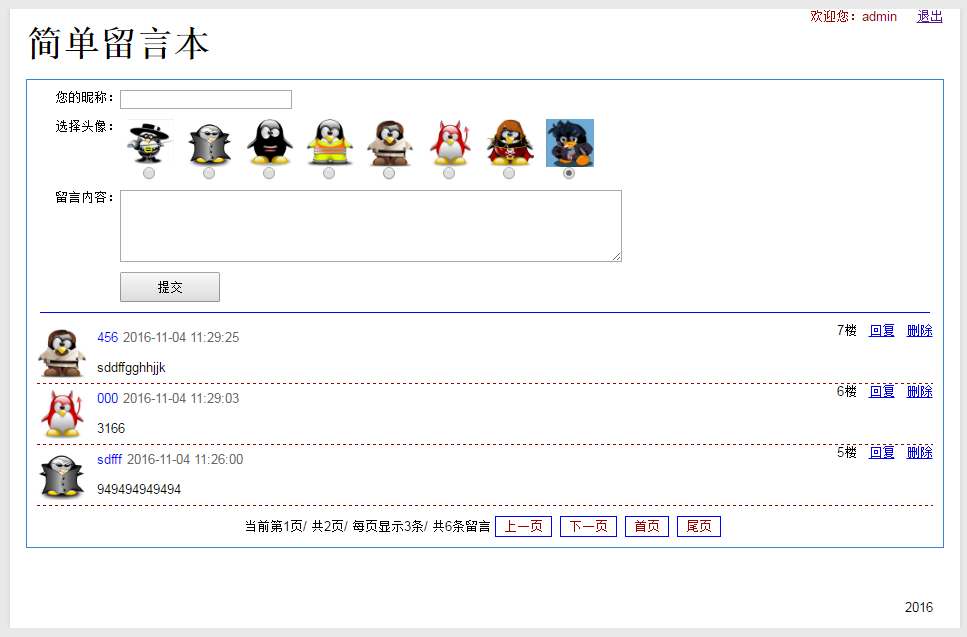
##As shown in the picture above:
Add your nickname, select your avatar, enter the content, use the <form> form to submit and then click below Your message will be displayed in the guestbook and added to the database.
The upper right corner is the login function for administrator login and logout.
After logging in as an administrator, reply and delete functions will be added to all user messages.
You can reply to this message or delete this message.
The number of messages is displayed through the paging function at the bottom of the guestbook. It is divided into several pages. You can click on the previous page and the next page to view the messages on different pages.
You can also return to the homepage and display the last page.
Of course, the use of MYSQL database and SQL statements is also essential.
Let’s get started.


