This article mainly introduces Asp.net MVC's use of knockoutjs to log in and record the user's internal and external network IP and city (recommended). Friends in need can refer to the following
Preface
I started with the first article, and now I want to start with the login, but I feel there are many things that should be written earlier, such as
1, Route configuration of MVC and Web API, how does the Route configuration of Web API support namespace
2. How to configure Filters (implement security verification, error handling, etc.)
3. Custom Filters, HttpRouteConstraint, ModelBinder and HttpParameterBinding, etc.
These problems have been encountered in my development process, but I feel that every point has to be said too much. If necessary, come back to it later.
Requirements
It’s still the same, we first need to understand what we want to achieve by logging in:
1. Login page ( Username, password, remember me, login button, reset button)
2. Message display (for example, when an error occurs, a certain error is displayed, when logging in, it is displayed as logging in, when the login is successful, it is displayed as jumping, etc.)
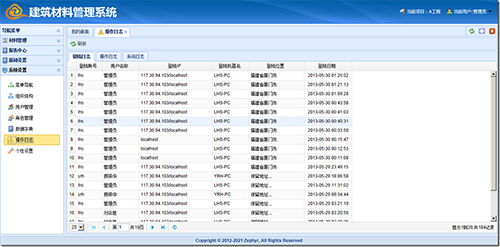
3. Login processing (verification, login, disabling the form while logging in, updating user login times and time, adding login history, including the user's internal IP, external IP, city, and other business processing)
4. Successful jump
Achievement effect
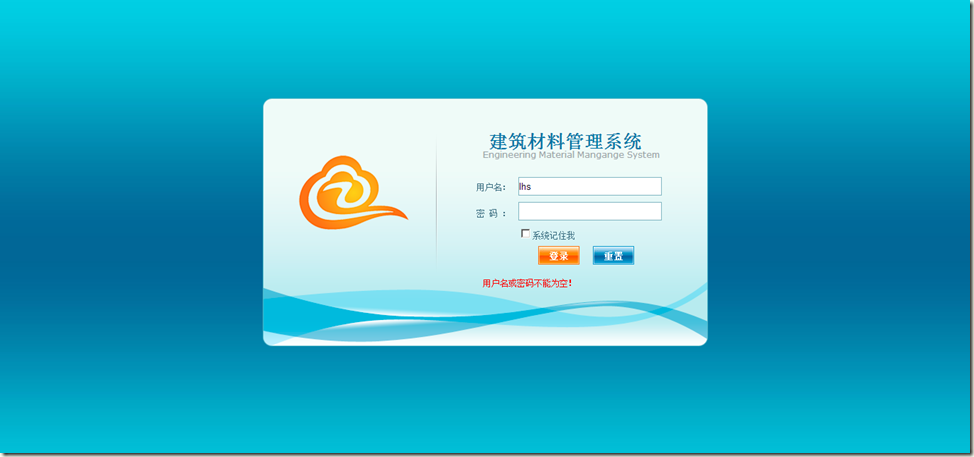
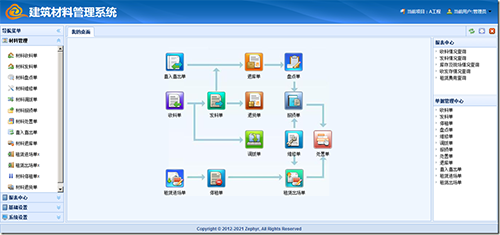
Before implementing it, let’s take a look at the screenshot of the effect
Login page

Jump page


Requirement analysis and implementation
The requirements are basically easy to implement. Only the internal and external network IP and the city where the login history is located need to be considered. one time. It is quite troublesome to obtain the client's internal and external network IP in asp.NET, but it is basically impossible to obtain the city, so we have to consider using a third-party API to achieve it. 1. The internal IP is obtained directly in the background. 2. The external IP can be obtained through Sina API http://counter.sina.com.cn/ip. It can also be returned to the city. Yes, the background can only return IP for unknown reasons3. The city is obtained through Baidu API http://api.map.baidu.com/location/ip?ak=&ip, but this cannot It will return the external IP, so I used both of them together, which was quite painful. There is a cross-domain problem when the client accesses the corresponding API. Through investigation, it was found that Baidu API supports JSONP, which can solve cross-domain problems very well. Sina API does not support it but it returns a variable. , we can directly write the Sina API in the page script to obtain the corresponding variables. The technology should be fine, so let’s start writing.Specific implementation
Step one: Create a new LoginController in MVC and add the following codeusing System;
using System.Web.Mvc;
using Newtonsoft.Json;
using Newtonsoft.Json.Linq;
using Zephyr.Core;
using Zephyr.Models;
using Zephyr.Web.Areas.Mms.Common;
namespace Zephyr.Controllers
{
[AllowAnonymous]
public class LoginController : Controller
{
public ActionResult Index()
{
ViewBag.CnName = "建筑材料管理系统";
ViewBag.EnName = "Engineering Material Mangange System";
return View();
}
}
}@{
ViewBag.Title = "登录系统";
Layout = null;
}
<!doctype html>
<html>
<head>
<title>@ViewBag.Title</title>
<link href="~/Content/css/page/login.css" rel="stylesheet" type="text/css" />
<script src="~/Content/js/jquery/jquery-1.8.1.min.js"></script>
<script src="~/Content/js/core/json2.js"></script>
<script src="~/Content/js/core/knockout-2.2.1.js"></script>
<script src="~/Content/js/viewModel/login.js"></script>
<script src="http://counter.sina.com.cn/ip"></script>
</head>
<body>
<p class="second_body">
<form data-bind="submit:loginClick">
<p class="logo"><img src="/Content/images/login/logo.png" alt="" /></p>
<p class="title-zh">@ViewBag.CnName</p>
<p class="title-en" style="@ViewBag.EnNameStyle">@ViewBag.EnName</p>
<p class="message" data-bind="html:message"></p>
<table border="0" style="width:300px;">
<tr>
<td style="padding-bottom: 5px;width:55px;">用户名:</td>
<td colspan="2"><input type="text" class="login" data-bind="value:form.usercode" /></td>
</tr>
<tr>
<td class="lable" style="letter-spacing: 0.5em; vertical-align: middle">密码:</td>
<td colspan="2"><input type="password" class="login" data-bind="value:form.password" /></td>
</tr>
<tr>
<td></td>
<td colspan="2"><input type="checkbox" data-bind="checked:form.remember" /><span>系统记住我</span></td>
</tr>
<tr>
<td colspan="3" style="text-align:center">
<input type="submit" value="登录" class="login_button" />
<input type="button" value="重置" class="reset_botton" data-bind="click:resetClick" />
</td>
</tr>
</table>
</form>
</p>
</body>
</html>var ILData = new Array("117.30.94.103","保留地址", "", "", ""); if (typeof(ILData_callback) != "undefined") { ILData_callback(); }var viewModel = function () {
var self = this;
this.form = {
usercode: ko.observable(),
password: ko.observable(),
remember:ko.observable(false),
ip: null,
city: null
};
this.message = ko.observable();
this.loginClick = function (form) {
$.ajax({
type: "POST",
url: "/login/doAction",
data: ko.toJSON(self.form),
dataType: "json",
contentType: "application/json",
success: function (d) {
if (d.status == 'success') {
self.message("登陆成功正在跳转,请稍候...");
window.location.href = '/';
} else {
self.message(d.message);
}
},
error: function (e) {
self.message(e.responseText);
},
beforeSend: function () {
$(form).find("input").attr("disabled", true);
self.message("正在登陆处理,请稍候...");
},
complete: function () {
$(form).find("input").attr("disabled", false);
}
});
};
this.resetClick = function () {
self.form.usercode("");
self.form.password("");
self.form.remember(false);
};
this.init = function () {
self.form.ip = ILData[0];
$.getJSON("http://api.map.baidu.com/location/ip?ak=F454f8a5efe5e577997931cc01de3974&callback=?", function (d) {
self.form.city = d.content.address;
});
if (top != window) top.window.location = window.location;
};
this.init();
};
$(function () { ko.applyBindings(new viewModel());});2、最后一句ko.applyBindings(new viewModel())即实现了页面和viewModel的绑定,至此,前台全部完成。接下来写登陆处理doAction,还是放在LoginController中,访问地址为/login/doAction。
第四步:在LoginController中添加doAction的方法返回JSON数据。代码如下:
public JsonResult DoAction(JObject request)
{
 var message = new sys_userService().Login(request);
 return Json(message, JsonRequestBehavior.DenyGet);
}然后在service层中处理
using System;
using System.Collections.Generic;
using Zephyr.Core;
using System.Dynamic;
using Newtonsoft.Json.Linq;
using Newtonsoft.Json;
using Zephyr.Utils;
using Zephyr.Web.Areas.Mms.Common;
namespace Zephyr.Models
{
public class sys_userService : ServiceBase<sys_user>
{
public object Login(JObject request)
{
var UserCode = request.Value<string>("usercode");
var Password = request.Value<string>("password");
//用户名密码检查
if (String.IsNullOrEmpty(UserCode) || String.IsNullOrEmpty(Password))
return new { status = "error", message = "用户名或密码不能为空!" };
//用户名密码验证
var result = this.GetModel(ParamQuery.Instance()
.AndWhere("UserCode", UserCode)
.AndWhere("Password", Password)
.AndWhere("IsEnable", true));
if (result == null || String.IsNullOrEmpty(result.UserCode))
return new { status = "error", message = "用户名或密码不正确!" };
//调用框架中的登陆机制
var loginer = new LoginerBase { UserCode = result.UserCode, UserName = result.UserName };
FormsAuth.SignIn(loginer.UserCode, loginer, 60 * 8);
//登陆后处理
this.UpdateUserLoginCountAndDate(UserCode); //更新用户登陆次数及时间
this.AppendLoginHistory(request); //添加登陆履历
MmsService.LoginHandler(request); //MMS系统的其它的业务处理
//返回登陆成功
return new { status = "success", message = "登陆成功!" };
}
//更新用户登陆次数及时间
public void UpdateUserLoginCountAndDate(string UserCode)
{
db.Sql(@"
update sys_user
set LoginCount = isnull(LoginCount,0) + 1
,LastLoginDate = getdate()
where UserCode = @0 "
, UserCode).Execute();
}
//添加登陆履历
public void AppendLoginHistory(JObject request)
{
var lanIP = ZHttp.ClientIP;
var hostName = ZHttp.IsLanIP(lanIP) ? ZHttp.ClientHostName : string.Empty; //如果是内网就获取,否则出错获取不到,且影响效率
var UserCode = request.Value<string>("usercode");
var UserName = MmsHelper.GetUserName();
var IP = request.Value<string>("ip");
var City = request.Value<string>("city");
if (IP != lanIP)
IP = string.Format("{0}/{1}", IP, lanIP).Trim('/').Replace("::1", "localhost");
var item = new sys_loginHistory();
item.UserCode = UserCode;
item.UserName = UserName;
item.HostName = hostName;
item.HostIP = IP;
item.LoginCity = City;
item.LoginDate = DateTime.Now;
db.Insert<sys_loginHistory>("sys_loginHistory", item).AutoMap(x => x.ID).Execute();
}
}
}接收参数定义为JObject对象比较方便取得请求数据,数据服务中的GetModel是服务基类中已有的方法,这当中用到了两个函数,一个为UpdateUserLoginCountAndDate为更新用户登陆次数及时间的处理,另一个AppendLoginHistory添加登陆履历。至此已大功告成!
以上所述是小编给大家介绍的Asp.net MVC利用knockoutjs实现登陆并记录用户的内外网IP及所在城市(推荐),希望对大家有所帮助,如果大家有任何疑问请给我留言,小编会及时回复大家的。在此也非常感谢大家对PHP中文网的支持!
更多Asp.net MVC利用knockoutjs实现登陆并记录用户的内外网IP及所在城市相关文章请关注PHP中文网!


