
To play with 3D in css3, you must understand a few words, namely perspective (perspective), rotation (rotate) and move(translate). Perspective is to look at 2D things on the screen from a realistic perspective to show the 3D effect. Rotation is no longer a rotation on a 2D plane, but a rotation of a three-dimensional coordinate system, including X-axis, Y-axis, and Z-axis rotation. TranslationSimilarly.
Of course I will explain it theoretically, but I guess you still don’t understand it. Here are 3 gifs:
Rotate along the X-axis

Rotate along the Y axis
Rotate along the Z axis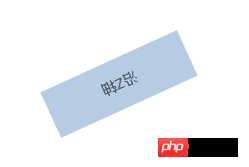
Rotate along the Z axis It should be no problem, then it will be easier to understand translation, which means moving on the X-axis, Y-axis, and Z-axis.
You may say that perspective is difficult to understand. Let me introduce several properties of perspective.
perspectiveThe English name is perspective. Without this thing, there is no way to form a 3D effect, but how does this thing allow us to browse? To create a 3D effect, you can look at the picture below. In fact, those who have studied painting should know the perspective relationship, and this is the truth here.
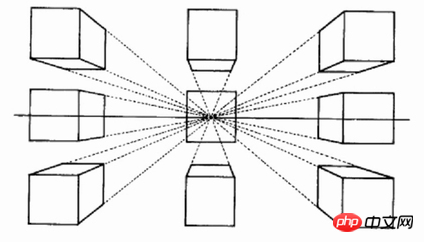
But in css it has a numerical value, for example perspective: 1000pxWhat does this represent? We can understand it this way. If we look directly at an object, the object will be super large and occupy our line of sight. As we get farther and farther away from it, it will become smaller and the three-dimensional feeling will come out, right? In fact, this numerical structure By determining the distance between our eyes and the screen, a virtual 3D illusion is constructed.
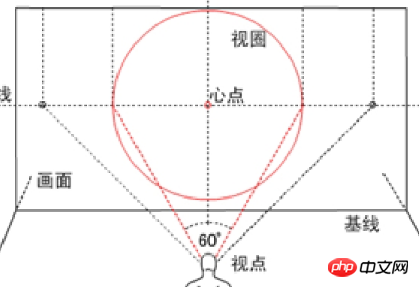
From the above we understand perspective, and after adding this origin, we What I mentioned earlier is the distance between the eye and the object, and this is the line of sight of the eye. The different positions of our viewpoint determine the different scenes we see. The default is the center, which is perspectice-origin: 50% 50% , the first value is the X-axis on which the 3D element is based, and the second value is defined as the position on the y-axis
When the perspective-origin attribute is defined for an element, its child elements will Get the perspective effect, not the element itself. Must be used with the perspective attribute, and only affects 3D transform elements. (W3school)
perspectiveHere we go again, that’s right, It is the key to 3D in css. transform-styleThe default is flat. If you want to have a 3D effect on the element, you must use transform-style: preserve -3d, otherwise it is just a plane transformation, not a 3D transformation
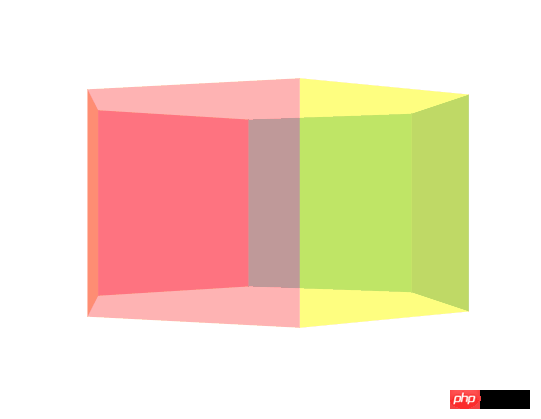
If the image cannot be loaded, just visit https://bupt- hjm.github.io/css3-3d/, if you think it is possible, remember to star it hh
piece-box
<p class="container">
    <p class="piece-box">
        <p class="piece piece-1"></p>
        <p class="piece piece-2"></p>
        <p class="piece piece-3"></p>
        <p class="piece piece-4"></p>
        <p class="piece piece-5"></p>
        <p class="piece piece-6"></p>
    </p>
</p>perspective,
/*容器*/
.container {
    -webkit-perspective: 1000px;
    -moz-perspective: 1000px;
    -ms-perspective: 1000px;
    perspective: 1000px;
}
/*piece盒子*/
 .piece-box {
        perspective-origin: 50% 50%;
        -webkit-transform-style: preserve-3d;
        -moz-transform-style: preserve-3d;
        -ms-transform-style: preserve-3d;
        transform-style: preserve-3d;
}/*容器*/
.container {
-webkit-perspective: 1000px;
-moz-perspective: 1000px;
-ms-perspective: 1000px;
perspective: 1000px;
}
/*piece盒子*/
.piece-box {
position: relative;
width: 200px;
height: 200px;
margin: 300px auto;
perspective-origin: 50% 50%;
-webkit-transform-style: preserve-3d;
-moz-transform-style: preserve-3d;
-ms-transform-style: preserve-3d;
transform-style: preserve-3d;
}
/*piece通用样式*/
.piece {
position: absolute;
width: 200px;
height: 200px;
background: red;
opacity: 0.5;
}
.piece-1 {
background: #FF6666;
}
.piece-2 {
background: #FFFF00;
}
.piece-3 {
background: #006699;
}
.piece-4 {
background: #009999;
}
.piece-5 {
background: #FF0033;
}
.piece-6 {
background: #FF6600;
}piece-6, because our 3Dtransform has not started yet
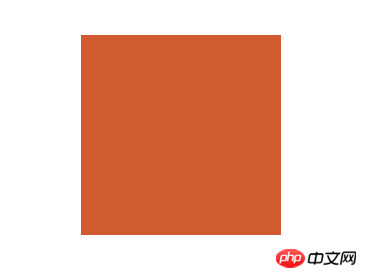
首先是实现走马灯,我们先不要让它走,先实现灯部分。
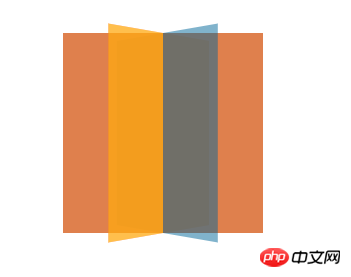
如何实现呢?因为要构成一个圆,圆是360度,而我们有6个piece,那么,很容易想到,我们需要把每一个piece以递增60度的方式rotateY,就变成如下
如何把他们从中心拉开呢?
这里我们还要注意一点,在我们使元素绕Y轴旋转以后,其实X轴和Z轴也会跟着旋转,所所以正方体的每个面的垂直线还是Z轴,我们就只需要改变下
translateZ的值,而当translateZ为正的时候,就朝着我们的方向走来,这样就可以拉开了
但是拉开的距离如何衡量?
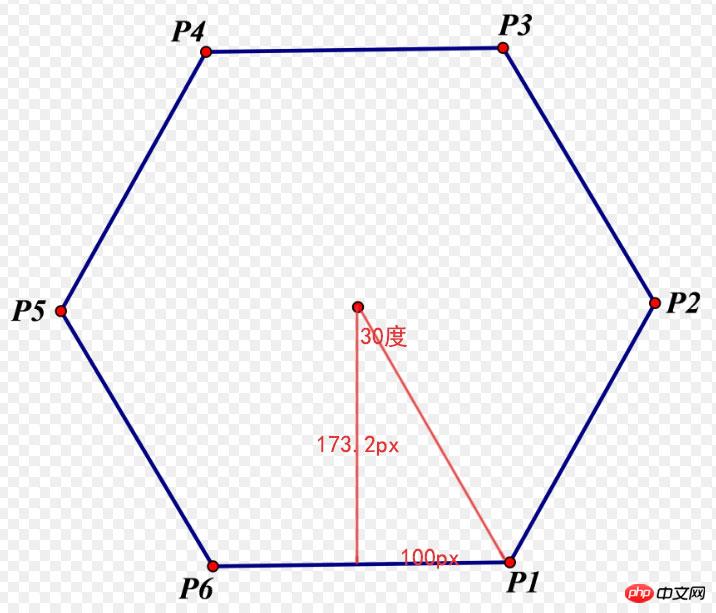
是不是一目了然了~
下面我们再修改下css
.piece-1 {
    background: #FF6666;
    -webkit-transform: rotateY(0deg) translateZ(173.2px);
    -ms-transform: rotateY(0deg) translateZ(173.2px);
    -o-transform: rotateY(0deg) translateZ(173.2px);
    transform: rotateY(0deg) translateZ(173.2px);

}
.piece-2 {
    background: #FFFF00;
    -webkit-transform: rotateY(60deg) translateZ(173.2px);
    -ms-transform: rotateY(60deg) translateZ(173.2px);
    -o-transform: rotateY(60deg) translateZ(173.2px);
    transform: rotateY(60deg) translateZ(173.2px);
}
.piece-3 {
    background: #006699;
    -webkit-transform: rotateY(120deg) translateZ(173.2px);
    -ms-transform: rotateY(120deg) translateZ(173.2px);
    -o-transform: rotateY(120deg) translateZ(173.2px);
    transform: rotateY(120deg) translateZ(173.2px);
}
.piece-4 {
    background: #009999;
    -webkit-transform: rotateY(180deg) translateZ(173.2px);
    -ms-transform: rotateY(180deg) translateZ(173.2px);
    -o-transform: rotateY(180deg) translateZ(173.2px);
    transform: rotateY(180deg) translateZ(173.2px);
}
.piece-5 {
    background: #FF0033;
    -webkit-transform: rotateY(240deg) translateZ(173.2px);
    -ms-transform: rotateY(240deg) translateZ(173.2px);
    -o-transform: rotateY(240deg) translateZ(173.2px);
    transform: rotateY(240deg) translateZ(173.2px);
}
.piece-6 {
    background: #FF6600;
    -webkit-transform: rotateY(300deg) translateZ(173.2px);
    -ms-transform: rotateY(300deg) translateZ(173.2px);
    -o-transform: rotateY(300deg) translateZ(173.2px);
    transform: rotateY(300deg) translateZ(173.2px);
}是不是已经实现了走马灯了?
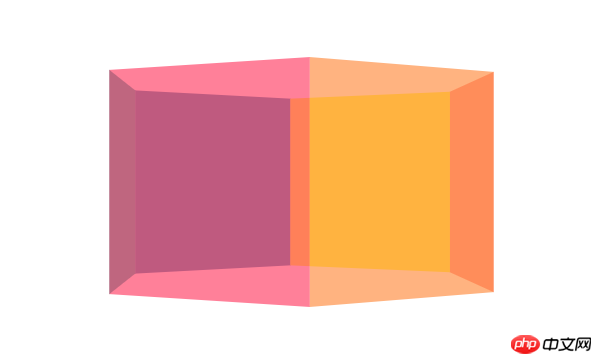
要实现走马灯动,其实很简单,我们只要在piece-box上加上旋转动画就行了,5s完成动画,从0度旋转到360度
/*piece盒子*/
.piece-box {
    position: relative;
    width: 200px;
    height: 200px;
    margin: 300px auto;
    perspective-origin: 50% 50%;
    -webkit-transform-style: preserve-3d;
    -moz-transform-style: preserve-3d;
    -ms-transform-style: preserve-3d;
    transform-style: preserve-3d;
    animation: pieceRotate 5s;
    -moz-animation: pieceRotate 5s; /* Firefox */
    -webkit-animation: pieceRotate 5s; /* Safari and Chrome */
    -o-animation: pieceRotate 5s ; /* Opera */
}
/*走马灯动画*/
@keyframes pieceRotate
{
0%   {-webkit-transform: rotateY(0deg);
        -ms-transform: rotateY(0deg);
        -o-transform: rotateY(0deg);
        transform: rotateY(0deg);}
100% {-webkit-transform: rotateY(360deg);
        -ms-transform: rotateY(360deg);
        -o-transform: rotateY(360deg);
        transform: rotateY(360deg);}
}
/* Firefox */
@-moz-keyframes pieceRotate
{
0%   {-webkit-transform: rotateY(0deg);
        -ms-transform: rotateY(0deg);
        -o-transform: rotateY(0deg);
        transform: rotateY(0deg);}
100% {-webkit-transform: rotateY(360deg);
        -ms-transform: rotateY(360deg);
        -o-transform: rotateY(360deg);
        transform: rotateY(360deg);}
}
/* Safari and Chrome */
@-webkit-keyframes pieceRotate
{
0%   {-webkit-transform: rotateY(0deg);
        -ms-transform: rotateY(0deg);
        -o-transform: rotateY(0deg);
        transform: rotateY(0deg);}
100% {-webkit-transform: rotateY(360deg);
        -ms-transform: rotateY(360deg);
        -o-transform: rotateY(360deg);
        transform: rotateY(360deg);}
}
/* Opera */
@-o-keyframes pieceRotate
{
0%   {-webkit-transform: rotateY(0deg);
        -ms-transform: rotateY(0deg);
        -o-transform: rotateY(0deg);
        transform: rotateY(0deg);}
100% {-webkit-transform: rotateY(360deg);
        -ms-transform: rotateY(360deg);
        -o-transform: rotateY(360deg);
        transform: rotateY(360deg);}
}这里就不放gif了~hhh是不是实现了酷炫的效果,还没结束哦~更酷炫的正方体组装
正方体,其实也不难实现,我这里就不很详细说了,你首先可以想象一个面,然后去拓展其他面如何去实现,比如我们把正方体的前面
translateZ(100px)让它靠近我们100px,然后后面translateZ(-100px)让它远离我们100px,左边是先translateX(-100px再rotateY(90deg),右边就是translateX(100px)再rotateY(90deg),上面是先translateY(-100px),rotateX(90deg),下面是先translateY(100px),rotateX(90deg),只要我们写进动画,一切就大功告成。
css就为如下,以下就只放piece1,其他读者可以自己类比实现,或者看我github的源码
.piece-1 {
     background: #FF6666;
     -webkit-transform: rotateY(0deg) translateZ(173.2px);
     -ms-transform: rotateY(0deg) translateZ(173.2px);
     -o-transform: rotateY(0deg) translateZ(173.2px);
     transform: rotateY(0deg) translateZ(173.2px);
     animation: piece1Rotate 5s 5s;
     -moz-animation: piece1Rotate 5s 5s; /* Firefox */
     -webkit-animation: piece1Rotate 5s 5s; /* Safari and Chrome */
     -o-animation: piece1Rotate 5s 5s; /* Opera */
     -webkit-animation-fill-mode: forwards; /* Chrome, Safari, Opera */
      animation-fill-mode: forwards;
 }
/*front*/
 @keyframes piece1Rotate
 {
 0%   {-webkit-transform: rotateY(0deg) translateZ(173.2px);
     -ms-transform: rotateY(0deg) translateZ(173.2px);
     -o-transform: rotateY(0deg) translateZ(173.2px);
     transform: rotateY(0deg) translateZ(173.2px);}
 100% {-webkit-transform: rotateY(0deg)  translateZ(100px);
     -ms-transform:  rotateY(0deg) translateZ(100px);
     -o-transform: rotateY(0deg)  translateZ(100px);
     transform:  rotateY(0deg) translateZ(100px);}
 }
 /* Firefox */
 @-moz-keyframes piece1Rotate
 {
 0%   {-webkit-transform: rotateY(0deg) translateZ(173.2px);
     -ms-transform: rotateY(0deg) translateZ(173.2px);
     -o-transform: rotateY(0deg) translateZ(173.2px);
     transform: rotateY(0deg) translateZ(173.2px);}
 100% {-webkit-transform: rotateY(0deg)  translateZ(100px);
     -ms-transform:  rotateY(0deg) translateZ(100px);
     -o-transform: rotateY(0deg)  translateZ(100px);
     transform:  rotateY(0deg) translateZ(100px);}
 }
 /* Safari and Chrome */
 @-webkit-keyframes piece1Rotate
 {
 0%   {-webkit-transform: rotateY(0deg) translateZ(173.2px);
     -ms-transform: rotateY(0deg) translateZ(173.2px);
     -o-transform: rotateY(0deg) translateZ(173.2px);
     transform: rotateY(0deg) translateZ(173.2px);}
 100% {-webkit-transform: rotateY(0deg)  translateZ(100px);
     -ms-transform:  rotateY(0deg) translateZ(100px);
     -o-transform: rotateY(0deg)  translateZ(100px);
     transform:  rotateY(0deg) translateZ(100px);}
 }
 /* Opera */
 @-o-keyframes piece1Rotate
 {
 0%   {-webkit-transform: rotateY(0deg) translateZ(173.2px);
     -ms-transform: rotateY(0deg) translateZ(173.2px);
     -o-transform: rotateY(0deg) translateZ(173.2px);
     transform: rotateY(0deg) translateZ(173.2px);}
 100% {-webkit-transform: rotateY(0deg)  translateZ(100px);
     -ms-transform:  rotateY(0deg) translateZ(100px);
     -o-transform: rotateY(0deg)  translateZ(100px);
     transform:  rotateY(0deg) translateZ(100px);}
}细心的读者可以发现我用了一个
animation-fill-mode: forwards;,这个其实就是让这些piece保持动画最后的效果,也就是正方体的效果,读者可以不加试试看,那还是会恢复原样。
最后就是正方体的旋转了,前面我们的容器已经用过animation了,读者可能会想我再加个class放animaiton不就行了,hhh,animaiton会覆盖掉前面的,那前面的走马灯的动画就没了,所以在html结构中,我再加了一个box包裹piece, 如下
<p class="container">
    <p class="piece-box">
        <p class="piece-box2"><!--新加的容器-->
            <p class="piece piece-1"></p>
            <p class="piece piece-2"></p>
            <p class="piece piece-3"></p>
            <p class="piece piece-4"></p>
            <p class="piece piece-5"></p>
            <p class="piece piece-6"></p>
        </p>
    </p>
</p>在动画上我们可以控制正方体动画的延时时间,就是等到正方体组装完成后再开始动画
animation: boxRotate 5s 10s infinite;第一个5s是动画时长,第二个10s是延时时间,然后我们让正方体的旋转,绕X轴从0度到360度,绕Y轴也0到Y轴360度。
.piece-box2 {
    -webkit-transform-style: preserve-3d;
    -moz-transform-style: preserve-3d;
    -ms-transform-style: preserve-3d;
    transform-style: preserve-3d;
    animation: boxRotate 5s 10s infinite;
    -moz-animation: boxRotate 5s 10s infinite; /* Firefox */
    -webkit-animation: boxRotate 5s 10s infinite; /* Safari and Chrome */
    -o-animation: boxRotate 5s 10s infinite; /* Opera */
}
/*正方体旋转动画*/
@keyframes boxRotate
{
0%   {-webkit-transform: rotateX(0deg) rotateY(0deg););
    -ms-transform: rotateX(0deg) rotateY(0deg););
    -o-transform: rotateX(0deg) rotateY(0deg););
    transform: rotateX(0deg) rotateY(0deg););}
100% {-webkit-transform: rotateX(360deg) rotateY(360deg);
    -ms-transform: rotateX(360deg) rotateY(360deg);
    -o-transform: rotateX(360deg) rotateY(360deg);
    transform: rotateX(360deg) rotateY(360deg);}
}
/* Firefox */
@-moz-keyframes boxRotate
{
0%   {-webkit-transform: rotateX(0deg) rotateY(0deg););
    -ms-transform: rotateX(0deg) rotateY(0deg););
    -o-transform: rotateX(0deg) rotateY(0deg););
    transform: rotateX(0deg) rotateY(0deg););}
100% {-webkit-transform: rotateX(360deg) rotateY(360deg);
    -ms-transform: rotateX(360deg) rotateY(360deg);
    -o-transform: rotateX(360deg) rotateY(360deg);
    transform: rotateX(360deg) rotateY(360deg);}
}
/* Safari and Chrome */
@-webkit-keyframes boxRotate
{
0%   {-webkit-transform: rotateX(0deg) rotateY(0deg););
    -ms-transform: rotateX(0deg) rotateY(0deg););
    -o-transform: rotateX(0deg) rotateY(0deg););
    transform: rotateX(0deg) rotateY(0deg););}
100% {-webkit-transform: rotateX(360deg) rotateY(360deg);
    -ms-transform: rotateX(360deg) rotateY(360deg);
    -o-transform: rotateX(360deg) rotateY(360deg);
    transform: rotateX(360deg) rotateY(360deg);}
}
/* Opera */
@-o-keyframes boxRotate
{
0%   {-webkit-transform: rotateX(0deg) rotateY(0deg););
    -ms-transform: rotateX(0deg) rotateY(0deg););
    -o-transform: rotateX(0deg) rotateY(0deg););
    transform: rotateX(0deg) rotateY(0deg););}
100% {-webkit-transform: rotateX(360deg) rotateY(360deg);
    -ms-transform: rotateX(360deg) rotateY(360deg);
    -o-transform: rotateX(360deg) rotateY(360deg);
    transform: rotateX(360deg) rotateY(360deg);}
}最后效果,大功告成!
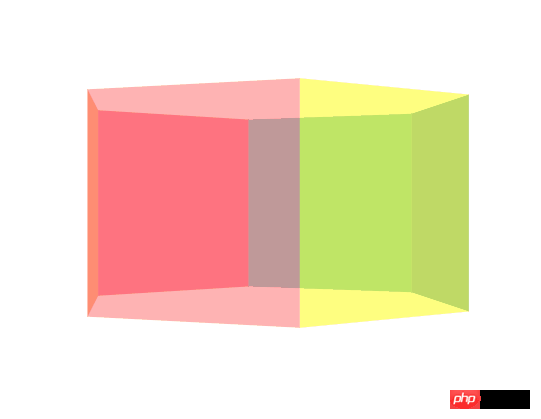
The above is the detailed content of Illustration of the 3D technical steps for playing with CSS3. For more information, please follow other related articles on the PHP Chinese website!
 The difference between windows hibernation and sleep
 How to set up Douyin to prevent everyone from viewing the work
 What is Bitcoin? Is it legal? Is it a scam?
 The role of domain name servers
 Summary of java basic knowledge
 C#Task usage
 What versions of linux system are there?
 C language random function usage


