

Android新人求教问:如何自定义ViewGroup,望大神潜入、不吝赐教。

3张扑克牌叠在一起显示效果如下:
这个布局效果可以用该RelativeLayout或FrameLayout,然后为每一个扑克牌设置margin就能实现,不过我觉得这种方式有点low,谁可以告知高级一点的实现方式啊,求告知~
回复内容:
3张扑克牌叠在一起显示效果如下:
这个布局效果可以用该RelativeLayout或FrameLayout,然后为每一个扑克牌设置margin就能实现,不过我觉得这种方式有点low,谁可以告知高级一点的实现方式啊,求告知~
除了你说的那种,我们还可以用ViewGroup实现。不过在定制ViewGroup之前,我们需要先理解一些定义。
Android绘制视图的方式。“绘制布局由两个遍历过程组成:测量过程和布局过程。测量过程由measure(int, int)方法完成,该方法从上到下遍历视图树。在递归遍历过程中,每个视图都会向下层传递尺寸和规格。当measure方法遍历结束,每个视图都保存了各自的尺寸信息。第二个过程由 layout(int,int,int,int)方法完成,该方法也是由上而下遍历视图树,在遍历过程中,每个父视图通过测量过程的结果定位所有子视图的位置信息。”
简而言之,第一步是测量ViewGroup的宽度和高度,在onMeasure()方法中完成,ViewGroup遍历所有子视图计算出它的大小。第二步是根据第一步获取的尺寸去布局所有子视图,在onLayout()中完成。
创建CascadeLayout
终于到了定制ViewGroup的阶段了。假设我们已经定制了一个CascadeLayout的容器,我们会这样使用它。
1.
3. xmlns:android="http://schemas.android.com/apk/res/android"
4. android:layout_width="fill_parent"
5. android:layout_height="fill_parent" >
6.
7.
9. android:layout_height="fill_parent"
10.
11. cascade:horizontal_spacing="30dp"
12. cascade:vertical_spacing="20dp" >
13.
14.
16. android:layout_height="150dp"
17. android:background="#FF0000" />
18.
19.
21. android:layout_height="150dp"
22. android:background="#00FF00" />
23.
24.
26. android:layout_height="150dp"
27. android:background="#0000FF" />
28.
29.
30.
首先,定义属性。在values文件夹下面创建attrs.xml,代码如下:
1.
2.
3.
4.
5.
6.
同时,为了严谨一些,定义一些默认的垂直距离和水平距离,以防在布局中没有提供这些属性。
在dimens.xml中添加如下代码:
1.
2.
3.
4.
准备工作已经做好了,接下来看一下CascadeLayout的源码,略微有点长,后面帮助大家分析一下。
1.public class CascadeLayout extends ViewGroup {
2.
3. private int mHorizontalSpacing;
4. private int mVerticalSpacing;
5.
6. public CascadeLayout(Context context, AttributeSet attrs) {
7. super(context, attrs);
8.
9. TypedArray a = context.obtainStyledAttributes(attrs,
10. R.styleable.CascadeLayout);
11.
12. try {
13. mHorizontalSpacing = a.getDimensionPixelSize(
14. R.styleable.CascadeLayout_horizontal_spacing,
15. getResources().getDimensionPixelSize(
16. R.dimen.cascade_horizontal_spacing));
17.
18. mVerticalSpacing = a.getDimensionPixelSize(
19. R.styleable.CascadeLayout_vertical_spacing, getResources()
20. .getDimensionPixelSize(R.dimen.cascade_vertical_spacing));
21. } finally {
22. a.recycle();
23. }
24.
25. }
26.
27. @Override
28. protected void onMeasure(int widthMeasureSpec, int heightMeasureSpec) {
29. int width = getPaddingLeft();
30. int height = getPaddingTop();
31. int verticalSpacing;
32.
33. final int count = getChildCount();
34. for (int i = 0; i
35. verticalSpacing = mVerticalSpacing;
36.
37. View child = getChildAt(i);
38. measureChild(child, widthMeasureSpec, heightMeasureSpec);
39.
40. LayoutParams lp = (LayoutParams) child.getLayoutParams();
41. width = getPaddingLeft() + mHorizontalSpacing * i;
42.
43. lp.x = width;
44. lp.y = height;
45.
46. if (lp.verticalSpacing >= 0) {
47. verticalSpacing = lp.verticalSpacing;
48. }
49.
50. width += child.getMeasuredWidth();
51. height += verticalSpacing;
52. }
53.
54. width += getPaddingRight();
55. height += getChildAt(getChildCount() - 1).getMeasuredHeight()
56. + getPaddingBottom();
57.
58. setMeasuredDimension(resolveSize(width, widthMeasureSpec),
59. resolveSize(height, heightMeasureSpec));
60. }
61.
62. @Override
63. protected void onLayout(boolean changed, int l, int t, int r, int b) {
64.
65. final int count = getChildCount();
66. for (int i = 0; i
67. View child = getChildAt(i);
68. LayoutParams lp = (LayoutParams) child.getLayoutParams();
69.
70. child.layout(lp.x, lp.y, lp.x + child.getMeasuredWidth(), lp.y
71. + child.getMeasuredHeight());
72. }
73. }
74.
75. @Override
76. protected boolean checkLayoutParams(ViewGroup.LayoutParams p) {
77. return p instanceof LayoutParams;
78. }
79.
80. @Override
81. protected LayoutParams generateDefaultLayoutParams() {
82. return new LayoutParams(LayoutParams.WRAP_CONTENT,
83. LayoutParams.WRAP_CONTENT);
84. }
85.
86. @Override
87. public LayoutParams generateLayoutParams(AttributeSet attrs) {
88. return new LayoutParams(getContext(), attrs);
89. }
90.
91. @Override
92. protected LayoutParams generateLayoutParams(ViewGroup.LayoutParams p) {
93. return new LayoutParams(p.width, p.height);
94. }
95.
96. public static class LayoutParams extends ViewGroup.LayoutParams {
97. int x;
98. int y;
99. public int verticalSpacing;
100.
101. public LayoutParams(Context context, AttributeSet attrs) {
102. super(context, attrs);
103. }
104.
105. public LayoutParams(int w, int h) {
106. super(w, h);
107. }
108.
109. }
110.}
首先,分析构造函数。
1.public CascadeLayout(Context context, AttributeSet attrs) {
2. super(context, attrs);
3.
4. TypedArray a = context.obtainStyledAttributes(attrs,
5. R.styleable.CascadeLayout);
6.
7. try {
8. mHorizontalSpacing = a.getDimensionPixelSize(
9. R.styleable.CascadeLayout_horizontal_spacing,
10. getResources().getDimensionPixelSize(
11. R.dimen.cascade_horizontal_spacing));
12.
13. mVerticalSpacing = a.getDimensionPixelSize(
14. R.styleable.CascadeLayout_vertical_spacing, getResources()
15. .getDimensionPixelSize(R.dimen.cascade_vertical_spacing));
16. } finally {
17. a.recycle();
18. }
19.
20. }
如果在布局中使用CasecadeLayout,系统就会调用这个构造函数,这个大家都应该知道的吧。这里不解释why,有兴趣的可以去看源码,重点看系统是如何解析xml布局的。
构造函数很简单,就是通过布局文件中的属性,获取水平距离和垂直距离。
然后,分析自定义LayoutParams。
这个类的用途就是保存每个子视图的x,y轴位置。这里把它定义为静态内部类。ps:提到静态内部类,我又想起来关于多线程内存泄露的问题了,如果有时间再给大家解释一下多线程造成内存泄露的问题。
1.public static class LayoutParams extends ViewGroup.LayoutParams {
2. int x;
3. int y;
4. public int verticalSpacing;
5.
6. public LayoutParams(Context context, AttributeSet attrs) {
7. super(context, attrs);
8. }
9.
10. public LayoutParams(int w, int h) {
11. super(w, h);
12. }
13.
14. }
除此之外,还需要重写一些方法,checkLayoutParams()、generateDefaultLayoutParams()等,这个方法在不同ViewGroup之间往往是相同的。
接下来,分析onMeasure()方法。
1.@Override
2.protected void onMeasure(int widthMeasureSpec, int heightMeasureSpec) {
3. int width = getPaddingLeft();
4. int height = getPaddingTop();
5. int verticalSpacing;
6.
7. final int count = getChildCount();
8. for (int i = 0; i
9. verticalSpacing = mVerticalSpacing;
10.
11. View child = getChildAt(i);
12. measureChild(child, widthMeasureSpec, heightMeasureSpec); // 令每个子视图测量自身
13.
14. LayoutParams lp = (LayoutParams) child.getLayoutParams();
15. width = getPaddingLeft() + mHorizontalSpacing * i;
16. // 保存每个子视图的x,y轴坐标
17. lp.x = width;
18. lp.y = height;
19.
20. if (lp.verticalSpacing >= 0) {
21. verticalSpacing = lp.verticalSpacing;
22. }
23.
24. width += child.getMeasuredWidth();
25. height += verticalSpacing;
26. }
27.
28. width += getPaddingRight();
29. height += getChildAt(getChildCount() - 1).getMeasuredHeight()
30. + getPaddingBottom();
31. // 使用计算所得的宽和高设置整个布局的测量尺寸
32. setMeasuredDimension(resolveSize(width, widthMeasureSpec),
33. resolveSize(height, heightMeasureSpec));
34.}
最后,分析onLayout()方法。
1.@Override
2.protected void onLayout(boolean changed, int l, int t, int r, int b) {
3.
4. final int count = getChildCount();
5. for (int i = 0; i
6. View child = getChildAt(i);
7. LayoutParams lp = (LayoutParams) child.getLayoutParams();
8.
9. child.layout(lp.x, lp.y, lp.x + child.getMeasuredWidth(), lp.y
10. + child.getMeasuredHeight());
11. }
12.}
逻辑很简单,用onMeasure()方法计算出的值为参数循环调用子View的layout()方法。
为子视图添加自定义属性
作为示例,下面将添加子视图重写垂直间距的方法。
第一步是向attrs.xml中添加一个新的属性。
1.
2.
3.
这里的属性名是layout_vertical_spacing,因为该属性名前缀是layout_,同时,又不是View固有的属性,所以该属性会被添加到LayoutParams的属性表中。在CascadeLayout类的构造函数中读取这个新属性。
1.public static class LayoutParams extends ViewGroup.LayoutParams {
2. int x;
3. int y;
4. public int verticalSpacing;
5.
6. public LayoutParams(Context context, AttributeSet attrs) {
7. super(context, attrs);
8.
9. TypedArray a = context.obtainStyledAttributes(attrs,
10. R.styleable.CascadeLayout_LayoutParams);
11. try {
12. verticalSpacing = a
13. .getDimensionPixelSize(
14. R.styleable.CascadeLayout_LayoutParams_layout_vertical_spacing,
15. -1);
16. } finally {
17. a.recycle();
18. }
19. }
20.
21. public LayoutParams(int w, int h) {
22. super(w, h);
23. }
24.
25. }
那怎么使用这个属性呢?so easy!
1.
3. android:layout_height="fill_parent"
4. cascade:horizontal_spacing="30dp"
5. cascade:vertical_spacing="20dp" >
6.
7.
8.
10. android:layout_height="150dp"
11. cascade:layout_vertical_spacing="90dp"
12. android:background="#FF0000" />
13.
14.
16. android:layout_height="150dp"
17. android:background="#00FF00" />
18.
19.
21. android:layout_height="150dp"
22. android:background="#0000FF" />
23.
其实你只需要搜索“创建定制的ViewGroup”就能找到正确的答案了。
right answer

Heiße KI -Werkzeuge

Undresser.AI Undress
KI-gestützte App zum Erstellen realistischer Aktfotos

AI Clothes Remover
Online-KI-Tool zum Entfernen von Kleidung aus Fotos.

Undress AI Tool
Ausziehbilder kostenlos

Clothoff.io
KI-Kleiderentferner

AI Hentai Generator
Erstellen Sie kostenlos Ai Hentai.

Heißer Artikel
Heiße Werkzeuge

Notepad++7.3.1
Einfach zu bedienender und kostenloser Code-Editor

SublimeText3 chinesische Version
Chinesische Version, sehr einfach zu bedienen

Senden Sie Studio 13.0.1
Leistungsstarke integrierte PHP-Entwicklungsumgebung

Dreamweaver CS6
Visuelle Webentwicklungstools

SublimeText3 Mac-Version
Codebearbeitungssoftware auf Gottesniveau (SublimeText3)
Heiße Themen


 PHP 8.4 Installations- und Upgrade-Anleitung für Ubuntu und Debian
Dec 24, 2024 pm 04:42 PM
PHP 8.4 Installations- und Upgrade-Anleitung für Ubuntu und Debian
Dec 24, 2024 pm 04:42 PM
PHP 8.4 bringt mehrere neue Funktionen, Sicherheitsverbesserungen und Leistungsverbesserungen mit einer beträchtlichen Menge an veralteten und entfernten Funktionen. In dieser Anleitung wird erklärt, wie Sie PHP 8.4 installieren oder auf PHP 8.4 auf Ubuntu, Debian oder deren Derivaten aktualisieren. Obwohl es möglich ist, PHP aus dem Quellcode zu kompilieren, ist die Installation aus einem APT-Repository wie unten erläutert oft schneller und sicherer, da diese Repositorys in Zukunft die neuesten Fehlerbehebungen und Sicherheitsupdates bereitstellen.
 So richten Sie Visual Studio-Code (VS-Code) für die PHP-Entwicklung ein
Dec 20, 2024 am 11:31 AM
So richten Sie Visual Studio-Code (VS-Code) für die PHP-Entwicklung ein
Dec 20, 2024 am 11:31 AM
Visual Studio Code, auch bekannt als VS Code, ist ein kostenloser Quellcode-Editor – oder eine integrierte Entwicklungsumgebung (IDE) –, die für alle gängigen Betriebssysteme verfügbar ist. Mit einer großen Sammlung von Erweiterungen für viele Programmiersprachen kann VS Code c
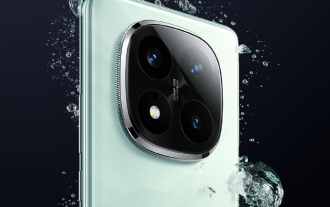 Xiaomi Redmi Note 14 Pro Plus erscheint als erstes Qualcomm Snapdragon 7s Gen 3 Smartphone mit Light Hunter 800 Kamera
Sep 27, 2024 am 06:23 AM
Xiaomi Redmi Note 14 Pro Plus erscheint als erstes Qualcomm Snapdragon 7s Gen 3 Smartphone mit Light Hunter 800 Kamera
Sep 27, 2024 am 06:23 AM
Das Redmi Note 14 Pro Plus ist nun offiziell als direkter Nachfolger des letztjährigen Redmi Note 13 Pro Plus (aktuell 375 $ bei Amazon) erhältlich. Wie erwartet steht das Redmi Note 14 Pro Plus neben dem Redmi Note 14 und dem Redmi Note 14 Pro an der Spitze der Redmi Note 14-Serie. Li
 Wie analysiert und verarbeitet man HTML/XML in PHP?
Feb 07, 2025 am 11:57 AM
Wie analysiert und verarbeitet man HTML/XML in PHP?
Feb 07, 2025 am 11:57 AM
Dieses Tutorial zeigt, wie XML -Dokumente mit PHP effizient verarbeitet werden. XML (Extensible Markup-Sprache) ist eine vielseitige textbasierte Markup-Sprache, die sowohl für die Lesbarkeit des Menschen als auch für die Analyse von Maschinen entwickelt wurde. Es wird üblicherweise für die Datenspeicherung ein verwendet und wird häufig verwendet
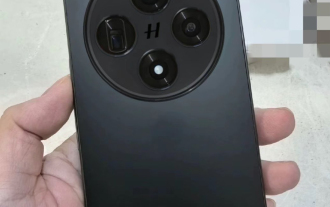 Das Design des Oppo Find X8 sieht auf ersten Bildern wie eine Kreuzung zwischen Apple iPhone 16 Pro und OnePlus Open aus
Sep 28, 2024 am 06:04 AM
Das Design des Oppo Find X8 sieht auf ersten Bildern wie eine Kreuzung zwischen Apple iPhone 16 Pro und OnePlus Open aus
Sep 28, 2024 am 06:04 AM
In der Vergangenheit hat Oppo seine Flaggschiff-Serie „Find X“ im späten Winter oder frühen Frühling aktualisiert, mit Ausnahme des ursprünglichen Find an dieser Stelle. H
 PHP -Programm zum Zählen von Vokalen in einer Zeichenfolge
Feb 07, 2025 pm 12:12 PM
PHP -Programm zum Zählen von Vokalen in einer Zeichenfolge
Feb 07, 2025 pm 12:12 PM
Eine Zeichenfolge ist eine Folge von Zeichen, einschließlich Buchstaben, Zahlen und Symbolen. In diesem Tutorial wird lernen, wie Sie die Anzahl der Vokale in einer bestimmten Zeichenfolge in PHP unter Verwendung verschiedener Methoden berechnen. Die Vokale auf Englisch sind a, e, i, o, u und sie können Großbuchstaben oder Kleinbuchstaben sein. Was ist ein Vokal? Vokale sind alphabetische Zeichen, die eine spezifische Aussprache darstellen. Es gibt fünf Vokale in Englisch, einschließlich Großbuchstaben und Kleinbuchstaben: a, e, ich, o, u Beispiel 1 Eingabe: String = "TutorialPoint" Ausgabe: 6 erklären Die Vokale in der String "TutorialPoint" sind u, o, i, a, o, ich. Insgesamt gibt es 6 Yuan
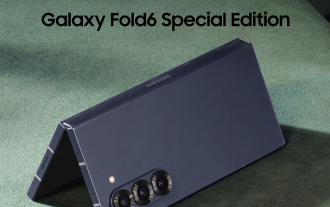 Die Samsung Galaxy Z Fold Special Edition soll Ende Oktober erscheinen, da ein widersprüchlicher Name auftaucht
Oct 01, 2024 am 06:21 AM
Die Samsung Galaxy Z Fold Special Edition soll Ende Oktober erscheinen, da ein widersprüchlicher Name auftaucht
Oct 01, 2024 am 06:21 AM
Die Einführung des lang erwarteten faltbaren „Special Edition“-Modells von Samsung hat eine weitere Wendung genommen. In den letzten Wochen verliefen die Gerüchte um die sogenannte Galaxy Z Fold Special Edition eher ruhig. Stattdessen hat sich der Fokus auf die Galaxy S25-Serie verlagert, darunter
 iQOO Z9 Turbo+ debütiert als Dimensity 9300+-Smartphone mit „außergewöhnlicher' Akkulaufzeit
Sep 26, 2024 am 06:20 AM
iQOO Z9 Turbo+ debütiert als Dimensity 9300+-Smartphone mit „außergewöhnlicher' Akkulaufzeit
Sep 26, 2024 am 06:20 AM
Das Z9 Turbo+ ist jetzt im chinesischen Online-Shop von Vivo für 2.199 Yuan (~313 US-Dollar) für ein Basismodell mit 12 GB RAM/256 GB internem Speicher erhältlich, während das RedmiK70 Extreme Edition mit der gleichen Konfiguration bei 2.599 Yuan (~370 US-Dollar) startete: Tatsächlich ist es so newiQ
