

重新配置或卸载 11gR2 Grid Infrastructure

Oracle 11g R2 Grid Infrastructure 的安装与配置较之前的版本提供了更多的灵活性。在Grid Infrastructure安装完毕前执行root.sh经常容易出现错误,并且需要修复该错误才能得以继续。在这个版本中我们可以直接通过执行脚本rootcrs.pl来重新配置Grid Infrastr
Oracle 11g R2 Grid Infrastructure 的安装与配置较之前的版本提供了更多的灵活性。在Grid Infrastructure安装完毕前执行root.sh经常容易出现错误,并且需要修复该错误才能得以继续。在这个版本中我们可以直接通过执行脚本rootcrs.pl来重新配置Grid Infrastructure而无需先卸载Grid Infrastructure,然后修复故障后进行再次安装。下面描述了rootcrs.pl的用法以及使用deinstall彻底卸载Grid Infrastructure。
1、rootcrs.pl命令介绍
[python] view plaincopyprint?
- #命令位置:$GRID_HOME/crs/install
- #命令说明:
- # 该命令主要是用于对crs进行维护与管理,包括patch,upgrade,downgrade,deconfig等等
- # perldoc rootcrs.pl执行这个命令获得完整的介绍
- [root@linux1 install]# ./rootcrs.pl -h
- Unknown option: h
- Usage:
- rootcrs.pl [-verbose] [-upgrade | -patch] [-hahome
] - [-paramfile
] - [-deconfig | -downgrade] [-force] [-lastnode]
- [-downgrade] [-oldcrshome
] [-version ] - [-unlock [-crshome
]] - Options:
- -verbose Run this script in verbose mode
- -upgrade Oracle HA is being upgraded from previous version
- -patch Oracle HA is being upgraded to a patch version
- -hahome Complete path of Oracle Clusterware home
- -paramfile Complete path of file specifying HA parameter values
- -lastnode Force the node this is executing on to be considered the
- last node of the install and perform actions associated
- with configurig the last node
- -downgrade Downgrade the clusterware
- -version For use with downgrade; special handling is required if
- downgrading to 9i. This is the old crs version in the format
- A.B.C.D.E (e.g 11.1.0.6.0).
- -deconfig Remove Oracle Clusterware to allow it to be uninstalled or reinstalled.
- -force Force the executon of steps in delete that cannot be verified
- to be safe
- -unlock Unlock CRS home
- -crshome Complete path of crs home. Use with unlock option.
- -oldcrshome For use with downgrade. Complete path of the old crs home.
- If neither -upgrade nor -patch is supplied, a new install is performed
- To see the full manpage for this program, execute:
- perldoc rootcrs.pl
#对于执行root.sh失败时,我们可以通过该命令以-deconfig 参数来清除crs的配置信息,然后根据log修复故障或使用patch之后再重新执行root.sh
#对于该命令的patch,upgrade,downgrade用法再此不作详细介绍
2、重新配置Grid Infrastructure及ASM
[python] view plaincopyprint?
- #重新配置Grid Infrastructure并不会移除已经复制的二进制文件,仅仅是回复到配置crs之前的状态,下面是其步骤
- a、使用root用户登录,并执行下面的命令(所有节点,但最后一个节点除外)
- # perl $GRID_HOME/crs/install/rootcrs.pl -verbose -deconfig -force
- b、同样使用root用户在最后一个节点执行下面的命令。该命令将清空ocr 配置和voting disk
- # perl $GRID_HOME/crs/install/rootcrs.pl -verbose -deconfig -force -lastnode
- c、如果使用了ASM磁盘,继续下面的操作以使得ASM重新作为候选磁盘(清空所有的ASM磁盘组)
- # dd if=/dev/zero of=/dev/sdb1 bs=1024 count=100
- # /etc/init.d/oracleasm deletedisk DATA /dev/sdb1
- # /etc/init.d/oracleasm createdisk DATA /dev/sdb1
- #Author : Robinson
- #Blog : http://blog.csdn.net/robinson_0612
3、彻底删除Grid Infrastructure
[python] view plaincopyprint?
- #11g R2 Grid Infrastructure也提供了彻底卸载的功能,deinstall该命令取代了使用OUI方式来清除clusterware以及ASM,回复到安装grid之前的环境。
- #该命令将停止集群,移除二进制文件及其相关的所有配置信息。
- #命令位置:$GRID_HOME/deinstall
- #下面是该命令操作的具体事例,操作期间,需要提供一些交互信息,以及在新的session以root身份清除一些/tmp下的文件
- [root@linux1 bin]# ./crsctl check crs
- CRS-4638: Oracle High Availability Services is online
- CRS-4537: Cluster Ready Services is online
- CRS-4529: Cluster Synchronization Services is online
- CRS-4533: Event Manager is online
- [root@linux1 bin]# cd ../deinstall/
- [root@linux1 deinstall]# pwd
- /u01/app/11.2.0/grid/deinstall
- [root@linux1 deinstall]# ./deinstall
- You must not be logged in as root to run ./deinstall.
- Log in as Oracle user and rerun ./deinstall.
- [root@linux1 deinstall]# su grid
- [grid@linux1 deinstall]$ ./deinstall
- Checking for required files and bootstrapping ...
- Please wait ...
- Location of logs /tmp/deinstall2013-07-16_05-54-03-PM/logs/
- ############ ORACLE DEINSTALL & DECONFIG TOOL START ############
- ######################## CHECK OPERATION START ########################
- Install check configuration START
- Checking for existence of the Oracle home location /u01/app/11.2.0/grid
- Oracle Home type selected for de-install is: CRS
- Oracle Base selected for de-install is: /u01/app/grid
- Checking for existence of central inventory location /u01/app/oraInventory
- Checking for existence of the Oracle Grid Infrastructure home /u01/app/11.2.0/grid
- The following nodes are part of this cluster: linux1,linux2
- Install check configuration END
- Traces log file: /tmp/deinstall2013-07-16_05-54-03-PM/logs//crsdc.log
- Network Configuration check config START
- Network de-configuration trace file location: /tmp/deinstall2013-07-16_05-54-03-PM/logs/netdc_check207506844451155733.log
- Network Configuration check config END
- Asm Check Configuration START
- ASM de-configuration trace file location: /tmp/deinstall2013-07-16_05-54-03-PM/logs/asmcadc_check2698133635629979531.log
- ASM configuration was not detected in this Oracle home. Was ASM configured in this Oracle home (y|n) [n]: y
- Automatic Storage Management (ASM) instance is detected in this Oracle home /u01/app/11.2.0/grid.
- ASM Diagnostic Destination : /u01/app/grid
- ASM Diskgroups : +DATA
- Diskgroups will be dropped
- De-configuring ASM will drop all the diskgroups and it's contents at cleanup time. This will affect all of the databases and ACFS
- that use this ASM instance(s).
- If you want to retain the existing diskgroups or if any of the information detected is incorrect, you can modify by entering 'y'.
- Do you want to modify above information (y|n) [n]:
- ######################### CHECK OPERATION END #########################
- ####################### CHECK OPERATION SUMMARY #######################
- Oracle Grid Infrastructure Home is: /u01/app/11.2.0/grid
- The cluster node(s) on which the Oracle home exists are: (Please input nodes seperated by ",", eg: node1,node2,...)linux1,linux2
- Oracle Home selected for de-install is: /u01/app/11.2.0/grid
- Inventory Location where the Oracle home registered is: /u01/app/oraInventory
- ASM instance will be de-configured from this Oracle home
- Do you want to continue (y - yes, n - no)? [n]: y
- A log of this session will be written to: '/tmp/deinstall2013-07-16_05-54-03-PM/logs/deinstall_deconfig2013-07-16_05-54-37-PM.out'
- Any error messages from this session will be written to: '/tmp/deinstall2013-07-16_05-54-03-PM/logs/deinstall_deconfig2013-07-16_05-54-37-PM.err'
- ######################## CLEAN OPERATION START ########################
- ASM de-configuration trace file location: /tmp/deinstall2013-07-16_05-54-03-PM/logs/asmcadc_clean3319637107726750003.log
- ASM Clean Configuration START
- ASM Clean Configuration END
- Network Configuration clean config START
- Network de-configuration trace file location: /tmp/deinstall2013-07-16_05-54-03-PM/logs/netdc_clean9055263637610505743.log
- De-configuring Naming Methods configuration file on all nodes...
- Naming Methods configuration file de-configured successfully.
- De-configuring Local Net Service Names configuration file on all nodes...
- Local Net Service Names configuration file de-configured successfully.
- De-configuring Directory Usage configuration file on all nodes...
- Directory Usage configuration file de-configured successfully.
- De-configuring backup files on all nodes...
- Backup files de-configured successfully.
- The network configuration has been cleaned up successfully.
- Network Configuration clean config END
- ---------------------------------------->
- Run the following command as the root user or the administrator on node "linux2".
- /tmp/deinstall2013-07-16_05-54-03-PM/perl/bin/perl -I/tmp/deinstall2013-07-16_05-54-03-PM/perl/lib
- -I/tmp/deinstall2013-07-16_05-54-03-PM/crs/install /tmp/deinstall2013-07-16_05-54-03-PM/crs/install/rootcrs.pl -force
- -delete -paramfile /tmp/deinstall2013-07-16_05-54-03-PM/response/deinstall_Ora11g_gridinfrahome1.rsp
- Run the following command as the root user or the administrator on node "linux1".
- /tmp/deinstall2013-07-16_05-54-03-PM/perl/bin/perl -I/tmp/deinstall2013-07-16_05-54-03-PM/perl/lib
- -I/tmp/deinstall2013-07-16_05-54-03-PM/crs/install /tmp/deinstall2013-07-16_05-54-03-PM/crs/install/rootcrs.pl -force
- -delete -paramfile /tmp/deinstall2013-07-16_05-54-03-PM/response/deinstall_Ora11g_gridinfrahome1.rsp -lastnode
- Press Enter after you finish running the above commands
- Oracle Universal Installer clean START
- Detach Oracle home '/u01/app/11.2.0/grid' from the central inventory on the local node : Done
- Delete directory '/u01/app/11.2.0/grid' on the local node : Done
- Delete directory '/u01/app/oraInventory' on the local node : Done
- Delete directory '/u01/app/grid' on the local node : Done
- Detach Oracle home '/u01/app/11.2.0/grid' from the central inventory on the remote nodes 'linux2' : Done
- Delete directory '/u01/app/11.2.0/grid' on the remote nodes 'linux2' : Done
- Delete directory '/u01/app/oraInventory' on the remote nodes 'linux2' : Done
- Delete directory '/u01/app/grid' on the remote nodes 'linux2' : Done
- Oracle Universal Installer cleanup was successful.
- Oracle Universal Installer clean END
- Oracle install clean START
- Clean install operation removing temporary directory '/tmp/install' on node 'linux1'
- Clean install operation removing temporary directory '/tmp/install' on node 'linux2'
- Oracle install clean END
- ######################### CLEAN OPERATION END #########################
- ####################### CLEAN OPERATION SUMMARY #######################
- ASM instance was de-configured successfully from the Oracle home
- Oracle Clusterware is stopped and successfully de-configured on node "linux2"
- Oracle Clusterware is stopped and successfully de-configured on node "linux1"
- Oracle Clusterware is stopped and de-configured successfully.
- Successfully detached Oracle home '/u01/app/11.2.0/grid' from the central inventory on the local node.
- Successfully deleted directory '/u01/app/11.2.0/grid' on the local node.
- Successfully deleted directory '/u01/app/oraInventory' on the local node.
- Successfully deleted directory '/u01/app/grid' on the local node.
- Successfully detached Oracle home '/u01/app/11.2.0/grid' from the central inventory on the remote nodes 'linux2'.
- Successfully deleted directory '/u01/app/11.2.0/grid' on the remote nodes 'linux2'.
- Successfully deleted directory '/u01/app/oraInventory' on the remote nodes 'linux2'.
- Successfully deleted directory '/u01/app/grid' on the remote nodes 'linux2'.
- Oracle Universal Installer cleanup was successful.
- Run 'rm -rf /etc/oraInst.loc' as root on node(s) 'linux1,linux2' at the end of the session.
- Oracle install successfully cleaned up the temporary directories.
- #######################################################################
- ############# ORACLE DEINSTALL & DECONFIG TOOL END #############

更多参考
有关Oracle RAC请参考
使用crs_setperm修改RAC资源的所有者及权限
使用crs_profile管理RAC资源配置文件
RAC 数据库的启动与关闭
再说 Oracle RAC services
Services in Oracle Database 10g
Migrate datbase from single instance to Oracle RAC
Oracle RAC 连接到指定实例
Oracle RAC 负载均衡测试(结合服务器端与客户端)
Oracle RAC 服务器端连接负载均衡(Load Balance)
Oracle RAC 客户端连接负载均衡(Load Balance)
ORACLE RAC 下非缺省端口监听配置(listener.ora tnsnames.ora)
ORACLE RAC 监听配置 (listener.ora tnsnames.ora)
配置 RAC 负载均衡与故障转移
CRS-1006 , CRS-0215 故障一例
基于Linux (RHEL 5.5) 安装Oracle 10g RAC
使用 runcluvfy 校验Oracle RAC安装环境
有关Oracle 网络配置相关基础以及概念性的问题请参考:
配置非默认端口的动态服务注册
配置sqlnet.ora限制IP访问Oracle
Oracle 监听器日志配置与管理
设置 Oracle 监听器密码(LISTENER)
配置ORACLE 客户端连接到数据库
有关基于用户管理的备份和备份恢复的概念请参考
Oracle 冷备份
Oracle 热备份
Oracle 备份恢复概念
Oracle 实例恢复
Oracle 基于用户管理恢复的处理
SYSTEM 表空间管理及备份恢复
SYSAUX表空间管理及恢复
Oracle 基于备份控制文件的恢复(unsing backup controlfile)
有关RMAN的备份恢复与管理请参考
RMAN 概述及其体系结构
RMAN 配置、监控与管理
RMAN 备份详解
RMAN 还原与恢复
RMAN catalog 的创建和使用
基于catalog 创建RMAN存储脚本
基于catalog 的RMAN 备份与恢复
RMAN 备份路径困惑
使用RMAN实现异机备份恢复(WIN平台)
使用RMAN迁移文件系统数据库到ASM
linux 下RMAN备份shell脚本
使用RMAN迁移数据库到异机
有关ORACLE体系结构请参考
Oracle 表空间与数据文件
Oracle 密码文件
Oracle 参数文件
Oracle 联机重做日志文件(ONLINE LOG FILE)
Oracle 控制文件(CONTROLFILE)
Oracle 归档日志
Oracle 回滚(ROLLBACK)和撤销(UNDO)
Oracle 数据库实例启动关闭过程
Oracle 10g SGA 的自动化管理
Oracle 实例和Oracle数据库(Oracle体系结构)

Heiße KI -Werkzeuge

Undresser.AI Undress
KI-gestützte App zum Erstellen realistischer Aktfotos

AI Clothes Remover
Online-KI-Tool zum Entfernen von Kleidung aus Fotos.

Undress AI Tool
Ausziehbilder kostenlos

Clothoff.io
KI-Kleiderentferner

AI Hentai Generator
Erstellen Sie kostenlos Ai Hentai.

Heißer Artikel
Heiße Werkzeuge

Notepad++7.3.1
Einfach zu bedienender und kostenloser Code-Editor

SublimeText3 chinesische Version
Chinesische Version, sehr einfach zu bedienen

Senden Sie Studio 13.0.1
Leistungsstarke integrierte PHP-Entwicklungsumgebung

Dreamweaver CS6
Visuelle Webentwicklungstools

SublimeText3 Mac-Version
Codebearbeitungssoftware auf Gottesniveau (SublimeText3)
Heiße Themen
 1378
1378
 52
52

 So deinstallieren Sie das WPS-Dokument
Mar 20, 2024 pm 02:01 PM
So deinstallieren Sie das WPS-Dokument
Mar 20, 2024 pm 02:01 PM
So deinstallieren Sie WPS-Dokumente: Gehen Sie zur Systemsteuerung und suchen Sie nach WPS, um WPS zu deinstallieren. Häufig verwendete Dokumente, Formulare, Präsentationen und andere Funktionen können direkt verwendet werden Arbeitseffizienz. Aber viele Freunde wissen nicht, wie man WPS-Dateien deinstalliert. Wie deinstalliert man also WPS-Dateien? Ich erkläre es dir weiter unten. Bei der Deinstallation werden Programmdateien, Ordner und zugehörige Daten von einem Computer entfernt, um Speicherplatz freizugeben und Software vom System zu entfernen. Darüber hinaus umfasst die Deinstallation das Löschen des Gerätetreibers und der zugehörigen Registrierungsinformationen von der Festplatte und das anschließende Entfernen des Geräts vom physischen Gerät des Computers. Im Folgenden finden Sie die Schritte zum Deinstallieren von WPS-Dokumenten, die zum Deinstallieren jeglicher Software geeignet sind.
 Führen Sie die Schritte zur Deinstallation von 360 Browser aus
Feb 25, 2024 pm 04:51 PM
Führen Sie die Schritte zur Deinstallation von 360 Browser aus
Feb 25, 2024 pm 04:51 PM
So deinstallieren Sie 360 Browser sauber Mit der rasanten Entwicklung und Popularität des Internets sind Browser zu einem unverzichtbaren Werkzeug im täglichen Leben der Menschen geworden. Auf dem Markt stehen viele Browser zur Auswahl, z. B. Chrome, Firefox, Edge usw. Allerdings wird 360 Browser als beliebter Browser in China auch von vielen Nutzern genutzt. In einigen Fällen müssen Benutzer den 360-Browser jedoch möglicherweise deinstallieren, weil sie ihn entweder nicht mehr verwenden oder einen anderen Browser ausprobieren möchten. In diesem Artikel stellen wir eine einfache und trockene Lösung vor
 So deinstallieren Sie Corsair Icue unter Windows 11/10 vollständig
Mar 04, 2024 am 10:22 AM
So deinstallieren Sie Corsair Icue unter Windows 11/10 vollständig
Mar 04, 2024 am 10:22 AM
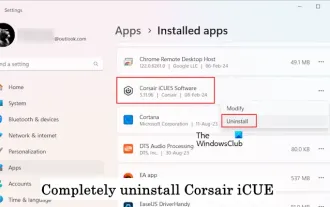
Die CorsairIcue-Software bietet Benutzern verschiedene Funktionen wie RGB-Beleuchtungssteuerung, Leistungsüberwachung wie Lüftersteuerung usw. Manchmal funktioniert die CorsairIcue-Software nicht richtig. In diesem Fall müssen wir es komplett deinstallieren und neu installieren. In diesem Artikel zeigen wir Ihnen, wie Sie CorsairIcue unter Windows 11/10 vollständig deinstallieren. So deinstallieren Sie CorsairIcue unter Windows 11/10 vollständig. Die folgenden Anweisungen führen Sie durch die Deinstallation von CorsairIcue unter Windows 11/10. Deinstallieren Sie CorsairICue über die Einstellungen oder die Systemsteuerung. Entfernen Sie alle zugehörigen Dienste. Entfernen Sie Registrierungsschlüssel. Entfernen Sie die verbleibenden Dateien. Unten:
 Das Funktionsprinzip und die Konfigurationsmethode von GDM im Linux-System
Mar 01, 2024 pm 06:36 PM
Das Funktionsprinzip und die Konfigurationsmethode von GDM im Linux-System
Mar 01, 2024 pm 06:36 PM
Titel: Das Funktionsprinzip und die Konfigurationsmethode von GDM in Linux-Systemen. In Linux-Betriebssystemen ist GDM (GNOMEDisplayManager) ein gängiger Anzeigemanager, der zur Steuerung der grafischen Benutzeroberfläche (GUI)-Anmeldung und Benutzersitzungsverwaltung verwendet wird. In diesem Artikel werden das Funktionsprinzip und die Konfigurationsmethode von GDM vorgestellt und spezifische Codebeispiele bereitgestellt. 1. Funktionsprinzip von GDM GDM ist der Display-Manager in der GNOME-Desktop-Umgebung. Er ist für den Start des X-Servers und die Bereitstellung der Anmeldeschnittstelle verantwortlich
 Wie deinstalliere ich Quark Network Disk? So deinstallieren Sie Quark Network Disk vollständig
Mar 14, 2024 am 08:52 AM
Wie deinstalliere ich Quark Network Disk? So deinstallieren Sie Quark Network Disk vollständig
Mar 14, 2024 am 08:52 AM
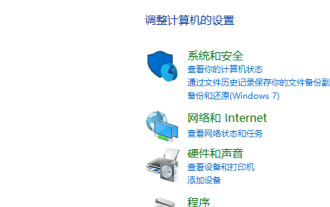
Es gibt viele benutzerfreundliche Netzwerk-Festplattensoftware auf dem Markt, wie z. B. Baidu Cloud Disk, Quark Cloud Disk, Alibaba Cloud Disk usw. Einige Benutzer haben die Ressourcen in Quark Network Disk auf eine andere Festplatte übertragen und möchten Quark Network Disk deinstallieren, stellen jedoch fest, dass die Deinstallation nicht möglich ist. Dieses Tutorial zeigt Ihnen, wie Sie Quark Network Disk vollständig deinstallieren. Wie deinstalliere ich Quark Network Disk? 1. Öffnen Sie zunächst das Bedienfeld. 2. Wählen Sie dann „Programm deinstallieren“. 3. Klicken Sie abschließend mit der rechten Maustaste und wählen Sie „Deinstallieren“, um eine saubere Deinstallation durchzuführen. PS: Nach der Deinstallation können Sie mit der Software auch noch einmal scannen, ob noch Müll übrig ist.
 So deinstallieren Sie openiv
Feb 23, 2024 am 09:09 AM
So deinstallieren Sie openiv
Feb 23, 2024 am 09:09 AM
Aufgrund der Beliebtheit von Computern und der Entwicklung von Software müssen wir häufig Software hinzufügen oder deinstallieren, um unseren Anforderungen gerecht zu werden. Eine der Anforderungen für die Softwareinstallation und -deinstallation ist OpenIV. OpenIV ist ein Tool zum Modifizieren und Verwalten von Grand Theft Auto (GTA)-Spielen. Allerdings kann es zu Verwirrung kommen, wenn wir OpenIV nicht mehr benötigen oder es deinstallieren müssen. In diesem Artikel erfahren Sie, wie Sie OpenIV deinstallieren. Zuerst müssen wir verstehen, wie OpenIV installiert wird. normalerweise
 Verstehen Sie Linux Bashrc: Funktionen, Konfiguration und Verwendung
Mar 20, 2024 pm 03:30 PM
Verstehen Sie Linux Bashrc: Funktionen, Konfiguration und Verwendung
Mar 20, 2024 pm 03:30 PM
Grundlegendes zu Linux Bashrc: Funktion, Konfiguration und Verwendung In Linux-Systemen ist Bashrc (BourneAgainShellruncommands) eine sehr wichtige Konfigurationsdatei, die verschiedene Befehle und Einstellungen enthält, die beim Systemstart automatisch ausgeführt werden. Die Bashrc-Datei befindet sich normalerweise im Home-Verzeichnis des Benutzers und ist eine versteckte Datei. Ihre Funktion besteht darin, die Bashshell-Umgebung für den Benutzer anzupassen. 1. Bashrc-Funktionseinstellungsumgebung
 Die neueste Lösung für das Problem, dass Office nicht sauber deinstalliert wird und nicht neu installiert werden kann
Mar 13, 2024 pm 04:31 PM
Die neueste Lösung für das Problem, dass Office nicht sauber deinstalliert wird und nicht neu installiert werden kann
Mar 13, 2024 pm 04:31 PM
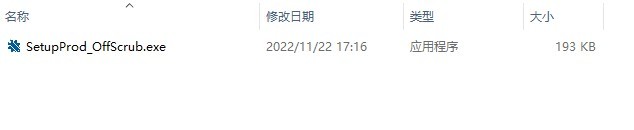
Heutzutage ist auf den Computern auf dem Markt standardmäßig Office-Software installiert. Einige Benutzer stellen jedoch fest, dass die Version nicht einfach zu verwenden ist. Wenn sie die häufig verwendete Office-Version deinstallieren und erneut installieren möchten, werden sie darauf hingewiesen, dass die Deinstallation fehlgeschlagen ist Dies liegt daran, dass das systemeigene Office nicht sauber deinstalliert werden kann, was zu einem Versionskonflikt während der Installation führt. Schauen wir uns an, wie Sie das Problem lösen können, dass Office nicht sauber deinstalliert wird und nicht neu installiert werden kann. Methode 1: Verwenden Sie das offizielle Office-Deinstallationstool 1. Laden Sie das [offizielle Office-Deinstallationstool von Microsoft] herunter, um die automatische Deinstallation von Office 2007~2019-Serien und Microsoft 365 und anderer Software zu unterstützen. 2. Nach dem Ausführen von [SetupProd_OffScrub.exe] wird es automatisch ausgeführt
