

ubuntu thrift 0.9.3编译安装

ubuntu thrift 0.9.3编译安装
编译并安装
安装依赖
apt-get install automake
apt-get install libssl-dev
apt-get install byacc
apt-get install bison
apt-get install flex
apt-get install libevent-dev
生成编译文件
cd thrift
./bootstrap.sh
configure.ac:84: installing './compile'
configure.ac:88: installing './config.guess'
configure.ac:88: installing './config.sub'
configure.ac:27: installing './install-sh'
configure.ac:27: installing './missing'
compiler/cpp/Makefile.am: installing './depcomp'
configure.ac: installing './ylwrap'
编译前配置,禁用java和python, 安装目录设为/usr/lib,而不是默认的/usr/local/lib
./configure --libdir=/usr/lib --without-java --without-python
...
thrift 0.9.3

Building C++ Library ......... : yes
Building C (GLib) Library .... : no
Building Java Library ........ : no
Building C# Library .......... : no
Building Python Library ...... : no
Building Ruby Library ........ : no
Building Haxe Library ........ : no
Building Haskell Library ..... : no
Building Perl Library ........ : no
Building PHP Library ......... : no
Building Erlang Library ...... : no
Building Go Library .......... : no
Building D Library ........... : no
Building NodeJS Library ...... : no
Building Lua Library ......... : no

C++ Library:
   Build TZlibTransport ...... : yes
   Build TNonblockingServer .. : yes
   Build TQTcpServer (Qt4) .... : no
   Build TQTcpServer (Qt5) .... : no

If something is missing that you think should be present,
please skim the output of configure to find the missing
component.  Details are present in config.log.
编译
make
运行测试程序
测试
make check
注意,v0.9.3的make check有个bug, 这里是对应的jira issue, 报错信息是
An error message from getaddrinfo on the console is expected:
Thrift: Mon Dec 14 12:19:09 2015 TServerSocket::listen() BIND 9090
安装
sudo make install
注意:
- $thrift-git-project 是thrift gi项目所在目录库文件安装在/usr/lib目录下头文件安装在/usr/local/include/thrift目录下
Making install in compiler/cpp
make[1]: Entering directory '$thrift-git-project/compiler/cpp'
make  install-am
make[2]: Entering directory '$thrift-git-project/compiler/cpp'
make[3]: Entering directory '$thrift-git-project/compiler/cpp'
 /bin/mkdir -p '/usr/local/bin'
  /bin/bash ../../libtool   --mode=install /usr/bin/install -c thrift '/usr/local/bin'
libtool: install: /usr/bin/install -c thrift /usr/local/bin/thrift
make[3]: Nothing to be done for 'install-data-am'.
make[3]: Leaving directory '$thrift-git-project/compiler/cpp'
make[2]: Leaving directory '$thrift-git-project/compiler/cpp'
make[1]: Leaving directory '$thrift-git-project/compiler/cpp'
Making install in lib
make[1]: Entering directory '$thrift-git-project/lib'
Making install in cpp
make[2]: Entering directory '$thrift-git-project/lib/cpp'
Making install in .
make[3]: Entering directory '$thrift-git-project/lib/cpp'
make[4]: Entering directory '$thrift-git-project/lib/cpp'
 /bin/mkdir -p '/usr/lib'
 /bin/bash ../../libtool   --mode=install /usr/bin/install -c   libthrift.la libthriftnb.la libthriftz.la '/usr/lib'
libtool: install: /usr/bin/install -c .libs/libthrift-0.9.3.so /usr/lib/libthrift-0.9.3.so
libtool: install: (cd /usr/lib && { ln -s -f libthrift-0.9.3.so libthrift.so || { rm -f libthrift.so && ln -s libthrift-0.9.3.so libthrift.so; }; })
libtool: install: /usr/bin/install -c .libs/libthrift.lai /usr/lib/libthrift.la
libtool: install: /usr/bin/install -c .libs/libthriftnb-0.9.3.so /usr/lib/libthriftnb-0.9.3.so
libtool: install: (cd /usr/lib && { ln -s -f libthriftnb-0.9.3.so libthriftnb.so || { rm -f libthriftnb.so && ln -s libthriftnb-0.9.3.so libthriftnb.so; }; })
libtool: install: /usr/bin/install -c .libs/libthriftnb.lai /usr/lib/libthriftnb.la
libtool: install: /usr/bin/install -c .libs/libthriftz-0.9.3.so /usr/lib/libthriftz-0.9.3.so
libtool: install: (cd /usr/lib && { ln -s -f libthriftz-0.9.3.so libthriftz.so || { rm -f libthriftz.so && ln -s libthriftz-0.9.3.so libthriftz.so; }; })
libtool: install: /usr/bin/install -c .libs/libthriftz.lai /usr/lib/libthriftz.la
libtool: install: /usr/bin/install -c .libs/libthrift.a /usr/lib/libthrift.a
libtool: install: chmod 644 /usr/lib/libthrift.a
libtool: install: ranlib /usr/lib/libthrift.a
libtool: install: /usr/bin/install -c .libs/libthriftnb.a /usr/lib/libthriftnb.a
libtool: install: chmod 644 /usr/lib/libthriftnb.a
libtool: install: ranlib /usr/lib/libthriftnb.a
libtool: install: /usr/bin/install -c .libs/libthriftz.a /usr/lib/libthriftz.a
libtool: install: chmod 644 /usr/lib/libthriftz.a
libtool: install: ranlib /usr/lib/libthriftz.a
libtool: finish: PATH="/usr/local/sbin:/usr/local/bin:/usr/sbin:/usr/bin:/sbin:/bin:/sbin" ldconfig -n /usr/lib
----------------------------------------------------------------------
Libraries have been installed in:
   /usr/lib

If you ever happen to want to link against installed libraries
in a given directory, LIBDIR, you must either use libtool, and
specify the full pathname of the library, or use the `-LLIBDIR'
flag during linking and do at least one of the following:
   - add LIBDIR to the `LD_LIBRARY_PATH' environment variable
     during execution
   - add LIBDIR to the `LD_RUN_PATH' environment variable
     during linking
   - use the `-Wl,-rpath -Wl,LIBDIR' linker flag
   - have your system administrator add LIBDIR to `/etc/ld.so.conf'

See any operating system documentation about shared libraries for
more information, such as the ld(1) and ld.so(8) manual pages.
----------------------------------------------------------------------
 /bin/mkdir -p '/usr/local/include/thrift/async'
 /usr/bin/install -c -m 644 src/thrift/async/TAsyncChannel.h src/thrift/async/TAsyncDispatchProcessor.h src/thrift/async/TAsyncProcessor.h src/thrift/async/TAsyncBufferProcessor.h src/thrift/async/TAsyncProtocolProcessor.h src/thrift/async/TConcurrentClientSyncInfo.h src/thrift/async/TEvhttpClientChannel.h src/thrift/async/TEvhttpServer.h '/usr/local/include/thrift/async'
 /bin/mkdir -p '/usr/local/include/thrift/concurrency'
 /usr/bin/install -c -m 644 src/thrift/concurrency/BoostThreadFactory.h src/thrift/concurrency/Exception.h src/thrift/concurrency/Mutex.h src/thrift/concurrency/Monitor.h src/thrift/concurrency/PlatformThreadFactory.h src/thrift/concurrency/PosixThreadFactory.h src/thrift/concurrency/StdMonitor.cpp src/thrift/concurrency/StdMutex.cpp src/thrift/concurrency/StdThreadFactory.cpp src/thrift/concurrency/StdThreadFactory.h src/thrift/concurrency/Thread.h src/thrift/concurrency/ThreadManager.h src/thrift/concurrency/TimerManager.h src/thrift/concurrency/FunctionRunner.h src/thrift/concurrency/Util.h '/usr/local/include/thrift/concurrency'
 /bin/mkdir -p '/usr/local/include/thrift/processor'
 /usr/bin/install -c -m 644 src/thrift/processor/PeekProcessor.h src/thrift/processor/StatsProcessor.h src/thrift/processor/TMultiplexedProcessor.h '/usr/local/include/thrift/processor'
 /bin/mkdir -p '/usr/local/include/thrift/protocol'
 /usr/bin/install -c -m 644 src/thrift/protocol/TBinaryProtocol.h src/thrift/protocol/TBinaryProtocol.tcc src/thrift/protocol/TCompactProtocol.h src/thrift/protocol/TCompactProtocol.tcc src/thrift/protocol/TDebugProtocol.h src/thrift/protocol/TBase64Utils.h src/thrift/protocol/TJSONProtocol.h src/thrift/protocol/TMultiplexedProtocol.h src/thrift/protocol/TProtocolDecorator.h src/thrift/protocol/TProtocolTap.h src/thrift/protocol/TProtocolException.h src/thrift/protocol/TVirtualProtocol.h src/thrift/protocol/TProtocol.h '/usr/local/include/thrift/protocol'
 /bin/mkdir -p '/usr/local/include/thrift/qt'
 /usr/bin/install -c -m 644 src/thrift/qt/TQIODeviceTransport.h src/thrift/qt/TQTcpServer.h '/usr/local/include/thrift/qt'
 /bin/mkdir -p '/usr/local/include/thrift/server'
 /usr/bin/install -c -m 644 src/thrift/server/TConnectedClient.h src/thrift/server/TServer.h src/thrift/server/TServerFramework.h src/thrift/server/TSimpleServer.h src/thrift/server/TThreadPoolServer.h src/thrift/server/TThreadedServer.h src/thrift/server/TNonblockingServer.h '/usr/local/include/thrift/server'
 /bin/mkdir -p '/usr/local/include/thrift'
 /usr/bin/install -c -m 644 ../../config.h src/thrift/thrift-config.h src/thrift/TDispatchProcessor.h src/thrift/Thrift.h src/thrift/TOutput.h src/thrift/TProcessor.h src/thrift/TApplicationException.h src/thrift/TLogging.h src/thrift/cxxfunctional.h src/thrift/TToString.h '/usr/local/include/thrift'
 /bin/mkdir -p '/usr/local/include/thrift/transport'
 /usr/bin/install -c -m 644 src/thrift/transport/PlatformSocket.h src/thrift/transport/TFDTransport.h src/thrift/transport/TFileTransport.h src/thrift/transport/TSimpleFileTransport.h src/thrift/transport/TServerSocket.h src/thrift/transport/TSSLServerSocket.h src/thrift/transport/TServerTransport.h src/thrift/transport/THttpTransport.h src/thrift/transport/THttpClient.h src/thrift/transport/THttpServer.h src/thrift/transport/TSocket.h src/thrift/transport/TPipe.h src/thrift/transport/TPipeServer.h src/thrift/transport/TSSLSocket.h src/thrift/transport/TSocketPool.h src/thrift/transport/TVirtualTransport.h src/thrift/transport/TTransport.h src/thrift/transport/TTransportException.h src/thrift/transport/TTransportUtils.h src/thrift/transport/TBufferTransports.h src/thrift/transport/TShortReadTransport.h src/thrift/transport/TZlibTransport.h '/usr/local/include/thrift/transport'
 /bin/mkdir -p '/usr/lib/pkgconfig'
 /usr/bin/install -c -m 644 thrift.pc thrift-nb.pc thrift-z.pc '/usr/lib/pkgconfig'
make[4]: Leaving directory '$thrift-git-project/lib/cpp'
make[3]: Leaving directory '$thrift-git-project/lib/cpp'
Making install in test
make[3]: Entering directory '$thrift-git-project/lib/cpp/test'
make  install-am
make[4]: Entering directory '$thrift-git-project/lib/cpp/test'
make[5]: Entering directory '$thrift-git-project/lib/cpp/test'
make[5]: Nothing to be done for 'install-exec-am'.
make[5]: Nothing to be done for 'install-data-am'.
make[5]: Leaving directory '$thrift-git-project/lib/cpp/test'
make[4]: Leaving directory '$thrift-git-project/lib/cpp/test'
make[3]: Leaving directory '$thrift-git-project/lib/cpp/test'
make[2]: Leaving directory '$thrift-git-project/lib/cpp'
make[2]: Entering directory '$thrift-git-project/lib'
make[3]: Entering directory '$thrift-git-project/lib'
make[3]: Nothing to be done for 'install-exec-am'.
make[3]: Nothing to be done for 'install-data-am'.
make[3]: Leaving directory '$thrift-git-project/lib'
make[2]: Leaving directory '$thrift-git-project/lib'
make[1]: Leaving directory '$thrift-git-project/lib'
Making install in test
make[1]: Entering directory '$thrift-git-project/test'
Making install in cpp
make[2]: Entering directory '$thrift-git-project/test/cpp'
make  install-am
make[3]: Entering directory '$thrift-git-project/test/cpp'
make[4]: Entering directory '$thrift-git-project/test/cpp'
make[4]: Nothing to be done for 'install-exec-am'.
make[4]: Nothing to be done for 'install-data-am'.
make[4]: Leaving directory '$thrift-git-project/test/cpp'
make[3]: Leaving directory '$thrift-git-project/test/cpp'
make[2]: Leaving directory '$thrift-git-project/test/cpp'
make[2]: Entering directory '$thrift-git-project/test'
make[3]: Entering directory '$thrift-git-project/test'
make[3]: Nothing to be done for 'install-exec-am'.
make[3]: Nothing to be done for 'install-data-am'.
make[3]: Leaving directory '$thrift-git-project/test'
make[2]: Leaving directory '$thrift-git-project/test'
make[1]: Leaving directory '$thrift-git-project/test'
Making install in tutorial
make[1]: Entering directory '$thrift-git-project/tutorial'
Making install in cpp
make[2]: Entering directory '$thrift-git-project/tutorial/cpp'
make  install-am
make[3]: Entering directory '$thrift-git-project/tutorial/cpp'
make[4]: Entering directory '$thrift-git-project/tutorial/cpp'
make[4]: Nothing to be done for 'install-exec-am'.
make[4]: Nothing to be done for 'install-data-am'.
make[4]: Leaving directory '$thrift-git-project/tutorial/cpp'
make[3]: Leaving directory '$thrift-git-project/tutorial/cpp'
make[2]: Leaving directory '$thrift-git-project/tutorial/cpp'
make[2]: Entering directory '$thrift-git-project/tutorial'
../compiler/cpp/thrift --gen html -r ../tutorial/tutorial.thrift
make[3]: Entering directory '$thrift-git-project/tutorial'
make[3]: Nothing to be done for 'install-exec-am'.
make[3]: Nothing to be done for 'install-data-am'.
make[3]: Leaving directory '$thrift-git-project/tutorial'
make[2]: Leaving directory '$thrift-git-project/tutorial'
make[1]: Leaving directory '$thrift-git-project/tutorial'
make[1]: Entering directory '$thrift-git-project'
make[2]: Entering directory '$thrift-git-project'
make[2]: Nothing to be done for 'install-exec-am'.
make[2]: Nothing to be done for 'install-data-am'.
make[2]: Leaving directory '$thrift-git-project'
make[1]: Leaving directory '$thrift-git-project'
Nach dem Login kopieren

Heiße KI -Werkzeuge

Undresser.AI Undress
KI-gestützte App zum Erstellen realistischer Aktfotos

AI Clothes Remover
Online-KI-Tool zum Entfernen von Kleidung aus Fotos.

Undress AI Tool
Ausziehbilder kostenlos

Clothoff.io
KI-Kleiderentferner

Video Face Swap
Tauschen Sie Gesichter in jedem Video mühelos mit unserem völlig kostenlosen KI-Gesichtstausch-Tool aus!

Heißer Artikel
Heiße Werkzeuge

Notepad++7.3.1
Einfach zu bedienender und kostenloser Code-Editor

SublimeText3 chinesische Version
Chinesische Version, sehr einfach zu bedienen

Senden Sie Studio 13.0.1
Leistungsstarke integrierte PHP-Entwicklungsumgebung

Dreamweaver CS6
Visuelle Webentwicklungstools

SublimeText3 Mac-Version
Codebearbeitungssoftware auf Gottesniveau (SublimeText3)
Heiße Themen
 1393
1393
 52
52

 Lösung für das Problem, dass das chinesische Sprachpaket nicht auf einem Win11-System installiert werden kann
Mar 09, 2024 am 09:48 AM
Lösung für das Problem, dass das chinesische Sprachpaket nicht auf einem Win11-System installiert werden kann
Mar 09, 2024 am 09:48 AM
Lösung für das Problem, dass das Win11-System das chinesische Sprachpaket nicht installieren kann. Mit der Einführung des Windows 11-Systems begannen viele Benutzer, ihr Betriebssystem zu aktualisieren, um neue Funktionen und Schnittstellen zu nutzen. Einige Benutzer stellten jedoch fest, dass sie das chinesische Sprachpaket nach dem Upgrade nicht installieren konnten, was ihre Erfahrung beeinträchtigte. In diesem Artikel besprechen wir die Gründe, warum das Win11-System das chinesische Sprachpaket nicht installieren kann, und stellen einige Lösungen bereit, die Benutzern bei der Lösung dieses Problems helfen. Ursachenanalyse Lassen Sie uns zunächst die Unfähigkeit des Win11-Systems analysieren
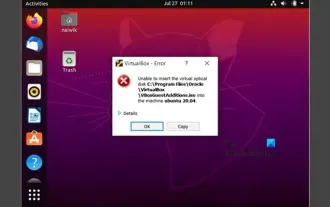 Gastzusätze können in VirtualBox nicht installiert werden
Mar 10, 2024 am 09:34 AM
Gastzusätze können in VirtualBox nicht installiert werden
Mar 10, 2024 am 09:34 AM
Möglicherweise können Sie keine Gastzusätze zu einer virtuellen Maschine in OracleVirtualBox installieren. Wenn wir auf Geräte>InstallGuestAdditionsCDImage klicken, wird einfach ein Fehler wie unten gezeigt ausgegeben: VirtualBox – Fehler: Virtuelles Laufwerk C kann nicht eingefügt werden: DateienOracleVirtualBoxVBoxGuestAdditions.iso in die Ubuntu-Maschine programmieren In diesem Beitrag werden wir verstehen, was passiert, wenn Sie. Was zu tun ist, wenn Sie Gastzusätze können in VirtualBox nicht installiert werden. Gastzusätze können nicht in VirtualBox installiert werden. Wenn Sie es nicht in Virtua installieren können
 Melden Sie sich als Superuser bei Ubuntu an
Mar 20, 2024 am 10:55 AM
Melden Sie sich als Superuser bei Ubuntu an
Mar 20, 2024 am 10:55 AM
In Ubuntu-Systemen ist der Root-Benutzer normalerweise deaktiviert. Um den Root-Benutzer zu aktivieren, können Sie mit dem Befehl passwd ein Passwort festlegen und sich dann mit dem Befehl su- als Root anmelden. Der Root-Benutzer ist ein Benutzer mit uneingeschränkten Systemadministratorrechten. Er verfügt über Berechtigungen zum Zugriff auf und zum Ändern von Dateien, zur Benutzerverwaltung, zum Installieren und Entfernen von Software sowie zum Ändern der Systemkonfiguration. Es gibt offensichtliche Unterschiede zwischen dem Root-Benutzer und normalen Benutzern. Der Root-Benutzer verfügt über die höchste Autorität und umfassendere Kontrollrechte im System. Der Root-Benutzer kann wichtige Systembefehle ausführen und Systemdateien bearbeiten, was normale Benutzer nicht können. In dieser Anleitung werde ich den Ubuntu-Root-Benutzer untersuchen, wie man sich als Root anmeldet und wie er sich von einem normalen Benutzer unterscheidet. Beachten
 Was soll ich tun, wenn Baidu Netdisk erfolgreich heruntergeladen wurde, aber nicht installiert werden kann?
Mar 13, 2024 pm 10:22 PM
Was soll ich tun, wenn Baidu Netdisk erfolgreich heruntergeladen wurde, aber nicht installiert werden kann?
Mar 13, 2024 pm 10:22 PM
Wenn Sie die Installationsdatei von Baidu Netdisk erfolgreich heruntergeladen haben, sie aber nicht normal installieren können, liegt möglicherweise ein Fehler in der Integrität der Softwaredatei vor oder es liegt ein Problem mit den verbleibenden Dateien und Registrierungseinträgen vor Lassen Sie uns die Analyse des Problems vorstellen, dass Baidu Netdisk erfolgreich heruntergeladen, aber nicht installiert werden kann. Analyse des Problems, dass Baidu Netdisk erfolgreich heruntergeladen, aber nicht installiert werden konnte 1. Überprüfen Sie die Integrität der Installationsdatei: Stellen Sie sicher, dass die heruntergeladene Installationsdatei vollständig und nicht beschädigt ist. Sie können es erneut herunterladen oder versuchen, die Installationsdatei von einer anderen vertrauenswürdigen Quelle herunterzuladen. 2. Deaktivieren Sie Antivirensoftware und Firewall: Einige Antivirensoftware oder Firewallprogramme verhindern möglicherweise die ordnungsgemäße Ausführung des Installationsprogramms. Versuchen Sie, die Antivirensoftware und die Firewall zu deaktivieren oder zu beenden, und führen Sie dann die Installation erneut aus
 Wie installiere ich Android-Apps unter Linux?
Mar 19, 2024 am 11:15 AM
Wie installiere ich Android-Apps unter Linux?
Mar 19, 2024 am 11:15 AM
Die Installation von Android-Anwendungen unter Linux war für viele Benutzer schon immer ein Problem. Insbesondere für Linux-Benutzer, die gerne Android-Anwendungen verwenden, ist es sehr wichtig, die Installation von Android-Anwendungen auf Linux-Systemen zu beherrschen. Obwohl die direkte Ausführung von Android-Anwendungen unter Linux nicht so einfach ist wie auf der Android-Plattform, können wir mithilfe von Emulatoren oder Tools von Drittanbietern Android-Anwendungen unter Linux dennoch problemlos genießen. Im Folgenden wird erläutert, wie Android-Anwendungen auf Linux-Systemen installiert werden.
 Android TV Box erhält inoffizielles Ubuntu 24.04-Upgrade
Sep 05, 2024 am 06:33 AM
Android TV Box erhält inoffizielles Ubuntu 24.04-Upgrade
Sep 05, 2024 am 06:33 AM
Für viele Benutzer klingt das Hacken einer Android-TV-Box entmutigend. Allerdings stand Entwickler Murray R. Van Luyn während der Broadcom-Chipknappheit vor der Herausforderung, nach geeigneten Alternativen zum Raspberry Pi zu suchen. Seine Zusammenarbeit mit der Armbia
 So installieren Sie Angular unter Ubuntu 24.04
Mar 23, 2024 pm 12:20 PM
So installieren Sie Angular unter Ubuntu 24.04
Mar 23, 2024 pm 12:20 PM
Angular.js ist eine frei zugängliche JavaScript-Plattform zum Erstellen dynamischer Anwendungen. Es ermöglicht Ihnen, verschiedene Aspekte Ihrer Anwendung schnell und klar auszudrücken, indem Sie die Syntax von HTML als Vorlagensprache erweitern. Angular.js bietet eine Reihe von Tools, die Sie beim Schreiben, Aktualisieren und Testen Ihres Codes unterstützen. Darüber hinaus bietet es viele Funktionen wie Routing und Formularverwaltung. In dieser Anleitung wird erläutert, wie Angular auf Ubuntu24 installiert wird. Zuerst müssen Sie Node.js installieren. Node.js ist eine JavaScript-Ausführungsumgebung, die auf der ChromeV8-Engine basiert und es Ihnen ermöglicht, JavaScript-Code auf der Serverseite auszuführen. In Ub sein
 So installieren Sie Podman unter Ubuntu 24.04
Mar 22, 2024 am 11:26 AM
So installieren Sie Podman unter Ubuntu 24.04
Mar 22, 2024 am 11:26 AM
Wenn Sie Docker verwendet haben, müssen Sie Daemons, Container und ihre Funktionen verstehen. Ein Daemon ist ein Dienst, der im Hintergrund läuft, wenn ein Container bereits in einem System verwendet wird. Podman ist ein kostenloses Verwaltungstool zum Verwalten und Erstellen von Containern, ohne auf einen Daemon wie Docker angewiesen zu sein. Daher bietet es Vorteile bei der Verwaltung von Containern, ohne dass langfristige Backend-Dienste erforderlich sind. Darüber hinaus erfordert Podman keine Root-Berechtigungen. In dieser Anleitung wird ausführlich erläutert, wie Sie Podman auf Ubuntu24 installieren. Um das System zu aktualisieren, müssen wir zunächst das System aktualisieren und die Terminal-Shell von Ubuntu24 öffnen. Sowohl während des Installations- als auch des Upgrade-Vorgangs müssen wir die Befehlszeile verwenden. eine einfache
