Microsoft replaced the classic Photo Viewer app in Windows 10 and 11 with Photos, its modern, feature-rich image viewer. However, if you liked the simplicity of Photo Viewer, here's how you can bring it back in Windows 10 and 11.
You can enable the classic Windows Photo Viewer app using a Windows Registry script. The following Windows Registry script reconfigures and enables the Windows Photo Viewer app.
Modifying your Windows Registry involves risk as incorrect modifications can cause your system to malfunction. If you intend to proceed with the steps below, first create a restore point and back up your Windows Registry. This will help you to recover your system if something goes wrong.
<code class="hljs xml">Windows Registry Editor Version 5.00 [HKEY_CLASSES_ROOT\Applications\Windowsphotoviewer.dll\shell\open] "MuiVerb"="@Windowsphotoviewer.dll,-3043" [HKEY_CLASSES_ROOT\Applications\Windowsphotoviewer.dll\shell\open\command] @="\"%SystemRoot%\\System32\\rundll32.exe\" \"%ProgramFiles%\\Windows Photo Viewer\\PhotoViewer.dll\", ImageView_Fullscreen %1" [HKEY_CLASSES_ROOT\Applications\Windowsphotoviewer.dll\shell\open\DropTarget] "Clsid"="{FFE2A43C-56B9-4bf5-9A79-CC6D4285608A}" [HKEY_CLASSES_ROOT\Applications\Windowsphotoviewer.dll\shell\print\command] @="\"%SystemRoot%\\System32\\rundll32.exe\" \"%ProgramFiles%\\Windows Photo Viewer\\PhotoViewer.dll\", ImageView_PrintTo %1" [HKEY_CLASSES_ROOT\Applications\Windowsphotoviewer.dll\shell\print\DropTarget] "Clsid"="{60fd46de-f830-4894-a628-6fa81bc0190d}"</code> 


Since Windows Photos Viewer doesn't have its own .EXE file, but only a .DLL, you can't open it from the search bar in Windows. Instead, to open pictures in Photo Viewer, right-click on any image in File Explorer, go to Open With > Choose another app, and then scroll down and select Windows Photo Viewer. Choose Just once to open the image. If you select Always, Windows will set Photo Viewer as the default app for that image format.

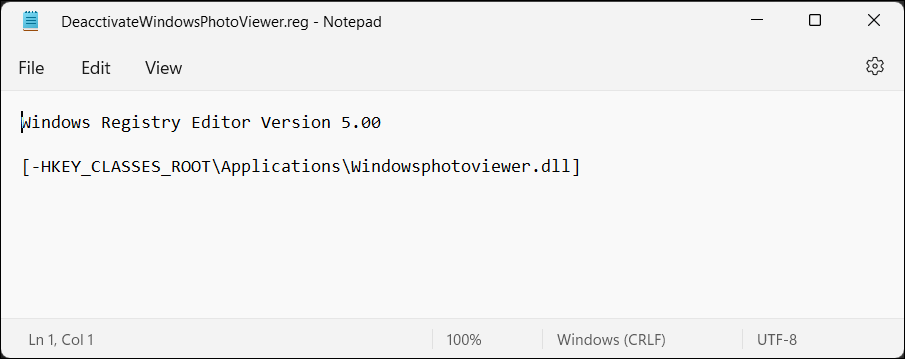
To disable Windows Photo Viewer, you must undo the changes you made earlier to the Windows Registry. It's worth making a backup again before making the changes. Then:
<code class="hljs css">WindowsRegistryEditorVersion 5.00[-HKEY_CLASSES_ROOT\Applications\Windowsphotoviewer.dll]</code>


Once done, restart Windows Explorer, and the Photo Viewer app will be disabled.

One Photo Viewer is an excellent Windows Photo Viewer and Windows Photos alternative. It's fast, free, and offers a clean interface by placing all the controls in the context menu, decluttering the toolbar area. Right-click the app interface to view the menu and access all the tools and settings.
One Photo Viewer offers all the bells and whistles you expect of an image viewer, plus more. You can scroll through the images using the arrow keys or the dedicated buttons, zoom in and out, rotate, crop, resize, or adjust colors.
Es unterstützt auch RAW-Formate, einschließlich HEIC- und WEBP-Animationen, eine Diashow aus einem Ordner oder geladenen Bildern, benutzerdefinierte Tastaturkürzel und ein Farbkorrekturtool für schnelle Verbesserungen. Sie können sich auch für die 3-Dollar-Pro-Version entscheiden, um zwei zusätzliche Funktionen zu erhalten: eine Symbolleiste für verbesserte Funktionalität und Miniaturansichten für eine einfachere Navigation.
Herunterladen: One Photo Viewer (kostenlos, Premium-Version verfügbar)
Wenn Sie jedoch lieber bei einer nativen Option bleiben möchten, probieren Sie die integrierte Windows-Fotos-App noch einmal aus. Es ist nicht so schlimm, wie Sie vielleicht beim ersten Gebrauch denken.
Das obige ist der detaillierte Inhalt vonSo stellen Sie den Windows Photo Viewer in Windows 10/11 wieder her. Für weitere Informationen folgen Sie bitte anderen verwandten Artikeln auf der PHP chinesischen Website!
 So aktivieren Sie den abgesicherten Word-Modus
 Einführung in die Verwendung der MySQL ELT-Funktion
 Was tun, wenn die Win8wifi-Verbindung nicht verfügbar ist?
 So verwenden Sie die Zeilenfunktion
 Was beinhalten E-Commerce-Plattformen?
 So registrieren Sie eine geschäftliche E-Mail-Adresse
 So richten Sie den virtuellen Speicher ein
 So runden Sie in Matlab
 Multifunktionsnutzung


