

In diesem Blogbeitrag führen wir Sie Schritt für Schritt durch den Prozess der Integration der Gesichtsauthentifizierung von FACEIO in Ihre Next.js-Anwendung, von der Einrichtung Ihres FACEIO-Kontos bis zur Implementierung der Integration in Ihre Codebasis.
Voraussetzungen
Bevor wir loslegen, stellen Sie sicher, dass Sie Folgendes eingerichtet haben:
Node.js und npm: Stellen Sie sicher, dass Node.js und npm auf Ihrem Entwicklungscomputer installiert sind. Sie können die neueste Version von der offiziellen Node.js-Website herunterladen.
Next.js: Sie müssen ein Next.js-Projekt eingerichtet haben. Wenn Sie noch keins haben, können Sie ein neues erstellen:
Einrichten der FACEIO-Anwendung
1.Erstellen Sie eine neue FACEIO-Anwendung: Melden Sie sich bei Ihrer FACEIO-Konsole an und klicken Sie auf die Schaltfläche „Neue App erstellen“.
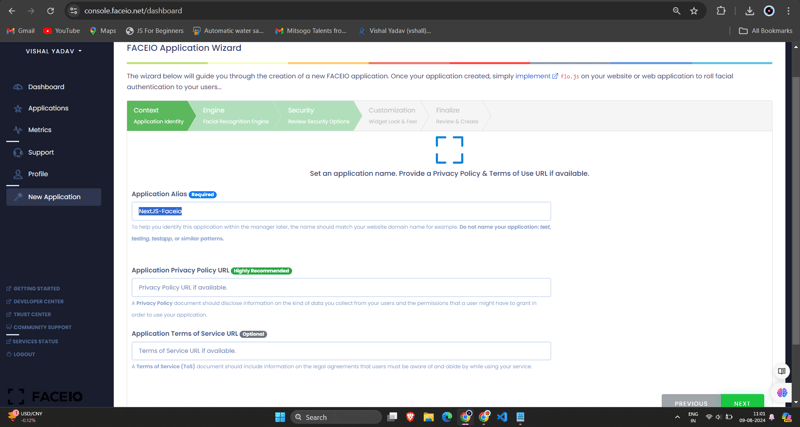
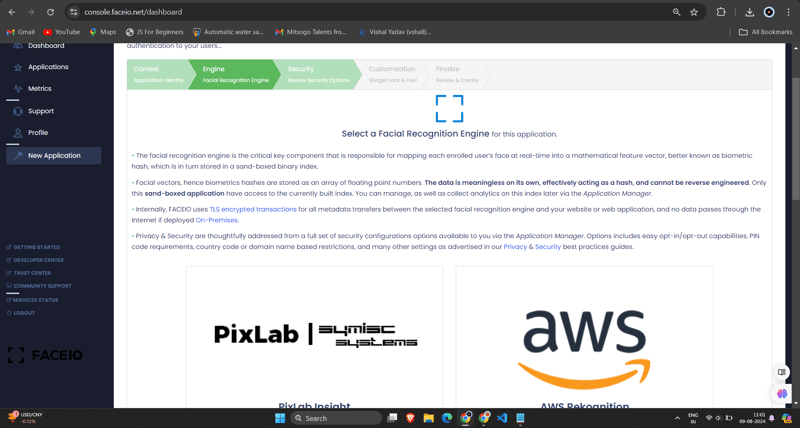
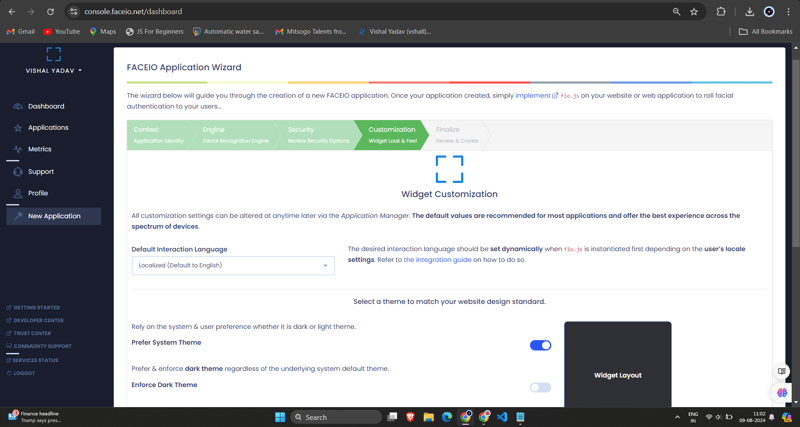
2.Konfigurieren Sie die Anwendung: Geben Sie die erforderlichen Informationen ein, z. B. den Anwendungsnamen, die Beschreibung und die Rückruf-URL (die die URL Ihrer Next.js-Anwendung sein wird). Wenn Sie das Formular ausgefüllt haben, klicken Sie auf „App erstellen“.
3.Erhalten Sie die FACEIO_APP_ID: Nach dem Erstellen der Anwendung erhalten Sie eine eindeutige FACEIO_APP_ID. Dies ist die Kennung, die Sie verwenden, um FACEIO in Ihre Next.js-Anwendung zu integrieren.
FACEIO in Ihre Next.js-Anwendung integrieren
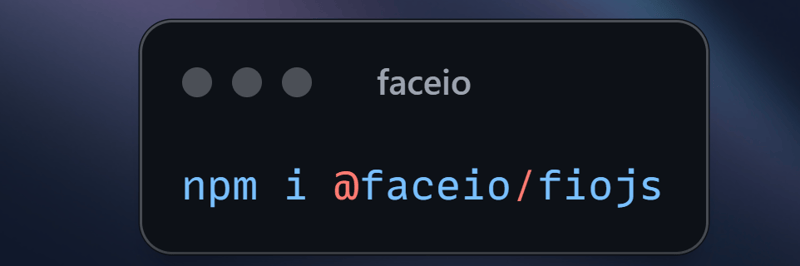
1.Installieren Sie das FACEIO NPM-Paket: Installieren Sie in Ihrem Next.js-Projekt das faceio-npm-Paket mit npm oder Yarn:
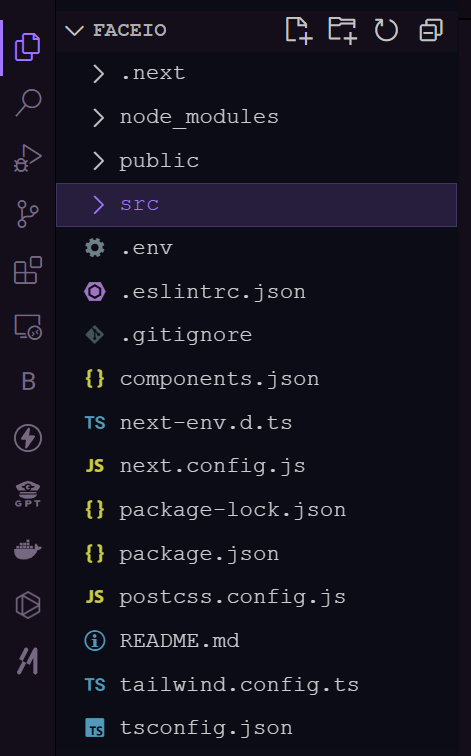
2.Erstellen Sie eine Gesichtsauthentifizierungskomponente: Erstellen Sie in Ihrem Next.js-Projekt eine neue Datei mit dem Namen Components/Dashboard.tsx (oder einem anderen Namen Ihrer Wahl) mit dem folgenden Code:
// Dashboard.tsx
import React from "react";
import { Card, CardHeader, CardTitle, CardContent } from "@/components/ui/card";
import { Button } from "@/components/ui/button";
import { FaUserCircle, FaLock, FaCode, FaChartBar, FaSignOutAlt } from 'react-icons/fa';

interface DashboardProps {
  userEmail: string;
  onLogout: () => void;
}

const Dashboard: React.FC<DashboardProps> = ({ userEmail, onLogout }) => {
  return (
    <div className="max-w-7xl mx-auto p-4 md:p-6 space-y-6">
      <Card className="w-full bg-black text-white">
        <CardHeader className="flex flex-col sm:flex-row items-start sm:items-center justify-between space-y-4 sm:space-y-0">
          <div>
            <CardTitle className="text-2xl sm:text-3xl font-bold">Welcome to FaceIO</CardTitle>
            <p className="text-base sm:text-lg mt-2">Email: {userEmail}</p>
          </div>
          <Button
            variant="secondary"
            size="sm"
            onClick={onLogout}
            className="flex items-center w-full sm:w-auto justify-center mt-8"
          >
            <FaSignOutAlt className="mr-2" /> Logout
          </Button>
        </CardHeader>
        <CardContent>
          <p className="text-lg sm:text-xl mb-4">You have successfully logged in.</p>
        </CardContent>
      </Card>

      <h2 className="text-xl sm:text-2xl font-bold text-center my-6">Facial Authentication for the Web</h2>

      <div className="grid grid-cols-1 sm:grid-cols-2 gap-4 sm:gap-6">
        <Card>
          <CardHeader>
            <CardTitle className="flex items-center text-base sm:text-lg">
              <FaUserCircle className="mr-2" /> Secure & Easy
            </CardTitle>
          </CardHeader>
          <CardContent>
            <p className="text-sm sm:text-base">Cross-browser, secure & easy to implement. Passwordless Authentication SDKs powered by Face Recognition for Web Sites & Apps.</p>
          </CardContent>
        </Card>

        <Card>
          <CardHeader>
            <CardTitle className="flex items-center text-base sm:text-lg">
              <FaLock className="mr-2" /> Privacy-Focused
            </CardTitle>
          </CardHeader>
          <CardContent>
            <p className="text-sm sm:text-base">Your facial data is encrypted and securely stored. We prioritize user privacy and data protection.</p>
          </CardContent>
        </Card>

        <Card>
          <CardHeader>
            <CardTitle className="flex items-center text-base sm:text-lg">
              <FaCode className="mr-2" /> Developer-Friendly
            </CardTitle>
          </CardHeader>
          <CardContent>
            <p className="text-sm sm:text-base">Easy integration with clear documentation. Get started quickly and implement facial authentication in your projects.</p>
          </CardContent>
        </Card>

        <Card>
          <CardHeader>
            <CardTitle className="flex items-center text-base sm:text-lg">
              <FaChartBar className="mr-2" /> Analytics & Insights
            </CardTitle>
          </CardHeader>
          <CardContent>
            <p className="text-sm sm:text-base">Gain valuable insights into user authentication patterns and improve your applications security.</p>
          </CardContent>
        </Card>
      </div>

      <div className="flex flex-col sm:flex-row justify-center items-center space-y-4 sm:space-y-0 sm:space-x-4 mt-8">
        <Button variant="default" size="lg" className="w-full sm:w-auto">
          Get Started →
        </Button>
        <Button variant="outline" size="lg" className="w-full sm:w-auto">
          Integration Guide →
        </Button>
        <Button variant="secondary" size="lg" className="w-full sm:w-auto">
          FACEIO Console →
        </Button>
      </div>

      <Card className="mt-8 bg-gray-100">
        <CardContent className="text-center py-6">
          <p className="text-base sm:text-lg font-semibold">Ready to implement facial authentication in your project?</p>
          <p className="mt-2 text-sm sm:text-base">Check out our documentation and start securing your application today!</p>
        </CardContent>
      </Card>
    </div>
  );
};

export default Dashboard;
3.Importieren Sie Ihre Dashboard.tsx-Komponente in die Login.tsx-Komponente:
/* eslint-disable react-hooks/exhaustive-deps */
"use client";
import {
Card,
CardContent,
CardDescription,
CardFooter,
CardHeader,
CardTitle,
} from "@/components/ui/card";
import { Terminal } from "lucide-react";
import { MailIcon, CheckCircleIcon } from "lucide-react";
import { Alert, AlertDescription, AlertTitle } from "@/components/ui/alert";
import { Input } from "@/components/ui/input";
import { Label } from "@/components/ui/label";
import { Button } from "./ui/button";
import faceIO from "@faceio/fiojs";
import { useEffect, useRef, useState } from "react";
import Link from "next/link";
import { toast } from "sonner";
import Dashboard from "./Dashboard";
type Props = {};
const Login: React.FC<Props> = ({}) => {
const faceioRef = useRef<faceIO | null>(null);
const [email, setEmail] = useState("");
const [userLogin, setUserLogin] = useState("");
const [isLoggedIn, setIsLoggedIn] = useState(false);
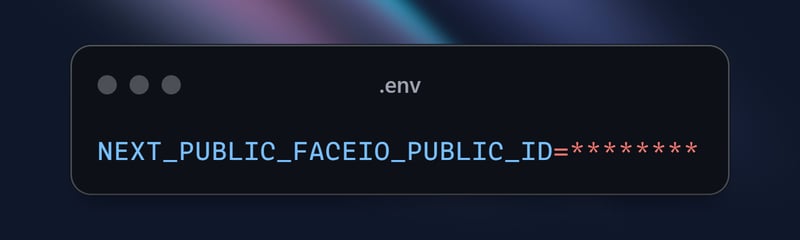
const publicKey = process.env.NEXT_PUBLIC_FACEIO_PUBLIC_ID as string;
const initialiseFaceio = async () => {
try {
faceioRef.current = new faceIO(publicKey);
console.log("FaceIO initialized successfully");
} catch (error) {
console.log(error);
handleError(error);
}
};
useEffect(() => {
initialiseFaceio();
}, []);
const handleRegister = async () => {
try {
if (!faceioRef.current) {
console.error("FaceIO instance is not initialized");
return;
}
await faceioRef.current?.enroll({
userConsent: false,
locale: "auto",
payload: { email: `${email}` },
});
toast.success("Successfully Registered user.");
} catch (error) {
handleError(error);
faceioRef.current?.restartSession();
}
};
const handleLogin = async () => {
try {
const authenticate = await faceioRef.current?.authenticate();
console.log("User authenticated successfully:", authenticate);
setUserLogin(authenticate.payload.email);
setIsLoggedIn(true);
toast.success("Successfully logged in.");
} catch (error) {
console.log(error);
handleError(error);
}
};
const handleLogout = () => {
setIsLoggedIn(false);
setUserLogin("");
toast.success("Successfully logged out.");
};
function handleError(errCode: any) {
const fioErrs = faceioRef.current?.fetchAllErrorCodes()!;
switch (errCode) {
case fioErrs.PERMISSION_REFUSED:
toast.info("Access to the Camera stream was denied by the end user");
break;
case fioErrs.NO_FACES_DETECTED:
toast.info(
"No faces were detected during the enroll or authentication process"
);
break;
case fioErrs.UNRECOGNIZED_FACE:
toast.info("Unrecognized face on this application's Facial Index");
break;
case fioErrs.MANY_FACES:
toast.info("Two or more faces were detected during the scan process");
break;
case fioErrs.FACE_DUPLICATION:
toast.info(
"User enrolled previously (facial features already recorded). Cannot enroll again!"
);
break;
case fioErrs.MINORS_NOT_ALLOWED:
toast.info("Minors are not allowed to enroll on this application!");
break;
case fioErrs.PAD_ATTACK:
toast.info(
"Presentation (Spoof) Attack (PAD) detected during the scan process"
);
break;
case fioErrs.FACE_MISMATCH:
toast.info(
"Calculated Facial Vectors of the user being enrolled do not matches"
);
break;
case fioErrs.WRONG_PIN_CODE:
toast.info("Wrong PIN code supplied by the user being authenticated");
break;
case fioErrs.PROCESSING_ERR:
toast.info("Server side error");
break;
case fioErrs.UNAUTHORIZED:
toast.info(
"Your application is not allowed to perform the requested operation (eg. Invalid ID, Blocked, Paused, etc.). Refer to the FACEIO Console for additional information"
);
break;
case fioErrs.TERMS_NOT_ACCEPTED:
toast.info(
"Terms & Conditions set out by FACEIO/host application rejected by the end user"
);
break;
case fioErrs.UI_NOT_READY:
toast.info(
"The FACEIO Widget could not be (or is being) injected onto the client DOM"
);
break;
case fioErrs.SESSION_EXPIRED:
toast.info(
"Client session expired. The first promise was already fulfilled but the host application failed to act accordingly"
);
break;
case fioErrs.TIMEOUT:
toast.info(
"Ongoing operation timed out (eg, Camera access permission, ToS accept delay, Face not yet detected, Server Reply, etc.)"
);
break;
case fioErrs.TOO_MANY_REQUESTS:
toast.info(
"Widget instantiation requests exceeded for freemium applications. Does not apply for upgraded applications"
);
break;
case fioErrs.EMPTY_ORIGIN:
toast.info("Origin or Referer HTTP request header is empty or missing");
break;
case fioErrs.FORBIDDDEN_ORIGIN:
toast.info("Domain origin is forbidden from instantiating fio.js");
break;
case fioErrs.FORBIDDDEN_COUNTRY:
toast.info(
"Country ISO-3166-1 Code is forbidden from instantiating fio.js"
);
break;
case fioErrs.SESSION_IN_PROGRESS:
toast.info(
"Another authentication or enrollment session is in progress"
);
break;
case fioErrs.NETWORK_IO:
default:
toast.info(
"Error while establishing network connection with the target FACEIO processing node"
);
break;
}
}
if (isLoggedIn) {
return <Dashboard userEmail={userLogin} onLogout={handleLogout} />;
}
return (
<div className="min-h-screen bg-gradient-to-r from-cyan-500 to-blue-500 flex items-center justify-center p-4 w-full">
<Card className="w-[400px] bg-white shadow-xl rounded-xl overflow-hidden">
<CardHeader className="bg-gray-50 border-b p-6">
<CardTitle className="text-2xl font-bold text-gray-800">
Secure Workspace
</CardTitle>
<CardDescription className="text-sm text-gray-600">
Authenticate to access your personalized work environment
</CardDescription>
</CardHeader>
<CardContent className="p-6 space-y-4">
<div className="space-y-2">
<Label
htmlFor="email"
className="text-sm font-medium text-gray-700"
>
Work Email
</Label>
<Input
id="email"
type="email"
placeholder="you@company.com"
className="w-full px-3 py-2 border rounded-md"
onChange={(e) => setEmail(e.target.value)}
/>
</div>
<div className="space-y-4">
<Button
className="w-full bg-blue-600 hover:bg-blue-700 text-white font-medium py-2 rounded-md transition duration-300 ease-in-out"
onClick={handleLogin}
>
Access Workspace
</Button>
<Button
className="w-full bg-gray-100 hover:bg-gray-200 text-gray-800 font-medium py-2 rounded-md transition duration-300 ease-in-out"
onClick={handleRegister}
disabled={!email.includes("@")}
>
Register New Account
</Button>
</div>
</CardContent>
<CardFooter className="bg-gray-50 border-t p-4">
<div className="w-full text-center text-xs text-gray-500">
Protected by FaceIO™ Technology.
<Link
href="https://faceio.net/security-policy"
className="text-blue-600 hover:underline ml-1"
>
Learn about our security measures
</Link>
</div>
</CardFooter>
</Card>
{userLogin && !isLoggedIn && (
<div className="fixed bottom-4 right-4 bg-green-100 border-l-4 border-green-500 text-green-700 p-4 rounded-md shadow-lg">
<div className="flex">
<div className="flex-shrink-0">
<CheckCircleIcon className="h-5 w-5 text-green-500" />
</div>
<div className="ml-3">
<p className="text-sm font-medium">Workspace Access Granted</p>
<p className="text-xs mt-1">Logged in as: {userLogin}</p>
</div>
</div>
</div>
)}
</div>
);
};
export default Login;
Denken Sie daran, „NEXT_PUBLIC_FACEIO_PUBLIC_ID“ durch die tatsächliche FACEIO_APP_ID zu ersetzen, die Sie von der FACEIO-Konsole erhalten haben.
import { buttonVariants } from "@/components/ui/button";
import { cn } from "@/lib/utils";
import Link from "next/link";
import { FaUserShield, FaImage, FaCode, FaRobot } from 'react-icons/fa';

export default function Home() {
  const demos = [
    { title: "FACIO Web Authentication", href: "/faceio", icon: FaUserShield },
    { title: "Image Processing", href: "/imageprocessing", icon: FaImage },
    { title: "Code Generation", href: "/codegeneration", icon: FaCode },
    { title: "AI Assistant", href: "/aiassistant", icon: FaRobot },
  ];

  return (
    <div className="max-h-screen  bg-gradient-to-br from-purple-700 via-blue-600 to-teal-500 text-white p-8 w-full">
      <div className="max-w-6xl mx-auto">
        <h1 className="text-5xl md:text-7xl font-bold text-center mb-8 animate-fade-in-down">
          PixLab Faceio
        </h1>
        <p className="text-xl text-center mb-12 animate-fade-in-up">
          Explore cutting-edge technologies and innovative solutions
        </p>

        <div className="grid grid-cols-1 md:grid-cols-2 gap-8">
          {demos.map((demo, index) => (
            <Link
              key={demo.href}
              href={demo.href}
              className={cn(
                buttonVariants({ variant: "outline" }),
                "h-40 text-lg font-semibold flex flex-col items-center justify-center space-y-4 bg-white bg-opacity-10 backdrop-filter backdrop-blur-lg rounded-xl hover:bg-opacity-20 transition-all duration-300 animate-fade-in",
                { 'animate-delay-100': index % 2 === 1 }
              )}
            >
              <demo.icon className="text-4xl" />
              {demo.title}
            </Link>
          ))}
        </div>

        <div className="mt-16 text-center animate-fade-in-up animate-delay-300">
          <h2 className="text-3xl font-bold mb-4">Why Choose PixLab?</h2>
          <ul className="text-lg space-y-2">
            <li>✨ Cutting-edge technologies</li>
            <li>? High-performance solutions</li>
            <li>? Advanced security features</li>
            <li>? Seamless integrations</li>
          </ul>
        </div>

        <footer className="mt-16 text-center text-sm opacity-75 animate-fade-in-up animate-delay-500">
          © 2024 PixLab. All rights reserved. Empowering innovation through technology.
        </footer>
      </div>
    </div>
  );
}
Das ist es! Sie haben jetzt die Gesichtsauthentifizierung von FACEIO in Ihre Next.js-Anwendung integriert. Wenn Benutzer auf die Schaltfläche „Mit Gesicht authentifizieren“ klicken, wird das FACEIO-Widget angezeigt, das sie durch den Authentifizierungsprozess führt.
Erfassen des FACEIO-Widgets in Aktion – Registrieren
Um die Funktionalität des FACEIO-Widgets zu demonstrieren, erfassen wir ein GIF des Registrierungsprozesses:
Dieses GIF zeigt die Benutzererfahrung des FACEIO-Gesichtsregistrierungsprozesses in der Next.js-Anwendung. Der Benutzer kann ganz einfach sein Gesicht registrieren, das bei zukünftigen Anmeldungen zur nahtlosen Authentifizierung verwendet wird.
Erfassung des FACEIO-Widgets in Aktion
Um die Funktionalität des FACEIO-Widgets zu demonstrieren, erfassen wir ein GIF des Authentifizierungsprozesses:
Dieses GIF zeigt die Benutzererfahrung des FACEIO-Gesichtsauthentifizierungsprozesses innerhalb der Next.js-Anwendung.
Wichtige Best Practices für die Sicherheit von FACEIO-Anwendungen
Doppelte Registrierungen eliminieren: Aktivieren Sie Einstellungen, um zu verhindern, dass sich derselbe Benutzer mehrmals registriert, um potenzielle Konflikte oder Missbrauch zu vermeiden.
Verbesserung der Anti-Spoofing-Maßnahmen: Aktivieren Sie Funktionen zur Erkennung und Blockierung von Face-Spoofing-Versuchen, um sicherzustellen, dass das System nur mit echten, lebenden Benutzern interagiert.
Eindeutigkeit der PIN garantieren: Stellen Sie sicher, dass die PIN jedes Benutzers innerhalb der Anwendung eindeutig ist, um unbefugten Zugriff zu verhindern.
Geobeschränkungen implementieren: Beschränken Sie die Instanziierung des FACEIO-Widgets auf autorisierte Domänennamen und Länder für zusätzliche Sicherheitskontrolle.
Vorteile der Verwendung von FACEIO in Ihrer Next.js-App
Die Integration von FACEIO in Ihre Next.js-Anwendung bietet mehrere Vorteile:
Verbesserte Benutzererfahrung: Das FACEIO-Widget bietet einen nahtlosen und intuitiven Authentifizierungsfluss, der es Benutzern erleichtert, sich bei Ihrer Anwendung anzumelden.
Plattformübergreifende Kompatibilität: FACEIO funktioniert auf verschiedenen Geräten und Browsern und sorgt so für ein einheitliches Benutzererlebnis.
Einfache Integration: Das faceio-npm-Paket vereinfacht den Integrationsprozess und ermöglicht es Ihnen, Ihrer Next.js-Anwendung schnell eine Gesichtsauthentifizierung hinzuzufügen.
FACEIO Community Forum: Hilfe bei Problemen erhalten Sie von der FACEIO Community.
Fazit
In diesem Blogbeitrag haben Sie erfahren, wie Sie den Gesichtsauthentifizierungsdienst von FACEIO in Ihre Next.js-Anwendung integrieren. Indem Sie die hier beschriebenen Schritte befolgen, können Sie Ihren Benutzern jetzt eine sichere und benutzerfreundliche Authentifizierungserfahrung bieten und so die Gesamtqualität Ihrer Webanwendung verbessern.
Wenn Sie weitere Fragen haben oder zusätzliche Hilfe benötigen, wenden Sie sich gerne an das FACEIO-Supportteam oder sehen Sie sich die umfassende FACEIO-Dokumentation an.
Viel Spaß beim Codieren!
Für den vollständigen Quellcode dieser Implementierung können Sie das GitHub-Repository besuchen und das Projekt im Detail erkunden.
Das obige ist der detaillierte Inhalt vonNahtlose Gesichtsauthentifizierung in Ihrer Next.js-App mit FACEIO. Für weitere Informationen folgen Sie bitte anderen verwandten Artikeln auf der PHP chinesischen Website!
 So beheben Sie den 504-Fehler im CDN
 So fügen Sie ein Video in HTML ein
 Was sind die Vor- und Nachteile der Dezentralisierung?
 Fehlerberichtslösung für den MySQL-Import einer SQL-Datei
 MySQL ändert die Speicher-Engine-Methode einer Tabelle
 So zentrieren Sie ein Div in CSS
 Was bedeutet es, wenn eine Nachricht gesendet, aber von der anderen Partei abgelehnt wurde?
 Wie viel entspricht Dimensity 9000 Snapdragon?


![[Web-Frontend] Node.js-Schnellstart](https://img.php.cn/upload/course/000/000/067/662b5d34ba7c0227.png)


