HTML-Ereignisattribute
In this article, we shall discuss in detail about HTML Event Attributes. Events are the actions that are performed as a result of user action. For example, when a user presses a keyboard to read the data, it is said to be keyboard events. These activities are done when a user looks into a website and performs a button click or when a page loads on pressing the refresh button where the browser does manipulation on the pages; all these actions are said to be an event. Here we will go through a basic understanding of events and how it works in the browser on the user actions. There is a different type of events that occur in the entire browser windows which are explained in the following sections.
Top 5 HTML Event Attributes
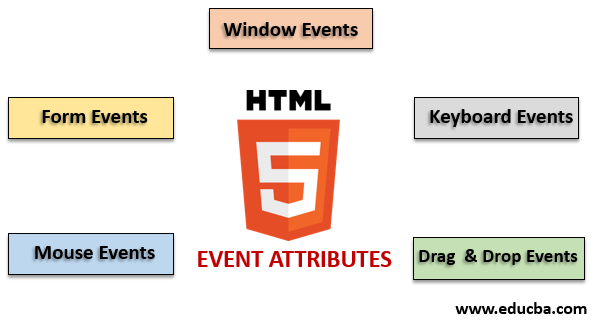
There is a different variant of events available in the HTML. And all these events have a small block of code named as an event handler that fires when the event action is performed. These are attached to the HTML elements. The event handlers or event listeners play an important role in the HTML event attributes. Let’s see different types of event attributes that are global declared and applied to HTML elements also their work in detail. Four primary event attributes are majorly used. They are:
- Window Event
- Form Events
- Mouse Events
- Keyboard Events
- Drag and drop Events
We shall describe all these attributes one by one with an example. First, we will go with.
1. Window Event
- onafterprintEvent: This attribute is supported by all the Html tags and works when a page started printing and has a single value script. Here comes an example of HTML code. This example shows when a button is pressed; it prints a message being printed in a dialog message.
Code:
<!DOCTYPE html>
<html>
<head>
<title>
Windows onafterprint Event
</title>
</head>
<body onafterprint="myfun()">
<h1>Windows onafterprint Event </h1>
<p>This attribute works in IE and Mozilla</p>
<body style = "text-align:center">
<script>
function myfun() {
alert("Document is being printed");
}
</script>
</body>
</html>Output:

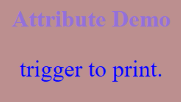
- onbeforeprint: It works before printing. The event gets fired after the printing process. Below is the example code.
Code:
<!DOCTYPE html>
<html>
<head>
<style>
body {
color: #9370DB;
background-color: #BC8F8F;
text-align: center;
padding: 20px;
}
p {
font-size: 2rem;
}
</style>
</head>
<body onbeforeprint="get()">
<h1> Attribute Demo</h1>
<p style="color:#0000FF;">trigger to print.</p>
<div class="show"></div>
<script>
function get() {
document.body.style.background = "#00BFFF";
}
</script>
</body>
</html>Output:
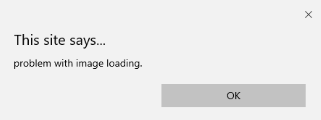
- onerror: This function is triggered when an error is thrown while no element exists.
Code:
<!DOCTYPE html>
<html>
<body>
<img src="p.jpg" onerror="myFun()">
<p>hello world.</p>
<script>
function myFun() {
alert("problem with image loading.");
}
</script>
</body>
</html>Output:
- onload: This function helps in loading an object and works well to see if a web page is correctly loaded.
Code:
<!DOCTYPE html>
<html>
<head>
<title>onload event demo</title>
</head>
<body>
<img src="pic.jpg" onload="ldImg()" width="50" height="92">
<script>
function ldImg() {
alert("image loaded without error");
}
</script>
</body>
</html>Output:
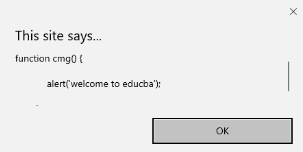
- onresize: This event is triggered when the browser window is resized, and any element can be triggered under the resize attribute.
Code:
<!DOCTYPE html>
<head>
<title>onresize event</title>
</head>
<body>
<script type="text/javascript">
function cmg() {
alert('welcome to educba');
}
window.onresize = cmg;
</script>
</head>
<body>
<input type="button"  value="Click the button"
onclick="alert(window.onresize);">
</body>
</html>Output:

- onunload: This event is triggered when a web page window is closed or when a user leaves the webpage. The below code unloads the page when a user leaves and throws an alert thanks for searching. This event sometimes works in all browsers.
Code:
<!DOCTYPE html>
<html>
<body onunload="onfunc()"><h1>Welcometo educba tutorial</h1>
<p>Leave the page .</p>
<script>
function onfunc() {
alert("Thank you for searching!");
}
</script>
</body>
</html>Output:

2. Form Events
It works with form Controls. The following are the attributes that occur when the user interacting with the browsers.
- onblur: This event occurs when the user’s attention is away from the form window. The following example takes input in the lower case, and when the submit button is clicked, it turns the output into the Upper case.
Code:
<!DOCTYPE html>
<html>
<head>
<title> Form onblur </title>
<style>
body {
text-align:center;
}
h1 {
color:pink;
}
</style>
</head>
<body>
<h1>EDUCBA</h1>
<input type="text" name="fname" id="aaa"
onblur="myfunc()">
<button type="button">Submit</button>
<script>
function myfunc() {
var a = document.getElementById("aaa");
a.value = a.value.toUpperCase();
}
</script>
</body>
</html>Output:
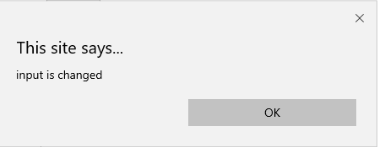

- onchange: This event occurs when a user changes the existing element in the form. It happens when an element loses focus.
Code:
<!DOCTYPE html>
<html lang="en">
<head>
<meta charset="utf-8">
<title>HTML onchange</title>
</head>
<body>
<form name="example" action="">  <input type="text" name="rahul" onchange="alert('input is changed')"><br>
<label>select the dress color</label>
<select onchange="alert('You have changed the selection!');">
<option>pink</option>
<option>Yellow</option>
<option>White</option>
</select>
<p><strong>Note:</strong> Select any option </p>
<label>Describe yourself in short : </label>   <br/><textarea cols="15" rows="7" name="details" onchange="alert('description has changed')">   </textarea><br>
<button type="button" name="submit">Submit</button>
</form>
</body>
</html>Output:

- onfocus: This attribute is enabled when the user gives attention to the element on a web page or when input is focussed. The below example highlights when we enter an input in the field.
Code:
<!DOCTYPE html>
<html>
<body>
<p>This event gets triggered whwn an element is been focussed.</p>
Name: <input type="text" id="name" onfocus="onfoc(this.id)"><br>
Location: <input type="text" id="loc" onfocus="onfoc(this.id)">
<script>
function onfoc(a) {
document.getElementById(a).style.background = "pink";
}
</script>
</body>
</html>Output:
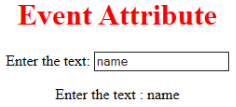
- oninput: This event triggers when the input is entered in the input field. It has been activated when the value in the text field is changed. It reflects once the value of the element is changed.
<!DOCTYPE html>
<html>
<head>
<title> HTML oninput </title>
</head>
<style>
body {
text-align:center;
}
h1 {
color:red;
}
</style>
<body>
<h1> Event Attribute </h1>
Enter the text:
<input type="text" id="EDUCBA"  oninput="myon()">
<p id= "sid"></p>
<script>
function myon()
{
var x = document.getElementById("EDUCBA").value;
document.getElementById("sid").innerHTML = "Enter the text : " +x;
}
</script>
</body>
</html>Output:

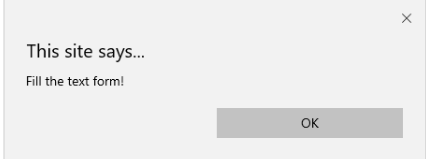
- oninvalid: This attribute calls the events when the text entered in the input type is invalid or remains empty. This event attribute must fill the input element.
Code:
<!DOCTYPE html>
<html>
<head>
<title> example oninvalid Event </title>
<style>
p {
color:orange;
}
body {
text-align:center;
}
</style>     </head>
<body>
<p> HTML is used to create a web page</p>
<form  method="get">
Enter the name:
<input type="text" oninvalid="alert('Fill the text form!');" required>
<input type="submit" value="Submit">
</form>  </body>
</html>Output:
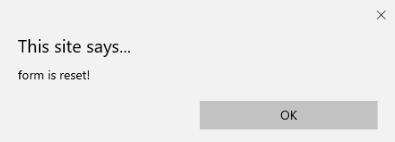
- onreset: It is fired when a form is a rest. The following example says when you submit the button, a form is processed, and again when you click to reset, the form is being reset.
Code:
<!DOCTYPE html>
<html>
<style>
body {font-family:calibri;}
label {font-variant:small-caps;}
ol {background-color:#610000; margin-top:35px;}
li {margin-top:3px; padding:3px; background-color:rose; font-size:15px;}
div {position:absolute;top:250px;left:70px; font-size:1.5em;
}
</style>
<body>
<ol>
<li>Form with input to reset and submit</li>
</ol>
<form action="" method="get" onreset="onRes()" onsubmit="onSub()">
<label>Enter input:<br /><input type="text" id="iv" oninvalid="onInva()" oninput="onInp()"></label><br /><br />
<input type="submit" value="press"> <input type="reset">
</form>
<div id="a_box"></div>
<script>
function onInva() {
alert("Input field cannot be empty!");
}
function onInp() {
var input_value = document.getElementById("iv").value;
document.getElementById("a_box").innerHTML = "Input value: <br />" + iv;
}
function onRes() {
alert("form is reset!");
}
function onSubmitEvent() {
alert("Form is loading");
location.reload();
}
</script>
</body>
</html>Output:
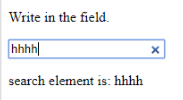
- onsearch: It works when a user presses an enter button.
Code:
<!DOCTYPE html>
<html>
<body>
<p>Write in the field.</p>
<input type="search" id="value1" onsearch="myF()">
<p id="sample"></p>
<script>
function myF() {
var k = document.getElementById("value1");
document.getElementById("sample").innerHTML = "search element is: " + k.value;
}
</script>
</body>
</html>Output:
- onselect: It is triggered when a text has been selected in an input box. It throws a dialog box printing an alert message.
Code:
<!DOCTYPE html>
<html>
<head>
<title>onselect demo</title>
<style>
h1 {
color:magenta;
}
body {
text-align:center;
}
</style>
<script>
function eduhtml() {
alert("text highlighted!");
}
</script>
</head>
<body>
<h1>EDUCBA Online tutorial</h1>
Text Box: <input type="text" value="onselectattribute: A well defined portal" onselect="eduhtml()">
</body>
</html>
</html>Output:

- onsubmit: The purpose of this event is to execute the action performed while pressing the submit button.
Code:
<!DOCTYPE html>
<html>
<body>
<head>
<title> Onsubmit Example</title>
</head>
<form action="demo_form.asp" onsubmit="myF()">
Enter name: <input type="text" name="fname">
<label>Email :</label>
<input id="email" name="email" type="text">
<input type="submit" value="Submit">
</form>
<script>
function myF() {
alert("The form was submitted");
}
</script>
</body>
</html>Output:

3. Key Board Attributes
- OnKeyDown: It is triggered when a user presses a down Arrow key.
Code:
<!DOCTYPE html>
<html>
<body>
<p>Example for Onkeydown.</p>
<input type="text" onkeydown="mykedwn()">
<script>
function mykedwn() {
alert("key press is activated");
}
</script>
</body>
</html>Output:

- OnKeyPress: This event gets triggered when the user presses any key on the keyboard. Note: some browser doesn’t support pressing any key.
Code:
<!DOCTYPE html>
<html>
<body>
<p> This example shows when a user type in the text area it triggers an event </p>
<form>
<textarea onkeypress="alert('triggering onkeypress event.')" placeholder="Place the cursor inside the textarea and press a key."  " cols="30" rows="4" style="background-color:pink;">> </textarea> </form>
</body>
</html>Output:

- OnKeyUp: This attribute gets triggered when a user releases a cursor from the text field. Below comes the demonstration.
Code:
<!DOCTYPE html>
<html>
<body>
<p> This example transforms the character to lower case.</p>
Fill the name: <input type="text" id="jjj" onkeyup="mykey()">
<script>
function mykey() {
var g = document.getElementById("jjj");
g.value = g.value.toLowerCase();
}
</script>
</body>
</html>Output:

4. Mouse Event Attributes
This action triggers a mouse event when a mouse is pressed either from a computer or any external devices like a smartphone or tablet. Some of the mouse events are given below:
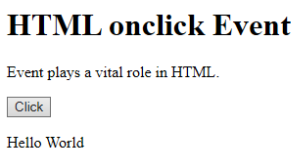
- onclick: It is triggered when a user presses the button over the mouse. An input example is given below to show the event while clicking the mouse.
Code:
<!DOCTYPE html>
<html>
<body>
<h1>HTML onclick Event</h1>
<p> Event plays a vital role in HTML.</p>
<button onclick="oncf()">Click </button>
<p id="sample"></p>
<script>
function oncf() {
document.getElementById("sample").innerHTML = "Hello World";
}
</script>
</body>
</html>Output:
- onmousemove: It is fired when a mouse is moved over an image in any direction.
Code:
<!doctype html>
<html>
<head><title> Event onmousemove demo</title>
</head>
<body>
<p>This event is activated when the pointer drags its direction.</p>
<body style="width:200px;height:80px;border:2px solid;" onmousemove="javascript:alert('mouse action');">Sample text</body>
</body>
</html>Output:

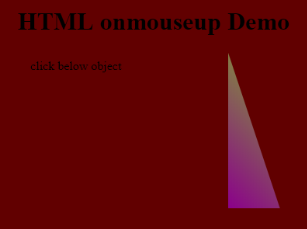
- Onmouseup: This event gives a notification when a user releases a button on an output.
Code:
<!DOCTYPE html>
<html>
<head>
<style>
body {
color:  "#ff0000";
height: 120vh;
background-color: #610000;
text-align: center;
}
.polygon {
float: right;
shape-inside: polygon(0 0, 0 200px, 100px 200px);
clip-path: polygon(0 0, 0 250px, 100px 300px);
height: 200px;
width: 200px;
background: linear-gradient(to bottom left, #7CFC00, #8B008B);
}
p {
margin: 30px auto;
}
</style>
</head>
<body>
<h1>HTML onmouseup Demo</h1>
<div class="polygon" onmouseup="mupfn()"></div>
<p> click below object</p>
<script>
function mupFn() {
document.querySelector('.polygon').style.transform = 'scale(2.2)';
}
</script>
</body>
</html>Output:
- Onmouseover: Execute a JavaScript when moving the mouse pointer over an image
Code:
<!DOCTYPE html>
<html>
<body>
<title>Example demonstrating Onmouseover.</title>
<h1 id="sample" onmouseover="A()" onmouseout="B()">Mouse over </h1>
<script>
function A() {
document.getElementById("sample").style.color = "yellow";}
function B() {
document.getElementById("sample").style.color = "green";
}
</script>
</body>
</html>Output:

5. Drag Event Attributes
This application helps in the HTML window when the user drags the input element. Below are the different event listeners used in HTML to store dragged data.
- Ondrag: This is used when an element is being dragged from the web page.
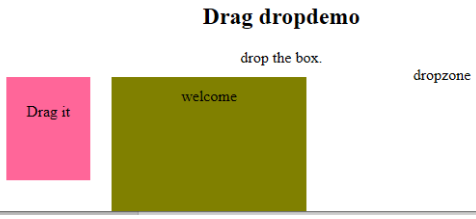
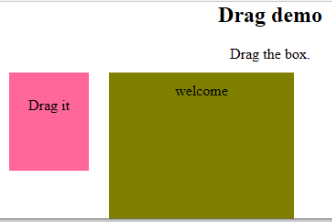
- Ondragstart: This fires when the user begins to drag from the input field. The below example demonstrates about dragging the two-target area.
Code:
<!DOCTYPE HTML>
<html>
<head>
<style type = "text/css">
#b1, #b2 {
float:left;padding:11px;margin:11px; -moz-user-select:none;
}
#b1 { background-color: #FF6699; width:65px; height:85px;  }
#b2 { background-color: #808000; width:180px; height:180px; }
</style>
<script type = "text/javascript">
function dStart(e) {
e.dataTransfer.effectAllowed = 'move';
e.dataTransfer.setData("Text", e.target.getAttribute('id'));
e.dataTransfer.setDragImage(e.target,0,0);
return true;
}
</script>
</head>
<body>
<center>
<h2>Drag demo</h2>
<div> Drag the box.</div>
<div id = "b1" draggable = "true"
ondragstart = "return dStart(e)">
<p>Drag it</p>
</div>
<div id = "b2">welcome</div>
</center>
</body>
</html>Output:
-
ondrop: Execute this attribute when a draggable element is dropped in element.
Code:
<!DOCTYPE HTML>
<html>
<head>
<style type = "text/css">
#b1, #b2 {
float:left;padding:11px;margin:11px; -moz-user-select:none;
}
#b1 { background-color: #FF6699; width:65px; height:85px;  }
#b2 { background-color: #808000; width:180px; height:180px; }
</style>
<script type = "text/javascript">
function dStart(e) {
e.dataTransfer.effectAllowed = 'move';
e.dataTransfer.setData("Text", e.target.getAttribute('id'));
e.dataTransfer.setDragImage(e.target,0,0);
return true;
}
</script>
</head>
<body>
<center>
<h2>Drag  dropdemo</h2>
<div> drop the box.</div>
<div id = "b1" draggable = "true"
ondragstart = "return dStart(e)">
<p>Drag it</p>
</div>
<div class="droptarget"
ondrop="drop(event)"
ondragover="allowDrop(event)">
</div>
<div id = "b2">welcome</div>
<span> dropzone </span>
</center>
</body>
</html>
Nach dem Login kopierenOutput:

Conclusion
This event attribute helps to make a web application very easier and attractive. The different occurrence of actions generates various events. Even though this approach is generally avoided, the programmer likes to learn the function assigned for the HTML attributes events. These event handlers are still executed to beautify the web pages.
Recommended Article
This is a guide to the HTML Event Attributes. Here we discuss the Introduction to HTML Event Attributes along with Code implementation and Output. you can also go through our suggested articles to learn more –
- HTML Frames
- HTML Style Attribute
- Applications of HTML
- HTML vs HTML5
Das obige ist der detaillierte Inhalt vonHTML-Ereignisattribute. Für weitere Informationen folgen Sie bitte anderen verwandten Artikeln auf der PHP chinesischen Website!

Heiße KI -Werkzeuge

Undresser.AI Undress
KI-gestützte App zum Erstellen realistischer Aktfotos

AI Clothes Remover
Online-KI-Tool zum Entfernen von Kleidung aus Fotos.

Undress AI Tool
Ausziehbilder kostenlos

Clothoff.io
KI-Kleiderentferner

Video Face Swap
Tauschen Sie Gesichter in jedem Video mühelos mit unserem völlig kostenlosen KI-Gesichtstausch-Tool aus!

Heißer Artikel

Heiße Werkzeuge

Notepad++7.3.1
Einfach zu bedienender und kostenloser Code-Editor

SublimeText3 chinesische Version
Chinesische Version, sehr einfach zu bedienen

Senden Sie Studio 13.0.1
Leistungsstarke integrierte PHP-Entwicklungsumgebung

Dreamweaver CS6
Visuelle Webentwicklungstools

SublimeText3 Mac-Version
Codebearbeitungssoftware auf Gottesniveau (SublimeText3)

Heiße Themen
 1670
1670
 14
14
 1428
1428
 52
52
 1329
1329
 25
25
 1276
1276
 29
29
 1256
1256
 24
24
 Tabellenrahmen in HTML
Sep 04, 2024 pm 04:49 PM
Anleitung zum Tabellenrahmen in HTML. Hier besprechen wir verschiedene Möglichkeiten zum Definieren von Tabellenrändern anhand von Beispielen für den Tabellenrand in HTML.
 Verschachtelte Tabelle in HTML
Sep 04, 2024 pm 04:49 PM
Dies ist eine Anleitung für verschachtelte Tabellen in HTML. Hier diskutieren wir anhand der entsprechenden Beispiele, wie man eine Tabelle innerhalb der Tabelle erstellt.
 HTML-Rand links
Sep 04, 2024 pm 04:48 PM
Anleitung zum HTML-Rand links. Hier besprechen wir einen kurzen Überblick über HTML margin-left und seine Beispiele sowie seine Code-Implementierung.
 HTML-Tabellenlayout
Sep 04, 2024 pm 04:54 PM
Leitfaden zum HTML-Tabellenlayout. Hier besprechen wir die Werte des HTML-Tabellenlayouts zusammen mit den Beispielen und Ausgaben im Detail.
 HTML-Eingabeplatzhalter
Sep 04, 2024 pm 04:54 PM
Leitfaden für HTML-Eingabeplatzhalter. Hier besprechen wir die Beispiele für HTML-Eingabeplatzhalter zusammen mit den Codes und Ausgaben.
 Wie analysiert und verarbeitet man HTML/XML in PHP?
Feb 07, 2025 am 11:57 AM
Dieses Tutorial zeigt, wie XML -Dokumente mit PHP effizient verarbeitet werden. XML (Extensible Markup-Sprache) ist eine vielseitige textbasierte Markup-Sprache, die sowohl für die Lesbarkeit des Menschen als auch für die Analyse von Maschinen entwickelt wurde. Es wird üblicherweise für die Datenspeicherung ein verwendet und wird häufig verwendet
 HTML-geordnete Liste
Sep 04, 2024 pm 04:43 PM
Leitfaden zur HTML-geordneten Liste. Hier besprechen wir auch die Einführung von HTML-geordneten Listen und Typen sowie deren Beispiele
 HTML-Onclick-Button
Sep 04, 2024 pm 04:49 PM
Anleitung zum HTML-OnClick-Button. Hier diskutieren wir deren Einführung, Funktionsweise, Beispiele und Onclick-Events in verschiedenen Veranstaltungen.


