

Entwerfen Sie eine Webseite in HTML

HTML, known as HyperText Markup Language, is one of the most popular languages used for designing web pages and structuring content. HTML uses tags, elements, images, and some latest components to make Web Pages more attractive and user-friendly.
By combining HTML with CSS, the appearance of a web page can be easily customized. HTML plays a crucial role in properly structuring web pages on the World Wide Web. It can be edited using simple text editors, allowing users to make changes whenever needed.
How to Design a Web Page in HTML? (Step-by-Step)
Step 1: Set up Your Project
- Create a new folder on your computer to store the files for your web page.

- Open a text editor like Notepad, Sublime Text, or Visual Studio Code in order to write your HTML code.

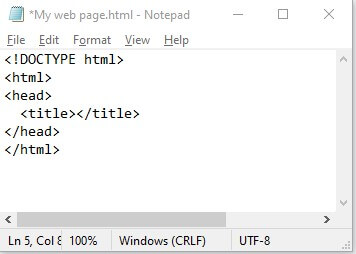
Step 2: Start with the HTML Structure
- Begin your HTML file by adding the declaration at the top. This tells the browser that you’re using HTML5.
- Create the opening and closing HTML tags: .
- Inside the HTML tags, create the opening and closing head tags: .
- Within the head tags, add the opening and closing title tags:
. This is where you’ll write the title of your web page.
Step 3: Add Content to the Body
- After the closing head tag, create the opening and closing body tags: . This is where you’ll put all the visible content of your web page.
- Inside the body tags, you can start adding elements such as headings, paragraphs, images, and links.
- To add a heading, use the tags for the main heading and , , and so on for subheadings.
- To add a paragraph, use the
- To add an image, use the
Within the
tag, you need to specify the src attribute, which should contain the file path or URL pointing to the location of the image file.
- To add a link, use the tags with the href attribute specifying the URL.
For a better understanding, here is the code:
<!DOCTYPE html>
<html>
<head>
<title>My First Web Page</title>
</head>
<body>
<h1>Unlock the Power of Online Learning</h1>
<p>Master 1000+ Tools & Technologies.</p>
<img src="C:\Users\Demo2\Desktop\HTML\webimage.PNG">
<ul>
<li>Python</li>
<li>Artificial Intelligence</li>
<li>Java</li>
</ul>
<a href="https://www.educba.com">View All 1000 Skills</a>
</body>
</html>
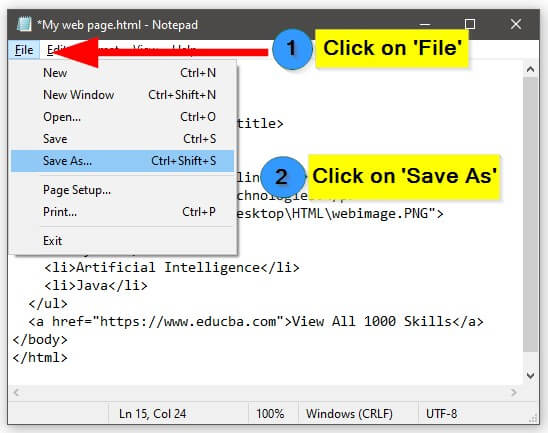
Step 4: Save your HTML File
- Save your file with a .html extension in the folder you created earlier.
- Choose a descriptive name for your file, such as my web page.html (which is commonly used as the main page of a website).

Step 5: View your Web Page
- Open the HTML file in a web browser such as Chrome, Firefox, or Safari.

- You should see the below web page displayed in the browser, showing the content we added.
Output:

Step 6: Continue Enhancing your Web Page
- Explore additional HTML tags and attributes to further enhance the structure and design of your web page.
- Learn CSS (Cascading Style Sheets) to style your web page and make it visually appealing.
- Experiment with more advanced HTML features like forms, tables, and multimedia elements.
HTML Tags and Elements for Web Design
Here’s a list of essential HTML tags and elements that are crucial for designing web pages in HTML.
| HTML Tag/Element | Purpose | |||||||||||||||||||||||||||||||
to |
Define different levels of headings | |||||||||||||||||||||||||||||||
| Define paragraphs of text | ||||||||||||||||||||||||||||||||
| Create line breaks | ||||||||||||||||||||||||||||||||
| Create an ordered list | ||||||||||||||||||||||||||||||||
| Create an unordered list | ||||||||||||||||||||||||||||||||
| Define items within a list | ||||||||||||||||||||||||||||||||
| Create hyperlinks | ||||||||||||||||||||||||||||||||
| Insert images | ||||||||||||||||||||||||||||||||
Examples of Design Web Pages in HTMLLet’s create some web pages to see the resultant web page. Example #1: Travel WebpageHere, we will create an amazing travel webpage showcasing places to visit in Switzerland. We will set one background image and add some text using HTML Code and Styling. HTML Code: <head>
<style>
.card {
max-width: 380px;
margin: auto;
text-align: center;
}
#main {
background-image: url('switzerland.jpg');
background-repeat: no-repeat;
background-size: cover;
}
.price {
color: #f1294a;
font-size: 18px;
}
.card button {
padding: 10px;
color: white;
background-color: #f1294a;
text-align: center;
}
</style>
</head>
<body id="main">
<h2 style="text-align:center">Places to Visit in Switzerland</h2>
<div class="card">
<h1><b>Explore Switzerland</b></h1>
<h3 class="price">Starting from CHF 2000</h3>
<h2>
<ul>
<li>Zurich</li>
<li>Geneva</li>
<li>Lucerne</li>
<li>Interlaken</li>
<li>Zermatt</li>
</ul>
</h2>
<p><button>Book Here</button></p>
</div>
</body>Nach dem Login kopieren Output: Example #2: Feedback FormWe will build one Feedback form in the form of a web page in this example. <!DOCTYPE html>
<html>
<head>
<meta name="viewport" content="width=device-width, initial-scale=1">
<style>
body {
font-family: Arial, sans-serif;
}
input[type=text], select, textarea {
width: 100%;
padding: 8px;
border: 1px solid #ccc;
border-radius: 4px;
margin-top: 4px;
margin-bottom: 10px;
}
input[type=submit] {
background-color: #4CAF50;
color: white;
padding: 8px 12px;
border: none;
border-radius: 4px;
cursor: pointer;
}
.container {
width: 80%;
max-width: 500px;
margin: 0 auto;
border-radius: 6px;
background-color: #F2F2F2;
padding: 20px;
}
h3 {
text-align: center;
}
label {
font-weight: bold;
}
textarea {
resize: vertical;
}
/* Optional: Add additional styles to make it more visually appealing */
.container {
box-shadow: 0 2px 4px rgba(0, 0, 0, 0.1);
}
input[type=submit]:hover {
background-color: #45a049;
}
</style>
</head>
<body>
<h3>We Value Your Suggestions!</h3>
<div class="container">
<form>
<label for="fname">First Name</label>
<input type="text" id="fname" name="firstname" placeholder="Enter your name">
<label for="lname">Last Name</label>
<input type="text" id="lname" name="lastname" placeholder="Enter your last name">
<label for="email">Email</label>
<input type="text" id="email" name="email" placeholder="Enter your email here">
<label for="subject">Suggestion</label>
<textarea id="subject" name="subject" placeholder="Provide your suggestion" style="height: 100px"></textarea>
<input type="submit" value="Submit">
</form>
</div>
</body>
</html>Nach dem Login kopieren Output: Example #3: OTT Platform HomepageIn this example, we will create another web page that showcases an amazing homepage for an OTT platform. HTML Code: <!DOCTYPE html>
<html>
<head>
<title>My OTT Platform</title>
<style>
/* CSS styles for the website */
body {
font-family: Arial, sans-serif;
margin: 0;
padding: 0;
background-color: #000;
color: #fff;
}
header {
background-color: #e50914;
padding: 20px;
text-align: center;
}
header h1 {
margin: 0;
font-size: 28px;
text-transform: uppercase;
color: #fff;
}
nav {
background-color: #000;
padding: 10px;
text-align: center;
}
nav a {
text-decoration: none;
margin: 10px;
color: #fff;
font-weight: bold;
}
main {
padding: 20px;
}
footer {
background-color: #e50914;
padding: 20px;
text-align: center;
}
.video {
display: flex;
flex-wrap: wrap;
justify-content: center;
margin-bottom: 20px;
}
.video .thumbnail {
position: relative;
width: 250px;
height: 140px;
margin: 10px;
overflow: hidden;
transition: transform 0.3s;
background-color: #333;
}
.video .thumbnail img {
width: 100%;
height: 100%;
object-fit: cover;
}
.video .thumbnail:hover {
transform: scale(1.1);
}
.video .title {
position: absolute;
bottom: 0;
left: 0;
width: 100%;
background-color: rgba(0, 0, 0, 0.7);
color: #fff;
padding: 10px;
margin: 0;
font-weight: bold;
}
/* Additional styles for Netflix-like appearance */
header, nav, main, footer {
max-width: 1200px;
margin: 0 auto;
}
.video .thumbnail {
width: 275px;
height: 155px;
}
.video .title {
font-size: 14px;
padding: 8px;
}
</style>
</head>
<body>
<header>
<h1>Welcome to My OTT Platform</h1>
</header>
<nav>
<a href="#">Home</a>
<a href="#">Movies</a>
<a href="#">TV Shows</a>
<a href="#">Documentaries</a>
<a href="#">My Account</a>
</nav>
<main>
<h2>Trending Now</h2>
<div class="video">
<div class="thumbnail">
<img src="video5.jpg" alt="Video 5">
<div class="title">Movie1</div>
</div>
<div class="thumbnail">
<img src="video6.jpg" alt="Video 6">
<div class="title">Movie2</div>
</div>
<div class="thumbnail">
<img src="video7.jpg" alt="Video 7">
<div class="title">Movie3</div>
</div>
</div>
<h2>Top 3 Shows</h2>
<div class="video">
<div class="thumbnail">
<img src="video8.jpg" alt="Video 8">
<div class="title">Show1</div>
</div>
<div class="thumbnail">
<img src="video9.jpg" alt="Video 9">
<div class="title">Show2</div>
</div>
<div class="thumbnail">
<img src="video10.jpg" alt="Video 10">
<div class="title">Show3</div>
</div>
</div>
<h2>International Movies</h2>
<div class="video">
<div class="thumbnail">
<img src="video11.jpg" alt="Video 11">
<div class="title">Movie1</div>
</div>
<div class="thumbnail">
<img src="video12.jpg" alt="Video 12">
<div class="title">Movie2</div>
</div>
<div class="thumbnail">
<img src="video13.jpg" alt="Video 13">
<div class="title">Movie3</div>
</div>
</div>
</main>
<footer>
<p>© 2023 My OTT Platform. All rights reserved.</p>
</footer>
</body>
</html>Nach dem Login kopieren Output: Example #4 Newsletter Subscription PageIn this example, let’s create a simple subscription page where users can subscribe to a newsletter. <form action="newsletter.php" method="post" style="background-color: #f2f2f2; padding: 20px; border-radius: 10px;"> <h2 style="color: #333;">Join our Newsletter!</h2> <div class="form-group"> <label for="name" style="color: #333;">Name:</label> <input type="text" id="name" name="name" placeholder="Enter your name" required style="padding: 5px; border: 1px solid #ccc; border-radius: 5px;"> </div> <div class="form-group"> <label for="email" style="color: #333;">Email:</label> <input type="email" id="email" name="email" placeholder="Enter your email" required style="padding: 5px; border: 1px solid #ccc; border-radius: 5px;"> </div> <div class="form-group"> <label for="interests" style="color: #333;">Interests:</label> <select id="interests" name="interests" multiple style="padding: 5px; border: 1px solid #ccc; border-radius: 5px;"> <option value="technology">Technology</option> <option value="fashion">Fashion</option> <option value="food">Food</option> <option value="travel">Travel</option> <option value="sports">Sports</option> </select> </div> <button type="submit" style="background-color: #04aa6d; color: #fff; padding: 10px 20px; border: none; border-radius: 5px; cursor: pointer;">Subscribe Now!</button> </form> Nach dem Login kopieren Output: Example #5: Guess the Number GameIn this instance, we will design a simple game where users have to guess the number generated by the system. <!DOCTYPE html>
<html>
<head>
<title>Guessing Game</title>
<style>
body {
text-align: center;
padding-top: 100px;
font-family: Arial, sans-serif;
background-color: #f2f2f2;
}
h1 {
color: #333333;
}
p {
color: #666666;
}
input {
padding: 10px;
font-size: 16px;
border-radius: 4px;
border: 1px solid #cccccc;
}
button {
padding: 10px 20px;
font-size: 16px;
background-color: #4CAF50;
color: white;
border-radius: 4px;
border: none;
cursor: pointer;
}
button:hover {
background-color: #45a049;
}
#result {
margin-top: 20px;
font-weight: bold;
}
</style>
</head>
<body>
<h1>Guessing Game</h1>
<p>Guess a number between 1 and 10:</p>
<input type="number" id="guess" min="1" max="10">
<button onclick="checkGuess()">Submit</button>
<p id="result"></p>
<script>
function checkGuess() {
var guess = parseInt(document.getElementById("guess").value);
var randomNumber = Math.floor(Math.random() * 10) + 1;
if (guess === randomNumber) {
document.getElementById("result").innerHTML = "Congratulations! You guessed the correct number.";
} else {
document.getElementById("result").innerHTML = "Wrong guess. The correct number was " + randomNumber + ".";
}
}
</script>
</body>
</html>Nach dem Login kopieren Output: ConclusionFrom all the above discussion, we can say that Web pages are created by using HTML code in a very simplified manner. Just simply put your HTML code in any one editor, save it with the .html extension, and open it within any browser. Das obige ist der detaillierte Inhalt vonEntwerfen Sie eine Webseite in HTML. Für weitere Informationen folgen Sie bitte anderen verwandten Artikeln auf der PHP chinesischen Website! Erklärung dieser Website
Der Inhalt dieses Artikels wird freiwillig von Internetnutzern beigesteuert und das Urheberrecht liegt beim ursprünglichen Autor. Diese Website übernimmt keine entsprechende rechtliche Verantwortung. Wenn Sie Inhalte finden, bei denen der Verdacht eines Plagiats oder einer Rechtsverletzung besteht, wenden Sie sich bitte an admin@php.cn

Heiße KI -Werkzeuge
Undresser.AI UndressKI-gestützte App zum Erstellen realistischer Aktfotos 
AI Clothes RemoverOnline-KI-Tool zum Entfernen von Kleidung aus Fotos. 
Undress AI ToolAusziehbilder kostenlos 
Clothoff.ioKI-Kleiderentferner 
Video Face SwapTauschen Sie Gesichter in jedem Video mühelos mit unserem völlig kostenlosen KI-Gesichtstausch-Tool aus! 
Heißer Artikel
Wie kann ich KB5055612 in Windows 10 nicht installieren?
4 Wochen vor
By DDD
<🎜>: Bubble Gum Simulator Infinity - So erhalten und verwenden Sie Royal Keys
4 Wochen vor
By 尊渡假赌尊渡假赌尊渡假赌
<🎜>: Wachsen Sie einen Garten - Komplette Mutationsführer
3 Wochen vor
By DDD
Nordhold: Fusionssystem, erklärt
4 Wochen vor
By 尊渡假赌尊渡假赌尊渡假赌
Mandragora: Flüstern des Hexenbaum
3 Wochen vor
By 尊渡假赌尊渡假赌尊渡假赌
Heiße Werkzeuge
Notepad++7.3.1Einfach zu bedienender und kostenloser Code-Editor 
SublimeText3 chinesische VersionChinesische Version, sehr einfach zu bedienen 
Senden Sie Studio 13.0.1Leistungsstarke integrierte PHP-Entwicklungsumgebung 
Dreamweaver CS6Visuelle Webentwicklungstools 
SublimeText3 Mac-VersionCodebearbeitungssoftware auf Gottesniveau (SublimeText3)
Heiße Themen
Java-Tutorial
 1672
1672
 14
14
CakePHP-Tutorial
1428
52
Laravel-Tutorial
1332
25
PHP-Tutorial
1277
29
C#-Tutorial
1257
24
 Tabellenrahmen in HTML
Sep 04, 2024 pm 04:49 PM
Tabellenrahmen in HTML
Sep 04, 2024 pm 04:49 PM
Anleitung zum Tabellenrahmen in HTML. Hier besprechen wir verschiedene Möglichkeiten zum Definieren von Tabellenrändern anhand von Beispielen für den Tabellenrand in HTML.  Verschachtelte Tabelle in HTML
Sep 04, 2024 pm 04:49 PM
Verschachtelte Tabelle in HTML
Sep 04, 2024 pm 04:49 PM
Dies ist eine Anleitung für verschachtelte Tabellen in HTML. Hier diskutieren wir anhand der entsprechenden Beispiele, wie man eine Tabelle innerhalb der Tabelle erstellt.  HTML-Rand links
Sep 04, 2024 pm 04:48 PM
HTML-Rand links
Sep 04, 2024 pm 04:48 PM
Anleitung zum HTML-Rand links. Hier besprechen wir einen kurzen Überblick über HTML margin-left und seine Beispiele sowie seine Code-Implementierung.  HTML-Tabellenlayout
Sep 04, 2024 pm 04:54 PM
HTML-Tabellenlayout
Sep 04, 2024 pm 04:54 PM
Leitfaden zum HTML-Tabellenlayout. Hier besprechen wir die Werte des HTML-Tabellenlayouts zusammen mit den Beispielen und Ausgaben im Detail.  HTML-Eingabeplatzhalter
Sep 04, 2024 pm 04:54 PM
HTML-Eingabeplatzhalter
Sep 04, 2024 pm 04:54 PM
Leitfaden für HTML-Eingabeplatzhalter. Hier besprechen wir die Beispiele für HTML-Eingabeplatzhalter zusammen mit den Codes und Ausgaben.  Wie analysiert und verarbeitet man HTML/XML in PHP?
Feb 07, 2025 am 11:57 AM
Wie analysiert und verarbeitet man HTML/XML in PHP?
Feb 07, 2025 am 11:57 AM
Dieses Tutorial zeigt, wie XML -Dokumente mit PHP effizient verarbeitet werden. XML (Extensible Markup-Sprache) ist eine vielseitige textbasierte Markup-Sprache, die sowohl für die Lesbarkeit des Menschen als auch für die Analyse von Maschinen entwickelt wurde. Es wird üblicherweise für die Datenspeicherung ein verwendet und wird häufig verwendet  HTML-geordnete Liste
Sep 04, 2024 pm 04:43 PM
HTML-geordnete Liste
Sep 04, 2024 pm 04:43 PM
Leitfaden zur HTML-geordneten Liste. Hier besprechen wir auch die Einführung von HTML-geordneten Listen und Typen sowie deren Beispiele  HTML-Onclick-Button
Sep 04, 2024 pm 04:49 PM
HTML-Onclick-Button
Sep 04, 2024 pm 04:49 PM
Anleitung zum HTML-OnClick-Button. Hier diskutieren wir deren Einführung, Funktionsweise, Beispiele und Onclick-Events in verschiedenen Veranstaltungen. 
|


