
Anzeigetreiber erleichtern die Kommunikation zwischen dem Windows-Betriebssystem (oder einem anderen Betriebssystem) und Ihrer GPU. Wenn der Bildschirmtreiber jedoch auf ein Problem stößt, werden unerwartete Fehler wie der Fehler „Bildschirmtreiber konnte nicht gestartet werden“ angezeigt.
Bemerkenswerte Gründe für diesen Fehler sind problematische Verbindungen, veraltete oder beschädigte Treiber, Registrierungsprobleme und Hardwareprobleme. Probieren Sie diese zehn Methoden aus, um den Fehler zu beheben und dafür zu sorgen, dass die Grafikkarte einwandfrei läuft.
Bevor Sie sich mit fortgeschritteneren Korrekturen befassen, starten Sie die Grafiktreiber Ihres Windows-PCs neu. Diese Methode gilt für alle GPU-Hersteller, sodass sie in PCs mit NVIDIA-, AMD- oder Intel-GPUs funktioniert.
Drücken Sie sofort die Windows-Tastenkombination Strg Umschalt B, um den Neustart einzuleiten. Ihr Bildschirm flackert und kann für einige Sekunden sogar dunkel werden. Danach erscheint die Anzeige wieder.
Wenn Sie ein externes Display mit einem Laptop verwenden, wird die Verbindung zum externen Display nach dem Neustart nicht wiederhergestellt. Sie müssen die App „Einstellungen“ öffnen und neu konfigurieren, um den Bildschirm auf dem externen Display zu erweitern oder zu duplizieren.
Der Fehler „Anzeigetreiber konnte nicht geladen werden“ führt dazu, dass Windows zum grundlegenden Anzeigetreiber wechselt. Wenn Sie jedoch einen einfachen VGA-USB-Adapter verwenden, um einen externen Monitor über USB anzuschließen, müssen Sie auf einen VGA-USB-Adapter mit eigener Stromversorgung umsteigen. Dies liegt daran, dass neuere GPUs den VGA-Standard nicht unterstützen.
Wenn Sie also eine Verbindung zu einem Monitor mit alten Eingangsoptionen wie VGA herstellen müssen, verwenden Sie einen VGA-USB-Adapter mit eigener Stromversorgung. Überprüfen Sie außerdem alle physischen Kabelverbindungen der Komponenten, einschließlich der GPU.
Veraltete und beschädigte Treiber können Fehler verursachen und mit neueren Betriebssystem-Updates schlecht funktionieren. Daher müssen Sie sie mit dem Geräte-Manager aktualisieren. So geht's:
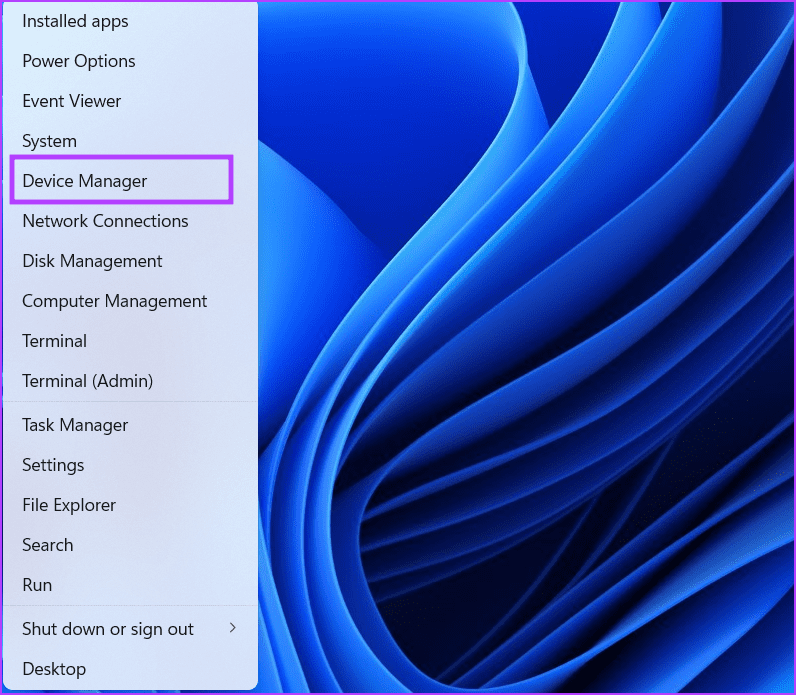
Schritt 1: Drücken Sie die Tastenkombination Windows-Taste X, um das Hauptbenutzermenü zu öffnen. Klicken Sie auf die Option Geräte-Manager.
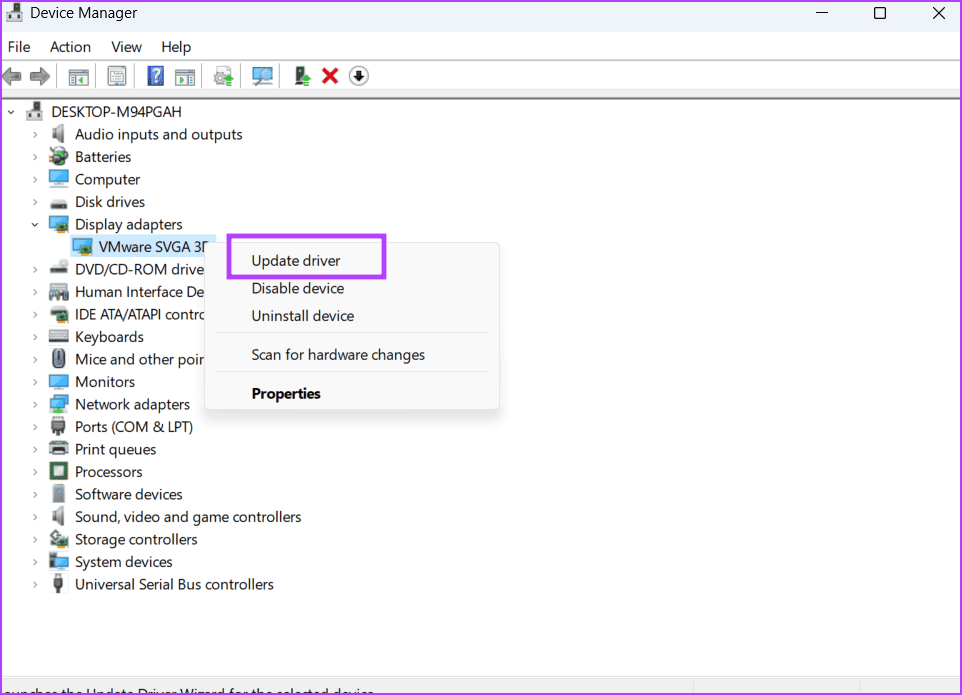
Schritt 2: Klicken Sie auf die Option Display-Adapter. Klicken Sie dann mit der rechten Maustaste auf den GPU-Namen und wählen Sie die Option Treiber aktualisieren.
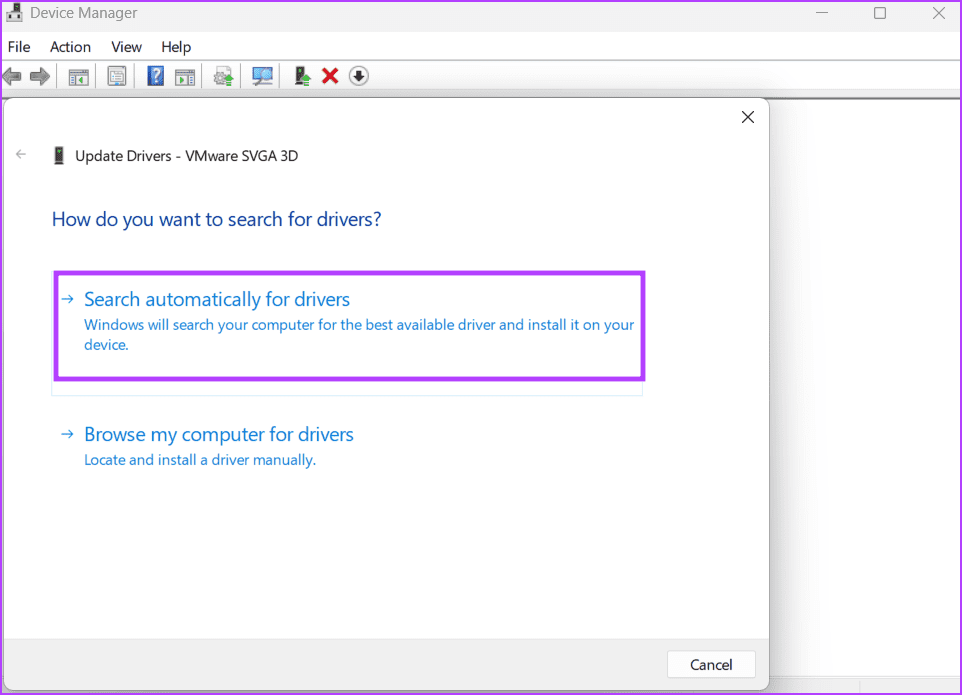
Schritt 3: Klicken Sie auf die Option „Automatisch nach Treibern suchen“. Warten Sie, bis die neuesten GPU-Treiber für Ihren PC heruntergeladen und installiert wurden.
Schritt 4: Schließen Sie den Geräte-Manager.
Die Fehlerbehebung für Hardware und Geräte kann Probleme mit Ihrem PC identifizieren und beheben. Microsoft beabsichtigt, das Tool zu entfernen, Sie können jedoch weiterhin über die Eingabeaufforderung darauf zugreifen. So geht's:
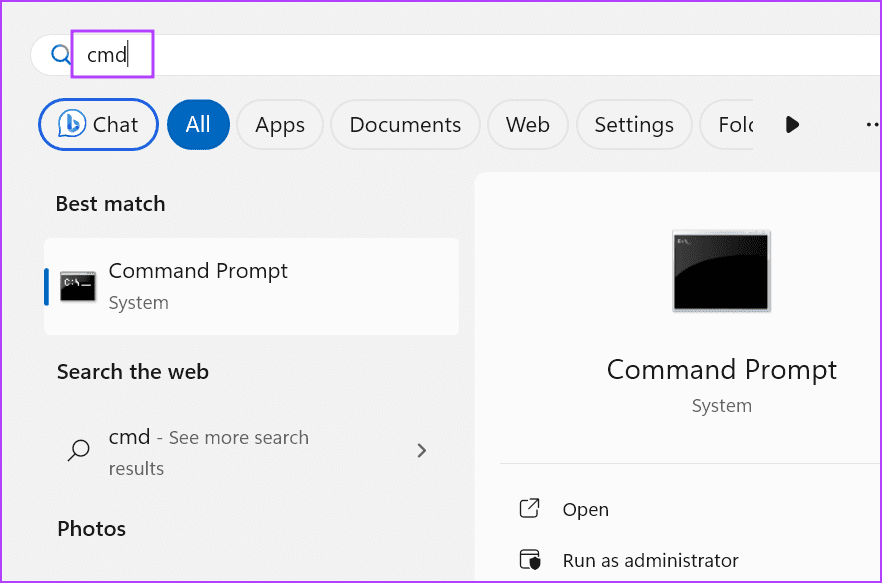
Schritt 1: Drücken Sie die Windows-Taste, um das Startmenü zu öffnen. Geben Sie cmd in das Suchfeld ein und drücken Sie gleichzeitig die Tastenkombination Strg, Umschalt und Eingabetaste.
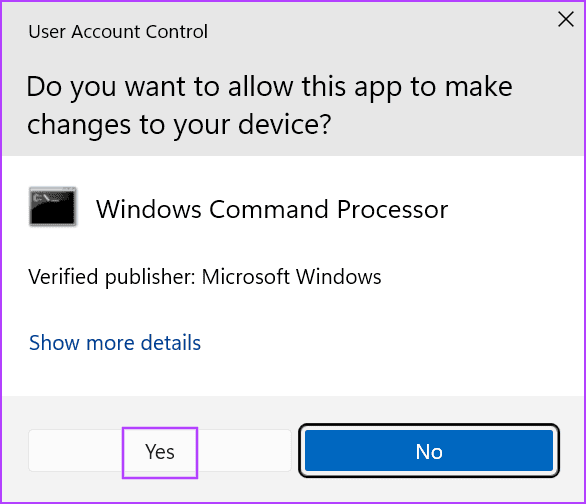
Schritt 2: Das Fenster zur Benutzerkontensteuerung wird geöffnet. Klicken Sie auf die Schaltfläche „Ja“, um die Eingabeaufforderung mit Administratorrechten zu öffnen.
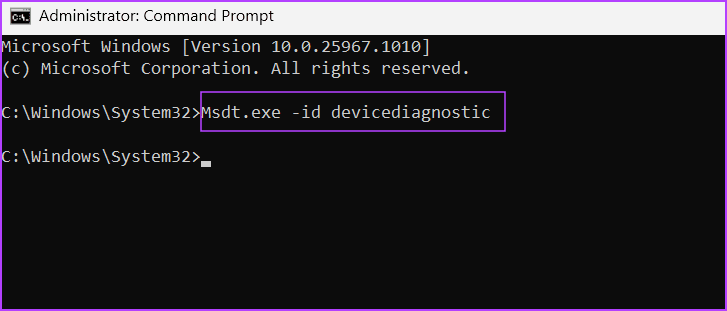
Schritt 3: Geben Sie den folgenden Befehl ein und drücken Sie die Eingabetaste, um die Fehlerbehebung für Hardware und Geräte zu starten:
<code>Msdt.exe -id devicediagnostic</code>
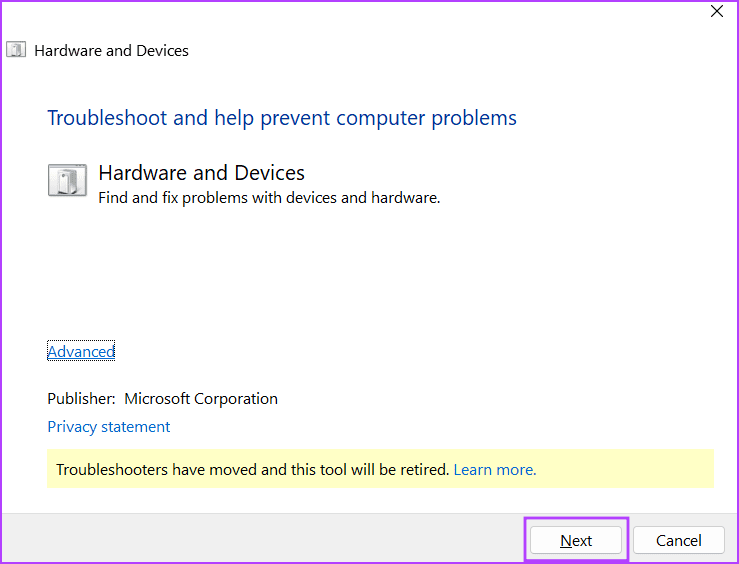
Schritt 4: Klicken Sie auf die Schaltfläche „Weiter“.
Step 5: Wait for the utility to identify and automatically fix problems on your PC.
Step 6: Close the troubleshooter window.
You must change the Windows Performance settings to fix your PC’s ‘display driver failed to load’ issue. This method worked wonders for some users whose Desktop Window Management program crash was the reason behind the display driver problem. Here’s how:
Step 1: Press the Windows key to open the Start menu. Type the following command in the search box and press Enter to launch the advanced setting window:
<code>%windir%\system32\SystemPropertiesPerformance.exe</code>
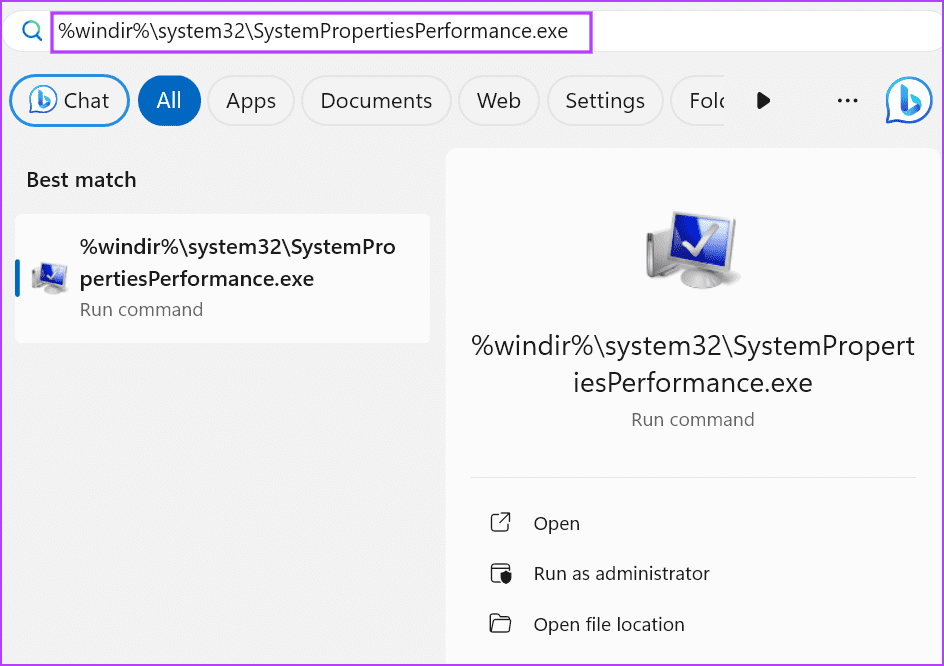
Step 2: Click on the ‘Adjust for best performance’ radio button.
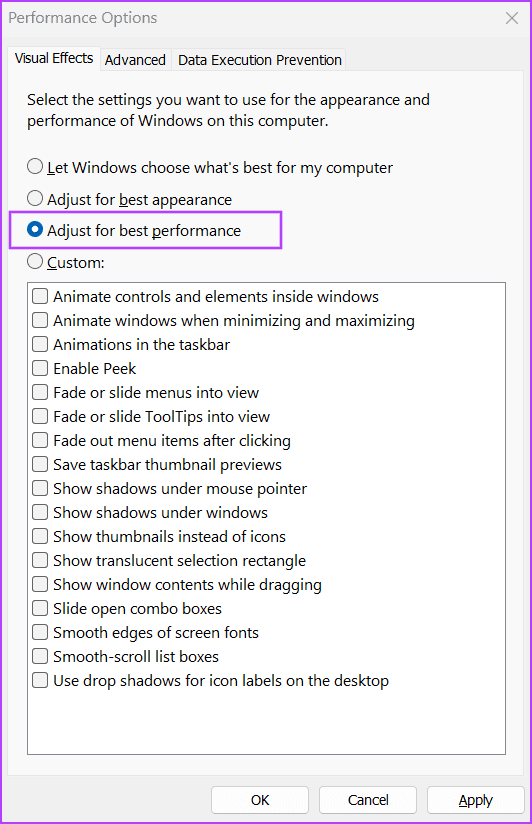
Step 3: Click on the Apply button and then click on the OK button.
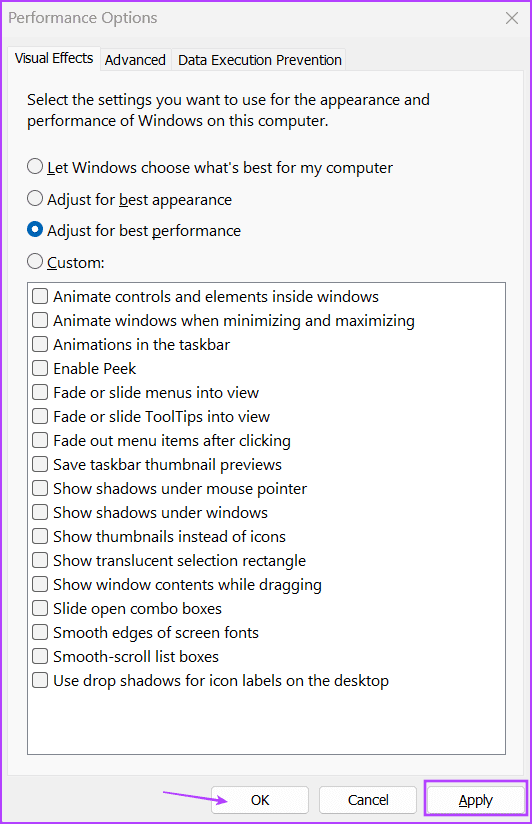
Step 4: Restart your PC.
If updating the graphics card drivers and running the hardware and devices troubleshooter doesn’t have any effect, and you still see the ‘failed to initialize display adapter’ error, you must remove and reinstall the GPU drivers. For this, you can use the Display Driver Uninstaller (DDU) tool, which wipes all the remnant files related to the GPU drivers. Here’s how:
Step 1: Download the portable version of the Display Driver Uninstaller (DDU) tool.
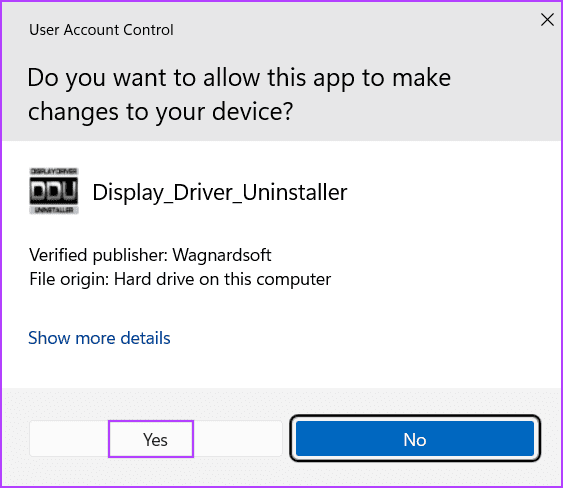
Step 2: Extract the tool and launch it using the executable file. When the User Account Control window pops up, click on the Yes button.
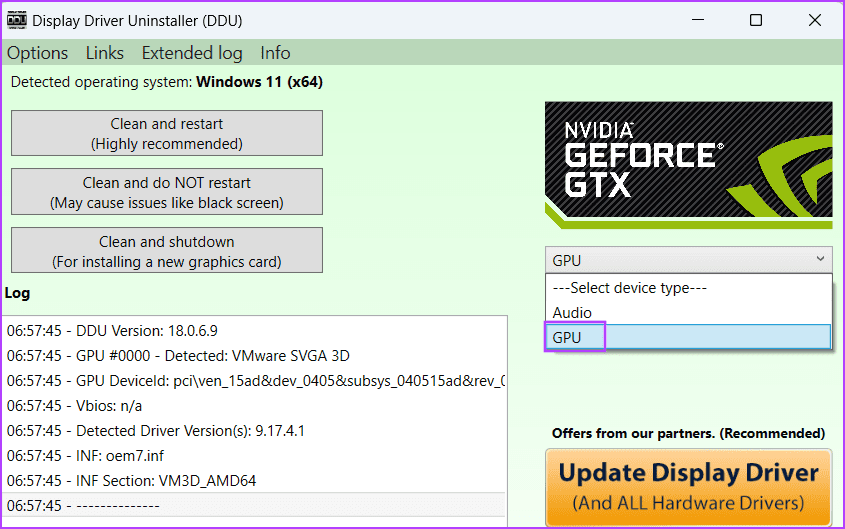
Step 3: Click on the Select device type drop-down list. Then click on the GPU option.
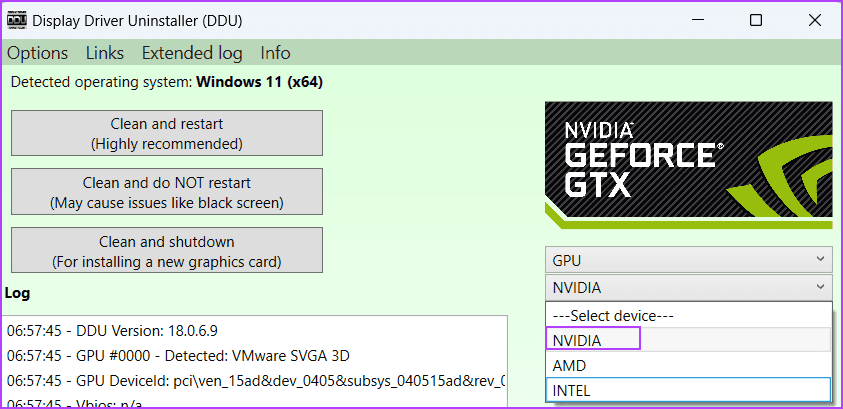
Step 4: Click on the device drop-down list to expand it. Select your GPU name in the list.
Step 5: Click on the Clean and restart option.
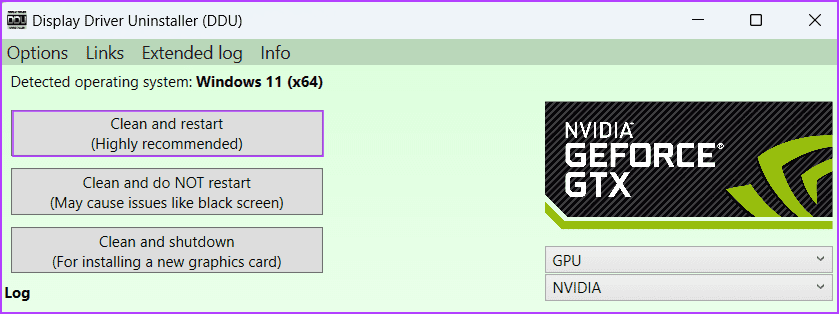
Step 6: Display Driver Uninstaller will start the GPU driver removal process and restart your PC.
Download the latest version of the graphics drivers from your GPU manufacturer’s website and install it on your PC.
You can modify the TDR values to resolve this bothersome graphics driver in Windows 11. This change will make Windows wait longer for a response from the GPU. But before doing that, create a registry backup and export it to an external storage drive. Then, repeat the following steps:
Step 1: Press the Windows key to open the Start menu. Type cmd in the search box and simultaneously press Ctrl + Shift + Enter keyboard shortcut.

Step 2: The User Account Control window will open. Click on the Yes button to launch the Command Prompt with admin privileges.

Step 3: Type the following command and press Enter to set a timeout of 60 seconds:
<code>reg add "HKEY_LOCAL_MACHINE\SYSTEM\CurrentControlSet\Control\GraphicsDrivers" /v TdrDelay /t REG_DWORD /d 60 /f</code>
Step 4: Execute the following command to increase the time before Windows throws a bug-check:
<code>reg add "HKEY_LOCAL_MACHINE\SYSTEM\CurrentControlSet\Control\GraphicsDrivers" /v TdrDdiDelay /t REG_DWORD /d 60 /f</code>
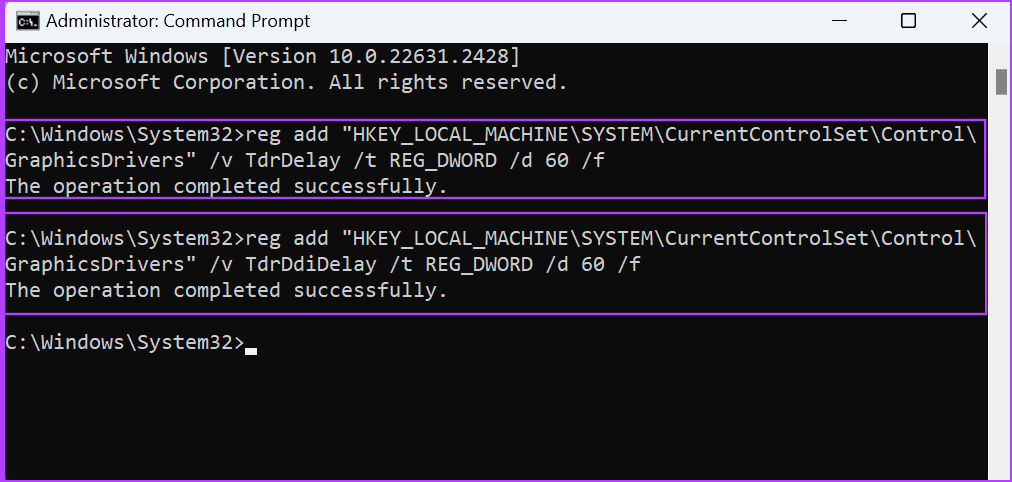
Step 5: Close the Command Prompt window and restart your PC.
If modifying the registry failed to impact the error, try applying a System Restore point. Here’s how:
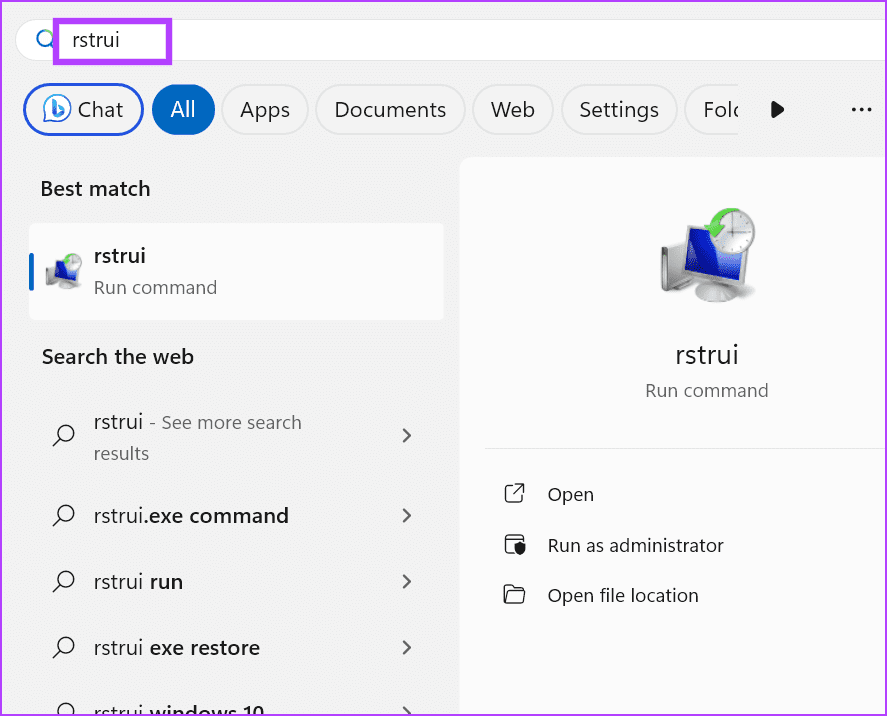
Step 1: Press the Windows key to open the Start menu. Type rstrui in the search bar and press Enter to open the System Restore window.
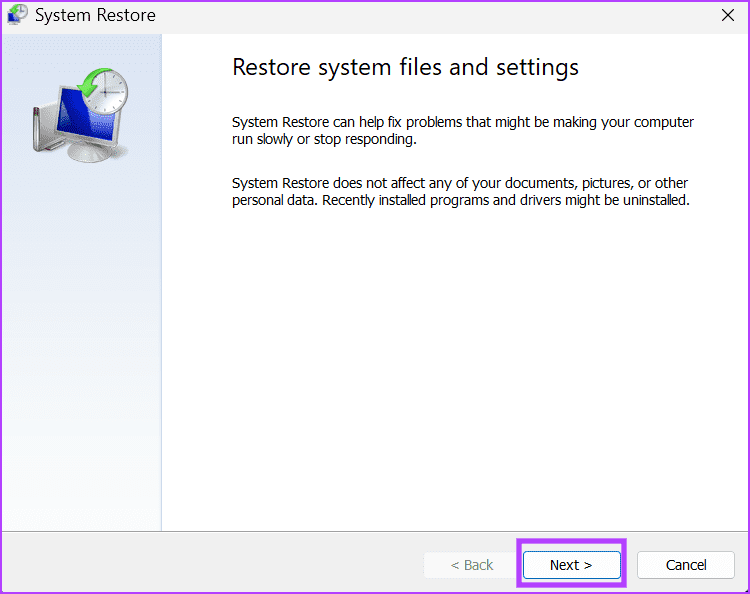
Step 2: Click on the Next button.
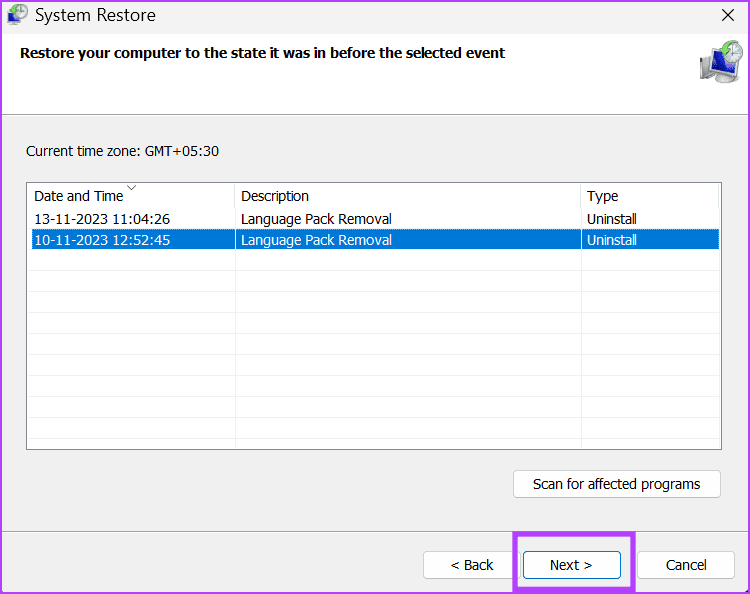
Step 3: Pick a restore point from the list and follow the on-screen instructions to apply the restore points on your PC.
Performing an In-place Upgrade is a great way to keep all the personal files and installed apps. But since it will keep the installed drivers, it is better to reset your PC. You can choose to save the personal files but will have to install the GPU drivers and all other programs manually. Here’s how to do it:
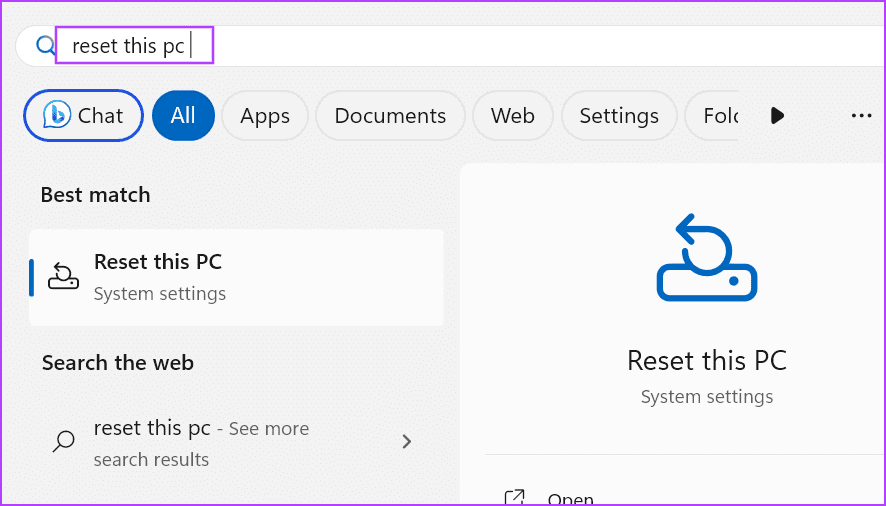
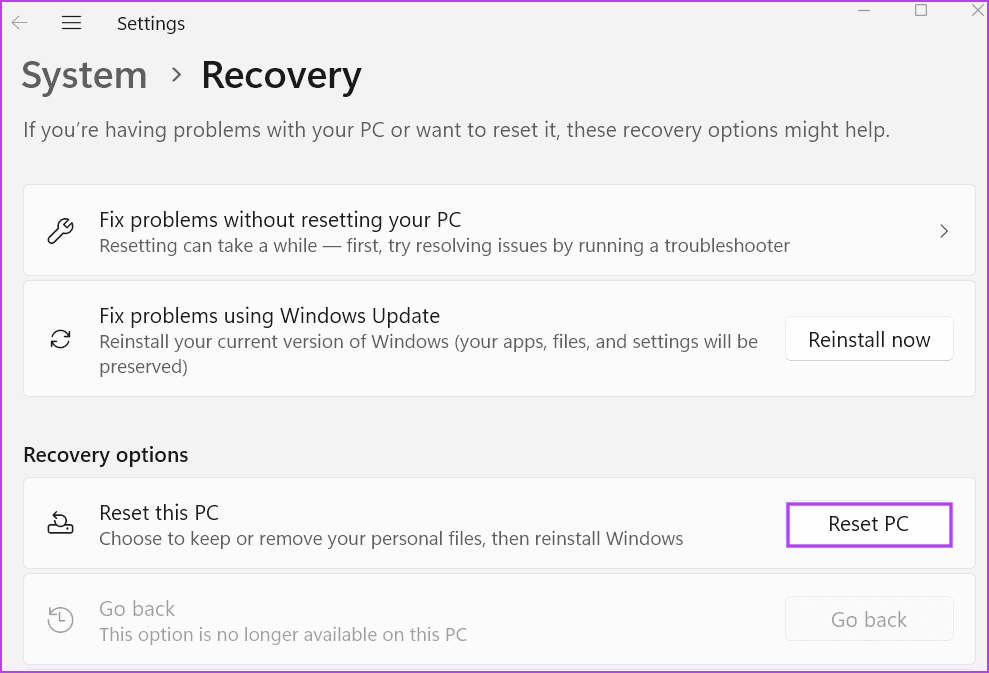
Step 1: Press the Windows key to open the Start menu. Type reset this pc in the search bar and press Enter to open the Settings app.
Step 2: Go to the Recovery options section. Click on the Reset PC button.
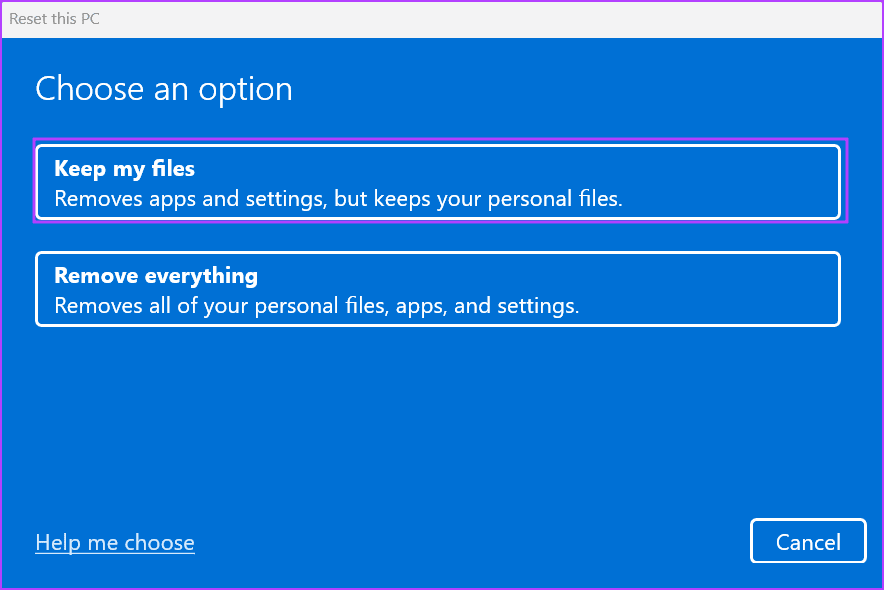
Step 3: Select the Keep my files in the Reset this PC window to save your personal files from deletion.
Follow the on-screen instructions to begin the reset process. Your PC will restart several times to reinstall Windows and boot to the lock screen.
After logging in, download and install all the system drivers from your OEM manufacturer’s website or using the driver disk or ISO file provided by your manufacturer. In the case of a custom PC, you must download drivers for each component separately.
After exhausting all the software-related fixes, if you still face the display driver issue, it’s time to get the GPU inspected by a technician for hardware defects. Some users also face issues due to a weak or faulty power supply unit, so ensure get that checked and replaced, if required.
These were the ten methods to fix the ‘Display Driver Failed to Start’ error in Windows 10 and 11 PCs. Restart GPU drivers, inspect physical connections, and use a powered VGA-USB adapter. After that, update or reinstall the drivers, adjust the Windows performance settings, and modify the system registry. Lastly, do a system reset and replace faulty hardware.
Das obige ist der detaillierte Inhalt vonDie 10 besten Möglichkeiten zur Behebung des Fehlers „Bildschirmtreiber konnte nicht gestartet werden' in Windows 10 und 11. Für weitere Informationen folgen Sie bitte anderen verwandten Artikeln auf der PHP chinesischen Website!


