
 Web-Frontend
js-Tutorial
jQuery Mobile-Popup-Fenster und Popup-Ebene Wissenszusammenfassung_jquery
Web-Frontend
js-Tutorial
jQuery Mobile-Popup-Fenster und Popup-Ebene Wissenszusammenfassung_jquery
jQuery Mobile-Popup-Fenster und Popup-Ebene Wissenszusammenfassung_jquery

Erstellen Sie zuerst ein Formular
<div data-role="popup" id="popupView" class="ui-content" data-overlay-theme="b" data-position-to="window" data-dismissible="false">
  <a href='javascript:void(0)' data-rel="back" class="ui-btn ui-corner-all ui-shadow ui-btn-a ui-icon-delete ui-btn-icon-notext ui-btn-right">Close</a>
  <div>弹出窗内容<div>
</div>
1) Es erscheint, nachdem Sie auf
geklickt haben
<a href="#popupView" data-rel="popup" data-transition="flip" class="ui-btn ui-corner-all">按钮</a>
2) Popup nach dem Laden der Seite
//页面延时加载<script>
setTimeout(function () {
  $("#popupView").popup('open');
}, 1000);//1秒</script> Keyword-Beschreibung:
data-overlay-theme: Hintergrundfarbe transparent grau data-position-to: Popup-Fenster, das in der Mitte des Fensters angezeigt wird data-dismissible: ob das Klicken auf eine beliebige Stelle außerhalb des Fensters erlaubt werden soll, um das Fenster zu schließen (Standard ist „true“) zulässig) Datenübergang: Popup-Methode
Im Folgenden finden Sie eine detaillierte Erläuterung der Verwendung der JQuery-Mobile-Popup-Ebene anhand von Codebeispielen
Dateien importieren
<head>
<link rel="stylesheet" href="http://code.jquery.com/mobile/1.3.2/jquery.mobile-1.3.2.min.css"> <script src="http://code.jquery.com/jquery-1.8.3.min.js"></script> <script src="http://code.jquery.com/mobile/1.3.2/jquery.mobile-1.3.2.min.js"></script>
</head>
Grundlagen der Popup-Ebene
Um eine Popup-Ebene zu erstellen, fügen Sie ein data-role="popup"-Attribut zum div-Tag hinzu, fügen Sie dann ein a-Tag hinzu, legen Sie die ID der Popup-div-Ebene im href-Attribut des a-Tags fest und fügen Sie hinzu Fügen Sie es den a-Tag-Eigenschaften hinzu
data-rel="popup"
To create a popup, add the data-role="popup" attribute to a div with the popup contents. Then create a link with the href set to the id of the popup div, and add the attribute data-rel="popup" to tell the framework to open the popup when the link is tapped. A popup div has to be nested inside the same page as the link.
<a href="#popupBasic" data-rel="popup" class="ui-btn ui-corner-all ui-shadow ui-btn-inline" data-transition="pop">Basic Popup</a>
<div data-role="popup" id="popupBasic">
<p>This is a completely basic popup, no options set.</p>
</div>
Einfaches Beispiel
<!DOCTYPE html>
<html>
<head>
<link rel="stylesheet" href="http://code.jquery.com/mobile/1.3.2/jquery.mobile-1.3.2.min.css">
<script src="http://code.jquery.com/jquery-1.8.3.min.js"></script>
<script src="http://code.jquery.com/mobile/1.3.2/jquery.mobile-1.3.2.min.js"></script>
</head>
<body>
<div data-role="page" id="pageone">
<a href="#popupBasic" data-rel="popup" class="ui-btn ui-corner-all ui-shadow ui-btn-inline" data-transition="pop">点击我弹出层</a>
<div data-role="popup" id="popupBasic">
<p>弹出层测试</p>
</div>
</div>
</body>
</html>
Tooltips können durch Hinzufügen eines Themas erstellt werden. Beispiele werden grundsätzlich über UI-Inhalte angezeigt und Auffüllungen hinzugefügt
A tooltip can be created by adding a theme swatch to a basic popup and adding padding via the ui-content class.
<p>A paragraph with a tooltip. <a href="#popupInfo" data-rel="popup" data-transition="pop" class="my-tooltip-btn ui-btn ui-alt-icon ui-nodisc-icon ui-btn-inline ui-icon-info ui-btn-icon-notext" title="Learn more">Learn more</a></p>
<div data-role="popup" id="popupInfo" class="ui-content" data-theme="a" style="max-width:350px;">
<p>Here is a <strong>tiny popup</strong> being used like a tooltip. The text will wrap to multiple lines as needed.</p>
</div>
Beispiel für eine Aufforderungsnachricht
<!DOCTYPE html>
<html>
<head>
<link rel="stylesheet" href="http://code.jquery.com/mobile/1.3.2/jquery.mobile-1.3.2.min.css">
<script src="http://code.jquery.com/jquery-1.8.3.min.js"></script>
<script src="http://code.jquery.com/mobile/1.3.2/jquery.mobile-1.3.2.min.js"></script>
</head>
<body>
<div data-role="page" id="pageone">
<p>A paragraph with a tooltip. <a href="#popupInfo" data-rel="popup" data-transition="pop" class="my-tooltip-btn ui-btn ui-alt-icon ui-nodisc-icon ui-btn-inline ui-icon-info ui-btn-icon-notext" title="Learn more">Learn more</a></p>
<div data-role="popup" id="popupInfo" class="ui-content" data-theme="a" style="max-width:350px;">
<p>Here is a <strong>tiny popup</strong> being used like a tooltip. The text will wrap to multiple lines as needed.</p>
</div>
</div>
</body>
</html>
Popup-Bild
<!DOCTYPE html>
<html>
<head>
<link rel="stylesheet" href="http://code.jquery.com/mobile/1.3.2/jquery.mobile-1.3.2.min.css">
<script src="http://code.jquery.com/jquery-1.8.3.min.js"></script>
<script src="http://code.jquery.com/mobile/1.3.2/jquery.mobile-1.3.2.min.js"></script>
</head>
<body>
<div data-role="page" id="pageone">
<a href="#popupParis" data-rel="popup" data-position-to="window" data-transition="fade"><img class="popphoto" src="http://demos.jquerymobile.com/1.4.3/_assets/img/paris.jpg" alt="Paris, France" style="width:30%"></a>
<a href="#popupSydney" data-rel="popup" data-position-to="window" data-transition="fade"><img class="popphoto" src="http://demos.jquerymobile.com/1.4.3/_assets/img/sydney.jpg" alt="Sydney, Australia" style="width:30%"></a>
<a href="#popupNYC" data-rel="popup" data-position-to="window" data-transition="fade"><img class="popphoto" src="http://demos.jquerymobile.com/1.4.3/_assets/img/newyork.jpg" alt="New York, USA" style="width:30%"></a>
<div data-role="popup" id="popupParis" data-overlay-theme="b" data-theme="b" data-corners="false">
<a href="#" data-rel="back" class="ui-btn ui-corner-all ui-shadow ui-btn-a ui-icon-delete ui-btn-icon-notext ui-btn-right">Close</a><img class="popphoto" src="http://demos.jquerymobile.com/1.4.3/_assets/img/paris.jpg" style="max-height:512px;" alt="Paris, France">
</div>
<div data-role="popup" id="popupSydney" data-overlay-theme="b" data-theme="b" data-corners="false">
<a href="#" data-rel="back" class="ui-btn ui-corner-all ui-shadow ui-btn-a ui-icon-delete ui-btn-icon-notext ui-btn-right">Close</a><img class="popphoto" src="http://demos.jquerymobile.com/1.4.3/_assets/img/sydney.jpg" style="max-height:512px;" alt="Sydney, Australia">
</div>
<div data-role="popup" id="popupNYC" data-overlay-theme="b" data-theme="b" data-corners="false">
<a href="#" data-rel="back" class="ui-btn ui-corner-all ui-shadow ui-btn-a ui-icon-delete ui-btn-icon-notext ui-btn-right">Close</a><img class="popphoto" src="http://demos.jquerymobile.com/1.4.3/_assets/img/newyork.jpg" style="max-height:512px;" alt="New York, USA">
</div>
</div>
</body>
</html>

Heiße KI -Werkzeuge

Undresser.AI Undress
KI-gestützte App zum Erstellen realistischer Aktfotos

AI Clothes Remover
Online-KI-Tool zum Entfernen von Kleidung aus Fotos.

Undress AI Tool
Ausziehbilder kostenlos

Clothoff.io
KI-Kleiderentferner

AI Hentai Generator
Erstellen Sie kostenlos Ai Hentai.

Heißer Artikel
Heiße Werkzeuge

Notepad++7.3.1
Einfach zu bedienender und kostenloser Code-Editor

SublimeText3 chinesische Version
Chinesische Version, sehr einfach zu bedienen

Senden Sie Studio 13.0.1
Leistungsstarke integrierte PHP-Entwicklungsumgebung

Dreamweaver CS6
Visuelle Webentwicklungstools

SublimeText3 Mac-Version
Codebearbeitungssoftware auf Gottesniveau (SublimeText3)
Heiße Themen


 Ersetzen Sie Stringzeichen in JavaScript
Mar 11, 2025 am 12:07 AM
Ersetzen Sie Stringzeichen in JavaScript
Mar 11, 2025 am 12:07 AM
Detaillierte Erläuterung der Methode für JavaScript -Zeichenfolge und FAQ In diesem Artikel werden zwei Möglichkeiten untersucht, wie String -Zeichen in JavaScript ersetzt werden: Interner JavaScript -Code und interne HTML für Webseiten. Ersetzen Sie die Zeichenfolge im JavaScript -Code Die direkteste Möglichkeit ist die Verwendung der Ersatz () -Methode: str = str.replace ("find", "ersetzen"); Diese Methode ersetzt nur die erste Übereinstimmung. Um alle Übereinstimmungen zu ersetzen, verwenden Sie einen regulären Ausdruck und fügen Sie das globale Flag G hinzu:: STR = Str.Replace (/fi
 Erstellen Sie Ihre eigenen AJAX -Webanwendungen
Mar 09, 2025 am 12:11 AM
Erstellen Sie Ihre eigenen AJAX -Webanwendungen
Mar 09, 2025 am 12:11 AM
Hier sind Sie also bereit, alles über dieses Ding namens Ajax zu lernen. Aber was genau ist das? Der Begriff AJAX bezieht sich auf eine lose Gruppierung von Technologien, mit denen dynamische, interaktive Webinhalte erstellt werden. Der Begriff Ajax, ursprünglich von Jesse J geprägt
 10 JQuery Fun- und Games -Plugins
Mar 08, 2025 am 12:42 AM
10 JQuery Fun- und Games -Plugins
Mar 08, 2025 am 12:42 AM
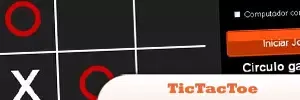
10 Fun JQuery Game -Plugins, um Ihre Website attraktiver zu machen und die Stickinität der Benutzer zu verbessern! Während Flash immer noch die beste Software für die Entwicklung von lässigen Webspielen ist, kann JQuery auch überraschende Effekte erzielen und zwar nicht mit reinen Action -Flash -Spielen vergleichbar sind, aber in einigen Fällen können Sie auch einen unerwarteten Spaß in Ihrem Browser haben. JQuery Tic Toe Game Die "Hello World" der Game -Programmierung hat jetzt eine Jquery -Version. Quellcode JQuery Crazy Word Kompositionsspiel Dies ist ein Spiel mit der Füllung, und es kann einige seltsame Ergebnisse erzielen, da das Wort nicht kennt. Quellcode JQuery Mine Sweeping Game
 Wie erstelle ich meine eigenen JavaScript -Bibliotheken?
Mar 18, 2025 pm 03:12 PM
Wie erstelle ich meine eigenen JavaScript -Bibliotheken?
Mar 18, 2025 pm 03:12 PM
In Artikel werden JavaScript -Bibliotheken erstellt, veröffentlicht und aufrechterhalten und konzentriert sich auf Planung, Entwicklung, Testen, Dokumentation und Werbestrategien.
 JQuery Parallax Tutorial - Animated Header Hintergrund
Mar 08, 2025 am 12:39 AM
JQuery Parallax Tutorial - Animated Header Hintergrund
Mar 08, 2025 am 12:39 AM
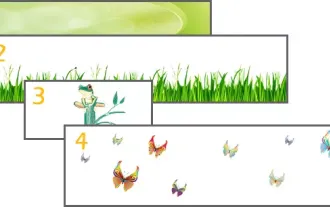
Dieses Tutorial zeigt, wie ein faszinierender Parallaxen -Hintergrundeffekt mit JQuery erstellt wird. Wir werden ein Header -Banner mit geschichteten Bildern bauen, die eine atemberaubende visuelle Tiefe erzeugen. Das aktualisierte Plugin funktioniert mit JQuery 1.6.4 und später. Laden Sie die herunter
 Wie optimiere ich den JavaScript -Code für die Leistung im Browser?
Mar 18, 2025 pm 03:14 PM
Wie optimiere ich den JavaScript -Code für die Leistung im Browser?
Mar 18, 2025 pm 03:14 PM
In dem Artikel werden Strategien zur Optimierung der JavaScript -Leistung in Browsern erörtert, wobei der Schwerpunkt auf die Reduzierung der Ausführungszeit und die Minimierung der Auswirkungen auf die Lastgeschwindigkeit der Seite wird.
 Automatische Aktualisierung der Div -Inhalte mit JQuery und Ajax
Mar 08, 2025 am 12:58 AM
Automatische Aktualisierung der Div -Inhalte mit JQuery und Ajax
Mar 08, 2025 am 12:58 AM
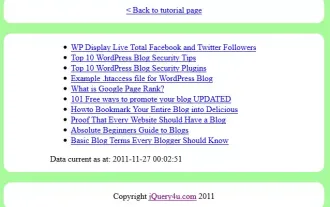
Dieser Artikel zeigt, wie Sie den Inhalt eines DIV automatisch alle 5 Sekunden mit JQuery und Ajax aktualisieren können. Das Beispiel holt und zeigt die neuesten Blog -Beiträge aus einem RSS -Feed zusammen mit dem letzten Aktualisierungstempel. Ein Ladebild ist Optiona
 Erste Schritte mit Matter.js: Einführung
Mar 08, 2025 am 12:53 AM
Erste Schritte mit Matter.js: Einführung
Mar 08, 2025 am 12:53 AM
Matter.js ist eine in JavaScript geschriebene 2D -Motorhilfe -Physik -Engine. Diese Bibliothek kann Ihnen helfen, die 2D -Physik in Ihrem Browser problemlos zu simulieren. Es bietet viele Merkmale, wie die Möglichkeit, starre Körper zu erstellen und physikalische Eigenschaften wie Masse, Fläche oder Dichte zuzuweisen. Sie können auch verschiedene Arten von Kollisionen und Kräften simulieren, wie z. B. die Schwerkraft Reibung. Matter.js unterstützt alle Mainstream -Browser. Darüber hinaus ist es für mobile Geräte geeignet, da es Berührungen erkennt und reagiert. Alle diese Funktionen machen es Ihre Zeit wert, zu lernen, wie man die Engine benutzt. In diesem Tutorial werde ich die Grundlagen dieser Bibliothek, einschließlich ihrer Installation und Nutzung, behandeln und a bereitstellen
