
Dieses Tutorial verwendet das NSXMLParser -Objekt zum Parsen von XML-Dateien. Die Parsing-Ergebnisse werden in der Tabellenansicht angezeigt. Dieses Tutorial basiert auf iOS 9.3 auf Xcode 7.3.1.
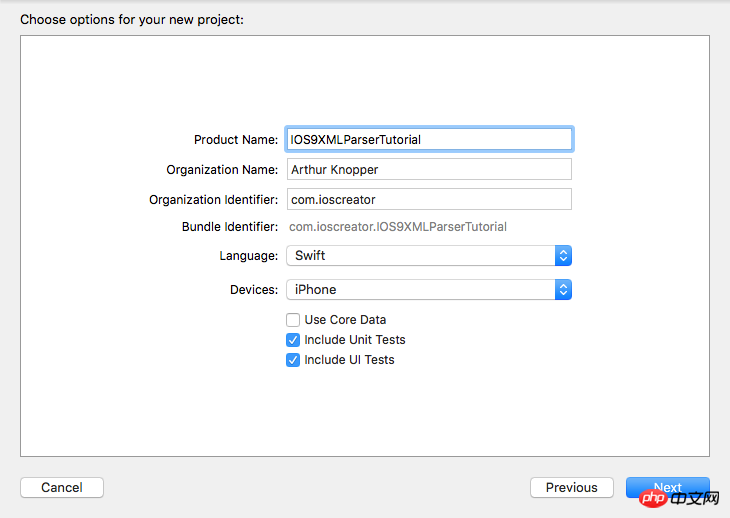
Öffnen Sie Xcode und erstellen Sie eine neue Einzelfensteranwendung. Der Name lautet IOS9XMLParserTutorial, und der Organisationsname und das Organisationslogo werden von Ihnen selbst festgelegt. Wählen Sie Swift als Sprache und iPhone als Gerät.
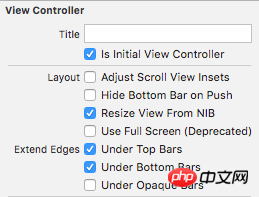
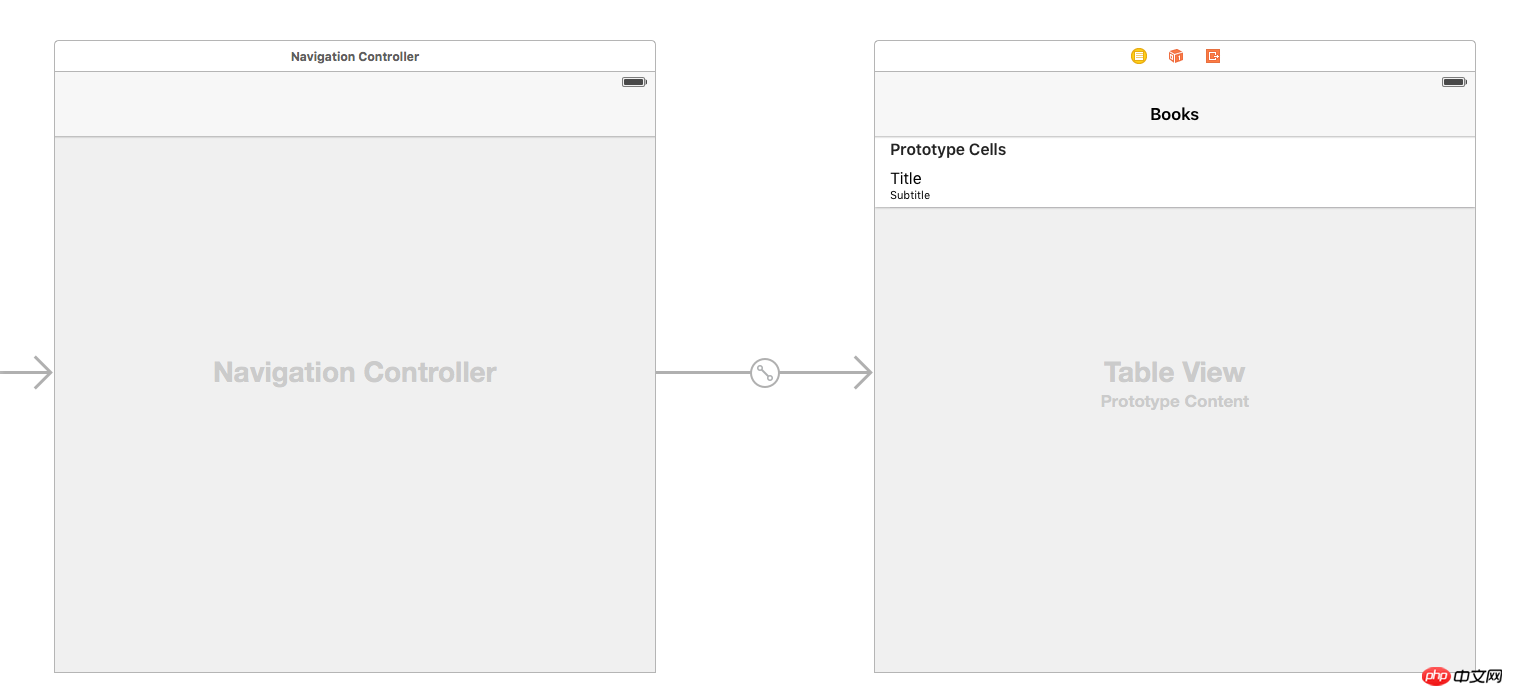
Entfernen Sie den View Controller aus dem Storyboard und ziehen Sie einen Navigation Controller auf die leere Zeichenfläche. Dieser Navigationscontroller verfügt automatisch über einen Table View Controller. Wenn Sie den anfänglichen View Controller löschen, wird auch der entsprechende Storyboard-Startpunkt entfernt. Wir wählen also zunächst den neu hinzugefügten Navigations-Controller aus und aktivieren das Kontrollkästchen „Ist Initial View Controller“ im Attributinspektor als Ausgangspunkt des neuen Storyboards.
Eigenschaft im Attributinspektor auf „Untertitel“.

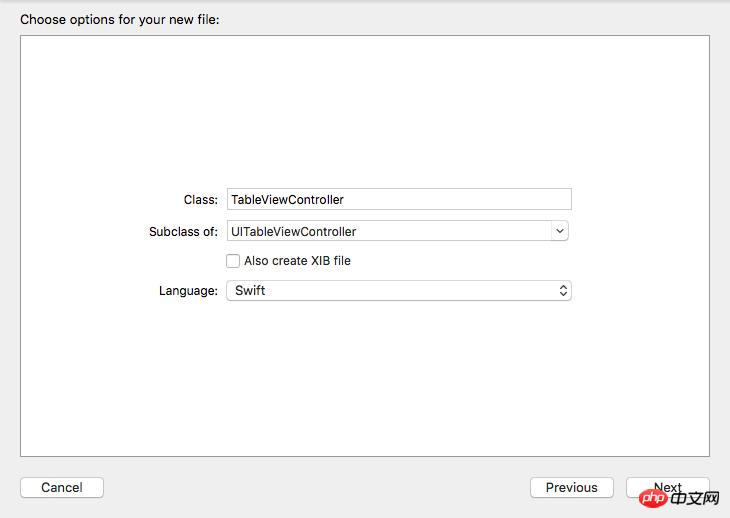

Datei, um eine neue Datei hinzuzufügen. Nennen Sie es Books.xml
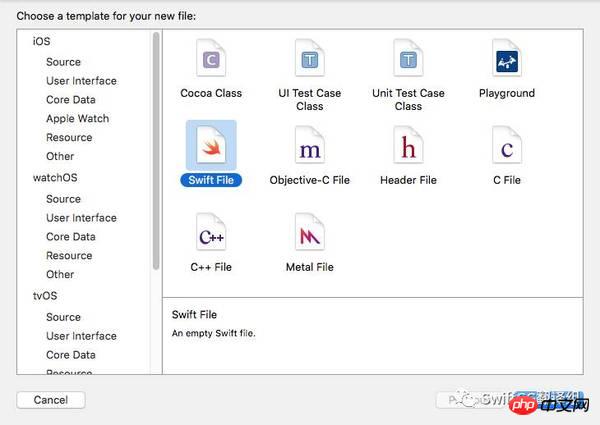
<?xml version="1.0"?>
<catalog>
    <book id="1">
        <title>To Kill a Mockingbird</title>
        <author>Harper Lee</author>
    </book>
    <book id="2">
        <title>1984</title>
        <author>George Orwell</author>
    </book>
    <book id="3">
        <title>The Lord of the Rings</title>
        <author>J.R.R Tolkien</author>
    </book>
    <book id="4">
        <title>The Catcher in the Rye</title>
        <author>J.D. Salinger</author>
    </book>
    <book id="5">
        <title>The Great Gatsby</title>
        <author>F. Scott Fitzgerald</author>
    </book>
</catalog>import Foundation
class Book {
var bookTitle: String = String()
var bookAuthor: String = String()
}Variablen hinzu.
var books: [Book] = []
var eName: String = String()
var bookTitle = String()
var bookAuthor = String()
override func viewDidLoad() {
    super.viewDidLoad()

    if let path = NSBundle.mainBundle().URLForResource("books", withExtension: "xml") {
        if let parser = NSXMLParser(contentsOfURL: path) {
            parser.delegate = self
            parser.parse()
        }
    }
}override func numberOfSectionsInTableView(tableView: UITableView) -> Int {
return 1
}
override func tableView(tableView: UITableView, numberOfRowsInSection section: Int) -> Int {
return books.count
}
override func tableView(tableView: UITableView, cellForRowAtIndexPath indexPath: NSIndexPath) -> UITableViewCell {
let cell = tableView.dequeueReusableCellWithIdentifier("Cell", forIndexPath: indexPath)
let book = books[indexPath.row]
cell.textLabel?.text = book.bookTitle
cell.detailTextLabel?.text = book.bookAuthor
return cell
}// 1
func parser(parser: NSXMLParser, didStartElement elementName: String, namespaceURI: String?,
qualifiedName qName: String?, attributes attributeDict: [String : String]) {
eName = elementName
if elementName == "book" {
bookTitle = String()
bookAuthor = String()
}
}
// 2
func parser(parser: NSXMLParser, didEndElement elementName: String, namespaceURI: String?, qualifiedName qName: String?) {
if elementName == "book" {
let book = Book()
book.bookTitle = bookTitle
book.bookAuthor = bookAuthor
books.append(book)
}
}
// 3
func parser(parser: NSXMLParser, foundCharacters string: String) {
let data = string.stringByTrimmingCharactersInSet(NSCharacterSet.whitespaceAndNewlineCharacterSet())
if (!data.isEmpty) {
if eName == "title" {
bookTitle += data
} else if eName == "author" {
bookAuthor += data
}
}
}Erstellen Sie das -Projekt und führen Sie es aus. Sie können die Titel und Autoren aller Bücher im TableViewController sehen. 
Das obige ist der detaillierte Inhalt vonAusführliche Einführung in das XML-Parsing (Grafik und Text). Für weitere Informationen folgen Sie bitte anderen verwandten Artikeln auf der PHP chinesischen Website!


