Dieser Artikel stellt hauptsächlich die Verwendung von HTML5 Canvas zum Erstellen dynamischer Partikelgitter Animationen vor. Er ist von großem praktischen Wert und Freunde in Not können sich darauf beziehen Es.
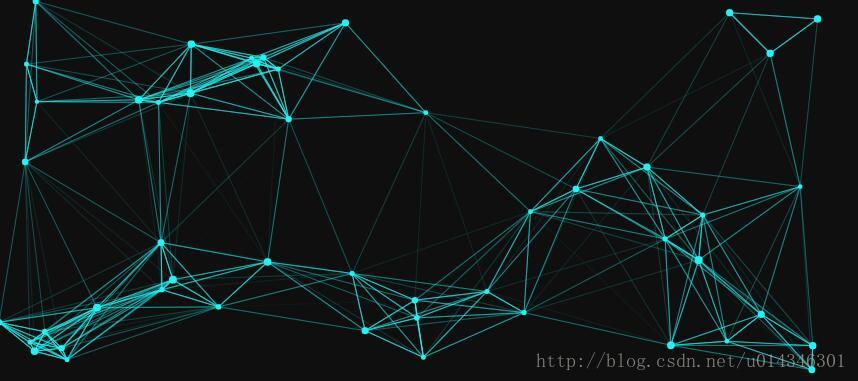
Ich habe kürzlich eine sehr coole Partikelgitteranimation gesehen, also habe ich selbst eine erstellt. Sie eignet sich gut als Hintergrund. Da CSDN keine Bilder hochladen kann, die größer als 2 M sind, schneide ich einfach ein statisches Bild aus:
Beginnen wir damit, wie man diesen Effekt erzielt:

Zuallererst von Natürlich ist es Zeit, eine Leinwand hinzuzufügen:
<canvas id="canvas"></canvas>
Das Folgende ist der Stil:
<style>
    #canvas{
        position: absolute;
        display: block;
        left:0;
        top:0;
        background: #0f0f0f;
        z-index: -1;
     }
</style>Der Z-Index der Leinwand oben: -1 kann unter einigen Elementen platziert werden als ein Hintergrund.
Um sicherzustellen, dass die Leinwand den gesamten Browser ausfüllen kann, müssen Breite und Höhe der Leinwand mit denen des Browsers übereinstimmen:
function getSize(){
    w = canvas.width = window.innerWidth;
    h = canvas.height = window.innerHeight;
}Breite und Höhe oben stellen die Breite bzw. Höhe des Browsers dar.
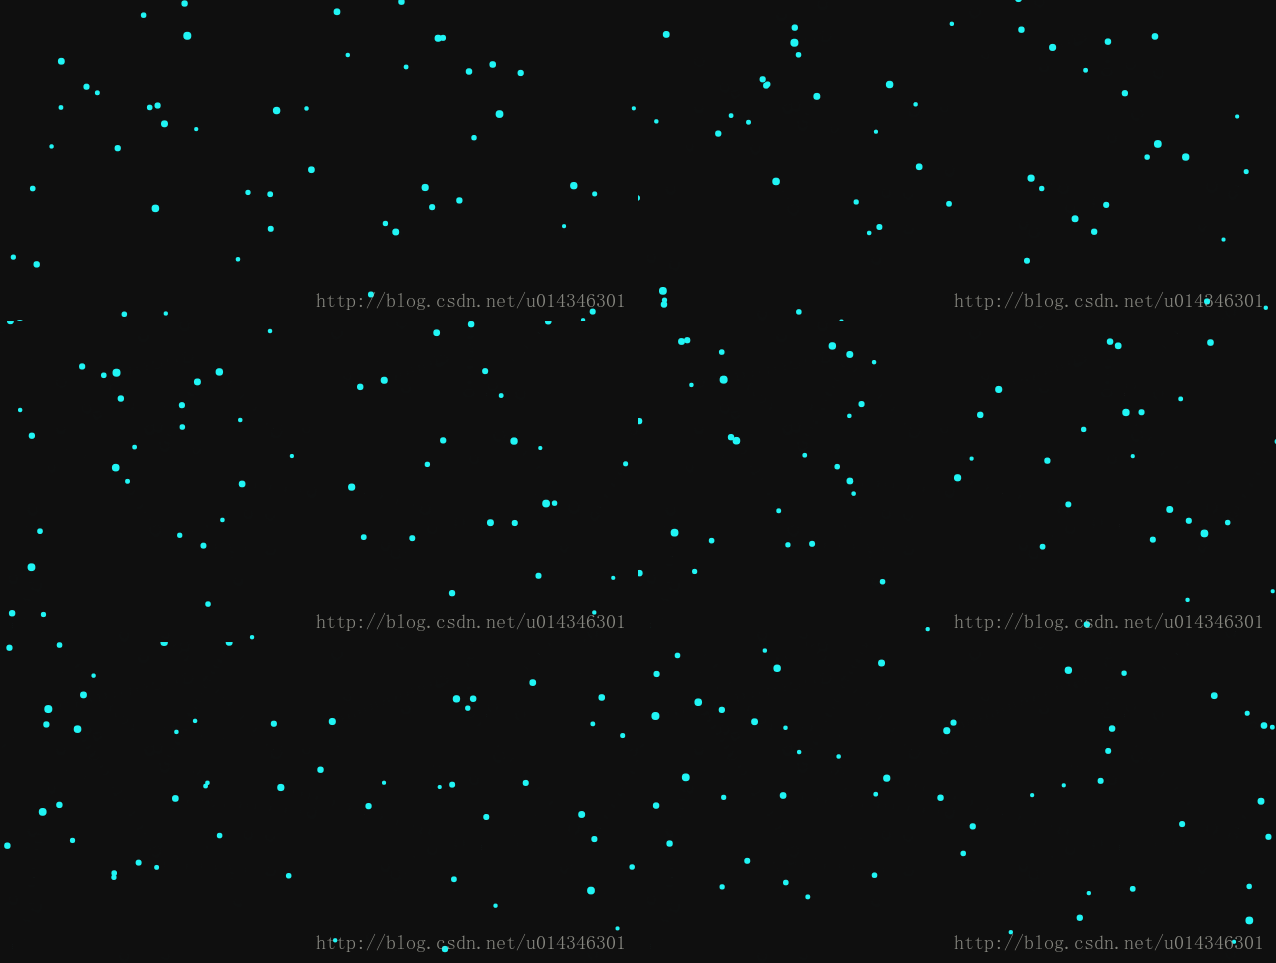
Nachdem wir die Breite und Höhe des Browsers ermittelt haben, besteht der nächste Schritt darin, die Partikel hineinzuziehen. Hier müssen wir im Voraus einige Partikelparameter definieren:
var opt = {
    particleAmount: 50,         //粒子个数
    defaultSpeed: 1,            //粒子运动速度
    variantSpeed: 1,            //粒子运动速度的变量
    particleColor: "rgb(32,245,245)",       //粒子的颜色
    lineColor:"rgb(32,245,245)",            //网格连线的颜色
    defaultRadius: 2,           //粒子半径
    variantRadius: 2,           //粒子半径的变量
    minDistance: 200            //粒子之间连线的最小距离
};Die oben genannten Geschwindigkeitsvariablen und Radiusvariablen sind beides. Dies soll sicherstellen, dass die Größe und Geschwindigkeit der Partikel nicht genau gleich sind.
Dann erstellen wir eine Klasse, um die Partikel zu initialisieren, also habe ich Kommentare hinzugefügt:
function Partical(){
    this.x = Math.random()*w;           //粒子的x轴坐标
    this.y = Math.random()*h;           //粒子的y轴坐标
    this.speed = opt.defaultSpeed + opt.variantSpeed*Math.random();     //粒子的运动速度
    this.directionAngle = Math.floor(Math.random()*360);                //粒子运动的方向
    this.color = opt.particleColor ;                                    //粒子的颜色
    this.radius = opt.defaultRadius+Math.random()*opt.variantRadius;    //粒子的半径大小
    this.vector = {
        x:this.speed * Math.cos(this.directionAngle),       //粒子在x轴的速度
        y:this.speed * Math.sin(this.directionAngle)        //粒子在y轴的速度
    }
    this.update = function(){                   //粒子的更新函数
        this.border();                           //判断粒子是否到了边界
        this.x += this.vector.x;                //粒子下一时刻在x轴的坐标
        this.y += this.vector.y;                //粒子下一时刻在y轴的坐标
    }
    this.border = function(){               //判断粒子是都到达边界
        if(this.x >= w || this.x<= 0){      //如果到达左右边界,就让x轴的速度变为原来的负数
            this.vector.x *= -1;
        }
        if(this.y >= h || this.y <= 0){     //如果到达上下边界,就让y轴的速度变为原来的负数
            this.vector.y *= -1;
        }
        if(this.x > w){                     //下面是改变浏览器窗口大小时的操作,改变窗口大小后有的粒子会被隐藏,让他显示出来即可
            this.x = w;
        }
        if(this.y > h){
            this.y = h;
        }
        if(this.x < 0){
            this.x = 0;
        }
        if(this.y < 0){
            this.y = 0;
        }
    }
    this.draw = function(){                 //绘制粒子的函数
        ctx.beginPath();
        ctx.arc(this.x, this.y, this.radius ,0 ,Math.PI * 2);
        ctx.closePath();
        ctx.fillStyle = this.color;
        ctx.fill();
    }
}function init(){
getSize();
for(let i = 0;i<opt.particleAmount; i++){
particle.push(new Partical());
}
loop();
}function loop(){
ctx.clearRect(0,0,w,h);
for(let i = 0;i<particle.length; i++){
particle[i].update();
particle[i].draw();
}
window.requestAnimationFrame(loop);
}
hinzufügen Ereignis Überwachen Sie, ob sich die Browsergröße ändert:
window.addEventListener("resize",function(){
winResize()
},false);var particle = [], w,h; //粒子数组,浏览器宽高
var delay = 200,tid; //延缓执行事件和setTimeout事件引用
function winResize(){
clearTimeout(tid);
tid = setTimeout(function(){
getSize(); //获取浏览器宽高,在文章最上面有介绍
},delay)
}
function getDistance(point1,point2){
return Math.sqrt(Math.pow(point1.x-point2.x,2) + Math.pow(point1.y - point2.y ,2));
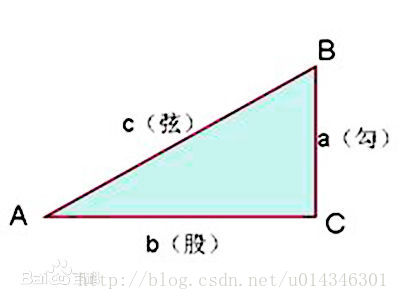
}现在我们可以计算出两个点的距离,那么我们就计算出所有每个粒子同其他所有粒子的距离,来确定它们之间是否需要连线,当然如果所有粒子的颜色深度都一模一样,那就有点丑了,所以我们这里可以根据两个粒子之间的距离来决定连线的透明度,两个粒子距离越近,越不透明,距离越远,越透明,超过一定距离就不显示了。
function linePoint(point,hub){
for(let i = 0;i<hub.length;i++){
let distance = getDistance(point,hub[i]);
let opacity = 1 -distance/opt.minDistance;
if(opacity > 0){
ctx.lineWidth = 0.5;
ctx.strokeStyle = "rgba("+line[0]+","+line[1]+","+line[2]+","+opacity+")";
ctx.beginPath();
ctx.moveTo(point.x,point.y);
ctx.lineTo(hub[i].x,hub[i].y);
ctx.closePath();
ctx.stroke();
}
}
}上面传入的两个参数分别是一个点和整个点的数组,let opacity = 1 -distance/opt.minDistance;用于判断连线之间的透明度同时也判断了距离,距离大于opt.minDistance时,opacity为负,下面判断时就过滤掉了,上面的颜色用到了正则表达式,需要先解析最上面opt对象里给出的颜色,然后再加上透明度,这段代码如下:
var line = opt.lineColor.match(/\d+/g);
最后在loop()函数里面不断循环计算距离就可以了,在loop()中加入代码后如下:
function loop(){
ctx.clearRect(0,0,w,h);
for(let i = 0;i<particle.length; i++){
particle[i].update();
particle[i].draw();
}
for(let i = 0;i<particle.length; i++){ //添加的是这个循环
linePoint(particle[i],particle)
}
window.requestAnimationFrame(loop);
}需要指出的是:如果添加过多的点和/或过多的连接距离(连接距离会创建过多的线条),动画也会扛不住。当视口变窄时最好降低粒子的运动速度:粒子的尺寸越小,在愈加狭窄空间内的移动速度貌似会越快。
显示整段代码:
canvas粒子动画
<canvas id="canvas"></canvas>
<script>
var canvas = document.getElementById("canvas");
var ctx = canvas.getContext("2d");
var opt = {
particleAmount: 50, //粒子个数
defaultSpeed: 1, //粒子运动速度
variantSpeed: 1, //粒子运动速度的变量
particleColor: "rgb(32,245,245)", //粒子的颜色
lineColor:"rgb(32,245,245)", //网格连线的颜色
defaultRadius: 2, //粒子半径
variantRadius: 2, //粒子半径的变量
minDistance: 200 //粒子之间连线的最小距离
};
var line = opt.lineColor.match(/\d+/g);
console.log(line);
var particle = [], w,h;
var delay = 200,tid;
init();
window.addEventListener("resize",function(){
winResize()
},false);
function winResize(){
clearTimeout(tid);
tid = setTimeout(function(){
getSize();
},delay)
}
function init(){
   getSize();
   for(let i = 0;i<opt.particleAmount; i++){
        particle.push(new Partical());
   }
   loop();
}
function loop(){
ctx.clearRect(0,0,w,h);
for(let i = 0;i<particle.length; i++){
particle[i].update();
particle[i].draw();
}
for(let i = 0;i<particle.length; i++){
linePoint(particle[i],particle)
}
window.requestAnimationFrame(loop);
}
function linePoint(point,hub){
for(let i = 0;i<hub.length;i++){
let distance = getDistance(point,hub[i]);
let opacity = 1 -distance/opt.minDistance;
if(opacity > 0){
ctx.lineWidth = 0.5;
ctx.strokeStyle = "rgba("+line[0]+","+line[1]+","+line[2]+","+opacity+")";
ctx.beginPath();
ctx.moveTo(point.x,point.y);
ctx.lineTo(hub[i].x,hub[i].y);
ctx.closePath();
ctx.stroke();
}
}
}
function getDistance(point1,point2){
        return Math.sqrt(Math.pow(point1.x-point2.x,2) + Math.pow(point1.y - point2.y ,2));
    }
function getSize(){
w = canvas.width = window.innerWidth;
h = canvas.height = window.innerHeight;
}
function Partical(){
this.x = Math.random()*w;
//粒子的x轴坐标
this.y = Math.random()*h;
//粒子的y轴坐标
this.speed = opt.defaultSpeed + opt.variantSpeed*Math.random();
//粒子的运动速度
this.directionAngle = Math.floor(Math.random()*360);
//粒子运动的方向
this.color = opt.particleColor ;
//粒子的颜色
this.radius = opt.defaultRadius+Math.random()*opt.variantRadius;
//粒子的半径大小
this.vector = {
x:this.speed * Math.cos(this.directionAngle),
//粒子在x轴的速度
y:this.speed * Math.sin(this.directionAngle)
//粒子在y轴的速度
}
this.update = function(){
//粒子的更新函数
this.border();
//判断粒子是否到了边界
this.x += this.vector.x;
//粒子下一时刻在x轴的坐标
this.y += this.vector.y;
//粒子下一时刻在y轴的坐标
}
this.border = function(){
//判断粒子是都到达边界
if(this.x >= w || this.x<= 0){
//如果到达左右边界,就让x轴的速度变为原来的负数
this.vector.x *= -1;
}
if(this.y >= h || this.y <= 0){
//如果到达上下边界,就让y轴的速度变为原来的负数
this.vector.y *= -1;
}
if(this.x > w){
//下面是改变浏览器窗口大小时的操作,改变窗口大小后有的粒子会被隐藏,让他显示出来即可
this.x = w;
}
if(this.y > h){
this.y = h;
}
if(this.x < 0){
this.x = 0;
}
if(this.y < 0){
this.y = 0;
}
}
this.draw = function(){ //绘制粒子的函数
ctx.beginPath();
ctx.arc(this.x, this.y, this.radius ,0 ,Math.PI * 2);
ctx.closePath();
ctx.fillStyle = this.color;
ctx.fill();
}
}
</script>
Das obige ist der detaillierte Inhalt vonAusführliche Erläuterung der gemeinsamen Nutzung von Beispielcode zum Erstellen dynamischer Partikelgitteranimationen mit HTML5 Canvas. Für weitere Informationen folgen Sie bitte anderen verwandten Artikeln auf der PHP chinesischen Website!
 Was sind die Produktionsmethoden der HTML5-Animationsproduktion?
 Der Unterschied zwischen HTML und HTML5
 Empfehlung für das Ranking von Computer-Hardware-Erkennungssoftware
 Eigenschaft mit linearem Gradienten
 Der Unterschied zwischen currentregion und usedrange
 Die Rolle der klonbaren Schnittstelle
 Gängige Methoden zur Erkennung von Website-Schwachstellen
 WeChat-Momente, zwei Striche und ein Punkt
 http 400 Ungültige Anfrage


