

Teilen Sie Beispielcode zum Erstellen von Gesichtern mit HTML5 Canvas

Hier verwenden wir hauptsächlich den Canvas von HTML5 zum Zeichnen. Beispielcode zum Erstellen von Gesichtern mit HTML5.
Erster Blick auf die Gesichtsdarstellung, die wir zeichnen möchten:
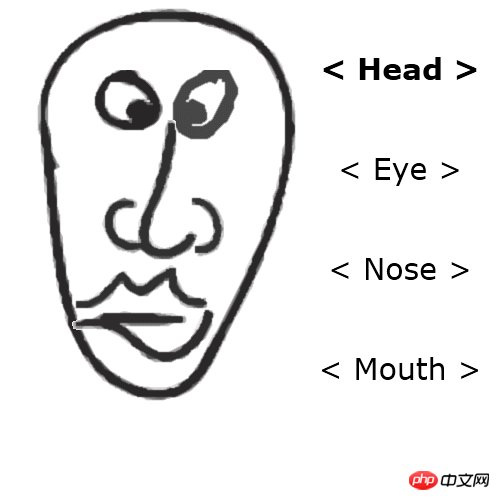
Hier verwenden wir hauptsächlich HTML5 Canvas zum Zeichnen.
Lassen Sie uns den gesamten Zeichenprozess starten:
1. HTML (index.html)
<!DOCTYPE html>
<html lang="en" >
    <head>
        <meta charset="utf-8" />

        <title>HTML5 Face Builder | Script Tutorials</title>

        <link href="css/main.css" rel="stylesheet" type="text/css" />

        <script src="http://code.jquery.com/jquery-latest.min.js"></script>
        <script type="text/javascript" src="js/script.js"></script>
    </head>
    <body>

        <header>
            <h2>HTML5 image crop tool</h2>
            <a href="http://www.script-tutorials.com/html5-face-builder/" class="stuts">Back to original tutorial on <span>Script Tutorials</span></a>

        </header>
        <p class="container">
            <canvas id="scene" width="500" height="500"></canvas>

            <p id="results">
                <h2>Use arrow keys to select your face details (up-down to select category, left-right to switch them), then click Spacebar to export as image.</h2>
                <img id="face_result" />
            </p>

        </p>
    </body>
</html>2 🎜>【Verwandte Empfehlungen】
// inner variables
var canvas, ctx;
var oHead, oEye, oNose, oMouth;
var iSel = 0;
// -------------------------------------------------------------
// objects :
function Head(x, y, x2, y2, w, h, image) {
this.x = x;
this.y = y;
this.x2 = x2;
this.y2 = y2;
this.w = w;
this.h = h;
this.image = image;
this.iSpr = 0;
}
function Eye(x, y, x2, y2, w, h, image) {
this.x = x;
this.y = y;
this.x2 = x2;
this.y2 = y2;
this.w = w;
this.h = h;
this.image = image;
this.iSpr = 0;
}
function Nose(x, y, x2, y2, w, h, image) {
this.x = x;
this.y = y;
this.x2 = x2;
this.y2 = y2;
this.w = w;
this.h = h;
this.image = image;
this.iSpr = 0;
}
function Mouth(x, y, x2, y2, w, h, image) {
this.x = x;
this.y = y;
this.x2 = x2;
this.y2 = y2;
this.w = w;
this.h = h;
this.image = image;
this.iSpr = 0;
}
// -------------------------------------------------------------
// draw functions :
function clear() { // clear canvas function
ctx.clearRect(0, 0, ctx.canvas.width, ctx.canvas.height);
}
function drawScene() { // main drawScene function
clear(); // clear canvas
// draw head
ctx.drawImage(oHead.image, oHead.x2 + oHead.iSpr*oHead.w, oHead.y2, oHead.w, oHead.h, oHead.x, oHead.y, oHead.w, oHead.h);
// draw eyes
ctx.drawImage(oEye.image, oEye.x2 + oEye.iSpr*oEye.w, oEye.y2, oEye.w, oEye.h, oEye.x, oEye.y, oEye.w, oEye.h);
// draw nose
ctx.drawImage(oNose.image, oNose.x2 + oNose.iSpr*oNose.w, oNose.y2, oNose.w, oNose.h, oNose.x, oNose.y, oNose.w, oNose.h);
// draw mouth
ctx.drawImage(oMouth.image, oMouth.x2 + oMouth.iSpr*oMouth.w, oMouth.y2, oMouth.w, oMouth.h, oMouth.x, oMouth.y, oMouth.w, oMouth.h);
// draw controls
ctx.textAlign = 'center';
ctx.fillStyle = '#000';
ctx.font = '30px Verdana';
if (iSel == 0)
ctx.font = 'bold 30px Verdana';
ctx.fillText('< Head >', 400, 80);
ctx.font = '30px Verdana';
if (iSel == 1)
ctx.font = 'bold 30px Verdana';
ctx.fillText('< Eye >', 400, 180);
ctx.font = '30px Verdana';
if (iSel == 2)
ctx.font = 'bold 30px Verdana';
ctx.fillText('< Nose >', 400, 280);
ctx.font = '30px Verdana';
if (iSel == 3)
ctx.font = 'bold 30px Verdana';
ctx.fillText('< Mouth >', 400, 380);
}
// -------------------------------------------------------------
// initialization
$(function(){
canvas = document.getElementById('scene');
ctx = canvas.getContext('2d');
// initialization of dragon
var oHeadImage = new Image();
oHeadImage.src = 'images/image.png';
oHeadImage.onload = function() {};
oHead = new Head(0, 0, 0, 755, 300, 405, oHeadImage);
oEye = new Eye(40, 70, 0, 120, 235, 80, oHeadImage);
oNose = new Nose(70, 120, 0, 276, 180, 140, oHeadImage);
oMouth = new Mouth(60, 260, 0, 546, 170, 120, oHeadImage);
$(window).keydown(function(event){
switch (event.keyCode) {
case 38: // Up key
iSel--;
if (iSel < 0) {
iSel = 3;
}
break;
case 40: // Up key
iSel++;
if (iSel >= 4) {
iSel = 0;
}
break;
case 37: // Left key
// update sprite positions
if (iSel == 0) {
oHead.iSpr--;
if (oHead.iSpr < 0) {
oHead.iSpr = 3;
}
}
if (iSel == 1) {
oEye.iSpr--;
if (oEye.iSpr < 0) {
oEye.iSpr = 4;
}
}
if (iSel == 2) {
oNose.iSpr--;
if (oNose.iSpr < 0) {
oNose.iSpr = 4;
}
}
if (iSel == 3) {
oMouth.iSpr--;
if (oMouth.iSpr < 0) {
oMouth.iSpr = 4;
}
}
break;
case 39: // Right key
// update sprite positions
if (iSel == 0) {
oHead.iSpr++;
if (oHead.iSpr >= 4) {
oHead.iSpr = 0;
}
}
if (iSel == 1) {
oEye.iSpr++;
if (oEye.iSpr >= 5) {
oEye.iSpr = 0;
}
}
if (iSel == 2) {
oNose.iSpr++;
if (oNose.iSpr >= 5) {
oNose.iSpr = 0;
}
}
if (iSel == 3) {
oMouth.iSpr++;
if (oMouth.iSpr >= 5) {
oMouth.iSpr = 0;
}
}
break;
case 32: // Spacebar key - export results
var temp_ctx, temp_canvas;
temp_canvas = document.createElement('canvas');
temp_ctx = temp_canvas.getContext('2d');
temp_canvas.width = 360;
temp_canvas.height = 410;
// draw head
temp_ctx.drawImage(oHead.image, oHead.iSpr*oHead.w, oHead.y2, oHead.w, oHead.h, oHead.x, oHead.y, oHead.w, oHead.h);
// draw eyes
temp_ctx.drawImage(oEye.image, oEye.iSpr*oEye.w, oEye.y2, oEye.w, oEye.h, oEye.x, oEye.y, oEye.w, oEye.h);
// draw nose
temp_ctx.drawImage(oNose.image, oNose.iSpr*oNose.w, oNose.y2, oNose.w, oNose.h, oNose.x, oNose.y, oNose.w, oNose.h);
// draw mouth
temp_ctx.drawImage(oMouth.image, oMouth.iSpr*oMouth.w, oMouth.y2, oMouth.w, oMouth.h, oMouth.x, oMouth.y, oMouth.w, oMouth.h);
var vData = temp_canvas.toDataURL();
$('#face_result').attr('src', vData);
break;
}
});
setInterval(drawScene, 40); // loop drawScene
});Kostenloses h5-Online-Video-Tutorial
2.HTML5-Vollversionshandbuch
3 . php.cn Original-HTML5-Video-Tutorial
Das obige ist der detaillierte Inhalt vonTeilen Sie Beispielcode zum Erstellen von Gesichtern mit HTML5 Canvas. Für weitere Informationen folgen Sie bitte anderen verwandten Artikeln auf der PHP chinesischen Website!

Heiße KI -Werkzeuge

Undresser.AI Undress
KI-gestützte App zum Erstellen realistischer Aktfotos

AI Clothes Remover
Online-KI-Tool zum Entfernen von Kleidung aus Fotos.

Undress AI Tool
Ausziehbilder kostenlos

Clothoff.io
KI-Kleiderentferner

Video Face Swap
Tauschen Sie Gesichter in jedem Video mühelos mit unserem völlig kostenlosen KI-Gesichtstausch-Tool aus!

Heißer Artikel
Heiße Werkzeuge

Notepad++7.3.1
Einfach zu bedienender und kostenloser Code-Editor

SublimeText3 chinesische Version
Chinesische Version, sehr einfach zu bedienen

Senden Sie Studio 13.0.1
Leistungsstarke integrierte PHP-Entwicklungsumgebung

Dreamweaver CS6
Visuelle Webentwicklungstools

SublimeText3 Mac-Version
Codebearbeitungssoftware auf Gottesniveau (SublimeText3)
Heiße Themen
 1393
1393
 52
52

 Tabellenrahmen in HTML
Sep 04, 2024 pm 04:49 PM
Tabellenrahmen in HTML
Sep 04, 2024 pm 04:49 PM
Anleitung zum Tabellenrahmen in HTML. Hier besprechen wir verschiedene Möglichkeiten zum Definieren von Tabellenrändern anhand von Beispielen für den Tabellenrand in HTML.
 Verschachtelte Tabelle in HTML
Sep 04, 2024 pm 04:49 PM
Verschachtelte Tabelle in HTML
Sep 04, 2024 pm 04:49 PM
Dies ist eine Anleitung für verschachtelte Tabellen in HTML. Hier diskutieren wir anhand der entsprechenden Beispiele, wie man eine Tabelle innerhalb der Tabelle erstellt.
 HTML-Rand links
Sep 04, 2024 pm 04:48 PM
HTML-Rand links
Sep 04, 2024 pm 04:48 PM
Anleitung zum HTML-Rand links. Hier besprechen wir einen kurzen Überblick über HTML margin-left und seine Beispiele sowie seine Code-Implementierung.
 HTML-Tabellenlayout
Sep 04, 2024 pm 04:54 PM
HTML-Tabellenlayout
Sep 04, 2024 pm 04:54 PM
Leitfaden zum HTML-Tabellenlayout. Hier besprechen wir die Werte des HTML-Tabellenlayouts zusammen mit den Beispielen und Ausgaben im Detail.
 HTML-Eingabeplatzhalter
Sep 04, 2024 pm 04:54 PM
HTML-Eingabeplatzhalter
Sep 04, 2024 pm 04:54 PM
Leitfaden für HTML-Eingabeplatzhalter. Hier besprechen wir die Beispiele für HTML-Eingabeplatzhalter zusammen mit den Codes und Ausgaben.
 Text in HTML verschieben
Sep 04, 2024 pm 04:45 PM
Text in HTML verschieben
Sep 04, 2024 pm 04:45 PM
Anleitung zum Verschieben von Text in HTML. Hier besprechen wir eine Einführung, wie Marquee-Tags funktionieren, mit Syntax und Beispielen für die Implementierung.
 HTML-geordnete Liste
Sep 04, 2024 pm 04:43 PM
HTML-geordnete Liste
Sep 04, 2024 pm 04:43 PM
Leitfaden zur HTML-geordneten Liste. Hier besprechen wir auch die Einführung von HTML-geordneten Listen und Typen sowie deren Beispiele
 HTML-Onclick-Button
Sep 04, 2024 pm 04:49 PM
HTML-Onclick-Button
Sep 04, 2024 pm 04:49 PM
Anleitung zum HTML-OnClick-Button. Hier diskutieren wir deren Einführung, Funktionsweise, Beispiele und Onclick-Events in verschiedenen Veranstaltungen.
