
Dieser Artikel stellt hauptsächlich das detaillierte Installations- und Konfigurations-Tutorial von Windows Apache2.4 VC9 (ApacheHaus) vor. Freunde in Not können sich auf
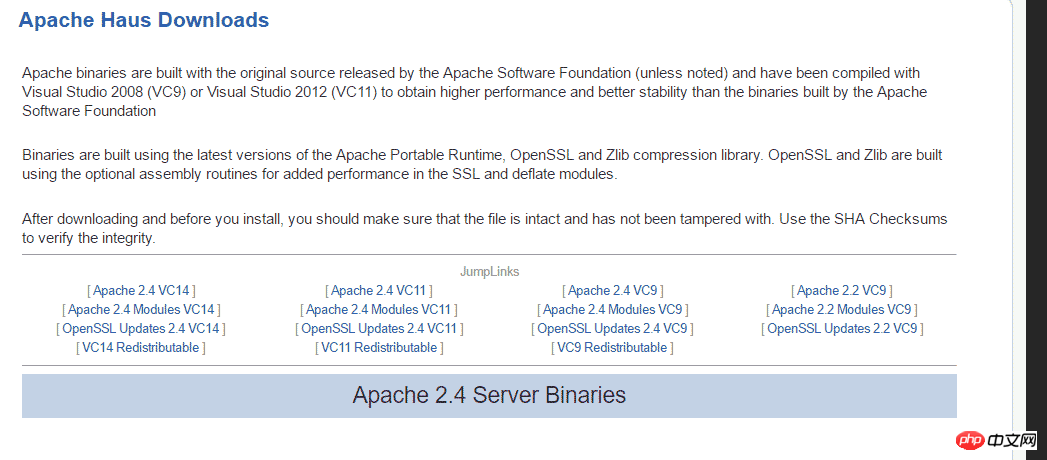
1, Apache-Download

ServerRoot "C:/Users/myPC/Downloads/httpd-2.2.31-x86-r3/Apache22"
DocumentRoot "F:/"
<Directory "F:/"> # # Possible values for the Options directive are "None", "All", # or any combination of: # Indexes Includes FollowSymLinks SymLinksifOwnerMatch ExecCGI MultiViews # # Note that "MultiViews" must be named *explicitly* --- "Options All" # doesn't give it to you. # # The Options directive is both complicated and important. Please see # http://httpd.apache.org/docs/2.2/mod/core.html#options # for more information. # Options Indexes FollowSymLinks # # AllowOverride controls what directives may be placed in .htaccess files. # It can be "All", "None", or any combination of the keywords: # Options FileInfo AuthConfig Limit # AllowOverride None # # Controls who can get stuff from this server. # Order allow,deny Allow from all </Directory>
ScriptAlias /cgi-bin/ "C:/Users/myPC/Downloads/httpd-2.2.31-x86-r3/Apache22/cgi-bin"
<Directory "C:/Users/myPC/Downloads/httpd-2.2.31-x86-r3/Apache22/cgi-bin">
  AllowOverride None
  Options None
  Order allow,deny
  Allow from all
</Directory>
3. Konfigurieren Sie die Apache 2--SSL-Konfiguration
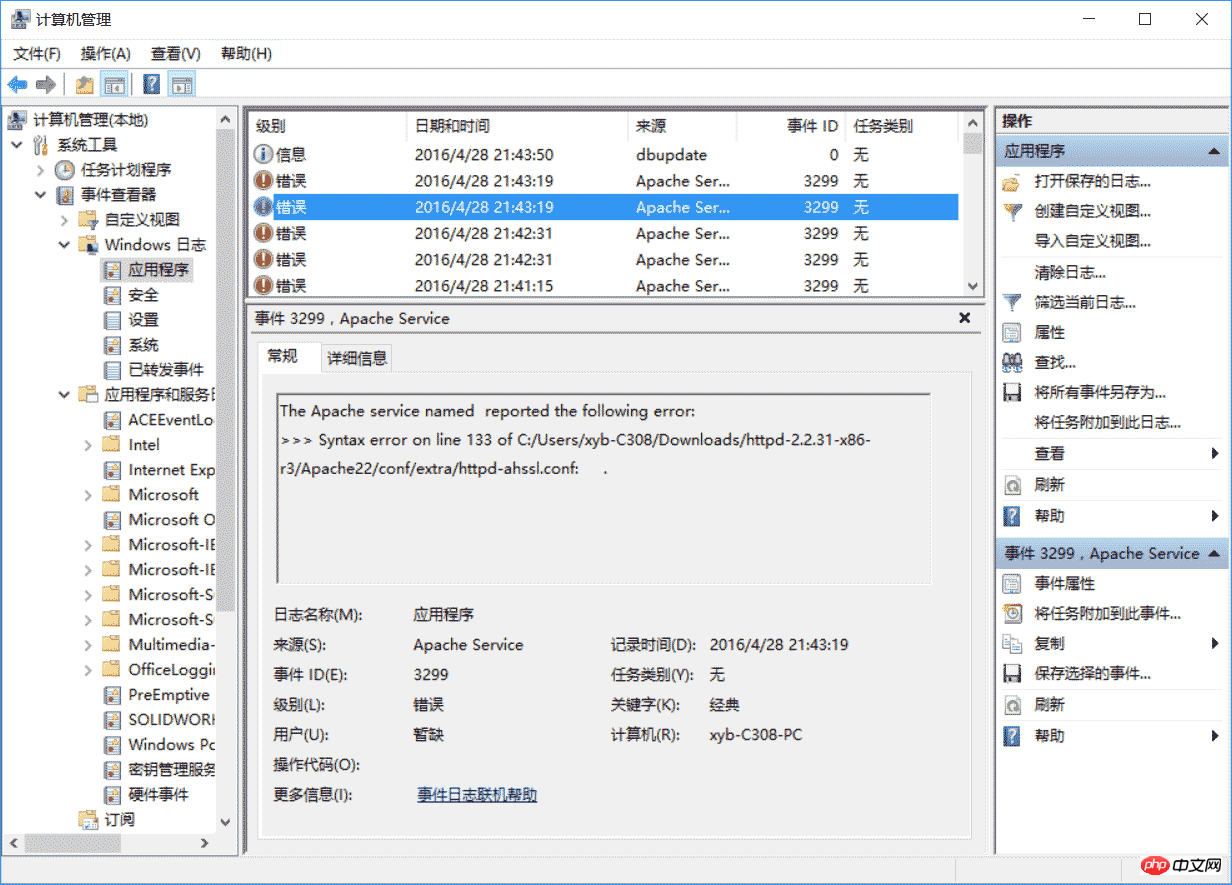
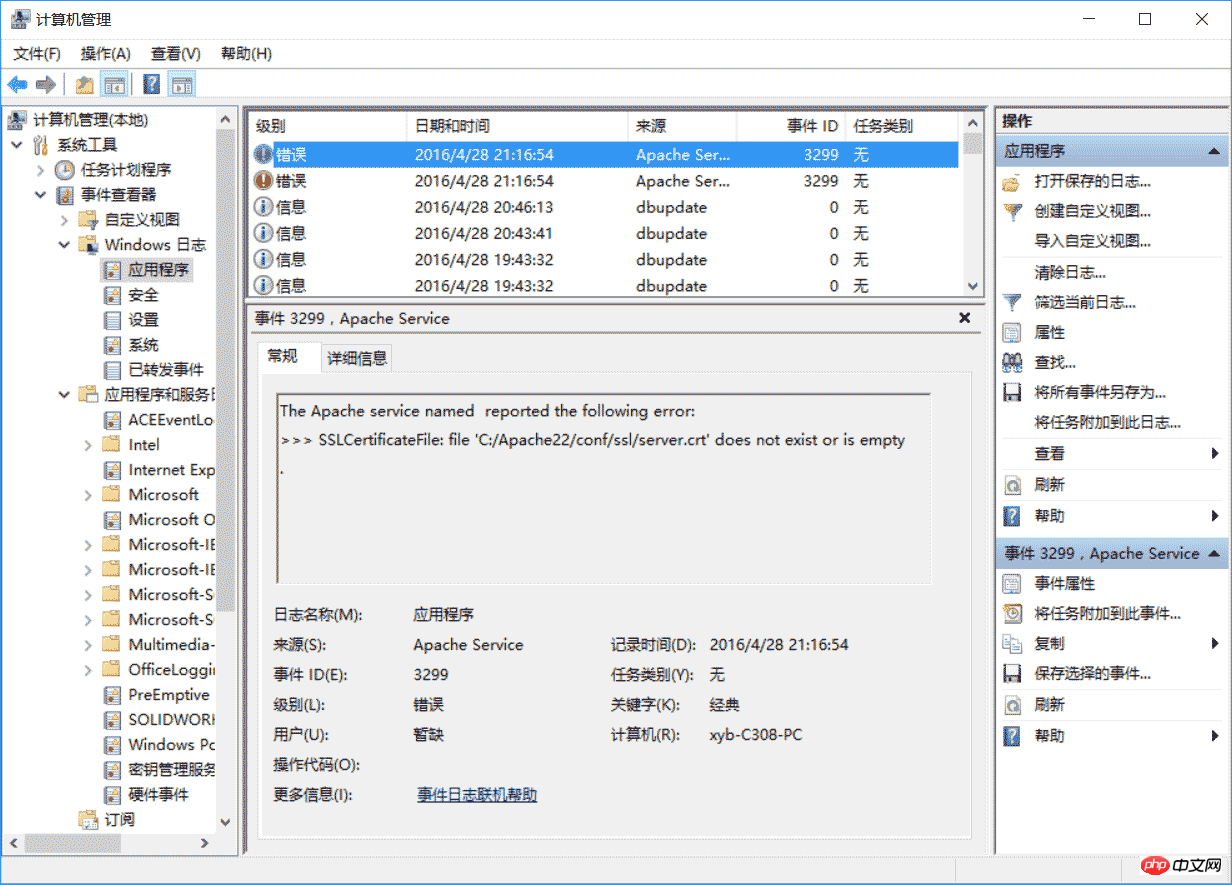
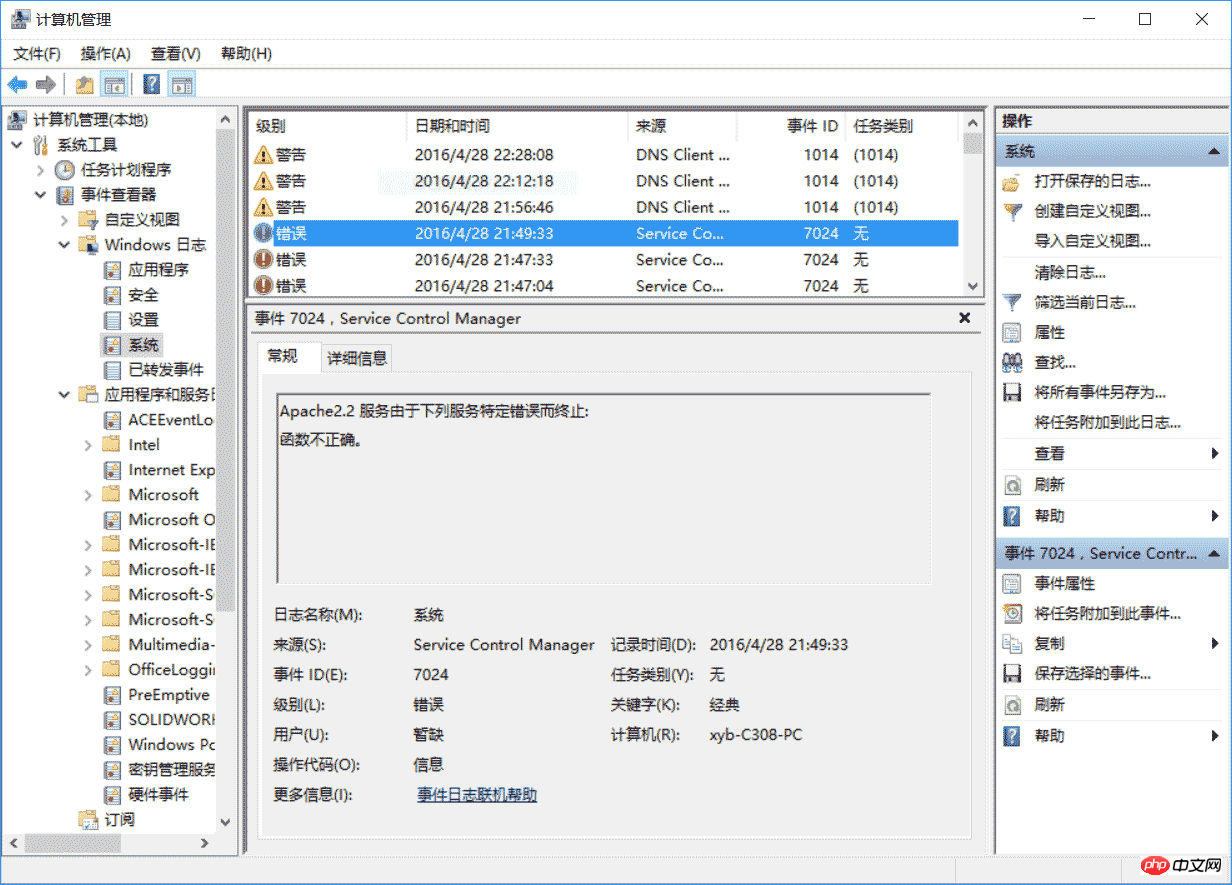
Wenn Sie dies verwenden, wird beim Starten des Dienstes im Allgemeinen das folgende Meldungsdialogfeld angezeigt: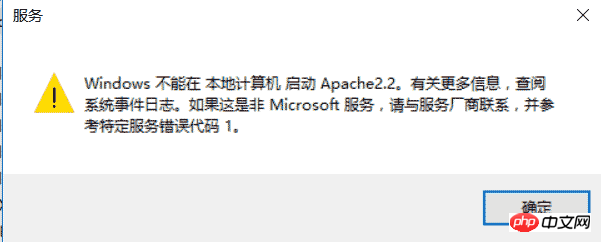
<VirtualHost _default_:443>
 SSLEngine on
 ServerName localhost:443
 SSLCertificateFile C:/Users/myPC/Downloads/httpd-2.2.31-x86-r3/Apache22/conf/ssl/server.crt
 SSLCertificateKeyFile C:/Users/myPC/Downloads/httpd-2.2.31-x86-r3/Apache22/conf/ssl/server.key
 DocumentRoot F:/

# openssl req -new > server.csr
# openssl rsa -in privkey.pem -out server.key
# openssl x509 -in server.csr -out server.crt -req -signkey server.key -days 2048
<FilesMatch "\.(cgi|shtml|phtml|php)$">
  SSLOptions +StdEnvVars
</FilesMatch>
<Directory "/Apache22/cgi-bin">
  SSLOptions +StdEnvVars
</Directory>
BrowserMatch "MSIE [2-5]" \
     nokeepalive ssl-unclean-shutdown \
     downgrade-1.0 force-response-1.0
CustomLog "C:/Users/myPC/Downloads/httpd-2.2.31-x86-r3/Apache22/logs/ssl_request.log" \
     "%t %h %{SSL_PROTOCOL}x %{SSL_CIPHER}x \"%r\" %b"
</virtualhost><VirtualHost *:443>
SSLEngine on
ServerName serverone.tld:443
SSLCertificateFile C:/Users/myPC/Downloads/httpd-2.2.31-x86-r3/Apache22/conf/ssl/serverone.crt
SSLCertificateKeyFile C:/Users/myPC/Downloads/httpd-2.2.31-x86-r3/Apache22/conf/ssl/serverone.key
DocumentRoot F:/
# openssl req -new > serverone.csr
# openssl rsa -in privkey.pem -out serverone.key
# openssl x509 -in serverone.csr -out serverone.crt -req -signkey serverone.key -days 2048
<FilesMatch "\.(cgi|shtml|phtml|php)$">
SSLOptions +StdEnvVars
</FilesMatch>
<Directory "/Apache22/cgi-bin">
SSLOptions +StdEnvVars
</Directory>
BrowserMatch "MSIE [2-5]" \
nokeepalive ssl-unclean-shutdown \
downgrade-1.0 force-response-1.0
CustomLog "C:/Users/myPC/Downloads/httpd-2.2.31-x86-r3/Apache22/logs/ssl_request.log" \
"%t %h %{SSL_PROTOCOL}x %{SSL_CIPHER}x \"%r\" %b" env=HTTPS
</virtualhost><VirtualHost *:443>
SSLEngine on
ServerName servertwo.tld:443
SSLCertificateFile C:/Users/myPC/Downloads/httpd-2.2.31-x86-r3/Apache22/conf/ssl/servertwo.crt
SSLCertificateKeyFile C:/Users/myPC/Downloads/httpd-2.2.31-x86-r3/Apache22/conf/ssl/servertwo.key
DocumentRoot F:/
# openssl req -new > servertwo.csr
# openssl rsa -in privkey.pem -out servertwo.key
# openssl x509 -in servertwo.csr -out servertwo.crt -req -signkey servertwo.key -days 2048
<FilesMatch "\.(cgi|shtml|phtml|php)$">
SSLOptions +StdEnvVars
</FilesMatch>
<Directory "/Apache22/cgi-bin">
SSLOptions +StdEnvVars
</Directory>
BrowserMatch "MSIE [2-5]" \
nokeepalive ssl-unclean-shutdown \
downgrade-1.0 force-response-1.0
CustomLog "C:/Users/myPC/Downloads/httpd-2.2.31-x86-r3/Apache22/ssl_request.log" \
"%t %h %{SSL_PROTOCOL}x %{SSL_CIPHER}x \"%r\" %b"
</virtualhost>als Administrator, um den bin-Ordner unter dem Apache-Programmordner einzugeben und geben Sie httpd -k install ein, um den Vorgang abzuschließen Installation des Apache-Dienstes.
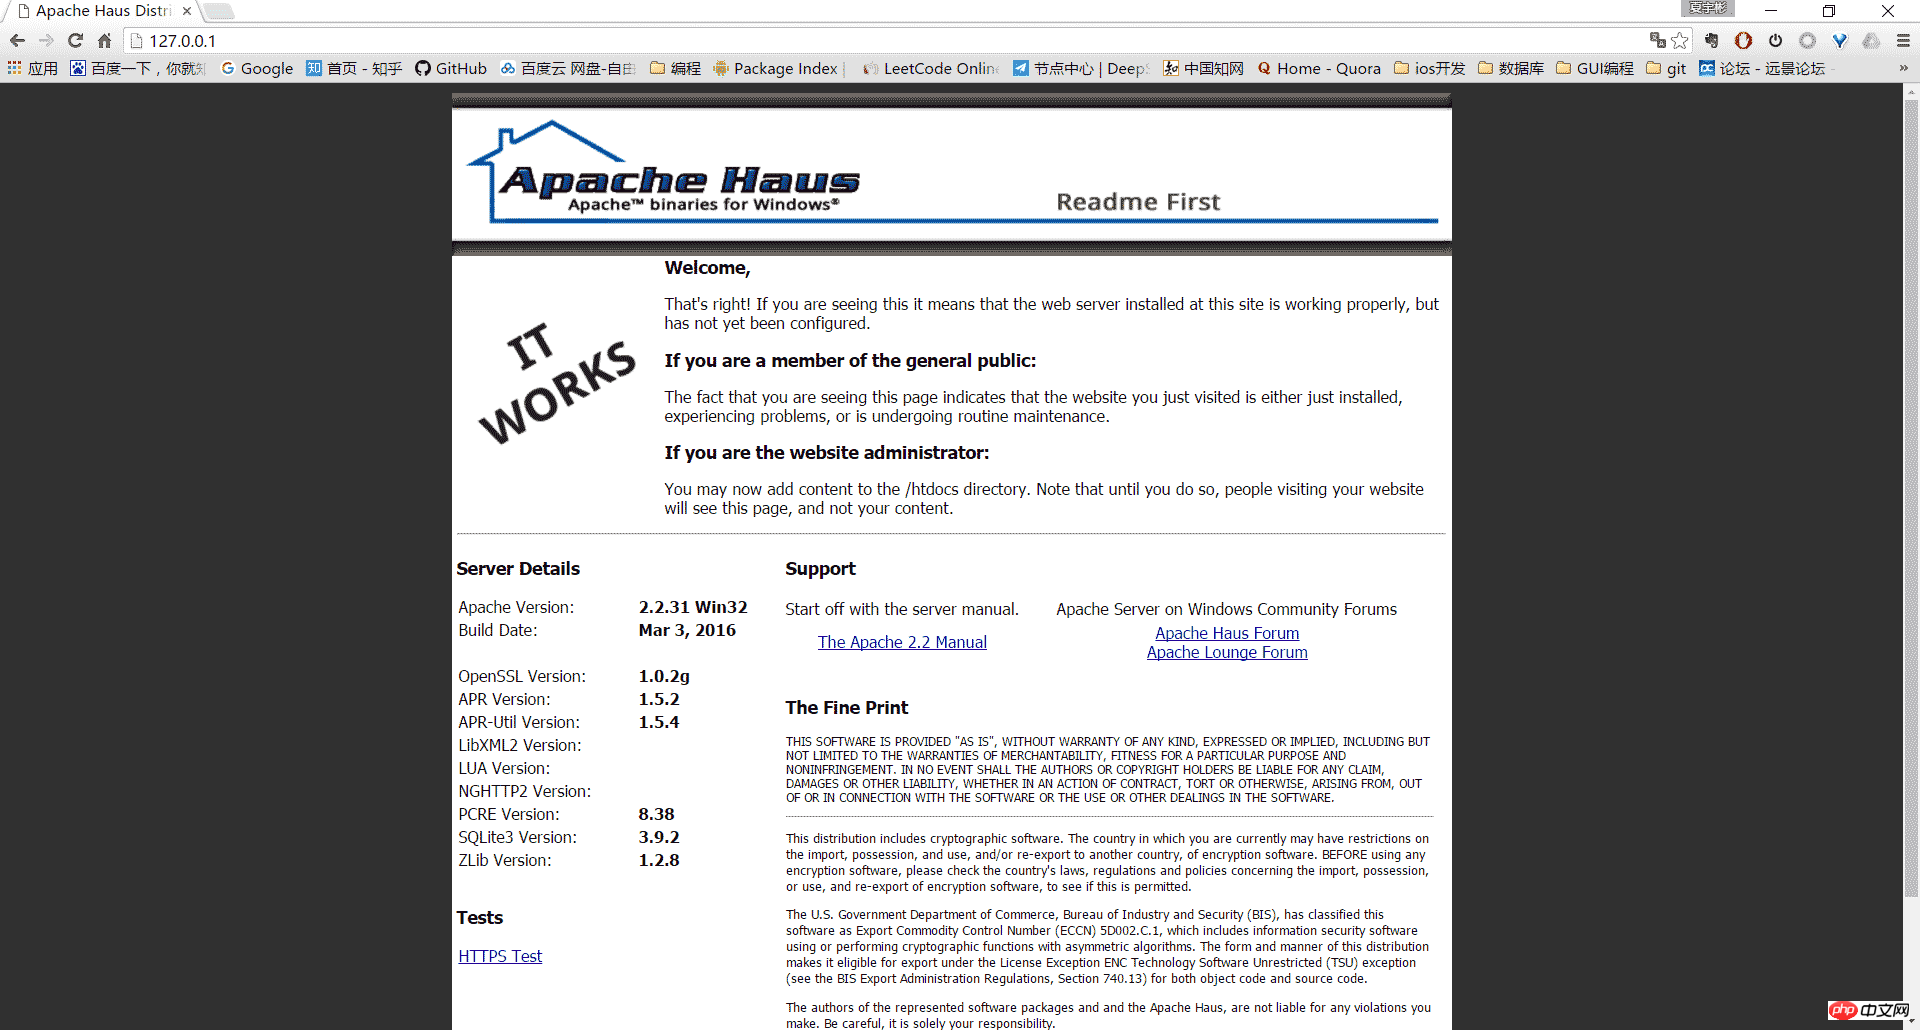
Dann doppelklicken Sie auf ApacheMonitor.exe im bin-Verzeichnis und klicken Sie rechts auf Start, um den Server zu starten, falls normal, wie unten gezeigt: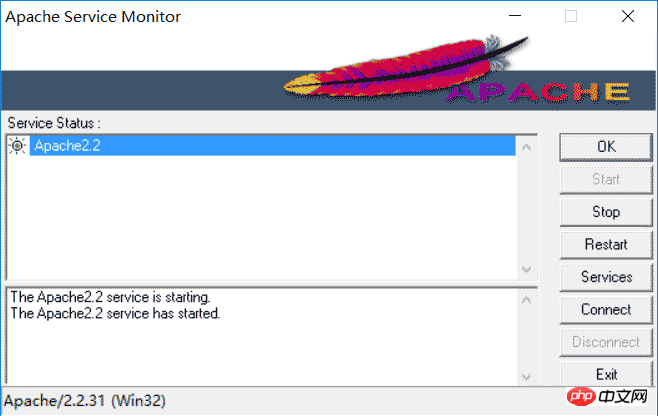
5, andere
Apache HTTP Server deinstallieren:
Geben Sie das bin-Verzeichnis als Administrator ein und verwenden Sie httpd -k uninstall, um den Dienst zu entfernen
Mit dem Befehl httpd -w -n „Apache2“ -k start zum Starten des Servers können die Protokolle während des Startvorgangs angezeigt werden, um die Fehleranalyse zu erleichtern.
Das obige ist der detaillierte Inhalt vonDetaillierte Erläuterung des Installations-Tutorials für Windows Apache2.4 VC9 (ApacheHaus).. Für weitere Informationen folgen Sie bitte anderen verwandten Artikeln auf der PHP chinesischen Website!
 Windows prüft den Portbelegungsstatus
 Überprüfen Sie die Portbelegungsfenster
 Windows-Fotos können nicht angezeigt werden
 Überprüfen Sie den Status der belegten Ports in Windows
 Windows kann nicht auf den freigegebenen Computer zugreifen
 Automatisches Windows-Update
 Windows Boot Manager
 Tastenkombinationen für den Windows-Sperrbildschirm


![[Web-Frontend] Node.js-Schnellstart](https://img.php.cn/upload/course/000/000/067/662b5d34ba7c0227.png)


