
这次给大家带来Uploadify实现显示进度条上传图片,Uploadify实现显示进度条上传图片的注意事项有哪些,下面就是实战案例,一起来看一下。
Uploadify是一个简单易用的多文件上传方案。作为一个Jquery插件,Uploadify使用简单,并具有高度的定制性。
Uploadify特性:
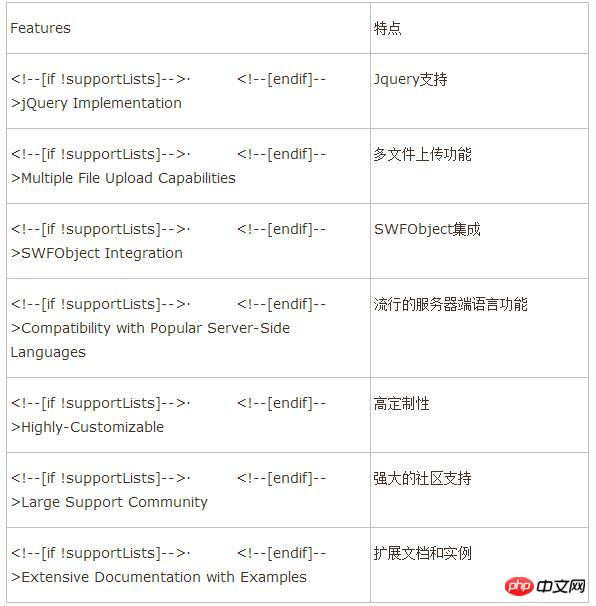
Uploadify简单说来,是基于Jquery的一款文件上传插件。它的功能特色总结如下:
1)、支持单文件或多文件上传,可控制并发上传的文件数
2)、在服务器端支持各种语言与之配合使用,诸如PHP,.NET,Java……
3)、通过参数可配置上传文件类型及大小限制
4)、通过参数可配置是否选择文件后自动上传
5)、易于扩展,可控制每一步骤的回调函数(onSelect, onCancel……)
6)、通过接口参数和CSS控制外观
7)、提供上传进度的事件回调,实时显示上传进度
8)、开始之前要先下载插件安装包到本地并引用,详细实现请看代码注释,下面开始代码。
1、html代码
<p id="webApplogo_file" style="display: block; width: 800px; background-color: #fff;">
<ul>
<li style="margin-left: 213px;"><span class="black_blod14">LOGO图标:</span></li>
<li style="margin-left: 3px;">
<input type="text" readonly="readonly" id="text_webApplogo" name="app_logo" class="appipt1" value="<%=applogo %>" /></li>
<li style="padding-top: 1px;">
<input type="file" id="webApplogo" name="webApplogo" />
</li>
<li><span style="display: none; margin-left: 5px; padding-left: 20px; color: #EA5200;
font-size: 12px; background: url('Images/icon_03.gif' ) no-repeat 0px 0px;" id="textporApplogo">
请上传LOGO图标!</span></li>
<li style="margin-left: 220px;"><span class="grey999" style="margin-left: 90px; float: left;">
尺寸72px*72px,png格式,建议使用 图标PSD模板 制作</span>
<p id="QID_webApplogo" class="fileQueue"></p>
<table id="webApplogo_tab" width="50%" border="0" cellspacing="0" cellpadding="0"
align="center" class="grey999" style="display: none; margin-left: 90px; float: left;">
<tr>
<td align="center" valign="bottom">
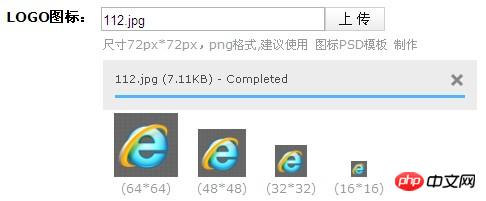
<img style="width: 64px; height: 64px;" id="img_64" src="images/icon_02.gif" border="0" /><br />
(64*64)
</td>
<td align="center" valign="bottom">
<img style="width: 48px; height: 48px;" id="img_48" src="images/icon_02.gif" border="0" /><br />
(48*48)
</td>
<td align="center" valign="bottom">
<img style="width: 32px; height: 32px;" id="img_32" src="images/icon_02.gif" border="0" /><br />
(32*32)
</td>
<td align="center" valign="bottom">
<img style="width: 16px; height: 16px;" id="img_16" src="images/icon_02.gif" border="0" /><br />
(16*16)
</td>
</tr>
</table>
</li>
</ul>
</p>2、Javascript代码(关键部分)
$("#webApplogo").uploadify({
   'uploader': 'js/uploadify-v2.1.4/uploadify.swf',//进度条,Uploadify里面含有
   'script': 'UploadApplogo.ashx',//一般处理程序
   'cancelImg': 'js/uploadify-v2.1.4/cancel.png',//取消图片路径
   'folder': 'Imagelogo',//上传文件夹名
   'auto': true, //文件添加到上传队列后,自动进行上传。默认为false
   'multi': false,//是否允许多文件上传。默认为false
   'fileExt':'*.gif;*.jpg;*.jpeg;*.png',//允许上传的文件类型,使用分号(”;)”分割 例如:*.jpg;*.gif,默认为null(所有文件类型)
   'fileDesc':'不超过2M的图片 (*.gif;*.jpg;*.png)',
   'sizeLimit': 2048000, //允许上传的文件大小(kb) 此为2M
   'onSelectOnce': function(event,data) { //在单文件或多文件上传时,选择文件时触发
    //event 事件对象(the event object)
    //data 选择的操作信息
    //data.filesSelected 选择文件操作中选中的文件数量
    $('#status-message').text(data.filesSelected + ' 文件正在等待上传…….');
   },
   'onComplete': function(event, queueID, fileObj, response, data) {//当单个文件上传完成后触发
    //event:事件对象(the event object)
    //ID:该文件在文件队列中的唯一表示
    //fileObj:选中文件的对象,他包含的属性列表
    //response:服务器端返回的Response文本,我这里返回的是处理过的文件名称
    //data:文件队列详细信息和文件上传的一般数据
    alert("文件:" + fileObj.name + " 上传成功!");
    //设置图片名称
    $("#applogo").attr("value",response);
    //设置输入框的值
    $("#text_webApplogo").attr("value",fileObj.name);
    //设置图片路径
    $("#img_64").attr("src","Imagelogo/64_"+response);
    $("#img_48").attr("src","Imagelogo/48_"+response);
    $("#img_32").attr("src","Imagelogo/32_"+response);
    $("#img_16").attr("src","Imagelogo/16_"+response);
    //图片路径设置完成后,显示图片
    $("#webApplogo_tab").css("display","block");
   },
   'onError': function(event, queueID, fileObj) {//当单个文件上传出错时触发
    alert("文件:" + fileObj.name + " 上传失败!");
   },
   'buttonImg':'Images/bn_04.gif',//浏览按钮的图片路径
   'width':60,//浏览按钮的宽和高
   'height':24
   ,'queueID':'QID_webApplogo'//页面上作为文件上传队列的元素的ID
});3、服务器端处理文件上传
/// <summary>
 /// 上传文件
 /// </summary>
 public class UploadApplogo : IHttpHandler
 {
  System.Drawing.Image image, image64, image48, image32, image16; //定义image类的对象
  protected string imagePath;//图片路径
  protected string imageType;//图片类型
  protected string imageName;//图片名称
  protected string fileName;//图片名称
  //提供一个回调方法,用于确定Image对象在执行生成缩略图操作时何时提前取消执行
  //如果此方法确定 GetThumbnailImage 方法应提前停止执行,则返回 true;否则返回 false
  System.Drawing.Image.GetThumbnailImageAbort callb = null;
  public void ProcessRequest(HttpContext context)
  {
   context.Response.ContentType = "text/plain";
   HttpPostedFile UploadImage = context.Request.Files["FileData"];
   //物理路径
   string uploadpath = HttpContext.Current.Server.MapPath(context.Request["folder"] + "\\");
   if (UploadImage != null)
   {
    //是否有目录,如没有就创建
    if (!Directory.Exists(uploadpath))
    {
     Directory.CreateDirectory(uploadpath);
    }
    //客户端文件完全名称
    string filename = UploadImage.FileName;
    string extname = filename.Substring(filename.LastIndexOf(".") + 1);
    //为不重复,设置文件名
    fileName = Guid.NewGuid().ToString() + "." + extname;
    //context.Response.Write("1");
    context.Response.Write(fileName);
   }
   else
   {
    context.Response.Write("0");
   }
   string mPath;
   imagePath = UploadImage.FileName;
   //取得图片类型
   imageType = imagePath.Substring(imagePath.LastIndexOf(".") + 1);
   //取得图片名称
   imageName = imagePath.Substring(imagePath.LastIndexOf("\\") + 1);
   Stream imgStream = UploadImage.InputStream;//流文件,准备读取上载文件的内容
   int imgLen = UploadImage.ContentLength;//上载文件大小
   //建立虚拟路径
   mPath = HttpContext.Current.Server.MapPath(context.Request["folder"]);
   //保存到虚拟路径
   UploadImage.SaveAs(mPath + "\\" + fileName);
   ////显示原图
   //imageSource.ImageUrl = "upFile/" + imageName;
   //为上传的图片建立引用
   image = System.Drawing.Image.FromFile(mPath + "\\" + fileName);
   //生成缩略图
   image64 = image.GetThumbnailImage(64, 64, callb, new System.IntPtr());
   //把缩略图保存到指定的虚拟路径
   image64.Save(HttpContext.Current.Server.MapPath(context.Request["folder"]) + "\\64_" + fileName);
   //释放image64对象的资源
   image64.Dispose();
   //生成缩略图
   image48 = image.GetThumbnailImage(48, 48, callb, new System.IntPtr());
   image48.Save(HttpContext.Current.Server.MapPath(context.Request["folder"]) + "\\48_" + fileName);
   image48.Dispose();
   //生成缩略图
   image32 = image.GetThumbnailImage(32, 32, callb, new System.IntPtr());
   image32.Save(HttpContext.Current.Server.MapPath(context.Request["folder"]) + "\\32_" + fileName);
   image32.Dispose();
   //生成缩略图
   image16 = image.GetThumbnailImage(16, 16, callb, new System.IntPtr());
   image16.Save(HttpContext.Current.Server.MapPath(context.Request["folder"]) + "\\16_" + fileName);
   image16.Dispose();
   //释放image对象占用的资源
   image.Dispose();
  }
  public bool IsReusable
  {
   get
   {
    return false;
   }
  }
}4、效果如下
相信看了本文案例你已经掌握了方法,更多精彩请关注php中文网其它相关文章!
推荐阅读:
Das obige ist der detaillierte Inhalt vonUploadify implementiert die Anzeige eines Fortschrittsbalkens zum Hochladen von Bildern. Für weitere Informationen folgen Sie bitte anderen verwandten Artikeln auf der PHP chinesischen Website!
 So aktivieren Sie den sekundären Anmeldedienst
 Methode zur Migration einer MySQL-Datenbank
 So definieren Sie Strings in PHP
 So öffnen Sie eine VCF-Datei
 Was ist der Befehl zum Löschen einer Spalte in SQL?
 Was ist die Anweisung zum Löschen einer Tabelle in SQL?
 So starten Sie die Oracle-Datenüberwachung
 So beheben Sie Fehler1


![[Web-Frontend] Node.js-Schnellstart](https://img.php.cn/upload/course/000/000/067/662b5d34ba7c0227.png)


