
Dieser Artikel stellt hauptsächlich die detaillierte Erklärung der ART-Zeichenmethode von React-Native vor. Ich werde ihn jetzt mit Ihnen teilen und als Referenz verwenden.
Hintergrund
Während des Entwicklungsprozesses mobiler Anwendungen ist das Zeichnen grundlegender zweidimensionaler Grafiken oder Animationen unerlässlich. Wenn man jedoch bedenkt, dass sowohl Android als auch iOS über eigene API-Lösungen verfügen, ist die Einführung einer allgemein akzeptierten technischen Lösung der Dual-Plattform-Kompatibilität des Codes förderlicher.
art ist ein CommonJS-Modul im Node-Stil, das so konzipiert ist, dass es mit mehreren Browsern kompatibel ist. Darauf aufbauend hat Facebook React-Art entwickelt, das Kunst so kapselt, dass sie von React.js verwendet werden kann, das die Front-End-SVG-Bibliothek implementiert. In Anbetracht der JSX-Syntax von „react.js“ unterstützt es jedoch bereits das Einfügen von SVG-Tags usw. direkt in den Dom (die React-Art-Bibliothek wird derzeit natürlich nicht verwendet). Darüber hinaus gibt es die Existenz von HTML Leinwand, daher ist React-Art im Frontend nicht unersetzlich.
Auf der mobilen Seite ist React-Art jedoch angesichts der plattformübergreifenden Anforderungen und der Anhäufung von Technologie auf der Website zu einer fertigen Lösung zum Zeichnen von Grafiken geworden. React-Native hat in 0.10.0 bzw. 0.18.0 Unterstützung für React-Art auf iOS- und Android-Plattformen hinzugefügt.
Beispielcode
Der Unterschied zwischen React.js und React-Native besteht nur in der unten beschriebenen ART-Erfassung, und dann kann dieses Beispiel auf die Webseite angewendet werden gleichzeitig und mobiles Endgerät. Das offizielle Beispiel, das mit React-Art geliefert wird: Vector-Widget
Vector-Widget implementiert zusätzlich Rotations- und Rotationsbeschleunigungsreaktionen auf Mausklickereignisse. Auf der Webseite ist eine Klickbeschleunigung zu sehen, auf der mobilen Seite ist sie jedoch ungültig. Der Grund dafür ist, dass React Native die Attribute onMouseDown und onMouseUp in der Gruppe nicht verarbeitet. Dieser Artikel konzentriert sich auf die Implementierung von statischem SVG und ignoriert vorübergehend einige der Animationseffekte.
ART
ART ist eine sehr wichtige Bibliothek in React Native, die sehr coole Zeichnungen und Animationen ermöglicht. Es ist zu beachten, dass Android während der Einführung von ART in React Native standardmäßig die ART-Bibliothek enthält und IOS abhängige Bibliotheken separat hinzufügen muss.
ios abhängige Bibliothek hinzufügen
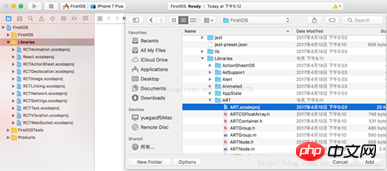
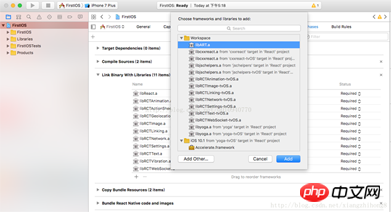
1 Verwenden Sie xcode, um das iOS-Projekt in React-native zu öffnen, wählen Sie das Verzeichnis „Bibliotheken“ aus. Klicken Sie mit der rechten Maustaste und Wählen Sie „Dateien hinzufügen“ zum Projektnamen. „node_modules/react-native/Libraries/ART/ART.xcodeproj“ Wählen Sie das Stammverzeichnis des Projekts aus. Klicken Sie auf „Binärdateien mit Bibliotheken verknüpfen“. Klicken Sie auf „+“. Wählen Sie „libART.a“. ', um hinzuzufügen.
Grundkomponenten
 ART stellt insgesamt 7 Komponenten vor: Oberfläche, Gruppe, Form, Text.
Oberfläche – ein rechteckiger renderbarer Bereich, der ein Container für andere Elemente ist
Breite: Breite des Rendering-Bereichs
import React from 'react'
import {
  View,
  ART
} from 'react-native'

export default class Line extends React.Component{

  render(){

    const path = ART.Path();
    path.moveTo(1,1); //将起始点移动到(1,1) 默认(0,0)
    path.lineTo(300,1); //连线到目标点(300,1)

    return(
      <View style={this.props.style}>
        <ART.Surface width={300} height={2}>
          <ART.Shape d={path} stroke="#000000" strokeWidth={1} />
        </ART.Surface>
      </View>
    )
  }
} 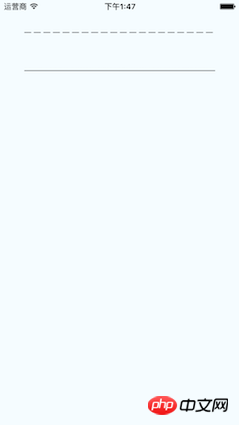
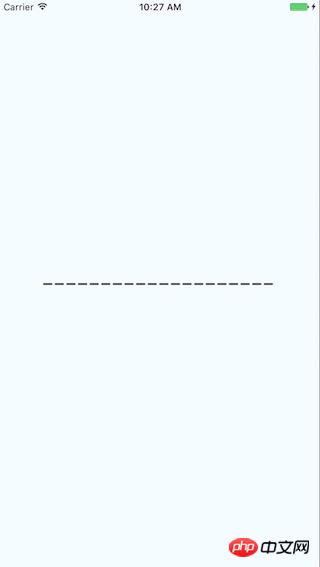
Verstehen Sie die Parameter von StrokeDash,
[10,5]: bedeutet das Zeichnen eines 10-Pixel-Volumenkörpers Linie und Zeichnen eines 5-Pixel-Leerzeichens, wie diese Schleife
[10,5,20,5]: bedeutet das Zeichnen einer 10-Pixel-Volllinie, das Zeichnen eines 5-Pixel-Leerzeichens und das Zeichnen eines 20-Pixel-Leerzeichens durchgezogene Linie und ein 5-Pixel-Leerzeichen
import React from 'react'
import {
  View,
  ART
} from 'react-native'

const {Surface, Shape, Path} = ART;

export default class DashLine extends React.Component{

  render(){

    const path = Path()
      .moveTo(1,1)
      .lineTo(300,1);

    return(
      <View style={this.props.style}>
        <Surface width={300} height={2}>
          <Shape d={path} stroke="#000000" strokeWidth={2} strokeDash={[10,5]}/>
        </Surface>
      </View>
    )
  }
}
Zeichnen Sie zunächst drei Seiten durch lineTo und verbinden Sie dann mit close die vierte Seite. fill führt eine Farbfüllung durch.
import React from 'react'
import {
  View,
  ART
} from 'react-native'

const {Surface, Shape, Path} = ART;

export default class Rect extends React.Component{

  render(){

    const path = new Path()
      .moveTo(1,1)
      .lineTo(1,99)
      .lineTo(99,99)
      .lineTo(99,1)
      .close();

    return(
      <View style={this.props.style}>
        <Surface width={100} height={100}>
          <Shape d={path} stroke="#000000" fill="#892265" strokeWidth={1} />
        </Surface>
      </View>
    )
  }
}绘圆
了解arc(x,y,radius)的使用, 终点坐标距离起点坐标的相对距离。
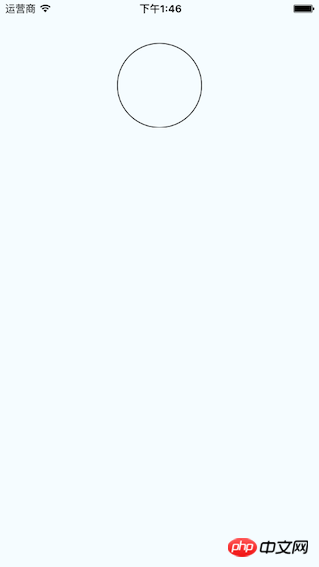
import React from 'react'
import {
  View,
  ART
} from 'react-native'

const {Surface, Shape, Path} = ART;

export default class Circle extends React.Component{

  render(){

    const path = new Path()
      .moveTo(50,1)
      .arc(0,99,25)
      .arc(0,-99,25)
      .close();


    return(
      <View style={this.props.style}>
        <Surface width={100} height={100}>
          <Shape d={path} stroke="#000000" strokeWidth={1}/>
        </Surface>
      </View>
    )
  }
}绘制文字
了解funt属性的使用,规则是“粗细 字号 字体”
注意: 字体应该是支持path属性的,应该是实现bug并没有不生效。 Android通过修改源码是可以解决的,IOS没看源码。
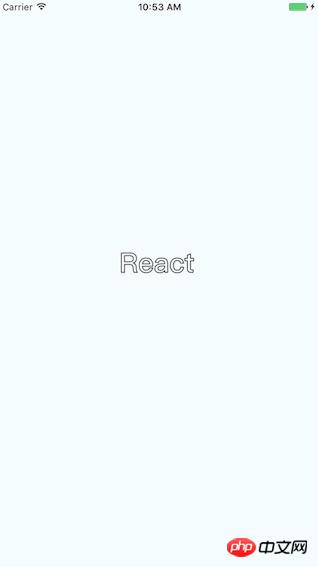
import React, {Component} from 'react';
import {
AppRegistry,
StyleSheet,
ART,
View
} from 'react-native';
const {Surface, Text, Path} = ART;
export default class ArtTextView extends Component {
render() {
return (
<View style={styles.container}>
<Surface width={100} height={100}>
<Text strokeWidth={1} stroke="#000" font="bold 35px Heiti SC" path={new Path().moveTo(40,40).lineTo(99,10)} >React</Text>
</Surface>
</View>
);
}
}
const styles = StyleSheet.create({
container: {
flex: 1,
justifyContent: 'center',
alignItems: 'center',
backgroundColor: '#F5FCFF',
},
});绘制扇形
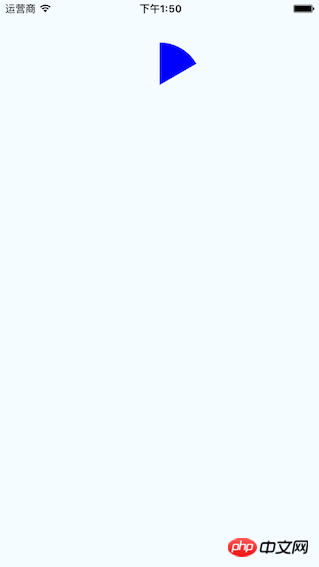
在这里需要使用arc做路径绘制。
Wedge.js
import React, { Component, PropTypes } from 'react';
import { ART } from 'react-native';
const { Shape, Path } = ART;
/**
* Wedge is a React component for drawing circles, wedges and arcs. Like other
* ReactART components, it must be used in a <Surface>.
*/
export default class Wedge extends Component<void, any, any> {
static propTypes = {
outerRadius: PropTypes.number.isRequired,
startAngle: PropTypes.number.isRequired,
endAngle: PropTypes.number.isRequired,
originX: PropTypes.number.isRequired,
originY: PropTypes.number.isRequired,
innerRadius: PropTypes.number,
};
constructor(props : any) {
super(props);
(this:any).circleRadians = Math.PI * 2;
(this:any).radiansPerDegree = Math.PI / 180;
(this:any)._degreesToRadians = this._degreesToRadians.bind(this);
}
/**
* _degreesToRadians(degrees)
*
* Helper function to convert degrees to radians
*
* @param {number} degrees
* @return {number}
*/
_degreesToRadians(degrees : number) : number {
if (degrees !== 0 && degrees % 360 === 0) { // 360, 720, etc.
return (this:any).circleRadians;
}
return degrees * (this:any).radiansPerDegree % (this:any).circleRadians;
}
/**
* _createCirclePath(or, ir)
*
* Creates the ReactART Path for a complete circle.
*
* @param {number} or The outer radius of the circle
* @param {number} ir The inner radius, greater than zero for a ring
* @return {object}
*/
_createCirclePath(or : number, ir : number) : Path {
const path = new Path();
path.move(0, or)
.arc(or * 2, 0, or)
.arc(-or * 2, 0, or);
if (ir) {
path.move(or - ir, 0)
.counterArc(ir * 2, 0, ir)
.counterArc(-ir * 2, 0, ir);
}
path.close();
return path;
}
/**
* _createArcPath(sa, ea, ca, or, ir)
*
* Creates the ReactART Path for an arc or wedge.
*
* @param {number} startAngle The starting degrees relative to 12 o'clock
* @param {number} endAngle The ending degrees relative to 12 o'clock
* @param {number} or The outer radius in pixels
* @param {number} ir The inner radius in pixels, greater than zero for an arc
* @return {object}
*/
_createArcPath(originX : number, originY : number, startAngle : number, endAngle : number, or : number, ir : number) : Path {
const path = new Path();
// angles in radians
const sa = this._degreesToRadians(startAngle);
const ea = this._degreesToRadians(endAngle);
// central arc angle in radians
const ca = sa > ea ? (this:any).circleRadians - sa + ea : ea - sa;
// cached sine and cosine values
const ss = Math.sin(sa);
const es = Math.sin(ea);
const sc = Math.cos(sa);
const ec = Math.cos(ea);
// cached differences
const ds = es - ss;
const dc = ec - sc;
const dr = ir - or;
// if the angle is over pi radians (180 degrees)
// we will need to let the drawing method know.
const large = ca > Math.PI;
// TODO (sema) Please improve theses comments to make the math
// more understandable.
//
// Formula for a point on a circle at a specific angle with a center
// at (0, 0):
// x = radius * Math.sin(radians)
// y = radius * Math.cos(radians)
//
// For our starting point, we offset the formula using the outer
// radius because our origin is at (top, left).
// In typical web layout fashion, we are drawing in quadrant IV
// (a.k.a. Southeast) where x is positive and y is negative.
//
// The arguments for path.arc and path.counterArc used below are:
// (endX, endY, radiusX, radiusY, largeAngle)
path.move(or + or * ss, or - or * sc) // move to starting point
.arc(or * ds, or * -dc, or, or, large) // outer arc
.line(dr * es, dr * -ec); // width of arc or wedge
if (ir) {
path.counterArc(ir * -ds, ir * dc, ir, ir, large); // inner arc
}
return path;
}
render() : any {
// angles are provided in degrees
const startAngle = this.props.startAngle;
const endAngle = this.props.endAngle;
// if (startAngle - endAngle === 0) {
// return null;
// }
// radii are provided in pixels
const innerRadius = this.props.innerRadius || 0;
const outerRadius = this.props.outerRadius;
const { originX, originY } = this.props;
// sorted radii
const ir = Math.min(innerRadius, outerRadius);
const or = Math.max(innerRadius, outerRadius);
let path;
if (endAngle >= startAngle + 360) {
path = this._createCirclePath(or, ir);
} else {
path = this._createArcPath(originX, originY, startAngle, endAngle, or, ir);
}
return <Shape {...this.props} d={path} />;
}
}示例代码:
import React from 'react'
import {
  View,
  ART
} from 'react-native'

const {Surface} = ART;
import Wedge from './Wedge'

export default class Fan extends React.Component{

  render(){

    return(
      <View style={this.props.style}>
        <Surface width={100} height={100}>
          <Wedge
           outerRadius={50}
           startAngle={0}
           endAngle={60}
           originX={50}
           originY={50}
           fill="blue"/>

        </Surface>
      </View>
    )
  }
}综合示例
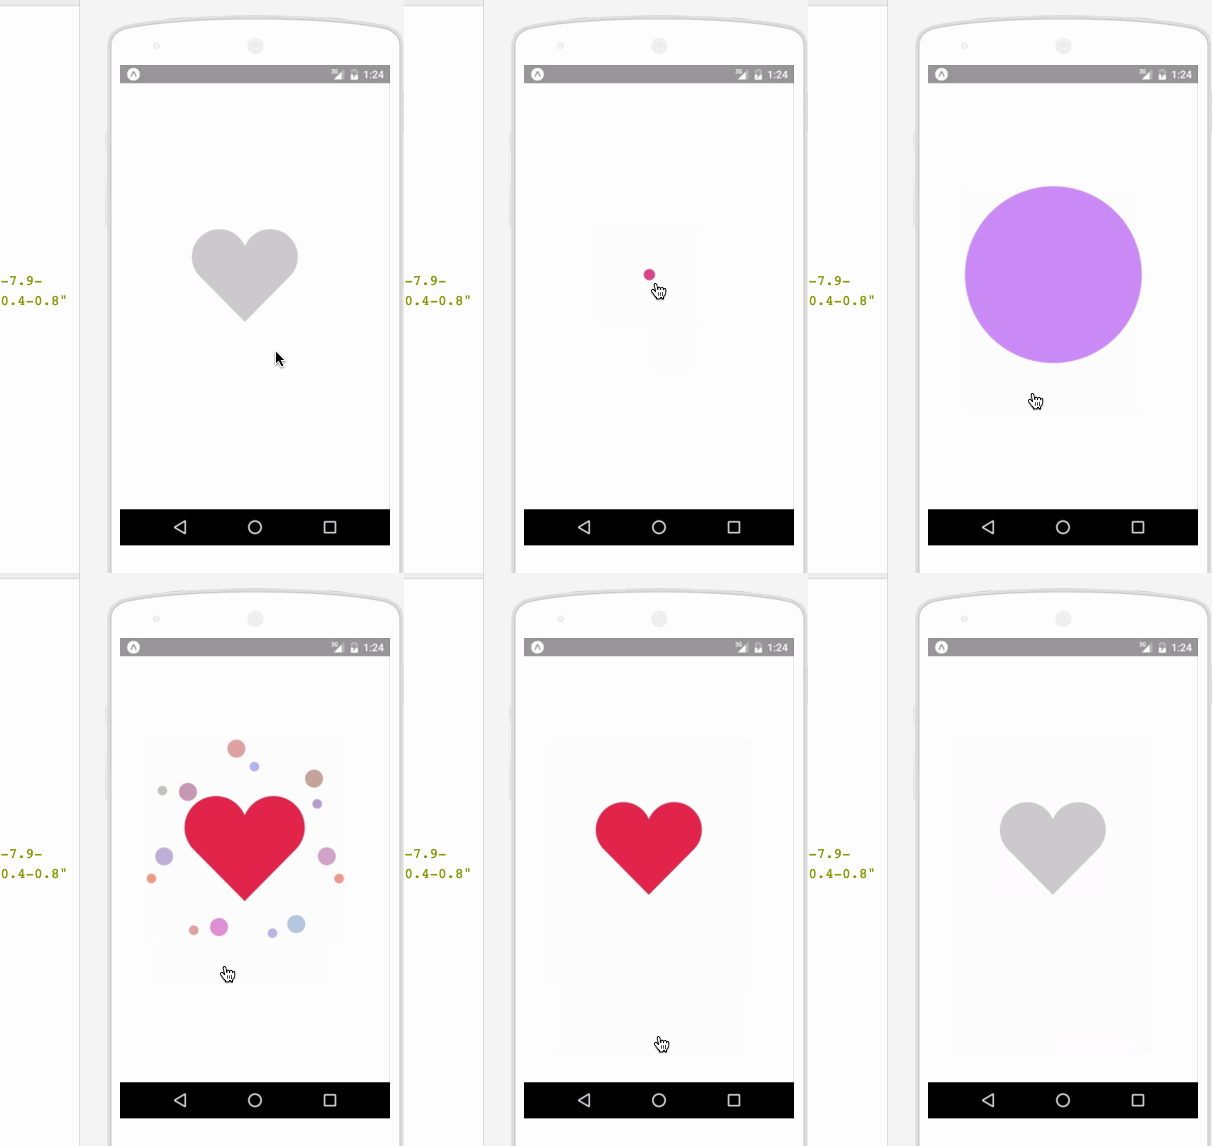
相关代码:
/**
* Sample React Native App
* https://github.com/facebook/react-native
* @flow
*/
import React, {
Component
}from 'react';
import {
ART as Art,
StyleSheet,
View,
Dimensions,
TouchableWithoutFeedback,
Animated
} from 'react-native';
var HEART_SVG = "M130.4-0.8c25.4 0 46 20.6 46 46.1 0 13.1-5.5 24.9-14.2 33.3L88 153.6 12.5 77.3c-7.9-8.3-12.8-19.6-12.8-31.9 0-25.5 20.6-46.1 46-46.2 19.1 0 35.5 11.7 42.4 28.4C94.9 11 111.3-0.8 130.4-0.8"
var HEART_COLOR = 'rgb(226,38,77,1)';
var GRAY_HEART_COLOR = "rgb(204,204,204,1)";
var FILL_COLORS = [
'rgba(221,70,136,1)',
'rgba(212,106,191,1)',
'rgba(204,142,245,1)',
'rgba(204,142,245,1)',
'rgba(204,142,245,1)',
'rgba(0,0,0,0)'
];
var PARTICLE_COLORS = [
'rgb(158, 202, 250)',
'rgb(161, 235, 206)',
'rgb(208, 148, 246)',
'rgb(244, 141, 166)',
'rgb(234, 171, 104)',
'rgb(170, 163, 186)'
]
getXYParticle = (total, i, radius) => {
var angle = ( (2 * Math.PI) / total ) * i;
var x = Math.round((radius * 2) * Math.cos(angle - (Math.PI / 2)));
var y = Math.round((radius * 2) * Math.sin(angle - (Math.PI / 2)));
return {
x: x,
y: y,
}
}
getRandomInt = (min, max) => {
return Math.floor(Math.random() * (max - min)) + min;
}
shuffleArray = (array) => {
for (var i = array.length - 1; i > 0; i--) {
var j = Math.floor(Math.random() * (i + 1));
var temp = array[i];
array[i] = array[j];
array[j] = temp;
}
return array;
}
var {
Surface,
Group,
Shape,
Path
} = Art;
//使用Animated.createAnimatedComponent对其他组件创建对话
//创建一个灰色的新型图片
var AnimatedShape = Animated.createAnimatedComponent(Shape);
var {
width: deviceWidth,
height: deviceHeight
} = Dimensions.get('window');
export default class ArtAnimView extends Component {
constructor(props) {
super(props);
this.state = {
animation: new Animated.Value(0)
};
}
explode = () => {
Animated.timing(this.state.animation, {
duration: 1500,
toValue: 28
}).start(() => {
this.state.animation.setValue(0);
this.forceUpdate();
});
}
getSmallExplosions = (radius, offset) => {
return [0, 1, 2, 3, 4, 5, 6].map((v, i, t) => {
var scaleOut = this.state.animation.interpolate({
inputRange: [0, 5.99, 6, 13.99, 14, 21],
outputRange: [0, 0, 1, 1, 1, 0],
extrapolate: 'clamp'
});
var moveUp = this.state.animation.interpolate({
inputRange: [0, 5.99, 14],
outputRange: [0, 0, -15],
extrapolate: 'clamp'
});
var moveDown = this.state.animation.interpolate({
inputRange: [0, 5.99, 14],
outputRange: [0, 0, 15],
extrapolate: 'clamp'
});
var color_top_particle = this.state.animation.interpolate({
inputRange: [6, 8, 10, 12, 17, 21],
outputRange: shuffleArray(PARTICLE_COLORS)
})
var color_bottom_particle = this.state.animation.interpolate({
inputRange: [6, 8, 10, 12, 17, 21],
outputRange: shuffleArray(PARTICLE_COLORS)
})
var position = getXYParticle(7, i, radius)
return (
<Group
x={position.x + offset.x }
y={position.y + offset.y}
rotation={getRandomInt(0, 40) * i}
>
<AnimatedCircle
x={moveUp}
y={moveUp}
radius={15}
scale={scaleOut}
fill={color_top_particle}
/>
<AnimatedCircle
x={moveDown}
y={moveDown}
radius={8}
scale={scaleOut}
fill={color_bottom_particle}
/>
</Group>
)
}, this)
}
render() {
var heart_scale = this.state.animation.interpolate({
inputRange: [0, .01, 6, 10, 12, 18, 28],
outputRange: [1, 0, .1, 1, 1.2, 1, 1],
extrapolate: 'clamp'
});
var heart_fill = this.state.animation.interpolate({
inputRange: [0, 2],
outputRange: [GRAY_HEART_COLOR, HEART_COLOR],
extrapolate: 'clamp'
})
var heart_x = heart_scale.interpolate({
inputRange: [0, 1],
outputRange: [90, 0],
})
var heart_y = heart_scale.interpolate({
inputRange: [0, 1],
outputRange: [75, 0],
})
var circle_scale = this.state.animation.interpolate({
inputRange: [0, 1, 4],
outputRange: [0, .3, 1],
extrapolate: 'clamp'
});
var circle_stroke_width = this.state.animation.interpolate({
inputRange: [0, 5.99, 6, 7, 10],
outputRange: [0, 0, 15, 8, 0],
extrapolate: 'clamp'
});
var circle_fill_colors = this.state.animation.interpolate({
inputRange: [1, 2, 3, 4, 4.99, 5],
outputRange: FILL_COLORS,
extrapolate: 'clamp'
})
var circle_opacity = this.state.animation.interpolate({
inputRange: [1, 9.99, 10],
outputRange: [1, 1, 0],
extrapolate: 'clamp'
})
return (
<View style={styles.container}>
<TouchableWithoutFeedback onPress={this.explode} style={styles.container}>
<View style={{transform: [{scale: .8}]}}>
<Surface width={deviceWidth} height={deviceHeight}>
<Group x={75} y={200}>
<AnimatedShape
d={HEART_SVG}
x={heart_x}
y={heart_y}
scale={heart_scale}
fill={heart_fill}
/>
<AnimatedCircle
x={89}
y={75}
radius={150}
scale={circle_scale}
strokeWidth={circle_stroke_width}
stroke={FILL_COLORS[2]}
fill={circle_fill_colors}
opacity={circle_opacity}
/>
{this.getSmallExplosions(75, {x: 89, y: 75})}
</Group>
</Surface>
</View>
</TouchableWithoutFeedback>
</View>
);
}
};
class AnimatedCircle extends Component {
render() {
var radius = this.props.radius;
var path = Path().moveTo(0, -radius)
.arc(0, radius * 2, radius)
.arc(0, radius * -2, radius)
.close();
return React.createElement(AnimatedShape);
}
}
var styles = StyleSheet.create({
container: {
flex: 1,
}
});以上就是本文的全部内容,希望对大家的学习有所帮助,更多相关内容请关注PHP中文网!
相关推荐:
Das obige ist der detaillierte Inhalt vonÜber die ART-Zeichenmethode von React-Native. Für weitere Informationen folgen Sie bitte anderen verwandten Artikeln auf der PHP chinesischen Website!
 Was sind die Java-Testtools?
 So öffnen Sie eine RAR-Datei
 So verwenden Sie die Suchfunktion
 Welche Datei ist windows.old?
 Was ist der Unterschied zwischen Golang und Python?
 Was sind Technologien der künstlichen Intelligenz?
 Was soll ich tun, wenn ich mein Breitband-Passwort vergesse?
 location.search
 Der Unterschied zwischen vscode und vs


