

HTML+CSS+JS imitiert den Win10-Helligkeitsanpassungseffekt

HTML+CSS+JS imitiert den Win10-Helligkeitsanpassungseffekt
Code
<!doctype html>
<html>
	<head>
		<meta charset="utf-8">
		<title>模仿win10的亮度调节</title>
		<style>
			.control_bar{
				height:200px;
				width:500px;
				border-bottom:3px solid #888888;

			}
			.control_bar_cursor{
				height:25px;
				width:8px;
				background: #505151;
				border-radius:5px;
				margin-top:-12.5px;
				position:relative;
				top:0;
				left:0;
			}
			.control_bar_cursor:hover{
				background:white;
			}
			#control_bar_mask{
				margin-top:-203px;
				width:0px;
			}
			.mask{
				position:fixed;
				bottom:0;
				top:0;
				left:0;
				right:0;
				background:black;
				z-index:-1;
			}
		</style>
	</head>
	<body>
		<p class="mask"></p>
		<p class="control_bar"></p>
		<p class="control_bar" style="border-bottom:3px solid #505151;" id="control_bar_mask"></p>
		<p class="control_bar_cursor"></p>
	</body>
	<script>
		window.onload = function(){
			var control_bar = document.getElementsByClassName("control_bar")[0];
			var control_bar_mask = document.getElementById("control_bar_mask");
			var control_bar_cursor = document.getElementsByClassName("control_bar_cursor")[0];
			var def_left = control_bar_cursor.offsetLeft;
			var mask = document.getElementsByClassName("mask")[0];
			document.body.onmousedown = function(){
				window.onmousemove = function(){
					var cursor_X = event.clientX;
					var cursor_Y = event.clientY;
					if(cursor_X < def_left){
						control_bar_cursor.style.left = 0;
					}else if(cursor_X > control_bar.offsetWidth + def_left){
						control_bar_cursor.style.left = control_bar.offsetWidth;
					}else{
						control_bar_cursor.style.left = cursor_X - def_left + "px";
					}
					//亮度比
					var proportion = parseInt(control_bar_cursor.offsetLeft - def_left) / parseInt(control_bar.offsetWidth - 1);
					control_bar_mask.style.width = proportion * control_bar.offsetWidth + "px";
					mask.style.opacity = 1 - proportion;
					};
				window.onmouseup = function(){
					window.onmousemove = null;
				};
			};
		};
	</script>
</html>1. Schreiben Sie das Erscheinungsbild jedes Elements auf
Hier wird dem Körper eine Hintergrundfarbe hinzugefügt, um die Beobachtung zu erleichtern
html
<p class="control_bar">
</p>
<p class="control_bar" style="border-bottom:3px solid #505151;"
id="control_bar_mask>
</p>
<p class="control_bar_cursor">
</p>
css
body{
    background:back;
}
.control_bar{
    height:200px;
    width:500px;
    border-bottom:3px solid #888888;
}
.control_bar_cursor{
    height:25px;
    width:8px;
    background: #505151;
    border-radius:5px;
}Rendering
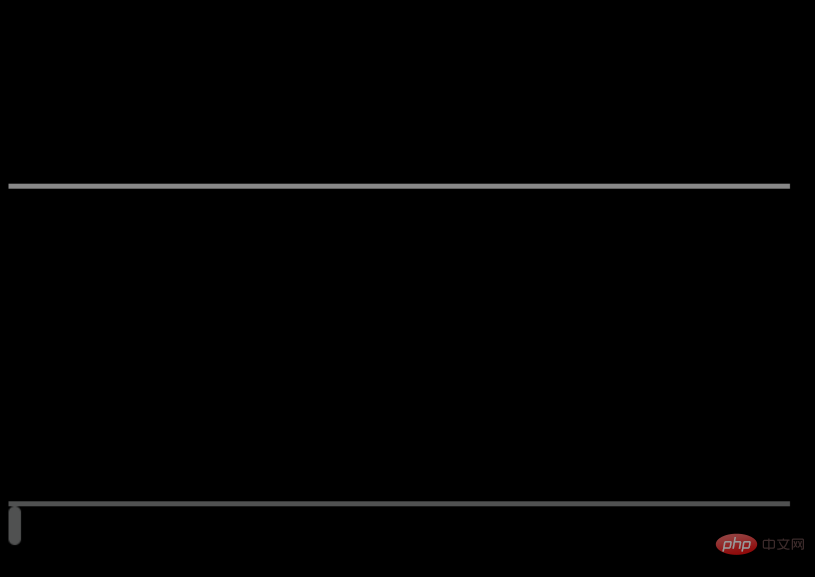
2. Stapeln Sie jedes Element zusammen
css
body{
    background:black;
}
.control_bar{
    height:200px;
    width:500px;
    border-bottom:3px solid #888888;

}
.control_bar_cursor{
    height:25px;
    width:8px;
    background: #505151;
    border-radius:5px;
    margin-top:-12.5px;
    position:relative;
    top:0;
    left:0;
}
.control_bar_cursor:hover{
    background:white;
}
#control_bar_mask{
    margin-top:-203px;
    width:100px;
}Um den Maskierungseffekt anzuzeigen, wird hier die p-Breite der Maskenebene kleiner eingestellt

3. Fügen Sie js hinzu
js
window.onload = function(){
    var control_bar = document.getElementsByClassName("control_bar")[0];
    var control_bar_mask = document.getElementById("control_bar_mask");
    var control_bar_cursor = document.getElementsByClassName("control_bar_cursor")[0];
    var def_left = control_bar_cursor.offsetLeft;
    document.body.onmousedown = function(){
        window.onmousemove = function(){
            var cursor_X = event.clientX;
            var cursor_Y = event.clientY;
            if(cursor_X < def_left){
                control_bar_cursor.style.left = 0;
            }else if(cursor_X > control_bar.offsetWidth + def_left){
                control_bar_cursor.style.left = control_bar.offsetWidth;
            }else{
                control_bar_cursor.style.left = cursor_X - def_left + "px";
            }
            var proportion = parseInt(control_bar_cursor.offsetLeft - def_left) / parseInt(control_bar.offsetWidth - 1);
            control_bar_mask.style.width = proportion * control_bar.offsetWidth + "px";
        };
        window.onmouseup = function(){
            window.onmousemove = null;
        };
    };
};4. Fügen Sie eine Maske hinzu und verwenden Sie eine Steuerleiste, um deren Transparenz zu steuern, um einen Helligkeitsanpassungseffekt zu erzielen
<p class="mask"></p>
.mask{
    position:fixed;
    bottom:0;
    top:0;
    left:0;
    right:0;
    background:black;
    z-index:-1;
}window.onload = function(){
var control_bar = document.getElementsByClassName("control_bar")[0];
var control_bar_mask = document.getElementById("control_bar_mask");
var control_bar_cursor = document.getElementsByClassName("control_bar_cursor")[0];
var def_left = control_bar_cursor.offsetLeft;
var mask = document.getElementsByClassName("mask")[0];
document.body.onmousedown = function(){
window.onmousemove = function(){
var cursor_X = event.clientX;
var cursor_Y = event.clientY;
if(cursor_X < def_left){
control_bar_cursor.style.left = 0;
}else if(cursor_X > control_bar.offsetWidth + def_left){
control_bar_cursor.style.left = control_bar.offsetWidth;
}else{
control_bar_cursor.style.left = cursor_X - def_left + "px";
}
//亮度比
var proportion = parseInt(control_bar_cursor.offsetLeft - def_left) / parseInt(control_bar.offsetWidth - 1);
control_bar_mask.style.width = proportion * control_bar.offsetWidth + "px";
mask.style.opacity = 1 - proportion;
};
window.onmouseup = function(){
window.onmousemove = null;
};
};
};Empfohlenes Tutorial: „HTML-Tutorial“
Das obige ist der detaillierte Inhalt vonHTML+CSS+JS imitiert den Win10-Helligkeitsanpassungseffekt. Für weitere Informationen folgen Sie bitte anderen verwandten Artikeln auf der PHP chinesischen Website!

Heiße KI -Werkzeuge

Undresser.AI Undress
KI-gestützte App zum Erstellen realistischer Aktfotos

AI Clothes Remover
Online-KI-Tool zum Entfernen von Kleidung aus Fotos.

Undress AI Tool
Ausziehbilder kostenlos

Clothoff.io
KI-Kleiderentferner

AI Hentai Generator
Erstellen Sie kostenlos Ai Hentai.

Heißer Artikel
Heiße Werkzeuge

Notepad++7.3.1
Einfach zu bedienender und kostenloser Code-Editor

SublimeText3 chinesische Version
Chinesische Version, sehr einfach zu bedienen

Senden Sie Studio 13.0.1
Leistungsstarke integrierte PHP-Entwicklungsumgebung

Dreamweaver CS6
Visuelle Webentwicklungstools

SublimeText3 Mac-Version
Codebearbeitungssoftware auf Gottesniveau (SublimeText3)
Heiße Themen
 1385
1385
 52
52

 So verwenden Sie Bootstrap in Vue
Apr 07, 2025 pm 11:33 PM
So verwenden Sie Bootstrap in Vue
Apr 07, 2025 pm 11:33 PM
Die Verwendung von Bootstrap in Vue.js ist in fünf Schritte unterteilt: Startstrap installieren. Bootstrap in main.js. Verwenden Sie die Bootstrap -Komponente direkt in der Vorlage. Optional: benutzerdefinierter Stil. Optional: Verwenden Sie Plug-Ins.
 Die Rollen von HTML, CSS und JavaScript: Kernverantwortung
Apr 08, 2025 pm 07:05 PM
Die Rollen von HTML, CSS und JavaScript: Kernverantwortung
Apr 08, 2025 pm 07:05 PM
HTML definiert die Webstruktur, CSS ist für Stil und Layout verantwortlich, und JavaScript ergibt eine dynamische Interaktion. Die drei erfüllen ihre Aufgaben in der Webentwicklung und erstellen gemeinsam eine farbenfrohe Website.
 So schreiben Sie geteilte Zeilen auf Bootstrap
Apr 07, 2025 pm 03:12 PM
So schreiben Sie geteilte Zeilen auf Bootstrap
Apr 07, 2025 pm 03:12 PM
Es gibt zwei Möglichkeiten, eine Bootstrap -Split -Zeile zu erstellen: Verwenden des Tags, das eine horizontale Split -Linie erstellt. Verwenden Sie die CSS -Border -Eigenschaft, um benutzerdefinierte Style Split -Linien zu erstellen.
 HTML, CSS und JavaScript verstehen: Ein Anfängerhandbuch
Apr 12, 2025 am 12:02 AM
HTML, CSS und JavaScript verstehen: Ein Anfängerhandbuch
Apr 12, 2025 am 12:02 AM
WebdevelopmentRelieSonHtml, CSS und JavaScript: 1) HtmlStructuresContent, 2) CSSstylesit und 3) JavaScriptaddssinteraktivität, Bildung von TheBasisofModerernwebexperiences.
 So ändern Sie Bootstrap
Apr 07, 2025 pm 03:18 PM
So ändern Sie Bootstrap
Apr 07, 2025 pm 03:18 PM
Um die Größe der Elemente in Bootstrap anzupassen, können Sie die Dimensionsklasse verwenden, einschließlich: Einstellbreite:.
 So richten Sie das Framework für Bootstrap ein
Apr 07, 2025 pm 03:27 PM
So richten Sie das Framework für Bootstrap ein
Apr 07, 2025 pm 03:27 PM
Um das Bootstrap -Framework einzurichten, müssen Sie die folgenden Schritte befolgen: 1. Verweisen Sie die Bootstrap -Datei über CDN; 2. Laden Sie die Datei auf Ihrem eigenen Server herunter und hosten Sie sie. 3.. Fügen Sie die Bootstrap -Datei in HTML hinzu; 4. Kompilieren Sie Sass/weniger bei Bedarf; 5. Importieren Sie eine benutzerdefinierte Datei (optional). Sobald die Einrichtung abgeschlossen ist, können Sie die Grid -Systeme, -Komponenten und -stile von Bootstrap verwenden, um reaktionsschnelle Websites und Anwendungen zu erstellen.
 So fügen Sie Bilder auf Bootstrap ein
Apr 07, 2025 pm 03:30 PM
So fügen Sie Bilder auf Bootstrap ein
Apr 07, 2025 pm 03:30 PM
Es gibt verschiedene Möglichkeiten, Bilder in Bootstrap einzufügen: Bilder direkt mit dem HTML -IMG -Tag einfügen. Mit der Bootstrap -Bildkomponente können Sie reaktionsschnelle Bilder und weitere Stile bereitstellen. Legen Sie die Bildgröße fest und verwenden Sie die IMG-Fluid-Klasse, um das Bild anpassungsfähig zu machen. Stellen Sie den Rand mit der img-beliebten Klasse ein. Stellen Sie die abgerundeten Ecken ein und verwenden Sie die IMG-Rund-Klasse. Setzen Sie den Schatten, verwenden Sie die Schattenklasse. Größen Sie die Größe und positionieren Sie das Bild im CSS -Stil. Verwenden Sie mit dem Hintergrundbild die CSS-Eigenschaft im Hintergrund.
 Reacts Rolle bei HTML: Verbesserung der Benutzererfahrung
Apr 09, 2025 am 12:11 AM
Reacts Rolle bei HTML: Verbesserung der Benutzererfahrung
Apr 09, 2025 am 12:11 AM
React kombiniert JSX und HTML, um die Benutzererfahrung zu verbessern. 1) JSX bettet HTML ein, um die Entwicklung intuitiver zu gestalten. 2) Der virtuelle DOM -Mechanismus optimiert die Leistung und reduziert den DOM -Betrieb. 3) Komponentenbasierte Verwaltungs-Benutzeroberfläche zur Verbesserung der Wartbarkeit. 4) Staatsmanagement und Ereignisverarbeitung verbessern die Interaktivität.
