这篇文章主要为大家分享了PHP实现微信网页授权开发教程,开发者可以通过授权后获取用户的基本信息,感兴趣的小伙伴们可以参考一下
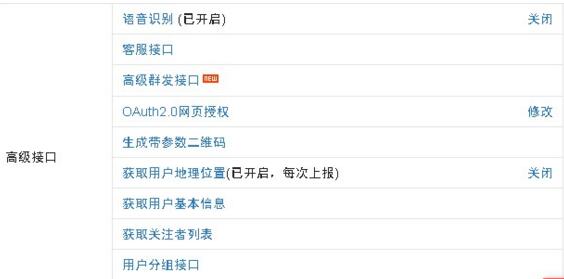
微信网页授权是服务号才有的高级功能,开发者可以通过授权后获取用户的基本信息;在此之前,想要获取消息信息只能在用户和公众号交互时根据openid获取用户信息;而微信网页授权可在不需要消息交互,也不需要关注的情况下获取用户的基本信息。

微信网页授权时通过OAuth2.0完成的,整个过程分为三步:
用户授权,获取code;
根据code获取access_token【可通过refresh_token刷新获取较长有效期】
通过access_token和openid获取用户信息
对微信网页授权过程做了简单封装:
<?php /** * 微信授权相关接口 */ class Wechat { //高级功能-》开发者模式-》获取 private $app_id = 'xxx'; private $app_secret = 'xxxxxxx'; /** * 获取微信授权链接 * * @param string $redirect_uri 跳转地址 * @param mixed $state 参数 */ public function get_authorize_url($redirect_uri = '', $state = '') { $redirect_uri = urlencode($redirect_uri); return "https://open.weixin.qq.com/connect/oauth2/authorize?appid={$this->app_id}&redirect_uri={$redirect_uri}&response_type=code&scope=snsapi_userinfo&state={$state}#wechat_redirect"; } /** * 获取授权token * * @param string $code 通过get_authorize_url获取到的code */ public function get_access_token($app_id = '', $app_secret = '', $code = '') { $token_url = "https://api.weixin.qq.com/sns/oauth2/access_token?appid={$this->app_id}&secret={$this->app_secret}&code={$code}&grant_type=authorization_code"; $token_data = $this->http($token_url); if($token_data[0] == 200) { return json_decode($token_data[1], TRUE); } return FALSE; } /** * 获取授权后的微信用户信息 * * @param string $access_token * @param string $open_id */ public function get_user_info($access_token = '', $open_id = '') { if($access_token && $open_id) { $info_url = "https://api.weixin.qq.com/sns/userinfo?access_token={$access_token}&openid={$open_id}&lang=zh_CN"; $info_data = $this->http($info_url); if($info_data[0] == 200) { return json_decode($info_data[1], TRUE); } } return FALSE; } public function http($url, $method, $postfields = null, $headers = array(), $debug = false) { $ci = curl_init(); /* Curl settings */ curl_setopt($ci, CURLOPT_HTTP_VERSION, CURL_HTTP_VERSION_1_1); curl_setopt($ci, CURLOPT_CONNECTTIMEOUT, 30); curl_setopt($ci, CURLOPT_TIMEOUT, 30); curl_setopt($ci, CURLOPT_RETURNTRANSFER, true); switch ($method) { case 'POST': curl_setopt($ci, CURLOPT_POST, true); if (!empty($postfields)) { curl_setopt($ci, CURLOPT_POSTFIELDS, $postfields); $this->postdata = $postfields; } break; } curl_setopt($ci, CURLOPT_URL, $url); curl_setopt($ci, CURLOPT_HTTPHEADER, $headers); curl_setopt($ci, CURLINFO_HEADER_OUT, true); $response = curl_exec($ci); $http_code = curl_getinfo($ci, CURLINFO_HTTP_CODE); if ($debug) { echo "=====post data======\r\n"; var_dump($postfields); echo '=====info=====' . "\r\n"; print_r(curl_getinfo($ci)); echo '=====$response=====' . "\r\n"; print_r($response); } curl_close($ci); return array($http_code, $response); } }以上就是本文的全部内容,希望对大家的学习有所帮助。
 So erstellen Sie einen WeChat-Klon
 Was ist der Unterschied zwischen Blockieren und Löschen bei WeChat?
 WeChat konnte keine Daten laden
 Was bedeutet WeChat-Klon?
 So öffnen Sie eine PHP-Datei
 WeChat stellt den Chatverlauf wieder her
 So löschen Sie WeChat-Emoticons
 So legen Sie Top-Text auf WeChat fest


