
In der folgenden Tutorial-Kolumne von Laravel erfahren Sie, wie Sie Funktionen zum Veröffentlichen, Bearbeiten und Durchsuchen von Artikeln basierend auf Laravel+Vue-Komponenten implementieren. Ich hoffe, dass es für Freunde in Not hilfreich sein wird!

Wir stellen die Backend-Schnittstelle basierend auf Laravel, Vue.js als Front-End-JavaScript-Komponenten-Entwicklungsframework und Bootstrap als CSS-Framework bereit.
Zuerst schreiben wir schnell den Back-End-Implementierungscode zum Hinzufügen, Löschen, Ändern und Überprüfen der Schnittstelle basierend auf dem Ressourcencontroller PostController, der im vorherigen Tutorial erstellt wurde: PostController 快速编写后端增删改查接口实现代码:
<?php namespace App\Http\Controllers;

use App\Models\Post;
use Exception;
use Illuminate\Contracts\Foundation\Application;
use Illuminate\Contracts\View\Factory;
use Illuminate\Contracts\View\View;
use Illuminate\Http\Request;
use Illuminate\Http\Response;
use Illuminate\Support\Collection;
use Illuminate\Support\Facades\Auth;

class PostController extends Controller
{
    public function __construct()
    {
        $this->middleware('auth')->except('index', 'all', 'show', 'data');
    }

    /**
     * Display a listing of the resource.
     *
     * @return Application|Factory|View|Response|\Illuminate\View\View
     */
    public function index()
    {
        return view('posts.index', ['pageTitle' => '文章列表页']);
    }

    /**
     * Show the form for creating a new resource.
     *
     * @return Application|Factory|View|Response|\Illuminate\View\View
     */
    public function create()
    {
        return view('posts.create', ['pageTitle' => '发布新文章']);
    }

    /**
     * Store a newly created resource in storage.
     *
     * @param Request $request
     * @return array
     */
    public function store(Request $request)
    {
        $data = $request->validate([
            'title' => 'required|max:128',
            'content' => 'required'
        ]);

        $post = new Post($data);
        $post->status = 1;
        $post->user_id = Auth::user()->id;
        if ($post->save()) {
            return ['success' => true, 'message' => '文章发布成功'];
        }
        return ['success' => false, 'message' => '保存文章数据失败'];
    }

    /**
     * Display the specified resource.
     *
     * @param Post $post
     * @return Application|Factory|View|Response|\Illuminate\View\View
     */
    public function show(Post $post)
    {
        return view('posts.show', ['id' => $post->id, 'pageTitle' => $post->title]);
    }

    /**
     * Show the form for editing the specified resource.
     *
     * @param Post $post
     * @return Application|Factory|View|Response|\Illuminate\View\View
     */
    public function edit(Post $post)
    {
        return view('posts.edit', ['pageTitle' => '编辑文章', 'id' => $post->id]);
    }

    /**
     * Update the specified resource in storage.
     *
     * @param Request $request
     * @param Post $post
     * @return array
     */
    public function update(Request $request, Post $post)
    {
        $data = $request->validate([
            'title' => 'required|max:128',
            'content' => 'required'
        ]);

        $post->fill($data);
        $post->status = 1;
        if ($post->save()) {
            return ['success' => true, 'message' => '文章更新成功'];
        }
        return ['success' => false, 'message' => '更新文章数据失败!'];
    }

    /**
     * Remove the specified resource from storage.
     *
     * @param Post $post
     * @return array
     * @throws Exception
     */
    public function destroy(Post $post)
    {
        if ($post->delete()) {
            return ['success' => true, 'message' => '文章删除成功'];
        }
        return ['success' => false, 'message' => '删除文章失败'];
    }

    /**
     * 获取所有文章数据
     *
     * @return Collection
     */
    public function all()
    {
        return Post::orderByDesc('created_at')->get();
    }

    /**
     * 获取单个文章数据
     *
     * @param Post $post
     * @return Post
     */
    public function data(Post $post)
    {
        $post->author_name = $post->author->name;
        return $post;
    }
}除了 Laravel 资源控制器自带的方法之外,我们额外提供了 all 和 data 两个方法,分别用于在 Vue 组件中通过 AJAX 请求获取文章列表数据和文章详情数据。因此,需要在路由文件 routes/web.php 中注册资源路由之前添加这两个方法对应的路由:
use App\Http\Controllers\PostController;

Route::get('posts/all', [PostController::class, 'all']);
Route::get('posts/{post}/data', [PostController::class, 'data']);
Route::resource('posts', PostController::class);注意这里我们使用了 Laravel 路由提供的隐式模型绑定功能快速获取模型实例。此外,相应的视图模板路径也做了调整,我们马上会介绍这些视图模板文件。
如果你在上篇教程填充的测试数据基础上新增过其他数据,可以运行 php artisan migrate:refresh 命令重建数据表快速清空已有数据并重新填充。
如果你不想查看返回实例数据格式的细节,可以在自带填充器 database/seeders/DatabaseSeeder.php 中定义填充代码:
<?php namespace Database\Seeders;
use App\Models\Post;
use Illuminate\Database\Seeder;
class DatabaseSeeder extends Seeder
{
/**
* Seed the application's database.
*
* @return void
*/
public function run()
{
// \App\Models\User::factory(10)->create();
Post::factory(10)->create();
}
}然后运行 php artisan migrate:refresh --seed 命令即可一步到位完成数据表重建、测试数据清空和重新填充:


由于我们使用的是 Laravel 提供的 laravel/ui 扩展包提供的 Bootstrap 和 Vue 前端脚手架代码,该扩展包还提供了用户认证相关脚手架代码实现,并且提供了一个视图模板布局文件 resources/views/layouts/app.blade.php,我们将通过模板继承基于这个布局文件来重构文章列表、表单、详情页相关视图模板文件,让整体 UI 统一。
我们前面在 PostController 中,为所有 GET 路由渲染的视图文件传递了 pageTitle 值作为不同页面的标题,要实现该功能,需要修改 resources/views/layouts/app.blade.php 布局文件中 title 标签对应的标签文本值:
<title>{{ $pageTitle ?? config('app.name', 'Laravel') }}</title>接下来,将原来的文章相关视图文件都移动到 resources/views/posts 目录下,改写文章列表视图文件模板代码如下(将原来的 posts.blade.php 重命名为 index.blade.php):
@extends('layouts.app')

@section('content')
    <p>
        <post-list></post-list>
    </p>
@endsection将原来的 form.blade.php 重命名为 create.blade.php,并编写文章发布表单页面视图文件模板代码如下:
@extends('layouts.app')

@section('content')
    <p>
        </p><p>
            <post-form>
            </post-form>
        </p>

@endsection由于文章发布和编辑表单共用一个 Vue 表单组件,所以我们这里额外传递了一些 props 属性到组件模板,包括表单标题(title)、操作类型(action)、表单提交 URL(url),后面马上会介绍表单组件的调整。
在 resources/views/posts 目录下新建一个 edit.blade.php 作为文件编辑页面视图文件,并编写模板代码如下:
@extends('layouts.app')

@section('content')
    <p>
        </p><p>
            <post-form> $id]) }}">
            </post-form>
        </p>

@endsection同样也使用 post-form 模板渲染文章编辑表单,只不过额外传递了一个 id 属性,用于在表单组件初始化待编辑的文章数据。
文章详情页视图后面单独介绍。
为了适配文章编辑表单,以及后端接口返回数据格式的调整,我们需要修改 Vue 表单组件实现代码:
<template>
<formsection>
<template>{{ title }}</template>
<template>
<p>
<label></label>
<inputtext></inputtext>
<errormsg></errormsg>
</p>
<p>
<label></label>
<textarea></textarea>
<errormsg></errormsg>
</p>
</template>
<template>
<button>立即发布</button>
</template>
<template>
<toastmsg>
{{ form.message }}
</toastmsg>
</template>
</formsection>
</template>
<script>
import FormSection from './form/FormSection';
import InputText from './form/InputText';
import TextArea from './form/TextArea';
import Button from './form/Button';
import ToastMsg from './form/ToastMsg';
import Label from "./form/Label";
import ErrorMsg from "./form/ErrorMsg";
export default {
components: {FormSection, InputText, TextArea, Label, ErrorMsg, Button, ToastMsg},
props: ['title', 'url', 'action', 'id'],
data() {
return {
form: new Form({
title: '',
content: ''
})
}
},
mounted() {
let post_id = Number(this.id);
if (this.action === 'update' && post_id > 0) {
this.load(post_id);
}
},
methods: {
load(id) {
this.form.title = '加载中...';
this.form.content = '加载中...';
let url = '/posts/' + id + '/data';
axios.get(url).then(resp => {
this.form.title = resp.data.title;
this.form.content = resp.data.content;
}).catch(error => {
alert('从服务端初始化表单数据失败');
});
},
store() {
if (this.action === 'create') {
this.form.post(this.url)
.then(data => {
// 发布成功后跳转到列表页
window.location.href = '/posts';
})
.catch(data => console.log(data)); // 自定义表单提交失败处理逻辑
} else {
this.form.put(this.url)
.then(data => {
// 更新成功后跳转到详情页
window.location.href = '/posts/' + this.id;
})
.catch(data => console.log(data)); // 自定义表单提交失败处理逻辑
}
},
clear(field) {
this.form.errors.clear(field);
}
}
}
</script>文章发布和编辑页面需要通过标题予以区分,所以我们通过 title 属性从父级作用域传递该标题值。
对于文章编辑表单,首先,我们会根据父级作用域传递的 id 属性值在 mounted 钩子函数中调用新增的 load 方法从后端接口 /posts/{post}/data
<style>
.alert {
margin-top: 10px;
}
</style>
<template>
<p>
<slot></slot>
</p>
</template>
<script>
export default {
props: ['validated', 'success']
}
</script>all und data, die zum Abrufen von Artikellistendaten und Artikeldetaildaten verwendet werden AJAX-Anfragen in der Vue-Komponente. Daher müssen Sie die diesen beiden Methoden entsprechenden Routen hinzufügen, bevor Sie die Ressourcenroute in der Routing-Datei routes/web.php registrieren: 🎜class Form {
constructor(data) {
...
this.validated = false;
}
...
/**
* 表单提交处理
*
* @param {string} url
* @param {string} method
*/
submit(url, method) {
return new Promise((resolve, reject) => {
axios[method](url, this.data())
.then(response => {
this.onSuccess(response.data);
this.validated = true;
if (this.success === true) {
resolve(response.data);
} else {
reject(response.data);
}
})
.catch(error => {
this.onFail(error.response.data.errors);
reject(error.response.data);
});
});
}
/**
* 处理表单提交成功
*
* @param {object} data
*/
onSuccess(data) {
this.success = data.success;
this.message = data.message;
this.reset();
}
...
}php artisan migrate:refresh ausführen. Code > Befehl zum Neuaufbau der Datentabelle, um vorhandene Daten schnell zu löschen und wieder aufzufüllen. 🎜🎜Wenn Sie die Details des zurückgegebenen Instanzdatenformats nicht sehen möchten, können Sie den Füllcode im integrierten Füller <code>database/seeders/DatabaseSeeder.php definieren: 🎜<style>
.post-detail {
width: 100%;
}
.post-title {
margin-bottom: .25rem;
font-size: 2.5rem;
}
.post-meta {
margin-bottom: 1.25rem;
color: #999;
}
.post-content {
font-size: 1.1rem;
font-weight: 400;
line-height: 1.5;
color: #212529;
}
</style>
<template>
<p>
<span>Loading...</span>
</p>
<p>
</p>
<h2>{{ title }}</h2>
<p>
Created at {{ created_at | diff_for_human }} by <a>{{ author_name }}</a>,
Status: {{ status | post_status_readable }},
Action: <a>编辑</a>
</p>
<p>
{{ content }}
</p>
</template>
<script>
export default {
props: ['post_id'],
data() {
return {
id: this.post_id,
title: '',
content: '',
status: '',
author_name: '',
created_at: '',
loaded: false
}
},
mounted() {
if (!this.loaded) {
this.load(Number(this.id));
}
},
methods: {
load(id) {
axios.get('/posts/' + this.id + '/data').then(resp => {
this.title = resp.data.title;
this.content = resp.data.content;
this.status = resp.data.status;
this.author_name = resp.data.author_name;
this.created_at = resp.data.created_at;
this.loaded = true;
}).catch(err => {
alert('加载文章数据失败');
});
}
}
}
</script>php artisan migrate aus: Der Befehl „refresh --seed“ kann die Rekonstruktion der Datentabelle, das Löschen von Testdaten und das Nachfüllen in einem Schritt abschließen: 🎜🎜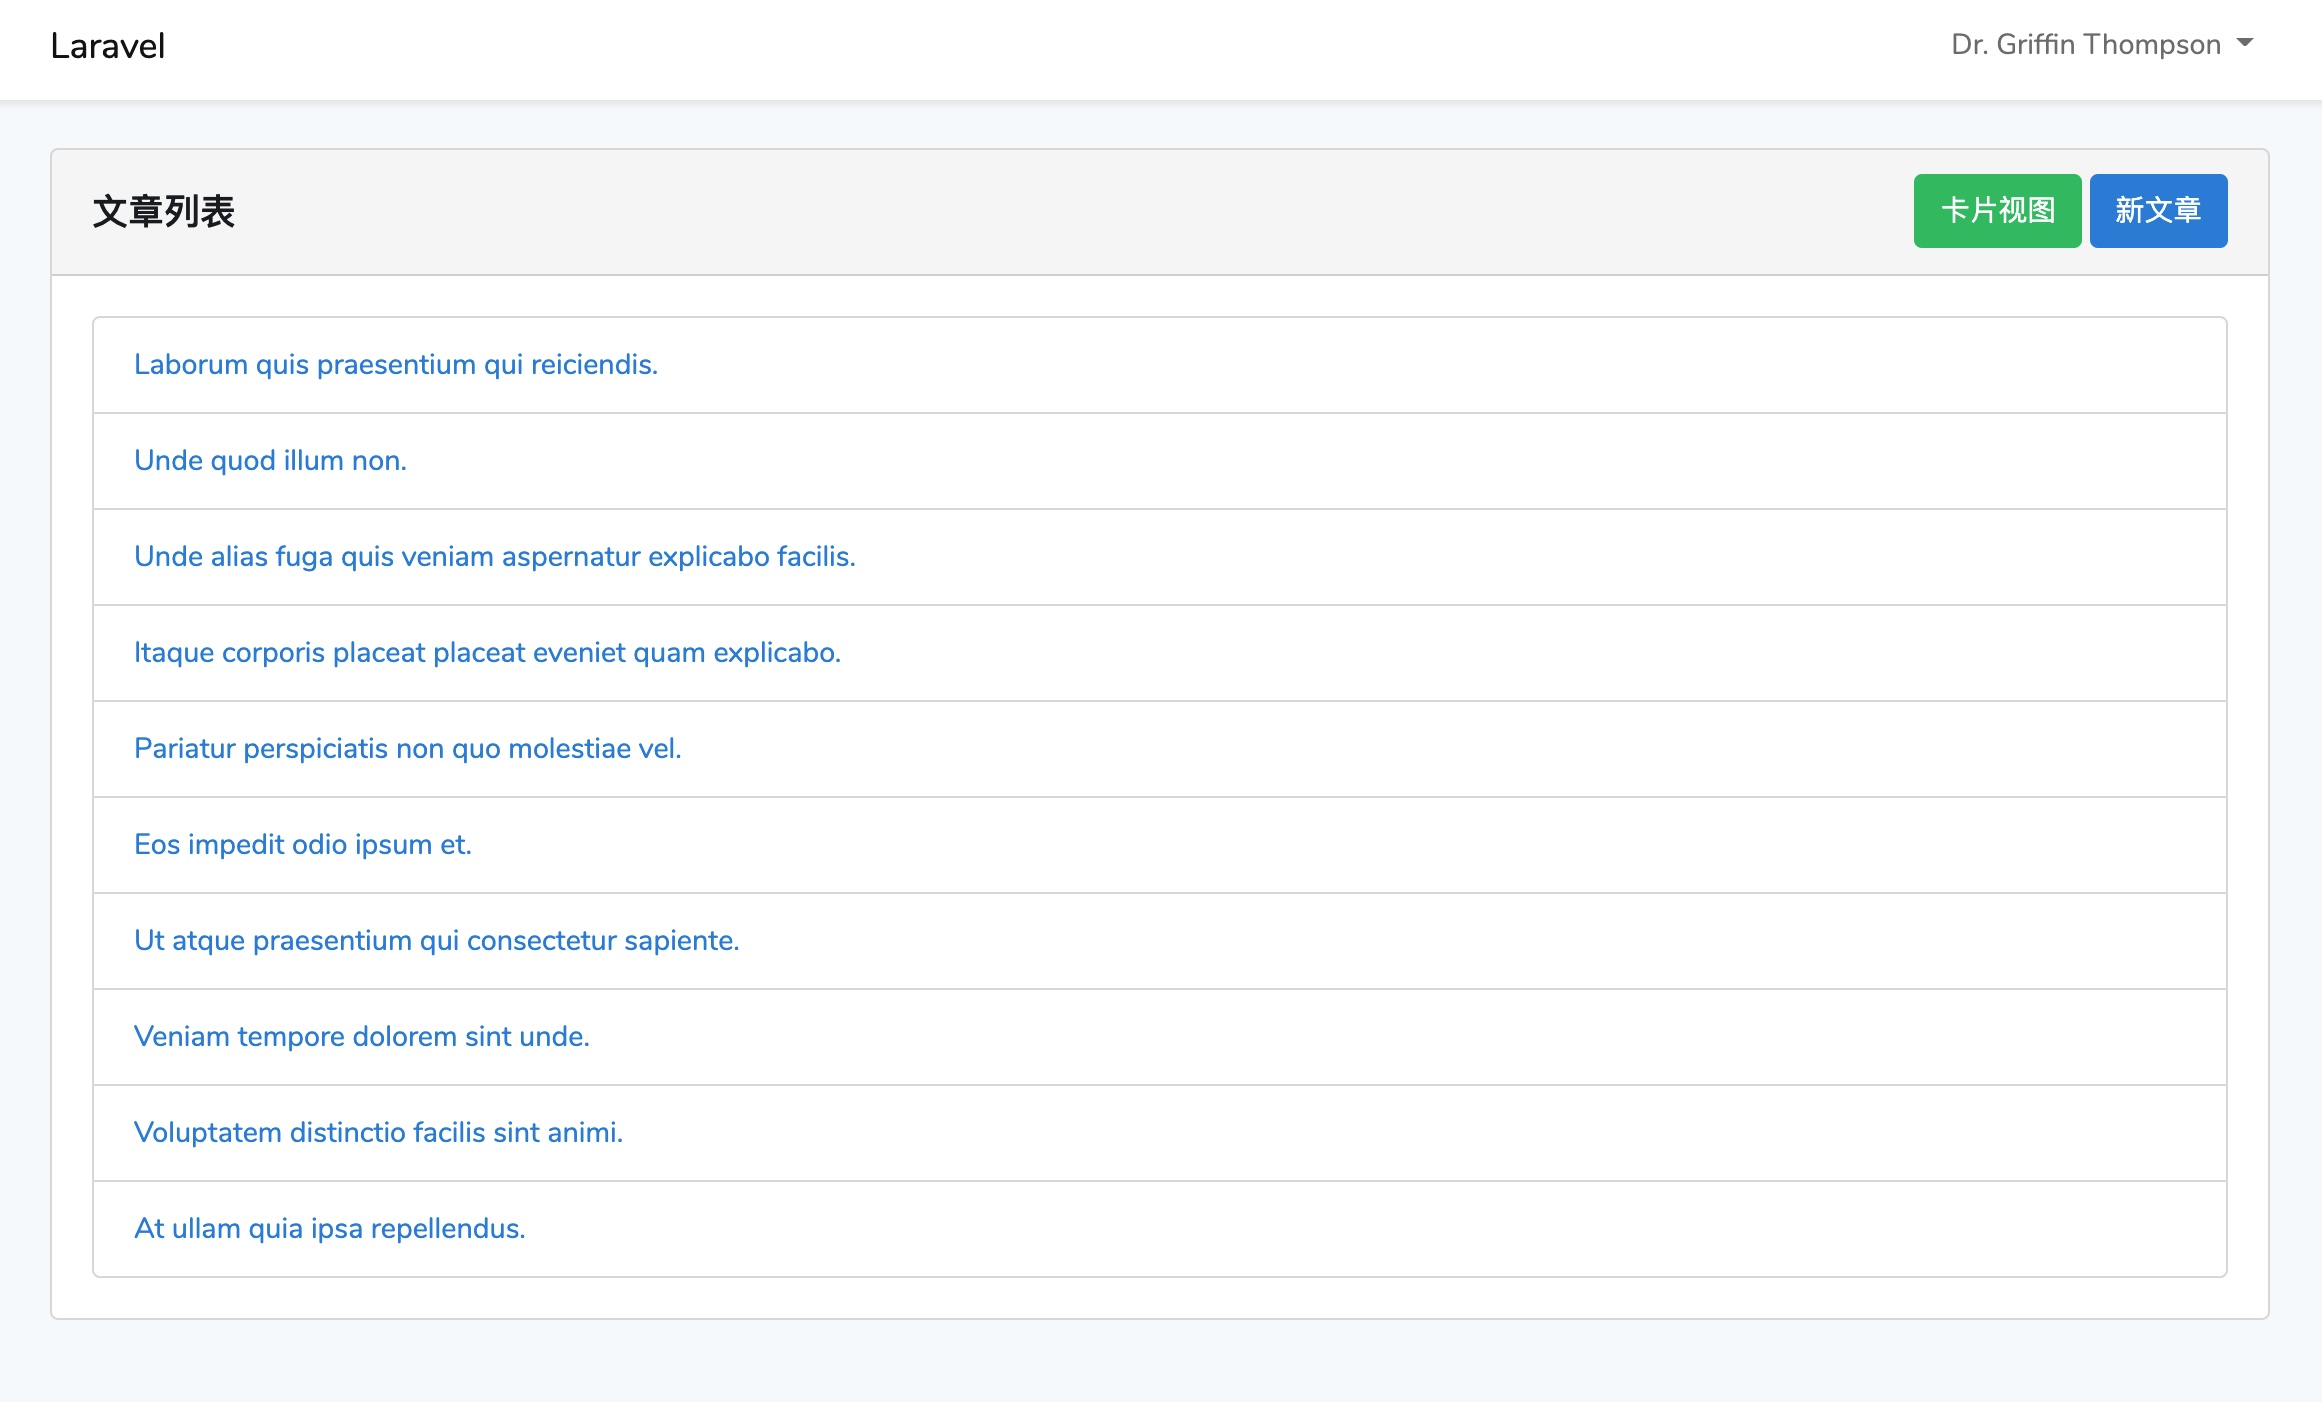 🎜🎜
🎜🎜 🎜
🎜laravel/ui bereitgestellt wird Erweiterungspaket, bereitgestellt von Laravel und Vue-Front-End-Gerüstcode. Dieses Erweiterungspaket bietet auch die Implementierung von Gerüstcode im Zusammenhang mit der Benutzerauthentifizierung und stellt eine Ansichtsvorlagen-Layoutdatei resources/views/layouts/app.blade.php bereit übergeben wir die Vorlage „Inherit“ und rekonstruieren die Ansichtsvorlagendateien für die Artikelliste, das Formular und die Detailseite basierend auf dieser Layoutdatei, um die gesamte Benutzeroberfläche zu vereinheitlichen. 🎜pageTitle für alle von GET-Routen gerenderten Ansichtsdateien im <code>PostController-Code> übergeben Der Wert dient als Titel verschiedener Seiten. Um diese Funktion zu implementieren, müssen Sie den Beschriftungstext entsprechend der Beschriftung title in der Datei resources/views/layouts/app.blade.php-Layoutdatei. Wert: 🎜<div class="code" style="position:relative; padding:0px; margin:0px;"><div class="code" style="position:relative; padding:0px; margin:0px;"><pre class="brush:php;toolbar:false">Vue.filter('post_status_readable', status => {
switch(status) {
case 0:
return '草稿';
case 1:
return '已发布';
default:
return '未知状态';
}
});</pre><div class="contentsignin">Nach dem Login kopieren</div></div><div class="contentsignin">Nach dem Login kopieren</div></div>
<h4 id="toc-4">Artikellistenansicht</h4>🎜Als nächstes verschieben Sie alle ursprünglichen artikelbezogenen Ansichtsdateien in die <code>resources/views/posts-Verzeichnis. Schreiben Sie den Code der Artikellistenansichtsdatei wie folgt um (benennen Sie die ursprüngliche <code>posts.blade.php in index.blade.php um): 🎜Vue.component('post-detail', require('./components/PostDetail.vue').default);form.blade.php in create.blade.php um und schreiben Sie die Artikelveröffentlichung Formularseitenansichtsdatei Der Vorlagencode lautet wie folgt: 🎜@extends('layouts.app')
@section('content')
<p>
<post-detail></post-detail>
</p>
@endsectiontitle code>), Operationstyp (action), Formularübermittlungs-URL (url), Anpassungen an Formularkomponenten werden in Kürze eingeführt. 🎜edit.blade.php als Datei im resources/views/posts-Verzeichnis Bearbeiten Sie die Seitenansichtsdatei und schreiben Sie den Vorlagencode wie folgt: 🎜<style>
.card-header h5 {
margin-top: 0.5em;
display: inline-block;
}
.card-header .float-right {
float: right;
}
</style>
<template>
<p>
</p>
<p>
</p>
<h5><slot></slot></h5>
<p>
<button>
{{ view.switch_to }}
</button>
<slot></slot>
</p>
...</template>post-form-Vorlage, um das Artikelbearbeitungsformular zu rendern, aber ein zusätzliches ID-Attribut wird übergeben, um das Formular zu initialisieren zu bearbeitende Artikeldaten. 🎜🎜Die Artikeldetailseitenansicht wird später separat eingeführt. 🎜<style>
.post-list {
width: 100%;
}
</style>
<template>
<p>
<listsection>
<template>文章列表</template>
<template>
<a>新文章</a>
</template>
<template>
<listitem>
{{ post.title }}
</listitem>
</template>
...</listsection></p></template>title. 🎜🎜Für das Artikelbearbeitungsformular rufen wir zunächst das neue load in der Hook-Funktion <code>mount auf, basierend auf dem vom übergeordneten Element übergebenen Attributwert id Die Methode code> lädt die entsprechenden Artikeldaten aus der Backend-Schnittstelle /posts/{post}/data, um das Formular auszufüllen. 🎜现在后端接口可以自动获取当前认证用户的 ID,所以 author 字段就没有必要填写了,直接将其移除。
文章创建和编辑对应的请求方式是不一样的,操作成功后处理逻辑也是不一样的(前者重定向到列表页,后者重定向到详情页),所以根据 action 属性值分别进行了处理。
此外,由于后端对表单数据进行验证后,保存数据阶段依然可能失败,所以前端提交表单后返回的响应状态码为 200 并不表示表单提交处理成功,还需要借助响应实体(JSON 格式)中的 success 字段进一步判断,进而通过 ToastMsg 子组件渲染成功或失败的提示文本。
ToastMsg 是从之前的 SuccessMsg 组件升级而来,直接将 SuccessMsg 组件重命名为 ToastMsg 并改写组件代码如下:
<style>
.alert {
margin-top: 10px;
}
</style>
<template>
<p>
<slot></slot>
</p>
</template>
<script>
export default {
props: ['validated', 'success']
}
</script>可以看到,如果表单提交处理成功(依然基于父级作用域传递的 form.success 属性)则显示成功提示样式及文案,否则显示失败提示样式和文案,而是否渲染该组件取决于表单验证是否成功,该字段基于父级作用域传递的 form.validated 属性,之前是没有这个属性的,所以我们需要额外添加,在 resources/js/form.js 中,调整相关代码实现如下:
class Form {
    constructor(data) {
        ...
        this.validated = false;
    }

    ...

    /**
     * 表单提交处理
     *
     * @param {string} url
     * @param {string} method
     */
    submit(url, method) {
        return new Promise((resolve, reject) => {
            axios[method](url, this.data())
                .then(response => {
                    this.onSuccess(response.data);
                    this.validated = true;
                    if (this.success === true) {
                        resolve(response.data);
                    } else {
                        reject(response.data);
                    }
                })
                .catch(error => {
                    this.onFail(error.response.data.errors);
                    reject(error.response.data);
                });
        });
    }


    /**
     * 处理表单提交成功
     *
     * @param {object} data
     */
    onSuccess(data) {
        this.success = data.success;
        this.message = data.message;
        this.reset();
    }

    ...

}这样一来,文章发布和编辑共用的 Vue 表单组件就重构好了。
我们接着来实现文章详情页。
在 component-practice/resources/js/components 目录下新建一个 PostDetail.vue 文件作为渲染文章详情的 Vue 单文件组件,并编写组件代码如下:
<style>
.post-detail {
width: 100%;
}
.post-title {
margin-bottom: .25rem;
font-size: 2.5rem;
}
.post-meta {
margin-bottom: 1.25rem;
color: #999;
}
.post-content {
font-size: 1.1rem;
font-weight: 400;
line-height: 1.5;
color: #212529;
}
</style>
<template>
<p>
<span>Loading...</span>
</p>
<p>
</p>
<h2>{{ title }}</h2>
<p>
Created at {{ created_at | diff_for_human }} by <a>{{ author_name }}</a>,
Status: {{ status | post_status_readable }},
Action: <a>编辑</a>
</p>
<p>
{{ content }}
</p>
</template>
<script>
export default {
props: ['post_id'],
data() {
return {
id: this.post_id,
title: '',
content: '',
status: '',
author_name: '',
created_at: '',
loaded: false
}
},
mounted() {
if (!this.loaded) {
this.load(Number(this.id));
}
},
methods: {
load(id) {
axios.get('/posts/' + this.id + '/data').then(resp => {
this.title = resp.data.title;
this.content = resp.data.content;
this.status = resp.data.status;
this.author_name = resp.data.author_name;
this.created_at = resp.data.created_at;
this.loaded = true;
}).catch(err => {
alert('加载文章数据失败');
});
}
}
}
</script>这个组件功能比较简单,在 mounted 钩子函数中通过父级作用域传递的 id 属性值调用 load 函数加载后端接口返回的文章数据,并通过数据绑定将其渲染到模板代码中,在加载过程中,会有一个动态的加载状态提示用户文章数据正在加载。
这里我们还使用了过滤器对数据进行格式化,日期过滤器已经是全局的了,状态过滤器之前是本地的,这里我们将其从文章列表卡片组件 CardItem 中将其迁移到 app.js 中作为全局过滤器:
Vue.filter('post_status_readable', status => {
switch(status) {
case 0:
return '草稿';
case 1:
return '已发布';
default:
return '未知状态';
}
});然后就可以在任何 Vue 组件中调用它了(CardItem 中过滤器调用代码做一下相应调整)。
在 app.js 中注册这个组件:
Vue.component('post-detail', require('./components/PostDetail.vue').default);再到 component-practice/resources/views/posts 目录下新建 show.blade.php 视图文件引用 post-detail 组件即可:
@extends('layouts.app')

@section('content')
<p>
    <post-detail></post-detail>
</p>
@endsection最后,我们到文章列表组件中新增一个发布文章入口。
打开子组件 ListSection,在视图模式切换按钮右侧新增一个插槽,用于从父级作用域传递更多额外操作按钮:
<style>
.card-header h5 {
    margin-top: 0.5em;
    display: inline-block;
}
.card-header .float-right {
    float: right;
}
</style>

<template>
<p>
    </p>
<p>
        </p>
<h5><slot></slot></h5>
        <p>
            <button>
                {{ view.switch_to }}
            </button>
            <slot></slot>
        </p>


...</template>然后在 PostList 中将发布文章按钮放到这个插槽中(样式代码也做了微调):
<style>
.post-list {
    width: 100%;
}
</style>

<template>
    <p>
    <listsection>
        <template>文章列表</template>
        <template>
            <a>新文章</a>
        </template>
        <template>
            <listitem>
                {{ post.title }}
            </listitem>
        </template>
...</listsection></p></template>顺便也为文章列表所有文章设置详情页链接,ListItem 链接是从 PostList 通过 props 属性传递的,CardItem 需要去子组件中设置:
<a><slot></slot></a>
至此,我们就完成了文章列表、发布、编辑和详情页的所有前后端功能代码编写。
如果你已经在本地运行了 npm run watch 并且通过 php arstisan serve 启动 PHP 内置 Web 服务器的话,就可以在浏览器通过 http://127.0.0.1:3002/posts (启用了 BrowserSync 代理)访问新的文章列表页了:

点击任意文章链接,即可进入文章详情页,加载数据成功之前,会有如下动态加载效果:


你可以点击「编辑」链接对这篇文章进行编辑:
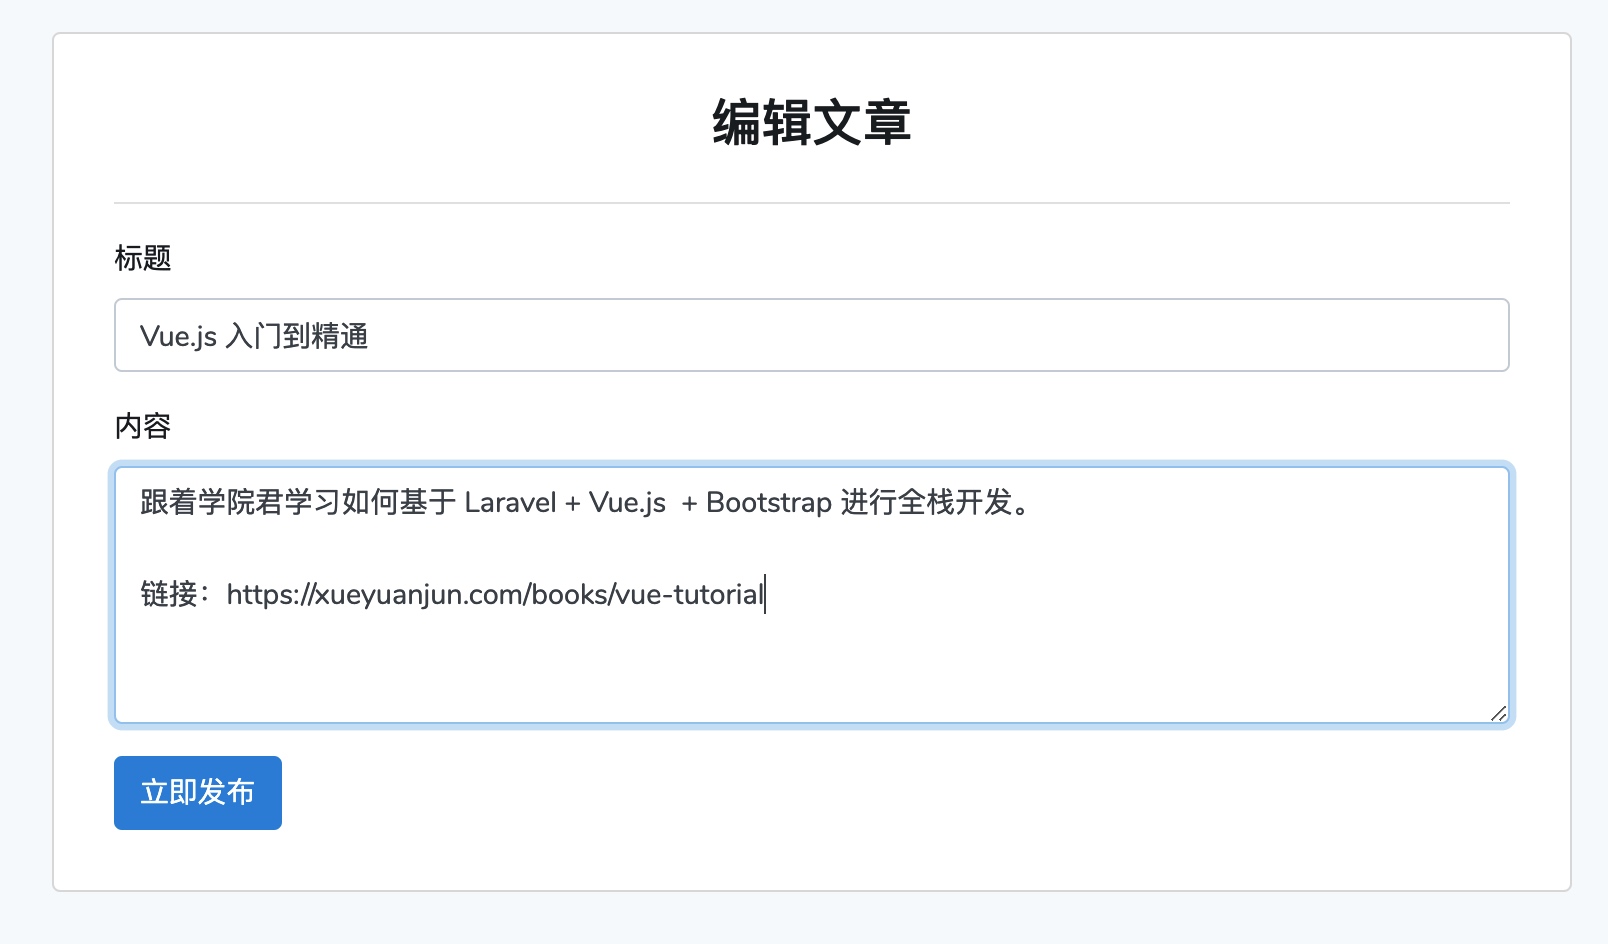
更新成功后,会跳转到文章详情页,对应字段均已更新,并且状态也从草稿变成了已发布:

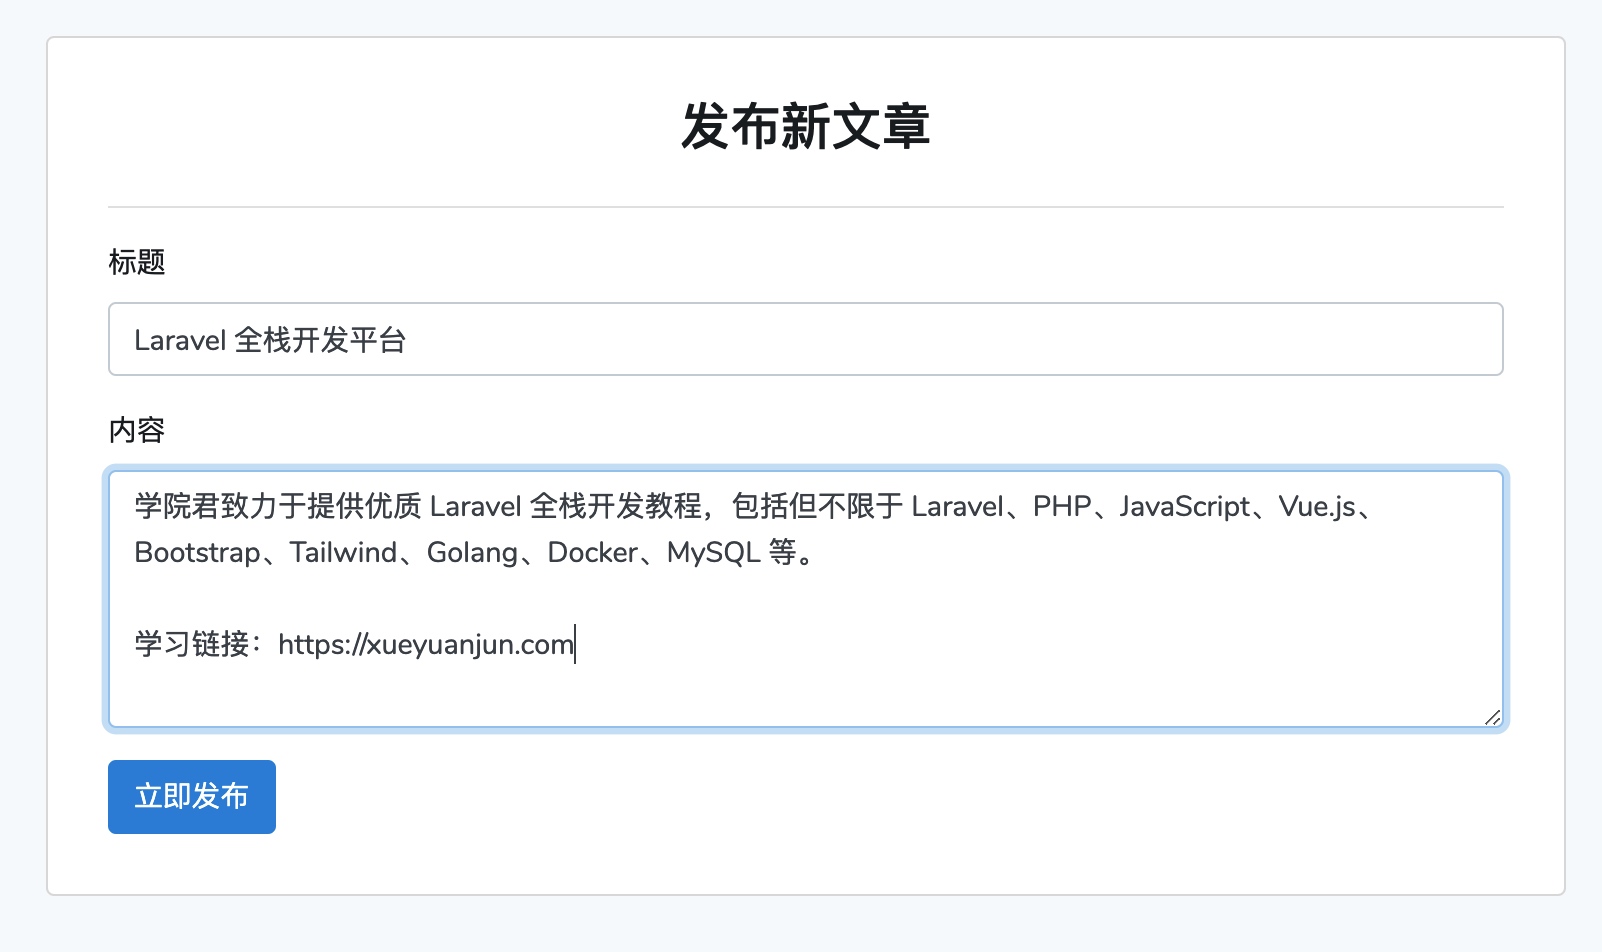
Natürlich muss der Benutzer für die Funktionen zum Veröffentlichen und Bearbeiten von Artikeln angemeldet sein (derzeit wird keine Berechtigungsüberprüfung durchgeführt). Wenn Sie nicht angemeldet sind, gelangen Sie durch Klicken auf die Schaltflächen „Bearbeiten“ und „Neuer Artikel“ zunächst zur Anmeldeseite (diese Funktion ist verfügbar). Durch den PostController Controller-Konstruktor) (implementiert durch die definierte Middleware-Methode) klicken wir beim Anmelden auf die Schaltfläche „Neuer Artikel“ in der oberen rechten Ecke der Artikellistenseite, um die Artikelveröffentlichungsseite aufzurufen:
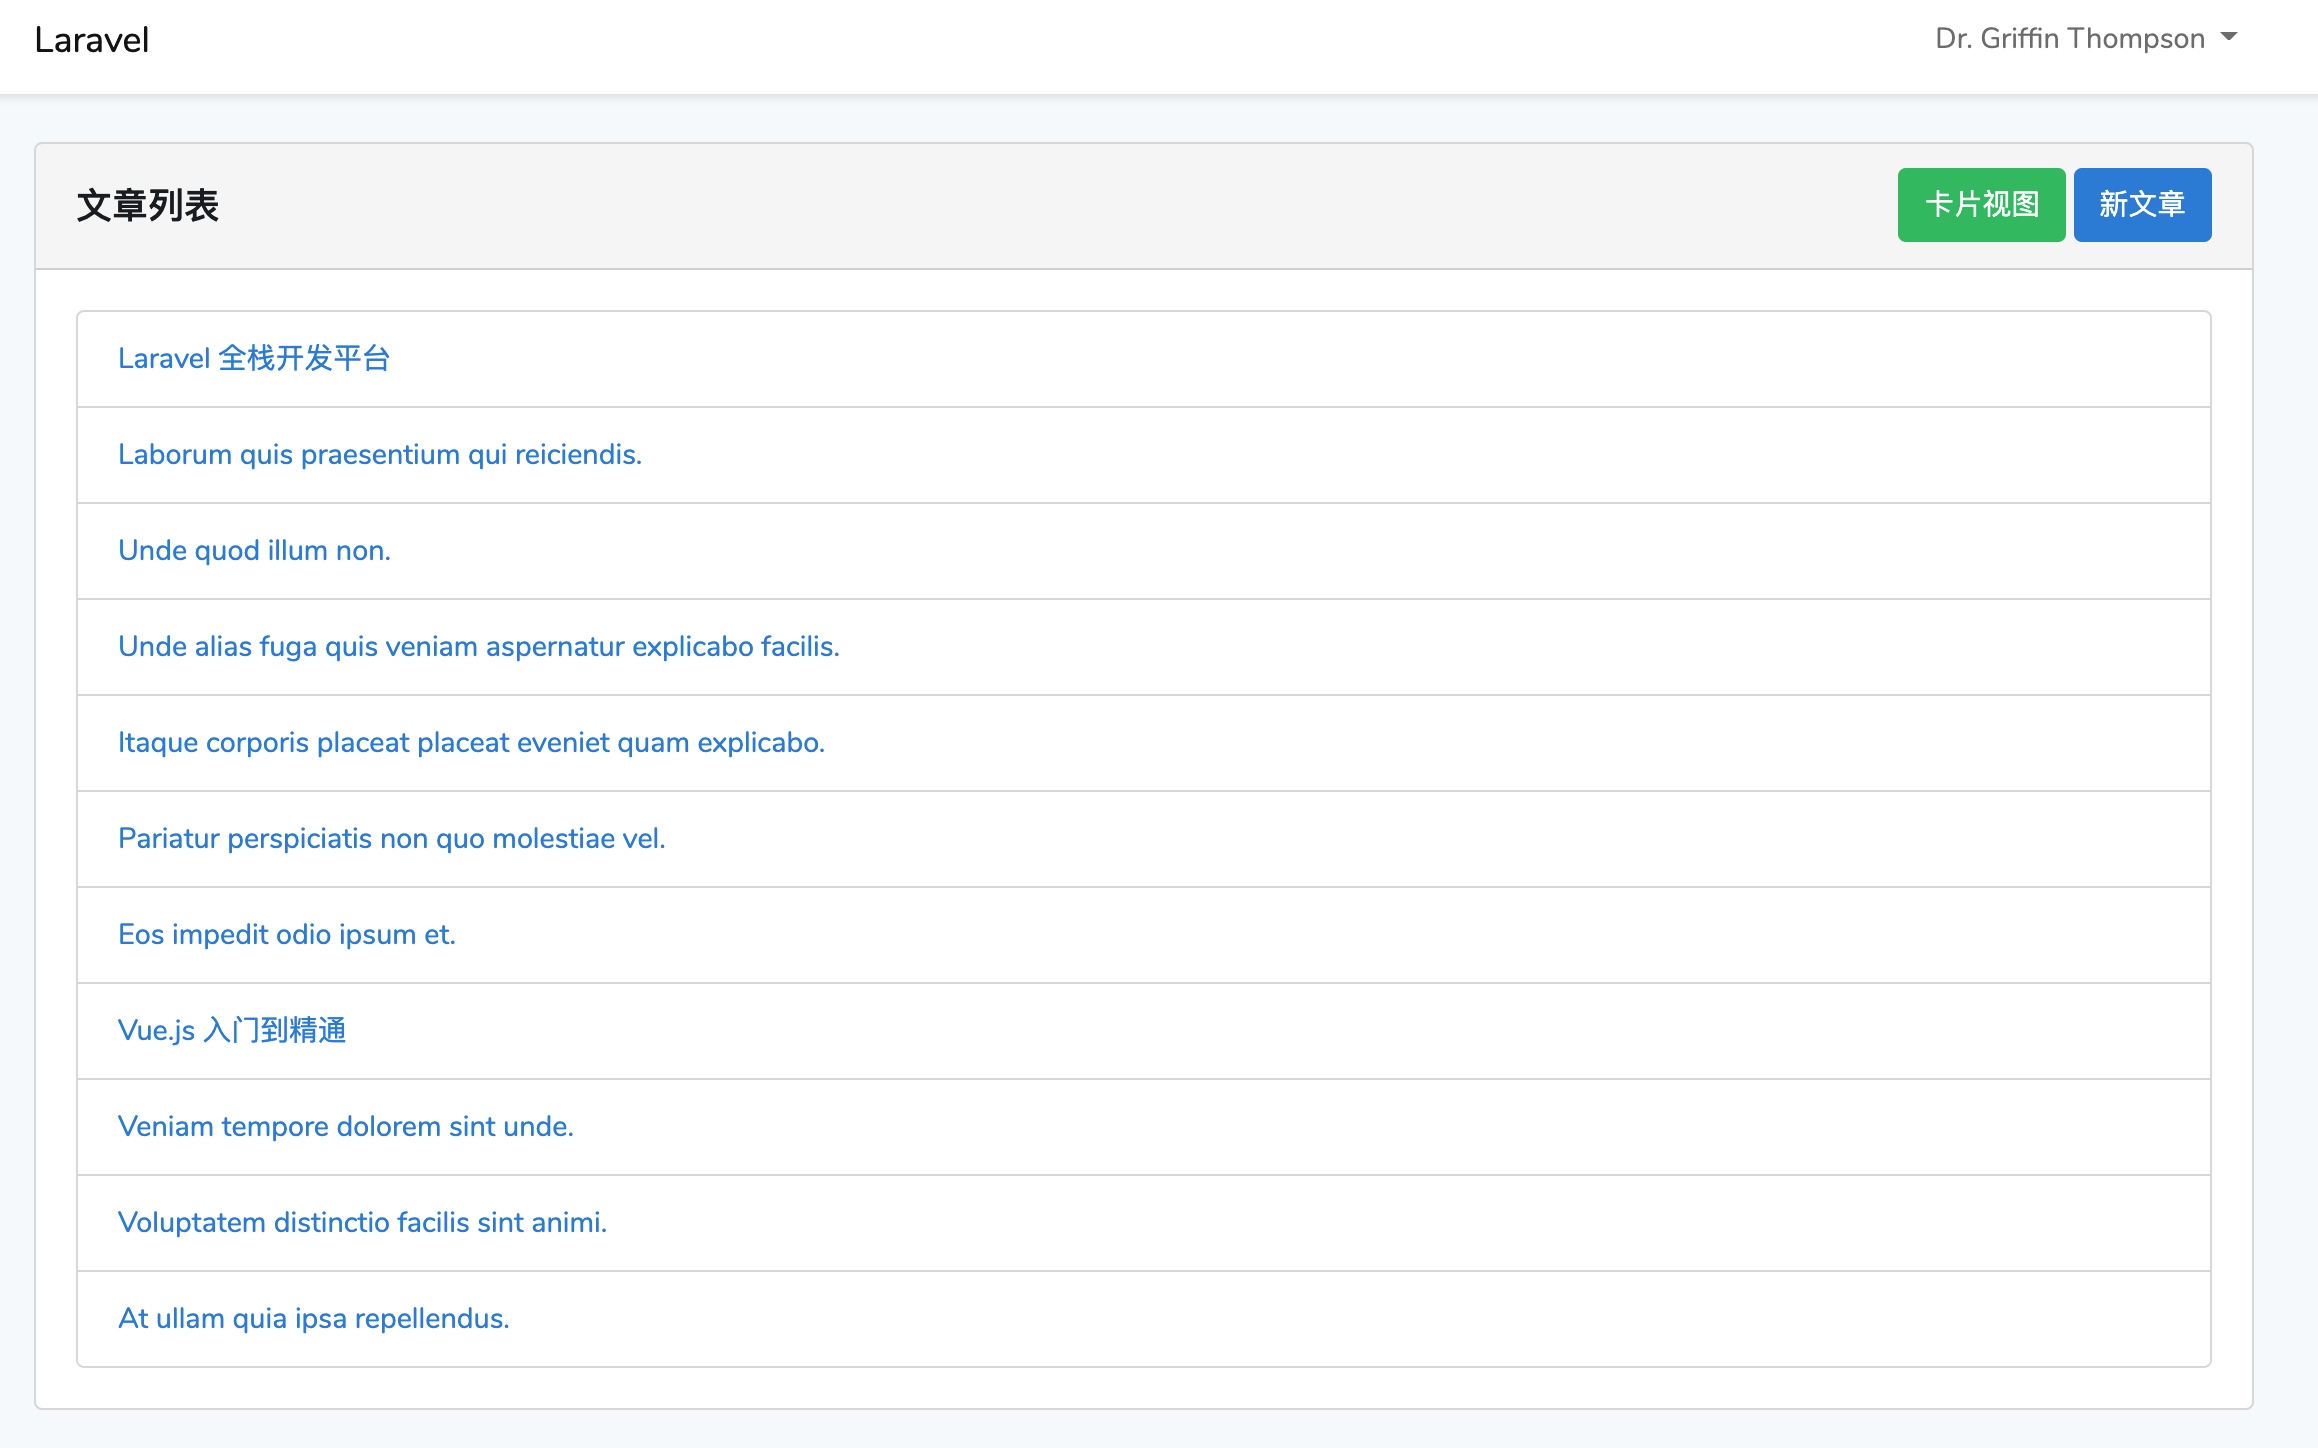
Nach Erfolg Beim Veröffentlichen springt die Seite zur Artikellistenseite und der gerade erstellte Artikel wird in der Liste angezeigt:
Nach dem Hinzufügen, Löschen, Ändern und Überprüfen bleibt im nächsten Tutorial nur noch ein „Löschen“ übrig Ich zeige Ihnen, wie Sie die Funktion zum Löschen von Artikeln implementieren, da ich das Löschen damit kombinieren möchte. Die Funktionsdemonstration basiert auf der Implementierung von Modalboxen, Dialogfeldern und Übergangseffekten.
Das obige ist der detaillierte Inhalt vonErfahren Sie, wie Sie Funktionen zum Veröffentlichen, Bearbeiten und Durchsuchen von Artikeln basierend auf Laravel+Vue-Komponenten implementieren. Für weitere Informationen folgen Sie bitte anderen verwandten Artikeln auf der PHP chinesischen Website!
 Die übergeordnete Vue-Komponente ruft die Methode der untergeordneten Komponente auf
 vue v-wenn
 Der Unterschied zwischen vue2.0 und 3.0
 So übergeben Sie einen Wert an die Vue-Komponente
 Der Unterschied zwischen vue3.0 und 2.0
 Vue allgemeine Anweisungen
 Was sind die am häufigsten verwendeten Anweisungen in Vue?
 Der Unterschied zwischen mpvue und vue