
In diesem Artikel werden einige CSS-Texteffekte vorgestellt, bei denen verschiedene Attributkombinationen verwendet werden, um verschiedene Textanimationseffekte zu erzielen. Es hat einen gewissen Referenzwert. Freunde in Not können sich darauf beziehen. Ich hoffe, es wird für alle hilfreich sein.

Beim Schreiben verschiedener DEMOs können manchmal einige spezielle Schriftarten den Animationseffekt besser widerspiegeln. Hier ist ein kleiner Trick, um Schriftarten in verschiedenen Formaten schnell einzuführen.
ist die Google Font-Website, die viele verschiedene Open-Source-Schriftarten bietet:
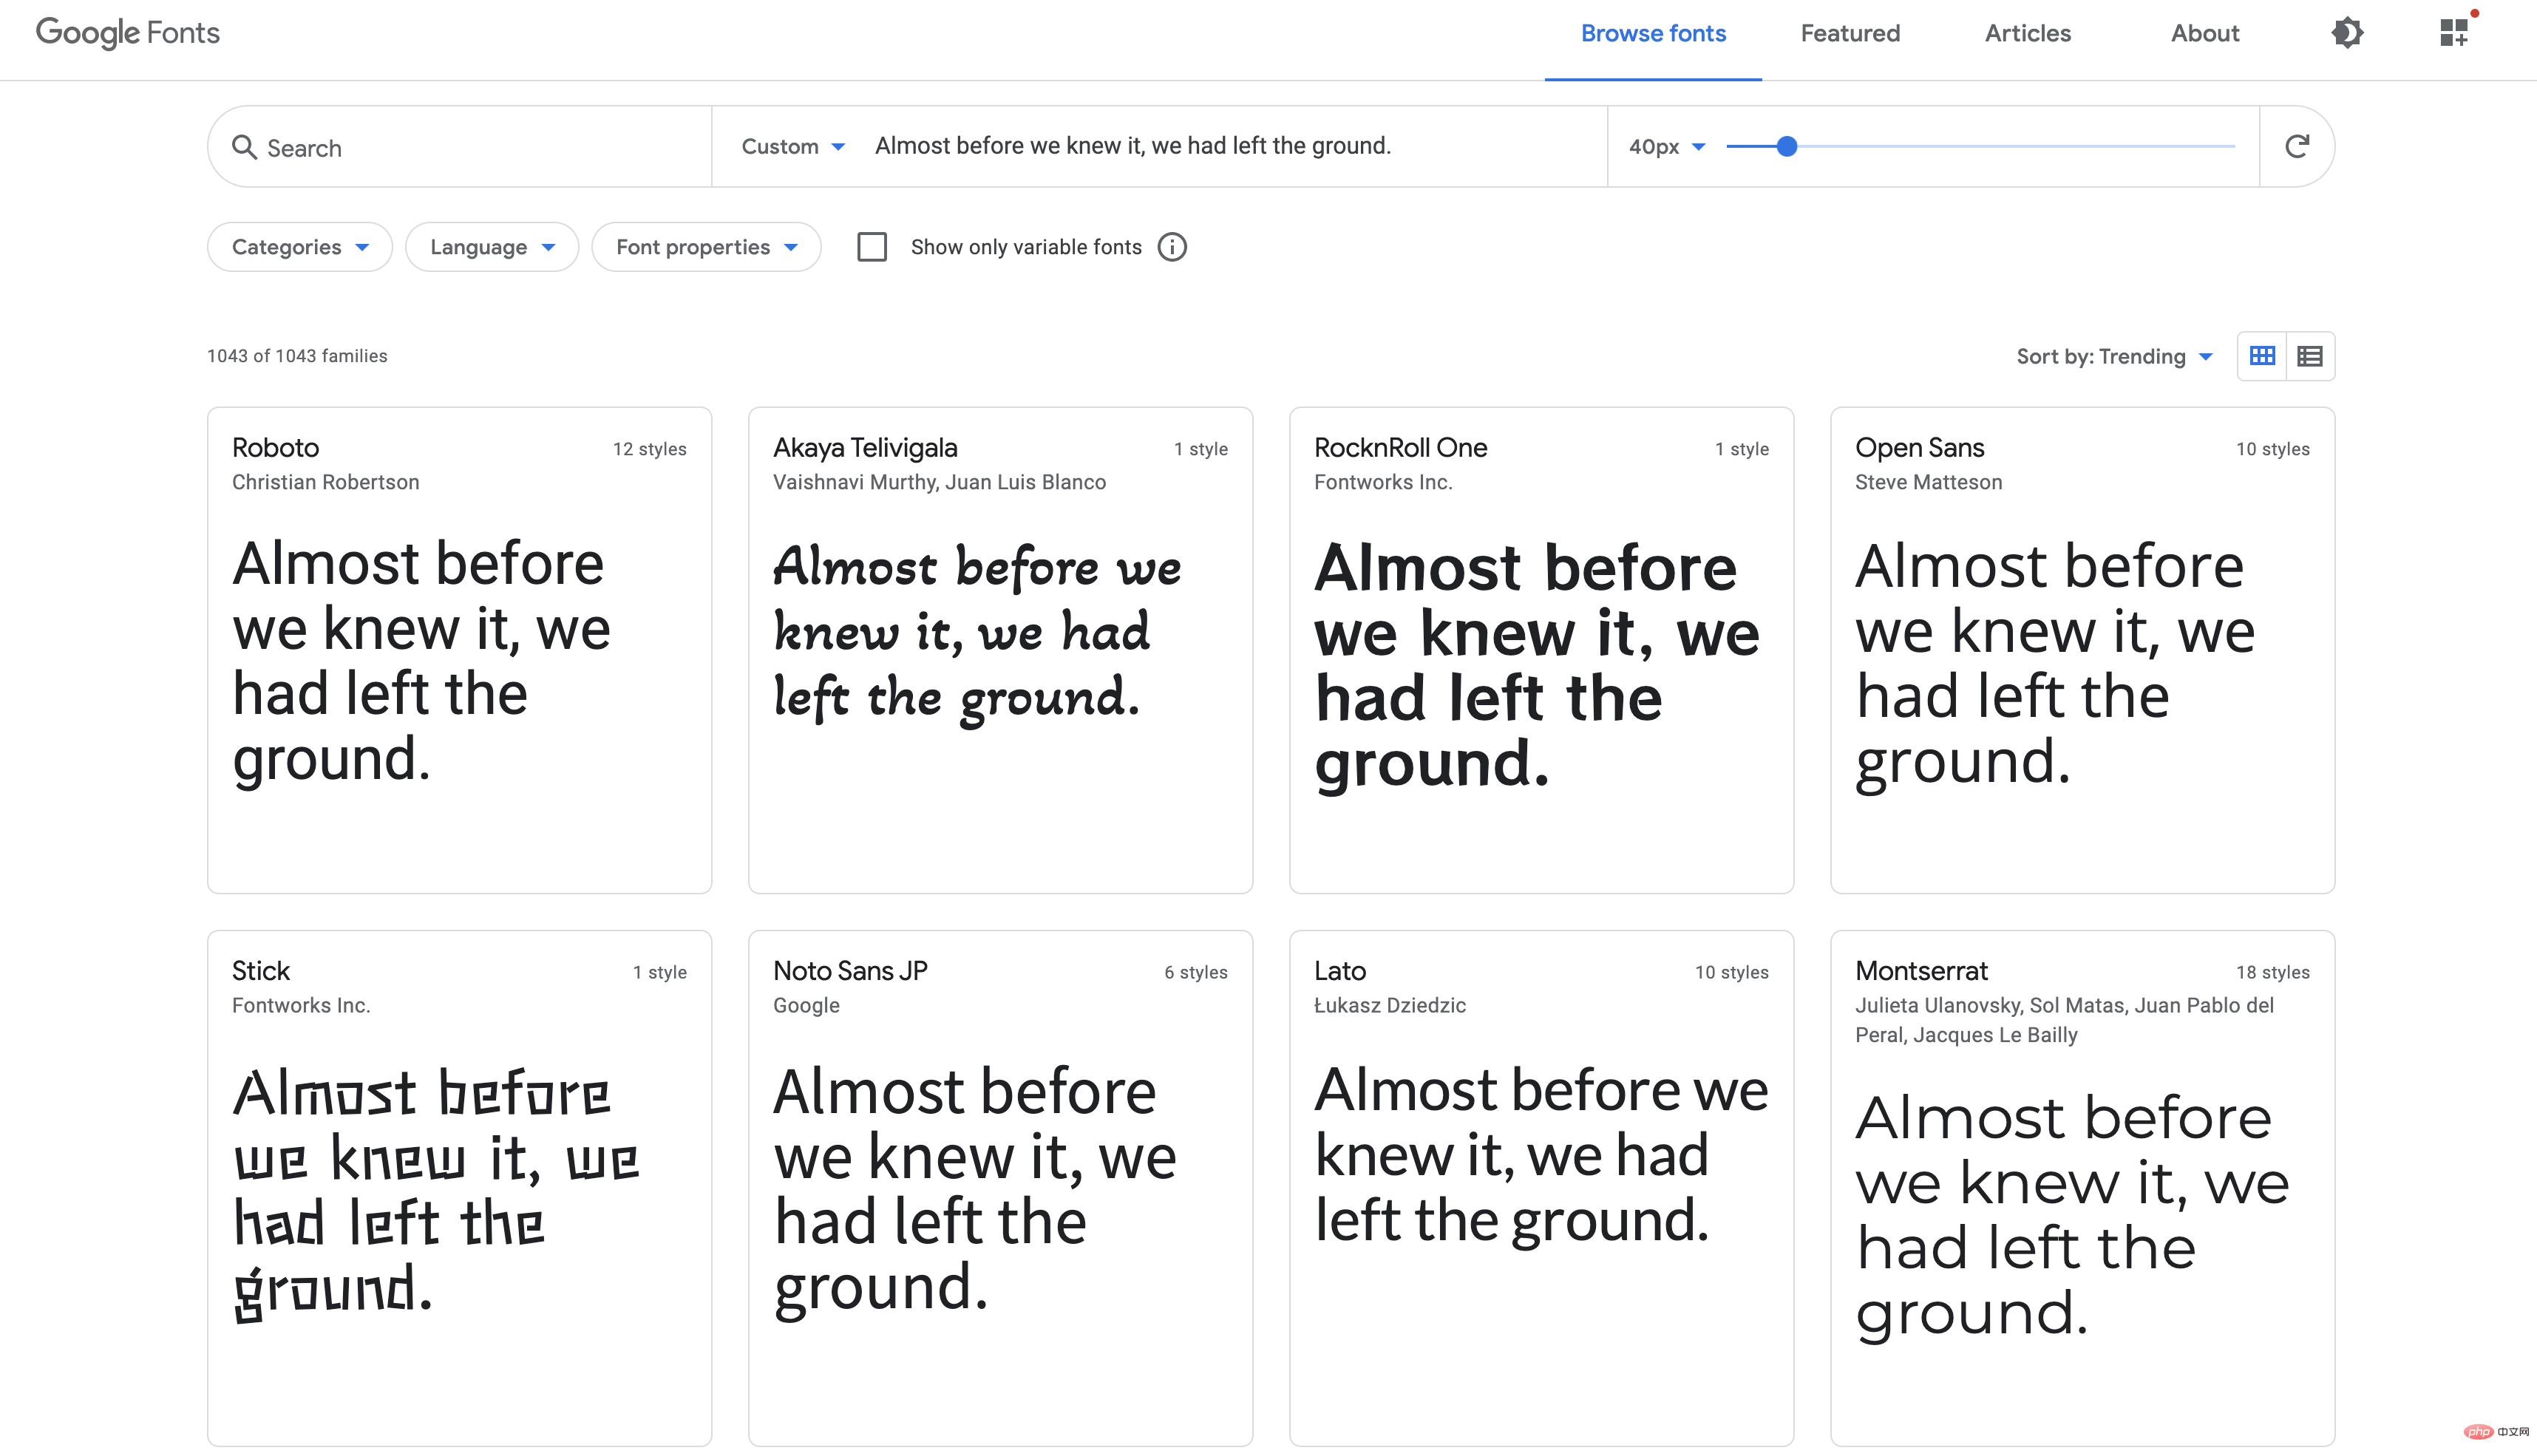
Wenn wir eine Schriftart finden, die uns gefällt, bietet das auch eine sehr schnelle und bequeme Möglichkeit, sie vorzustellen. Wählen Sie die entsprechende Schriftart aus und wählen Sie +Diesen Stil auswählen, um ihn über link und @import zu importieren: +Select this style,便可以通过 link 和 @import 两种方式引入:
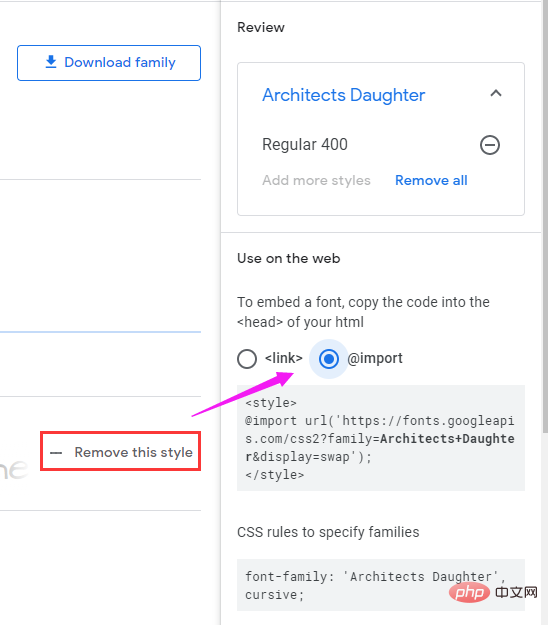
使用 link 标签引入:
<link rel="preconnect" href="https://fonts.gstatic.com">
<link href="https://fonts.googleapis.com/css2?family=Source+Code+Pro:wght@200&display=swap" rel="stylesheet">
OR,在 CSS 代码中,使用 @import 引入:
<style> @import url('https://fonts.googleapis.com/css2?family=Source+Code+Pro:wght@200&display=swap'); </style>
上述两种方式内部其实都是使用的 @font-face 进行了字体的定义。
我们可以通过 @font-face 快速声明指定一个自定义字体。类似这样:
@font-face {
  font-family: "Open Sans";
  src: url("/fonts/OpenSans-Regular-webfont.woff2") format("woff2"),
       url("/fonts/OpenSans-Regular-webfont.woff") format("woff");
}这样,利用 Google Font,我们就可以便捷的享受各种字体了。
我在我的个人项目或者一些 DEMO 中,需要一些艺术字体或者特殊字体展示不一样的效果时,经常会使用这种方式。而至于在业务中,是否需要引入一些特殊字体,就见仁见智了。
接下来,就会分门别类的看看,字体在 CSS 中,和不同是属性相结合,能够鼓捣出什么样的效果。
通过将字体与字体阴影 text-shadow,相结合,阴影的不同运用方式,产生不一样的效果。
我们通过一系列 Demo 来看看。
通过多层次,颜色逐渐变化(透明)的阴影变化,可以生成长阴影:
div {
  text-shadow: 0px 0px #992400, 1px 1px rgba(152, 36, 1, 0.98), 2px 2px rgba(151, 37, 2, 0.96), 3px 3px rgba(151, 37, 2, 0.94), 4px 4px rgba(150, 37, 3, 0.92), 5px 5px rgba(149, 38, 4, 0.9), 6px 6px rgba(148, 38, 5, 0.88), 7px 7px rgba(148, 39, 5, 0.86), 8px 8px rgba(147, 39, 6, 0.84), 9px 9px rgba(146, 39, 7, 0.82), 10px 10px rgba(145, 40, 8, 0.8), 11px 11px rgba(145, 40, 8, 0.78), 12px 12px rgba(144, 41, 9, 0.76), 13px 13px rgba(143, 41, 10, 0.74), 14px 14px rgba(142, 41, 11, 0.72), 15px 15px rgba(142, 42, 11, 0.7), 16px 16px rgba(141, 42, 12, 0.68), 17px 17px rgba(140, 43, 13, 0.66), 18px 18px rgba(139, 43, 14, 0.64), 19px 19px rgba(138, 43, 15, 0.62), 20px 20px rgba(138, 44, 15, 0.6), 21px 21px rgba(137, 44, 16, 0.58), 22px 22px rgba(136, 45, 17, 0.56), 23px 23px rgba(135, 45, 18, 0.54), 24px 24px rgba(135, 45, 18, 0.52), 25px 25px rgba(134, 46, 19, 0.5), 26px 26px rgba(133, 46, 20, 0.48), 27px 27px rgba(132, 47, 21, 0.46), 28px 28px rgba(132, 47, 21, 0.44), 29px 29px rgba(131, 48, 22, 0.42), 30px 30px rgba(130, 48, 23, 0.4), 31px 31px rgba(129, 48, 24, 0.38), 32px 32px rgba(129, 49, 24, 0.36), 33px 33px rgba(128, 49, 25, 0.34), 34px 34px rgba(127, 50, 26, 0.32), 35px 35px rgba(126, 50, 27, 0.3), 36px 36px rgba(125, 50, 28, 0.28), 37px 37px rgba(125, 51, 28, 0.26), 38px 38px rgba(124, 51, 29, 0.24), 39px 39px rgba(123, 52, 30, 0.22), 40px 40px rgba(122, 52, 31, 0.2), 41px 41px rgba(122, 52, 31, 0.18), 42px 42px rgba(121, 53, 32, 0.16), 43px 43px rgba(120, 53, 33, 0.14), 44px 44px rgba(119, 54, 34, 0.12), 45px 45px rgba(119, 54, 34, 0.1), 46px 46px rgba(118, 54, 35, 0.08), 47px 47px rgba(117, 55, 36, 0.06), 48px 48px rgba(116, 55, 37, 0.04), 49px 49px rgba(116, 56, 37, 0.02), 50px 50px rgba(115, 56, 38, 0);
}
当然,多重阴影以及每重的颜色我们很难一个一个手动去写,在写长阴影的时候通常需要借助 SASS、LESS

link Tag-Einführung: @function makelongrightshadow($color) {
$val: 0px 0px $color;
@for $i from 1 through 50 {
$color: fade-out(desaturate($color, 1%), .02);
$val: #{$val}, #{$i}px #{$i}px #{$color};
}
@return $val;
}
div {
text-shadow: makeLongShadow(hsl(14, 100%, 30%));
}@import, um Folgendes einzuführen: div {
text-shadow: 0 -1px 0 #ffffff, 0 1px 0 #2e2e2e, 0 2px 0 #2c2c2c, 0 3px 0 #2a2a2a, 0 4px 0 #282828, 0 5px 0 #262626, 0 6px 0 #242424, 0 7px 0 #222222, 0 8px 0 #202020, 0 9px 0 #1e1e1e, 0 10px 0 #1c1c1c, 0 11px 0 #1a1a1a, 0 12px 0 #181818, 0 13px 0 #161616, 0 14px 0 #141414, 0 15px 0 #121212);
}@font-face.  Wir können über @font-face schnell eine benutzerdefinierte Schriftart deklarieren. Etwa so:
div {
  color: #202020;
  background-color: #2d2d2d;
  letter-spacing: .1em;
  text-shadow: -1px -1px 1px #111111, 2px 2px 1px #363636;
}Als nächstes schauen wir uns an, welche Effekte durch die Kombination von Schriftarten mit unterschiedlichen Attributen in CSS erzielt werden können.
Text und Schatten
Durch die Kombination von Schriftarten und Schriftartschatten
text-shadowkönnen unterschiedliche Arten der Verwendung von Schatten unterschiedliche Effekte erzeugen.
p {
    color: #fff;
    text-shadow:
        0 0 10px #0ebeff,
        0 0 20px #0ebeff,
        0 0 50px #0ebeff,
        0 0 100px #0ebeff,
        0 0 200px #0ebeff
} Natürlich ist es für uns schwierig, mehrere Schatten zu haben und Jede Farbe muss manuell geschrieben werden. Normalerweise müssen Sie
 SASS und LESS verwenden, um Zeit zu sparen: p {
transition: .2s;
&:hover {
text-shadow: 0 0 10px #0ebeff, 0 0 20px #0ebeff, 0 0 50px #0ebeff, 0 0 100px #0ebeff, 0 0 200px #0ebeff;
}
} Dreidimensionaler Schattentext Effekt
Wenn mehrere Schattenschichten vorhanden sind, der Farbwechsel jedoch nicht so stark ist, kann ein dreidimensionaler Effekt erzeugt werden. 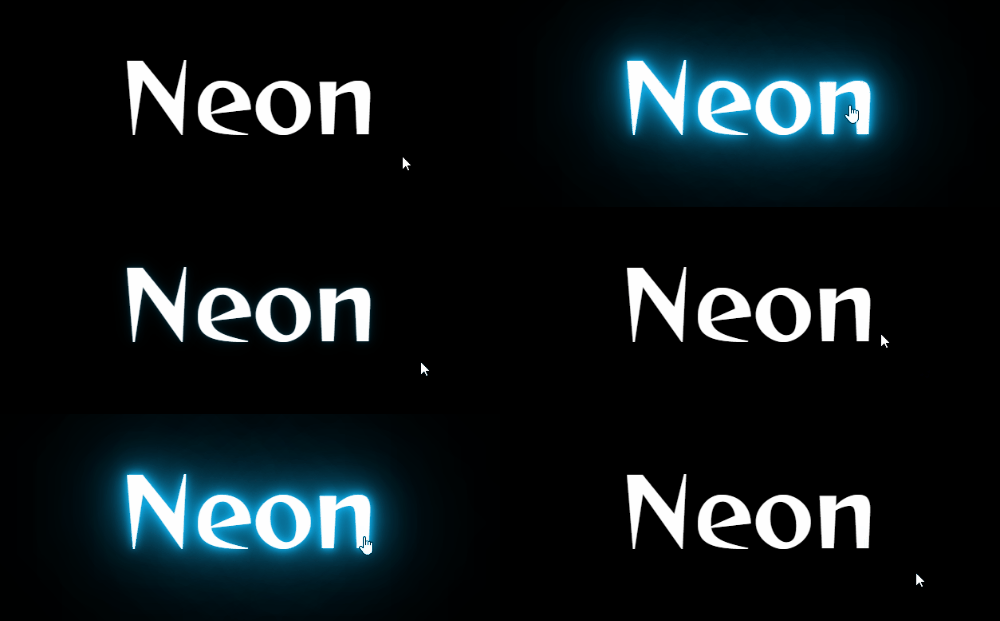
<p>
  <span id="n">n</span>
  <span id="e">e</span>
  <span id="o">o</span>
  <span id="n2">n</span>
</p>
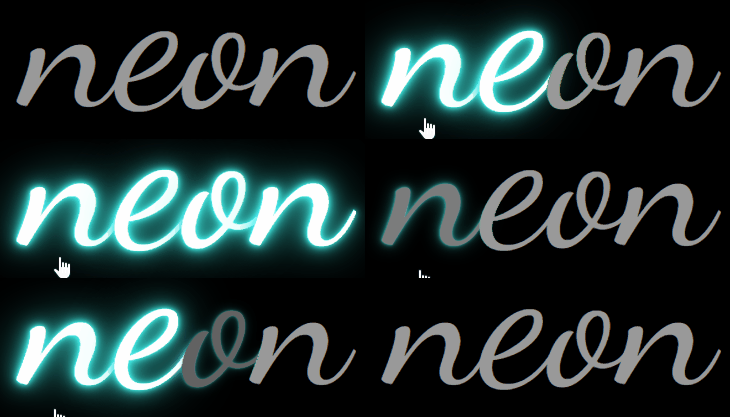
Inline-Schattentexteffekt
Mit angemessener Abstimmung von Schattenfarbe und Hintergrundfarbe können Sie einen Schatten erzielen, der dem Inline-Effekt ähnelt.
p:hover span {
  animation: flicker 1s linear forwards;
}
p:hover #e {
  animation-delay: .2s;
}
p:hover #o {
  animation-delay: .5s;
}
p:hover #n2 {
  animation-delay: .6s;
}

@keyframes flicker {
  0% {
    color: #333;
  }
  5%, 15%, 25%, 30%, 100% {
    color: #fff;
    text-shadow:
      0px 0px 5px var(--color),
      0px 0px 10px var(--color),
      0px 0px 20px var(--color),
      0px 0px 50px var(--color);

  }
  10%, 20% {
    color: #333;
    text-shadow: none;
  }
}
<div>Clip</div>

<style>
div {
  font-size: 180px;
  font-weight: bold;
  color: deeppink;
  background: url($img) no-repeat center center;
  background-size: cover;
}
</style>div {
font-size: 180px;
font-weight: bold;
color: deeppink;
background: url($img) no-repeat center center;
background-size: cover;
background-clip: text;
}div {
color: transparent;
background-clip: text;
}{
background: linear-gradient(45deg, #009688, yellowgreen, pink, #03a9f4, #9c27b0, #8bc34a);
background-clip: text;
}截 GIF 图的帧率不太够,看着效果不太好,可以点进下面的 DEMO 感受下:
Demo地址:https://codepen.io/Chokcoco/pen/zYoEaaq
CSS 中的背景 background,也提供了一些属性用于增强文字的效果。(学习视频分享:css视频教程)
背景中有个属性为 background-clip, 其作用就是设置元素的背景(背景图片或颜色)的填充规则。
与 box-sizing 的取值非常类似,通常而言,它有 3 个取值,border-box,padding-box,content-box,后面规范新增了一个 background-clip。时至今日,部分浏览器仍需要添加前缀 webkit 进行使用 -webkit-background-clip。
使用了这个属性的意思是,以区块内的文字作为裁剪区域向外裁剪,文字的背景即为区块的背景,文字之外的区域都将被裁剪掉。
看个最简单的 Demo ,没有使用 background-clip:text :
<div>Clip</div>
<style>
div {
font-size: 180px;
font-weight: bold;
color: deeppink;
background: url($img) no-repeat center center;
background-size: cover;
}
</style>效果如下:
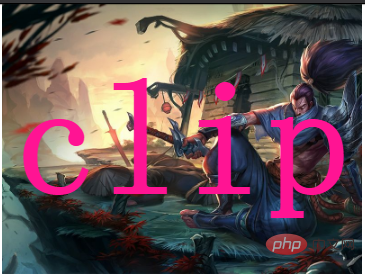
Demo地址:https://codepen.io/Chokcoco/pen/WjOBzB
background-clip:text我们稍微改造下上面的代码,添加 -webkit-background-clip:text:
div {
  font-size: 180px;
  font-weight: bold;
  color: deeppink;
  background: url($img) no-repeat center center;
  background-size: cover;
  background-clip: text;
}效果如下:
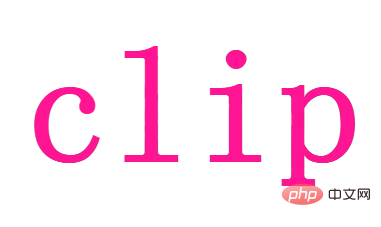
Demo地址:https://codepen.io/Chokcoco/pen/eWRaVJ
看到这里,可能有人就纳闷了,这不就是文字设置 color 属性嘛。
别急,由于文字设置了颜色,挡住了 p 块的背景,如果将文字设置为透明呢?文字是可以设置为透明的 color: transparent 。
div {
  color: transparent;
  background-clip: text;
}效果如下:
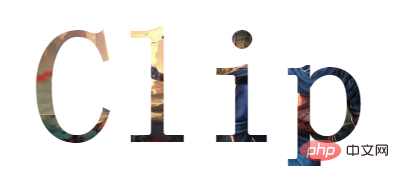
Demo地址:https://codepen.io/Chokcoco/pen/oWwRmE
通过将文字设置为透明,原本 p 的背景就显现出来了,而文字以外的区域全部被裁剪了,这就是 background-clip:text 的作用。
background-clip 图文搭配这样,我们可以选取合适的图片合适的字体,实现任意风格的文字效果。
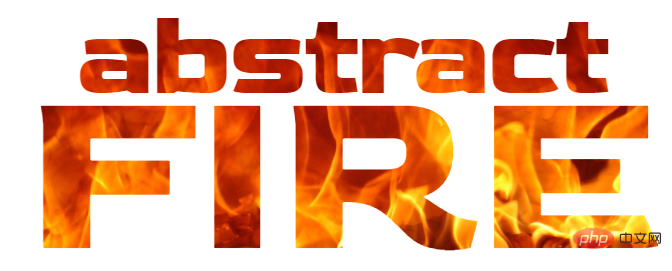
Demo地址:https://codepen.io/Chokcoco/pen/wvopKEL
又或者,利用这个效果实现一张创意海报:
background-clip 实现渐变文字再者,利用这个属性,也可以轻松的实现渐变色的文字:
{
    background: linear-gradient(45deg, #009688, yellowgreen, pink, #03a9f4, #9c27b0, #8bc34a);
    background-clip: text;
}
配合 background-position 或者 filter: hue-rotate(),让渐变动起来:
{
    background: linear-gradient(45deg, #009688, yellowgreen, pink, #03a9f4, #9c27b0, #8bc34a);
    background-clip: text;
    animation: huerotate 5s infinite;
}

@keyframes huerotate {
    100% {
        filter: hue-rotate(360deg);
    }
}
CodePen Demo -- background-clip: text 文字渐变色
地址:https://codepen.io/Chokcoco/pen/PmjMwz
background-clip 给文字增加高光动画利用 background-clip, 我们还可以轻松的给文字增加高光动画。
譬如这样:

其本质也是利用了 background-clip,伪代码如下:
<p data-text="Lorem ipsum dolor"> Lorem ipsum dolor </p>
p {
    position: relative;
    color: transparent;
    background-color: #E8A95B;
    background-clip: text;
}
p::after {
    content: attr(data-text);
    position: absolute;
    left: 0;
    top: 0;
    width: 100%;
    height: 100%;
    background-Ausführliche Erläuterung von N Techniken zur Realisierung von Textanimationen mit CSS: linear-gradient(120deg, transparent 0%, transparent 6rem, white 11rem, transparent 11.15rem, transparent 15rem, rgba(255, 255, 255, 0.3) 20rem, transparent 25rem, transparent 27rem, rgba(255, 255, 255, 0.6) 32rem, white 33rem, rgba(255, 255, 255, 0.3) 33.15rem, transparent 38rem, transparent 40rem, rgba(255, 255, 255, 0.3) 45rem, transparent 50rem, transparent 100%);
    background-clip: text;
    background-size: 150% 100%;
    background-repeat: no-repeat;
    animation: shine 5s infinite linear;
}
@keyframes shine {
	0% {
		background-position: 50% 0;
	}
	100% {
		background-position: -190% 0;
	}
}去掉伪元素的 background-clip: text,就能看懂原理:

Demo地址:https://codepen.io/Chokcoco/pen/OJbEOmb
mask 与文字还有一个与背景相关的属性 -- mask 。
之前在多篇文章都提到了 mask,比较详细的一篇是 -- 奇妙的 CSS MASK,本文不对 mask 的基本概念做过多讲解,向下阅读时,如果对一些 mask 的用法感到疑惑,可以再去看看。
只需要记住核心的,使用 mask 最重要结论就是:添加了 mask 属性的元素,其内容会与 mask 表示的渐变的 transparent 的重叠部分,并且重叠部分将会变得透明。
利用 mask,我们可以实现各种文字的出场特效:
<div>
    <p>Hello MASK</p>
</div>核心的 CSS 代码:
div {
    mask: radial-gradient(circle at 50% 0%, #000, transparent 30%);
    animation: scale 6s infinite;
}
@keyframes scale {
    0% {
        mask-size: 100% 100%;
    }
    60%,
    100% {
        mask-size: 150% 800%;
    }
}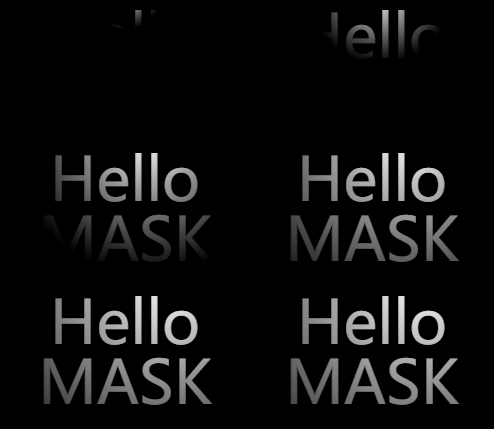
改变不同的方向,又或者是这样:

Demo地址:https://codepen.io/Chokcoco/pen/OJbxZLM
接下来,就到了非常有意思的混合模式及滤镜了。这两个属性给 CSS 世界增添了非常多的趣味性,活灵活用,会感叹 CSS 居然如此的强大美妙。
之前有多非常多篇关于混合模式及滤镜的文章,一些基础的用法就不再赘述。
在 CSS 中,我们可以利用 -webkit-text-stroke,给文字快速的添加边框,利用这个,可以快速生成镂空型的文字:
p {
    -webkit-text-stroke: 3px #373750;
}
当然,我们看到,用到的属性 -webkit-text-stroke 带了 webkit 前缀,存在一定的兼容性问题。
所以,在更早的时候,我们还会使用 text-shadow,生成镂空文字。
p {
    text-shadow: 0 0 5px #fff;
}
可以看到,因为使用的是阴影,所以有很明显的虚化的感觉,存在一定的瑕疵。
还有一种非常绕的方法,利用混合模式加上滤镜,也能生成镂空文字。
p {
    position: relative;
    color: #fff;

    &::after {
        content: 'Magic Text';
        position: absolute;
        left: 0;
        top: 0;
        color: #fff;
        mix-blend-mode: difference;
        filter: blur(1px);
    }
}
这里利用 filter: blur(1px) 生成了一个比原字体稍微大一点点的字体覆盖在原字体之上,再利用 mix-blend-mode: difference 消除掉了同色的部分,只留下了利用模糊滤镜多出来的那一部分。
mix-blend-mode: difference: 差值模式(Difference),作用是查看每个通道中的颜色信息,比较底色和绘图色,用较亮的像素点的像素值减去较暗的像素点的像素值。与白色混合将使底色反相;与黑色混合则不产生变化。
示意动图如下:

Demo地址:https://codepen.io/Chokcoco/pen/ZEBoEzM?editors=1100
好,回到上面的 -webkit-text-stroke,拿到了镂空文字后,我们还可以利用混合模式 mix-blend-mode: multiply 生成渐变色的文字。
mix-blend-mode: multiply: 正片叠底(multiply),将两个颜色的像素值相乘,然后除以255得到的结果就是最终色的像素值。通常执行正片叠底模式后的颜色比原来两种颜色都深。任何颜色和黑色正片叠底得到的仍然是黑色,任何颜色和白色执行正片叠底则保持原来的颜色不变,而与其他颜色执行此模式会产生暗室中以此种颜色照明的效果。
p {
    position: relative;
    -webkit-text-stroke: 3px #9a9acc;

    &::before{
		content: ' ';
		width: 100%;
		height: 100%;
		position: absolute;
		left: 0;
		top: 0;
		background-Ausführliche Erläuterung von N Techniken zur Realisierung von Textanimationen mit CSS: linear-gradient(45deg, #ff269b, #2ab5f5, #ffbf00);
		mix-blend-mode: multiply;
	}
}
在这里,mix-blend-mode: multiply 发挥的作用和 mask 非常的类似,我们其实是生成了一幅渐变图案,但是只有在文字轮廓内,渐变颜色才会显现。
当然,上述效果和整体的黑色底色也是有关系的。
示意图如下:

Demo地址:https://codepen.io/Chokcoco/pen/Rwoybzr
OK,在上述的基础上,我们可以继续叠加混合模式,这次我们利用剩余的一个 ::after 伪类,再添加一个 mix-blend-mode: color-dodge 混合模式,给文字加上最后的点缀,实现美妙的光影效果。
mix-blend-mode: color-dodge: 颜色减淡模式(Color Dodge),查看每个通道的颜色信息,通过降低“对比度”使底色的颜色变亮来反映绘图色,和黑色混合没变化。。
核心的伪代码:
p {
    position: relative;
    -webkit-text-stroke: 3px #7272a5;

    &::before {
		content: ' ';
		background-Ausführliche Erläuterung von N Techniken zur Realisierung von Textanimationen mit CSS: linear-gradient(45deg, #ff269b, #2ab5f5, #ffbf00);
		mix-blend-mode: multiply;
    }

    &::after {
        content: "";
        position: absolute;
        background: radial-gradient(circle, #fff, #000 50%);
        background-size: 25% 25%;
        mix-blend-mode: color-dodge;
        animation: mix 8s linear infinite;
    }
}

@keyframes mix {
    to {
        transform: translate(50%, 50%);
    }
}看看效果:

这里就要感叹 mix-blend-mode: color-dodge 的神奇了,去掉这个混合模式,其实是这样的:

Demo地址:https://codepen.io/Chokcoco/pen/Rwoybzr
好,就上面这个效果,还可以继续吗?答案是可以的。限于篇幅,本文不再继续在这个效果上深入,感兴趣的可以拿着上面的 DEMO 自己再捣鼓捣鼓。
这里还是利用 mix-blend-mode: difference 差值模式,实现一种文字与底色反色的 Title 效果。
mix-blend-mode: difference: 差值模式(Difference),作用是查看每个通道中的颜色信息,比较底色和绘图色,用较亮的像素点的像素值减去较暗的像素点的像素值。与白色混合将使底色反相;与黑色混合则不产生变化。
代码非常的简单,我们实现一个黑白相间的背景,文本的颜色为白色,配合上差值模式,即可实现黑底上的文字为白色,白底上的文字为黑色的效果。
p  {
    background: repeating-radial-gradient(circle at 200% 200%, #000 0, #000 150px, #fff 150px, #fff 300px);

    &::before {
        content: "LOREM IPSUM";
        color: #fff;
        mix-blend-mode: difference;
    }
}可以用于一些标题效果:

Demo地址:https://codepen.io/Chokcoco/pen/GRpzYxE
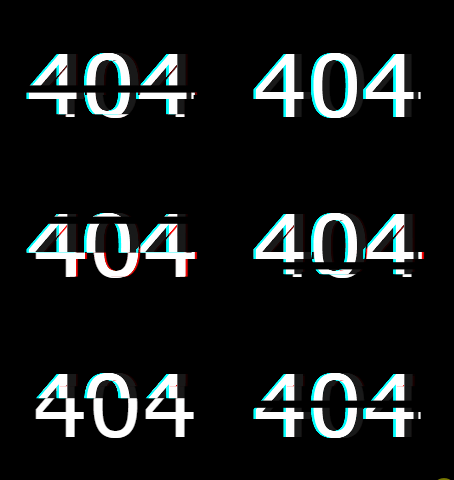
OK,接下来,我们再尝试下其他混合模式的搭配。在 CSS 故障艺术 一文中,提到了一种故障艺术。
什么是故障艺术?我们熟知的抖音的 LOGO 正是故障艺术其中一种表现形式。它有一种魔幻的感觉,看起来具有闪烁、震动的效果,很吸引人眼球。
看看效果:

本文篇幅有点长,代码就不上了,完整 DEMO 在这里:
当然,我们也不是一定要使用混合模式去使得融合部分为白色,可以仅仅是使用这个配色效果,基于上面效果的另外一个版本,没有使用混合模式。

完整 DEMO 在这里:
仅仅使用配色没有使用混合模式的好处在于,对于每一个文字的副本,有了更大的移动距离和可以处理的空间。
稍微替换一下文本文案为 Ausführliche Erläuterung von N Techniken zur Realisierung von Textanimationen mit CSS,再添加上一些滤镜效果(hue-rotate()、blur())嘿嘿,找到了一个可能实际可用的场景:
效果一:
效果二:
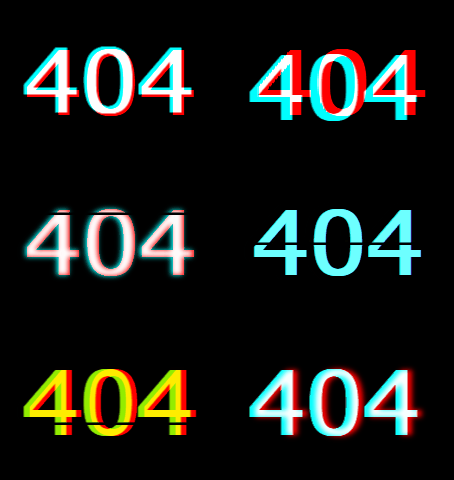
两个 Ausführliche Erläuterung von N Techniken zur Realisierung von Textanimationen mit CSS 效果的 Demo 如下:
小技巧,在使用混合模式的时,有的时候,效果不希望和背景混合在一起,可以使用
isolation: isolate进行隔离。
在 你所不知道的 CSS 滤镜技巧与细节 一文中,介绍了利用滤镜实现的一种融合效果。
利用了模糊滤镜叠加对比度滤镜产生的融合效果。
单独将两个滤镜拿出来,它们的作用分别是:
filter: blur(): 给图像设置高斯模糊效果。
filter: contrast(): 调整图像的对比度。
但是,当他们“合体”的时候,产生了奇妙的融合现象。简单的例子:
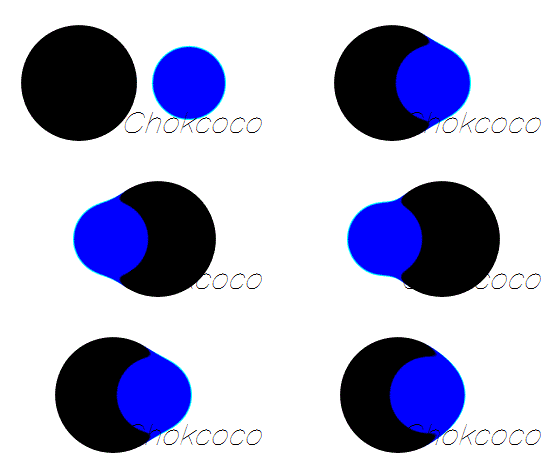
Demo地址:https://codepen.io/Chokcoco/pen/QqWBqV
利用这个特性,可以实现一些文字融合的效果:
利用这个方法,我们还可以设计一些文字融合的效果:


具体实现你可以看这里:
Demo地址:https://codepen.io/Chokcoco/pen/jLjNRj
最后,我们再来看看文字与 SVG。
在 SVG 与 CSS 的搭配中,有一类非常适合拿来做动画的属性,也就是 stroke-* 相关的几个属性,利用它们,我们只需要掌握简单的 SVG 语法,就可以快速制作相关的线条动画。
我们利用 SVG 中几个和边框、线条相关的属性,来实现文字的线条动画,下面罗列一下,其实大部分和 CSS 对比一下非常好理解,只是换了个名字:
接下来,我们利用 stroke-* 相关属性,实现一个简单的线条文字动画。
<svg viewBox="0 0 400 200">
	<text x="0" y="70%"> Lorem </text>
</svg>
svg text {
	animation: stroke 5s infinite alternate;
	letter-spacing: 10px;
	font-size: 150px;
}
@keyframes stroke {
	0% {
		fill: rgba(72, 138, 20, 0);
		stroke: rgba(54, 95, 160, 1);
		stroke-dashoffset: 25%;
		stroke-dasharray: 0 50%;
		stroke-width: 1;
	}
	70% {
		fill: rgba(72, 138, 20, 0);
		stroke: rgba(54, 95, 160, 1);
		stroke-width: 3;
	}
	90%,
	100% {
		fill: rgba(72, 138, 204, 1);
		stroke: rgba(54, 95, 160, 0);
		stroke-dashoffset: -25%;
		stroke-dasharray: 50% 0;
		stroke-width: 0;
	}
}动画的核心就是,利用动态变化文字的 stroke-dasharray 和 stroke-dashoffset 形成视觉上的线条变换,动画的最后再给文字上色。看看效果:
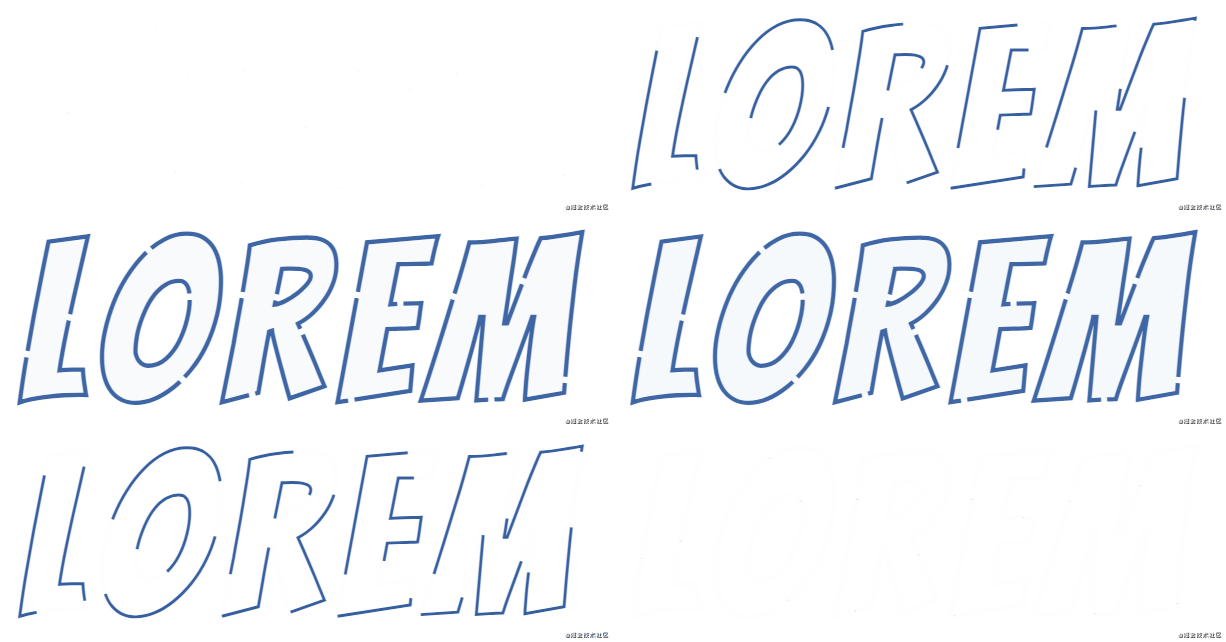
Demo地址:https://codepen.io/Chokcoco/pen/dyOjMMd
本文介绍了一些我认为比较有意思的文字动画小技巧,当然 CSS 中还有非常多有意思的文字效果,限于篇幅,不一一展开。
原文地址:https://www.cnblogs.com/coco1s/p/14498283.html
作者:ChokCoco
更多编程相关知识,请访问:编程视频!!
Das obige ist der detaillierte Inhalt vonAusführliche Erläuterung von N Techniken zur Realisierung von Textanimationen mit CSS. Für weitere Informationen folgen Sie bitte anderen verwandten Artikeln auf der PHP chinesischen Website!